Why Does My Soap Pump Not Work?
Common Causes of Non-Working Soap Pumps
There are several common reasons why a soap dispenser pump may stop working properly. Some of the most frequent causes include:
Clogged Pump
Over time, soap scum, mineral deposits, and other gunk can build up inside the pump mechanism, clogging the passageways and preventing the pump from working. This is especially common with foam soap pumps. Regular cleaning can help prevent clogs.

Empty Soap Reservoir
If the soap reservoir is empty, no soap will be able to make it to the pump to be dispensed. Always check the reservoir first and refill it with hand soap if it’s empty. The pump may still prime and push out air even when empty.
Loose Pump Head
The pump head contains the nozzle and needs to form a tight seal where it attaches to the dispenser. If it becomes loose, air can leak in and prevent proper pumping. Tighten the pump head or replace it if needed.
Blocked Nozzle
A clogged nozzle is another common issue, especially with foam soap pumps. Dried soap, contaminants, or buildup can obstruct the tiny nozzle opening. Use a pin to gently clean out the opening.
Broken Internal Spring
Within the pump mechanism is a small spring that helps push the soap out. If this spring becomes damaged or worn out, the pump won’t generate enough force. Replacing the spring or the entire pump may be required.
Dead Batteries
Battery-powered automatic soap dispensers will stop working when the batteries run out. Replace them with new batteries to restore function.
Checking the Soap Reservoir
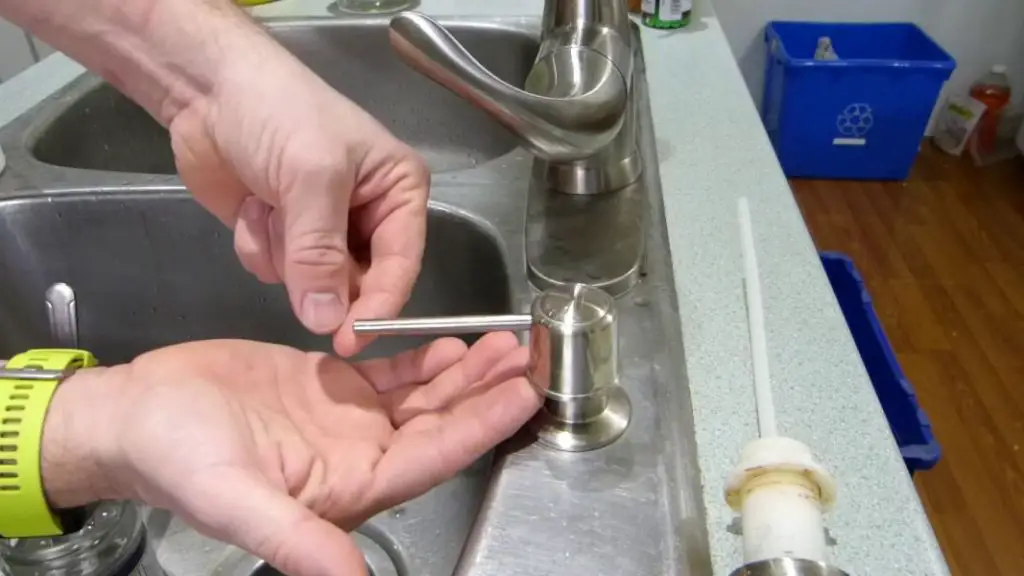
One of the most common reasons a soap pump stops working is because the soap reservoir runs empty. The reservoir is the container that holds the liquid soap inside the pump housing. If this container is empty, the pump will not be able to draw up soap to dispense.
To check the reservoir, remove the pump head and nozzle to access the reservoir directly. Look inside to see if there is liquid soap remaining. If the reservoir is empty, refill it with fresh hand soap according to the dispenser instructions. Make sure not to overfill the reservoir past its recommended capacity.
Also inspect the reservoir and supply tube for any clogs or obstructions. If soap has dried out inside the tubes, it can prevent the pump from working properly. Use warm water and a small brush to clear out any blockages.
Cite: “Stick a chopstick in the hole and move it around as you pour. That will break the bubbles as they form.” (source)
Inspecting the Pump Head
One common reason a soap pump may stop working properly is an issue with the pump head itself. Start by inspecting the pump head closely for any cracks, leaks, or other damage that could prevent it from functioning. Gently pull on the pump head to ensure it is still securely attached and has not become loose over time. According to HomeTalk, soap dispenser heads can become cracked or worn out from repeated use over time, leading to malfunctions
Also examine the inner tubes and valves inside the pump head to check for any obstructions or clogs that could be blocking the flow of soap, as recommended by Pfister Faucets. Built-up soap scum or mineral deposits from hard water can cause the small internal tubes and mechanisms to get stuck. Try flushing the system with hot water or an all-purpose cleaner to dissolve any deposits. If the tubes appear clear but the pump still doesn’t work, the interior valves or seals may need to be replaced.
Sources:
https://www.hometalk.com/diy/repair/q-why-is-my-soap-dispenser-pump-not-working-44602654
Examining the Nozzle
One of the most common causes of a non-working soap pump is a clogged nozzle. Over time, soap can dry and build up in the nozzle hole, preventing soap from being dispensed properly. To examine the nozzle, first remove it from the pump head by gently twisting and pulling down.
Check the nozzle hole for any blockages. Often, dried soap or mineral deposits from hard water can obstruct the opening. Try using a thin object like a straightened paper clip or pin to gently clear out the hole. According to this guide, inserting a paper clip and wiggling it around can help dislodge stuck debris.
If the nozzle is damaged or cracking, it may need to be replaced for the pump to work again. Replacement nozzles are often available from the soap dispenser manufacturer or can be found at hardware stores. When putting the nozzle back, be sure it clicks securely into place in the pump head.
Testing the Pump Mechanism
One of the most common reasons a soap pump stops working properly is an issue with the pump mechanism itself. There are a few key things to check:
Check for a broken spring – Many soap pumps operate using a spring mechanism that pushes the soap up through the nozzle when engaged. Over time, this spring can weaken, break, or become misaligned, preventing the pump from working. Carefully disassemble the pump head and inspect the spring to see if it is damaged. Replace the spring if needed.
Replace batteries – For battery-operated automated soap dispensers, dead or missing batteries are often the culprit. Replace the batteries with fresh ones of the correct size and type for the dispenser model. Proper battery power is required for the sensor and motor to activate the pump.
Test the automation sensor – Automated soap dispensers rely on a sensor to detect hand placement and activate the pump. Make sure this sensor is clean and operating properly. Wave your hand in front of the sensor and listen for the activating click. Consult the product manual for sensor troubleshooting tips.
Testing these basic components of the pump mechanism can often uncover the reason a soap dispenser fails to work. Make any necessary repairs or replacements. If the issue persists, further investigation of the nozzle, valves, or interior tubing may be required. For additional troubleshooting advice, see this guide.
Cleaning Interior Components
One of the most common causes of a non-working soap pump is buildup of dried soap or residue inside the pump mechanism. To properly clean the interior components, you’ll need to disassemble the pump head and nozzle.
Start by removing the pump head from the bottle or reservoir. On most pumps, you can simply unscrew or pull firmly on the head to detach it. Then remove the nozzle as well. With the pump head and nozzle detached, you’ll have access to the interior tubes and valves.
Take the separated pieces and hold them under hot running water, scrubbing with a small brush to remove any dried soap residue or buildup. Pay special attention to the small tubes and valves where clogs frequently occur. You may need to use a pin or paperclip to clear out any remaining obstructions.[1]
Once all interior components are clean, reassemble the pump head and nozzle, taking care to firmly press pieces back into place. Wipe down the exterior with a damp cloth as well. The pump should function properly after a thorough interior cleaning.
Replacing Defective Parts
If certain components of your soap dispenser are broken or worn out, replacing individual parts can often get your dispenser working again. Some of the most commonly replaced parts include:
Pump Heads
The pump head is the mechanism that presses down to dispense soap when activated. These can wear out over time. Replacement pump heads that match your dispenser brand and model can often be ordered online or at hardware stores (Amazon).
Springs
There is often a spring inside the pump head assembly. This spring can lose its tension, preventing the pump from working properly. Like pump heads, replacement springs can be purchased at online retailers or hardware stores.
Batteries
If you have an automatic, sensor-activated dispenser, worn out batteries could be the issue. Install fresh AA or AAA batteries based on your model. Check that the batteries are inserted correctly and making good contact.
Nozzles
Soap dispenser nozzles can get clogged with dried soap or minerals, preventing soap from flowing. Try soaking the nozzle in hot water to dissolve built-up deposits. If needed, order a replacement nozzle that fits your dispenser (Dispenser.com).
Installing a New Soap Dispenser
If your current soap dispenser is broken beyond repair, installing a new one may be the best option. There are a few steps to follow for a successful new soap dispenser installation:
Choose the type of dispenser – Consider your needs and bathroom aesthetics. Options include single chamber dispensers for liquid soap only or multi-chamber dispensers with separate reservoirs for products like shampoo, conditioner, and body wash. Dispensers come in different styles and finishes like brass, chrome, nickel, and plastic.
Pick the location – Most homeowners install shower-mounted dispensers, but you can also mount them on the wall or sink. Pick a spot that’s easy to reach and won’t interfere with showering. Consider the dispenser’s size so you have enough clearance.
Mount it securely – Use the manufacturer’s mounting hardware and follow instructions. For tile walls, drill holes with a masonry bit and use wall anchors. Use silicone adhesive to prevent water getting behind the dispenser.
Fill and test – Once mounted, fill the dispenser chambers according to product directions. Press and hold the pump, plug the nozzle, then release to prime it. Test dispensing and check for leaks. Enjoy your upgraded shower experience.
With some planning and effort, installing a shower dispenser successfully is an easy DIY project. Refer to this guide for more helpful dispenser installation tips.
Using Alternate Soap Options
If your regular liquid soap pump is no longer functioning properly, there are several alternative soap options you can use in your bathroom instead:
Try switching to a bar soap. Bar soap avoids the pump mechanism entirely and allows you to directly apply soap. Select an unscented bar with moisturizing ingredients to avoid drying out hands. Bar soap can produce messy drips, so use a soap dish.
Consider installing an automatic soap dispenser. These dispensers use sensor technology to detect hands and dispense soap without needing to push a pump. Automatic dispensers require batteries but eliminate pump issues. Select a model with good reviews that reliably dispenses soap.[1]
Liquid hand soap is an easy swap for standard liquid bath soap. Pour hand soap into a spare soap dispenser or dish and use it as you would regular bath soap. Pick a natural hand soap free of harsh chemicals.[2]
Preventing Future Soap Dispenser Problems
There are several steps you can take to help prevent soap dispenser problems from occurring in the future:
Regular cleaning is essential for keeping soap dispensers working properly. Soap residue and buildup can clog pumps and nozzles over time. Frequently wash removable parts with warm soapy water. You can also fill the reservoir with a water and vinegar solution to break down deposits (Janitorial Manager).
Use high-quality alkaline or lithium batteries in battery-powered dispensers. Low quality batteries can leak and corrode contacts. Check and replace batteries regularly to ensure dispensers have consistent power.
Avoid overfilling the soap reservoir which can lead to clogs and leaks. Leave at least 1/4 inch of space at the top of the reservoir. Check fluid levels often and refill when low.
Inspect your soap dispenser periodically for issues. Look for leaks, stuck or clogged nozzles, low batteries, and other problems. Addressing minor issues quickly can prevent having to replace the entire dispenser.


