How Do You Mix Mustard Yellow Clay?
Mustard yellow is a rich, warm shade that adds vibrancy and depth to pottery and sculptures made with clay. Mixing your own mustard yellow clay allows you to achieve the perfect hue and ensures color consistency across your creations. The process involves blending a neutral clay body with yellow and brown ceramic stains. By adjusting the proportions, you can create light buttery yellows to deep earthy mustard tones.
Making your own mustard yellow clay has many advantages over buying pre-colored clay. You can customize the shade and make as much or as little as you need for your project. Mixing your own also costs less than specialty colored clays. With a few simple steps, you’ll have high-quality, flexible clay in the exact mustard yellow color you desire.
Read on to learn the easy process of blending mustard yellow clay, from choosing the right clay body and colorants to proper aging and storage. With the techniques below, you’ll be able to mix consistent, vibrant mustard yellow clay for all your sculpting and ceramic crafting needs.
Gather Materials
To make a mustard yellow clay, you will need the following materials:
-
2 parts white clay (polymer or air-dry)
-
1 part yellow ochre clay
-
Small amounts of brown, orange, red, and/or black clay
-
Clay tools like a pottery wheel, sculpting tools, or acrylic roller
-
Containers for mixing
-
Plastic wrap
-
Ziplock bags for storage
Having all the necessary clays and tools gathered ahead of time will make the process smooth and efficient.
Measure Out Clays
When mixing mustard yellow clay, you’ll need to measure out the appropriate ratios of clay types. There are a couple key considerations when measuring your clays:
Clay Ratios
A mustard yellow clay typically contains a mix of white, red, and yellow clays. A common ratio is:
- 50% white clay
- 30% red clay
- 20% yellow clay
This ratio can be adjusted based on the specific hue you’re aiming for. More red clay will create an earthier, orange-toned yellow. More white clay will give you a brighter, lemony yellow.
Measuring by Weight vs Volume
For consistency, it’s best to measure your clays by weight rather than volume. Using a gram scale, weigh out the appropriate ratios of each clay type. Measuring by volume with cups or spoons can vary a lot based on factors like how tightly the clay is packed.
Go by the gram weight rather than trying to judge percentages by sight. This will help ensure your mustard yellow clay mix is consistent each time.
Knead the Clay
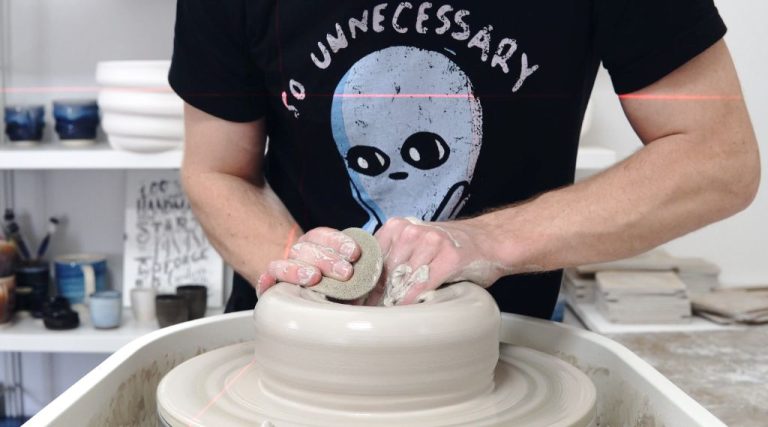
Properly kneading the clay is a crucial step for achieving an even color distribution and smooth consistency. Use the palms of your hands and fingers to repeatedly press into the clay and fold it over itself. Apply enough pressure to thoroughly incorporate the colors without overworking the clay.
Aim for a uniform consistency with no streaks of color. Knead until the clay is smooth, pliable, and not sticky. The clay should hold together in a ball without crumbling apart. Avoid kneading so much that the clay becomes too stiff.
Kneading can take 5-10 minutes depending on the amount and firmness of the clay. Pay attention to the texture and make any necessary adjustments. The properly kneaded clay will be ready for the next steps in the process.
Add Colorants
To achieve that perfect mustard yellow clay color, you’ll need to add colorant powders or liquid concentrates.
The most common options for coloring polymer clay are:
- Mica powder – Available in a huge variety of colors, mica powder gives a shimmery, pearlescent effect.
- Oil paint – Use oil paints designed specifically for clay rather than standard oil paints. Add just a small amount at a time.
- Acrylic paint – Thick, heavy bodied acrylics work best. They give an opaque, rich color.
- Coloring liquid – Specialty coloring liquids for clay come in many hues. Add by drops or thin coats.
To achieve a mustard yellow, start by adding a tiny amount of colorant at a time. Knead it thoroughly into the clay. Yellow ochre and cadmium yellow oil paints or mica powder will get you close to the desired mustard tone.
Add colorant a little at a time until you achieve the perfect saturation of mustard yellow. Typically just a few drops or pinches will suffice. Too much can make the clay difficult to work with. erred yellow, add more colorant. If it becomes too intense, add plain clay to dilute it.
More Kneading
Once you’ve added the colorant to your clay, kneading is crucial to evenly distribute the pigment throughout the clay body. At this stage, thorough and prolonged kneading is required to fully integrate the color into the clay. Without adequate kneading, you may end up with sections of lighter and darker color in the final clay.
Kneading helps break down the clay particles and blend them with the colorant. It also ensures the moisture level remains consistent within the clay. Continue kneading for 10-15 minutes after adding the pigment, until the color is uniform throughout the clay with no streaks. Test a small piece of clay by rolling it into a coil – it should have an even color all the way through.
The longer you knead, the more homogeneous the color will become. Don’t rush through this step – take your time to knead until satisfied with the consistency of color. Thorough kneading now will pay off later with smooth, evenly colored clay.
Aging the Clay
Once you’ve kneaded in your colorants and achieved your desired mustard yellow color, it’s important to let the clay rest before using it. This “aging” process allows time for the clay particles to fully absorb any moisture and bind together. It also allows any air bubbles introduced during kneading to rise to the surface where they can then be smoothed out.
Plan to let your mustard yellow polymer clay rest in an airtight package for at least 24 hours before sculpting or molding with it. Some clays may take 48-72 hours to fully age. You’ll know the clay is ready to use when it has an even, smooth texture throughout and feels firm yet pliable in your hands.
Aging prevents many sculpting and crafting headaches down the line. Well-aged clay is easier to condition and shape without cracking or crumbling. It also helps finished pieces hold details better and prevents later shrinking or cracking during baking/curing. Taking the time to let your mustard yellow clay rest results in a better quality and more durable end product.
Test Color
Once you’ve kneaded the colorant into the clay, it’s important to test the color match before using the clay for projects. Here are some tips for testing the color:
Take a small piece of the mixed clay and roll it into a snake shape. Flatten the snake into a thin pancake shape.
Hold the flattened clay next to the color you’re trying to match. Look at it under different lighting conditions, like sunlight, incandescent and fluorescent lighting.
Compare the clay test strip to the target color. If the color is too light, knead in more colorant. If it’s too dark, knead in more of the original clay.
Repeat the test process until the clay color matches the desired shade. Testing in different lighting helps ensure the color looks accurate under various conditions.
Keep notes on how much colorant you added so you can replicate the color mix next time. Photo documentation of color tests can also be helpful for matching colors.
Getting an exact color match often takes some trial and error. Don’t be afraid to re-mix, add more pigment, and re-test until the polymer clay matches your desired mustard yellow shade.
Store Clay
Once you’ve mixed your mustard yellow clay, you’ll need to store it properly to keep it workable for future projects. Here are some tips:
Choose an airtight storage container like a plastic bin or bucket with a tight sealing lid. Clay dries out quickly when exposed to air, so a sealable container is essential. Glass jars also work well for smaller amounts of clay.
To keep clay soft and moist, add a damp sponge or cloth to the storage container. The moisture from the sponge will prevent the clay from drying out. Just make sure not to add too much water or the clay can become sticky.
Store clay in a cool, dry place away from direct sunlight and heat. Temperature fluctuations can negatively affect the clay’s consistency.
If storing clay for more than a few weeks, consider wrapping it in plastic wrap first, then placing it in the airtight container. This provides extra protection against drying out.
Check on stored clay periodically. If it starts to dry or harden, add a bit of water and knead thoroughly to restore flexibility.
With proper storage methods, your homemade mustard yellow clay should remain soft and workable for months after mixing.
Using the Mustard Yellow Clay
The mustard yellow clay you’ve created has some great properties that make it wonderful to work with. Here are some things to keep in mind when using this clay for your projects:
Plasticity – The addition of the yellow colorant shouldn’t affect the nice plasticity of the clay. It should still be smooth and pliable, making it easy to shape and sculpt.
Texture – The clay will retain a smooth surface texture. The colorant doesn’t add any grit or roughness.
Strength – Properly aged, the clay will be strong enough for sculpting and holding fine details without cracking or crumbling.
Firing – The clay should fire to a rich, bright mustard yellow color. Make sure to fire according to the manufacturer’s specifications.
Some great project ideas that would look fabulous in mustard yellow clay include:
- Sculptures of autumn harvest fruits and vegetables like corn, squash, or pumpkins.
- Southwestern-style pottery like bowls, vases, or figurines.
- Retro kitchen canisters, utensil holders, or napkin rings.
- 70s-inspired decor like peace sign necklaces or flower vases.
- Cheerful clay gnomes, animals, or figurines for the home.
The mustard yellow is a warm, happy color that’s versatile for many applications. Have fun being creative with this bright custom clay blend!


