What Equipment Is Used In Pottery?
Wheel
The pottery wheel is perhaps the most iconic piece of equipment used in pottery. Pottery wheels enable potters to efficiently shape and form clay vessels with symmetry and precision. Wheels have been used for thousands of years to produce pottery.
The earliest evidence of pottery wheels dates back to Mesopotamia around 3500-3000 BCE. These early wheels were known as tournettes or “slow wheels.” They were made of stone and powered by hand or foot. The tournette evolved into the faster kick wheel in China around 2000 BCE. Kick wheels use the potter’s foot to spin the wheel head. Then in the Middle Ages, the flywheel was developed which allowed momentum to power the wheel rotation. Finally in the 19th century, potters began using electric powered wheels.1
Today there are several common types of pottery wheels. Kick wheels are economical and portable. Electric wheels offer variable speed control and more power. Treadle wheels use foot pedals instead of kicks to drive the rotation. And there are also combination electric-kick wheels.
Proper wheel maintenance helps ensure smooth spinning and avoids vibration. Wheels should be periodically lubricated and tightened. There are many useful accessories for wheels including splash pans, bats, leveling feet, and customized wheel heads.
Kilns
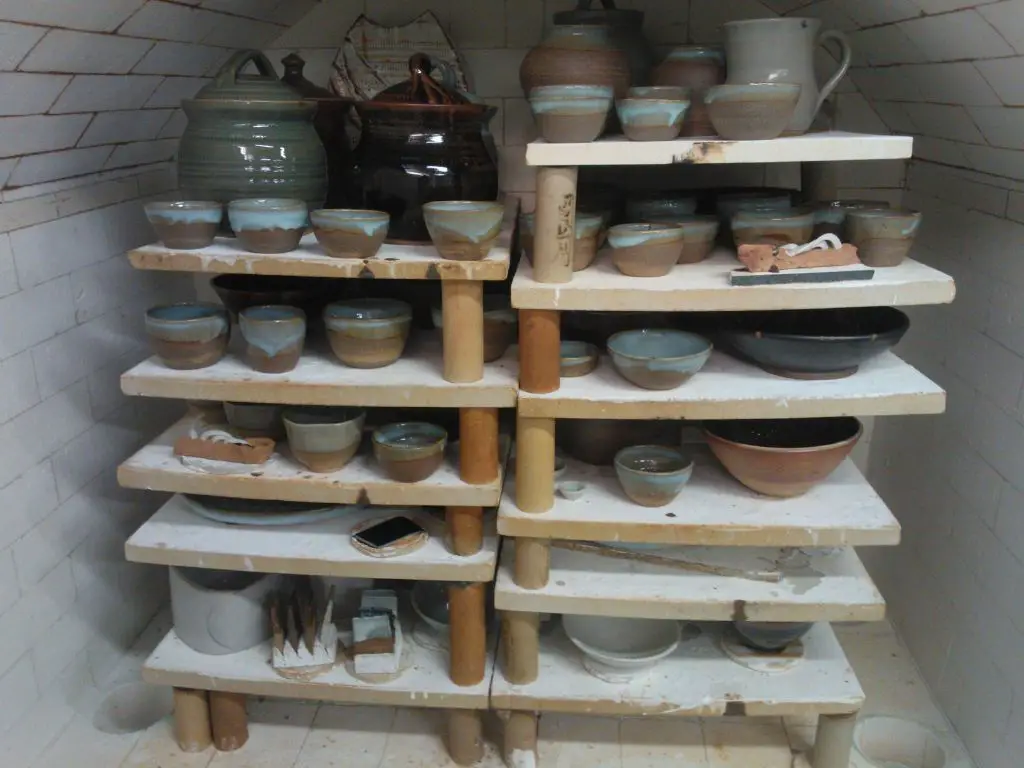
Kilns are an essential piece of equipment for firing pottery and ceramics. The purpose of a kiln is to heat pottery to high temperatures to permanently harden clay objects through a process called sintering. Kilns allow potters to precisely control the firing process by evenly heating wares to a target temperature.

There are several types of kilns used in pottery:
- Electric kilns are the most common for home potters. Electric elements heat the interior chamber. These kilns allow precise temperature control with digital controllers.
- Gas kilns use propane or natural gas for fuel. While they can reach higher temperatures than electric kilns, they require ventilation.
- Wood-fired kilns use wood as the fuel. These kilns allow more atmospheric effects but are more difficult to control.
Major features to consider when selecting a kiln include the maximum temperature, interior dimensions, and any special features like autocone shutoff. Kiln capacity refers to the cubic feet of interior space. Popular options range from 9 cubic feet up to 29+ cubic feet for production studios.
For best results, kilns should be properly maintained by replacing worn bricks and keeping elements in good working order. The firing process requires heating wares slowly to avoid cracks, holding at a peak temperature, and then cooling gradually. Kiln owners follow digital programs or firing schedules to control the stages. See this article for an overview of designing firing schedules.
Clays
The potter’s clay is a very complex material with unique properties that make it perfect for shaping and firing into ceramic ware. There are many different types of clays used in pottery, each with their own characteristics. According to Adeagbo (2016), the engineering properties of pottery clays depends mostly on the mineralogical and chemical composition, the grain size distribution, and the processing method.
Some of the most common types of clays used in pottery include:
- Earthenware clay – Fires at lower temperatures. Porous when fired.
- Stoneware clay – Denser and less porous than earthenware at high fire temperatures.
- Porcelain clay – Very dense and non-porous when fired at high temperatures. (http://eprints.abuad.edu.ng/96/1/061_078.pdf)
An important property of clay is its plasticity – its ability to be molded and retain its shape. Plasticity is affected by the clay’s composition and the presence of fluxing impurities that begin to melt during firing. Clays must be properly prepared before use in pottery. Preparation includes processes such as:
- Wedging – Kneading and cutting clay to remove air bubbles and evenly distribute moisture.
- Slaking – Mixing clay powder with water to create a slurry.
- Sieving – Removing pebbles, grit and other impurities.
Proper clay preparation helps prevent cracking and exploding during drying and firing the final piece.
Tools
Potters use a variety of hand tools during the throwing and trimming process. Some essential hand tools include ribs, loops, trimming tools, and modeling tools like shapers, paddles, and scrapers. Ribs help shape and smooth clay on the potter’s wheel. Loops are wire tools used to trim excess clay from the bottom of pots. Trimming tools like kidney shaped scrapers and blades refine the shape and surface of thrown pieces. Modeling tools help sculpt and add detail to handbuilt clay projects.
Cutting tools are also key when working with clay. Potters use wire tools to slice slabs of clay and cut pieces off the wheel. Loop tools can cut clay in tight places that knives can’t reach. Needle tools make detailed lines and textures. Pottery knives, like fettling knives, help trim seams on handbuilt objects. Banding wheels are rotating tables used to trim and smooth rims after pieces have been thrown on the wheel or handbuilt.
Some popular brands for high quality pottery hand tools include Sheffield Pottery and Falcon Tools.
Glazes
Glazes are an essential part of most pottery, serving both decorative and functional purposes. At their most basic level, glazes provide a glass-like coating over clay that makes it nonporous, so liquids cannot soak into the clay body. Glazes come in endless colors, textures, and finishes, allowing potters to enhance the look of their pieces.
Glazes consist of three main ingredients: silica, fluxes, and stabilizers. Silica, in the form of minerals like quartz, makes up the glassy portion of the glaze. Fluxes lower the melting point of the glaze so it can fuse to the clay body at pottery kiln temperatures. Common fluxes include feldspar, borax, and calcium carbonate. Finally, stabilizers like alumina and zirconium oxide help prevent glazes from becoming too runny when fired.
There are many techniques potters use to apply glazes. The simplest is dipping wares directly into a bucket of glaze or pouring the glaze over them. Paintbrush application allows potters to coat specific areas while leaving others unglazed. Spraying glaze through an airbrush or spray gun gives an even, consistent coat. More creative techniques include splattering glaze by flicking a stiff brush, stippling glaze with a sponge, or dripping glaze to create runs and drips. Proper glaze application takes practice, but allows limitless possibilities for creative effects (The Crucible, 2021).
Molds
Molds are commonly used in pottery to create identical replicas of a master form. There are several types of molds used for different purposes:
Plaster molds are made from plaster of Paris and are used for slip casting. The clay slip is poured into the mold and allowed to harden before the excess slip is poured out. Plaster molds absorb water from the slip allowing the clay to form a shell on the interior walls of the mold (An Interconnected World? Evidence of Interaction in the Arts of the Ancient Americas).
Slip casting involves pouring liquid clay slip into a plaster mold so that a layer forms against the inside walls of the mold. Once the layer is thick enough, the excess slip is poured out of the mold. The cast piece is then removed and left to dry before firing. Multiple identical pieces can be produced using the same mold.
Press molds and jiggering are techniques used to mass produce pottery. Press molds are usually made of plaster and used for molding plates, tiles and simple forms. A lump of clay is pressed into the mold using a profile tool to compress it evenly. Jiggering uses a rotating mold on a wheel and a shaped tool to form the interior and exterior surfaces of a clay form (An Interconnected World? Evidence of Interaction in the Arts of ).
Decorating
There are many creative ways to decorate the surface of pottery pieces. Some popular techniques include:
Slipping involves coating the pottery with a layer of diluted clay slip. The slip can be a different color than the base clay to create visual contrast. Sgraffito involves scratching designs through this slipped surface to reveal the clay color underneath. Mishima involves inlaying slip into carved lines in the leather-hard clay. Decorative techniques like these add beautiful effects to pottery.
Pottery can also be decorated using underglazes, glazes, and overglazes. Underglazes are used to add color and patterns before applying a clear glaze. Glazes are glassy coatings that create effects like glossy surfaces and flowing colors. Overglazes are decorative coatings applied on top of an already fired glaze. Combining these methods allows for creative, multifaceted looks.
Decorating the surface of pottery pieces takes craftsmanship and imagination. The array of options allows potters to make each piece truly unique.
Firing
Firing is one of the most important steps in creating pottery. It refers to heating the clay pieces to high temperatures in a kiln in order to harden and finish them.
The general firing process involves the following steps:
- Allow clay pieces to dry fully before firing. Remove any moisture to prevent cracking.
- Load pieces carefully into the kiln, leaving enough space for air circulation.
- Program the kiln with the desired temperature cycle. Fast ramp-up to top temperature, followed by a hold time to allow heat to fully penetrate pieces.
- For oxidation firing, ensure adequate airflow in the kiln to allow oxygen in. For reduction firing, restrict airflow to remove oxygen.
- Heat kiln at a gradual rate, often over 8-12 hours. Monitor temperature via kiln thermocouples.
- Soak at top temperature (called the “firing temperature” – usually between 1000-1300°C) for the required time.
- Allow controlled cooling over several hours to avoid cracking pieces.
Achieving the right atmosphere and temperature is crucial for quality results. Oxidation firing with enough air circulation results in vibrant glaze colors. Reduction firing with limited air produces earthy tones. The highest firing temperature reachable by the kiln determines the durability of the finished pottery.
Modern electric and gas kilns allow precise computerized control over the firing schedule. This helps achieve consistent results with less effort compared to manual kiln operation.
Safety
Working with clay and glazes in a pottery studio can expose you to various hazards if proper safety practices are not followed. Some key safety guidelines include:
Wear proper protective equipment like dust masks, respirators, gloves, and protective eyewear when working with dry clay, glazes, and during firing. Dust from clay, silica, and other materials can cause lung damage if inhaled over time 20 Ways to Stay Safe in the Pottery Studio. Respirators filter out dangerous respirable particles.
Use local exhaust ventilation when working at the wheel or doing any task that generates large amounts of dust. Keep the area clean and tidy. Wet mop floors instead of sweeping to reduce dust.
Learn how to properly use equipment like the wheel and kiln. Do not overload kilns and follow firing schedules. Allow adequate ventilation when firing. Ensure adequate clearance between the kiln and walls or other objects. Let kilns cool completely before unloading.
Store hazardous chemicals properly in sealed containers. Use separate workspaces for different materials to avoid cross-contamination. Always label contents clearly and follow safety datasheets.
Wear fireproof aprons and keep a fire extinguisher on hand. Be mindful of tripping hazards like cords and tubing on the floor. Avoid distractions and do not work when overly tired.
Educate yourself on material safety and always work in a mindful, attentive manner. Protect yourself and others by making pottery studio safety a top priority.
Getting Started
For beginners looking to get into pottery, having the right equipment and supplies is key. Here are some of the basic items you’ll need to set up a home pottery studio:
-
A potter’s wheel – Either an electric or kick wheel allows you to throw and shape clay into pots and other round objects.
-
Clay – Choose between air-dry, polymer or firing clay depending on your planned projects and access to a kiln.
-
Clay tools – Basic tools like ribbon tools, loop tools and cutting wires help shape, trim and smooth the clay.
-
Slip and scoring tools – Used to “glue” wet clay pieces together before firing.
-
Bats or throwing boards – Provides a flat surface on the wheel to throw your clay.
-
Water containers – For keeping clay wet and rinsing tools.
For your home pottery studio, designate a space in your house such as a spare room, basement or garage. Cover any surfaces like floors or tables to protect from water and clay. Have access to water for cleaning up. An open layout allows space to work on larger projects.
Good beginner pottery projects to start with include:
-
Pinch pots – Build up clay into a simple pot using your fingers and thumbs.
-
Coil pots – Roll clay into ropes and stack into pot shapes.
-
Slab pots – Cut clay into flat pieces and form into boxes or other shapes.
-
Wheel throwing – Try making basic bowls, cups, vases on the potter’s wheel.
Take a pottery class at a local studio to learn techniques from an expert. As you gain experience with clay, move on to more complex forms, surface decoration and glazing.


