How Thick Does A Clay Slab Need To Be?
Clay slab thickness is an important consideration when working with clay. The thickness of your slab will impact the structural integrity of your finished piece, how quickly it dries, how easily it can be manipulated, and more. Finding the ideal thickness for your particular project and clay type is key to creating successful pottery and ceramic sculptures.
When working with clay slabs, you generally want to use the thinnest slab that will hold up for your intended project. Thinner slabs are easier to shape, dry faster, require less clay, and enable finer detailing. However, too thin and the clay can easily warp, crack, and collapse either when working with it or during the drying and firing process. Conversely, thicker slabs offer more structural strength but are harder to shape smoothly, take longer to dry, and can end up with cracks from excessive shrinkage.
In this article, we’ll look at the ideal thicknesses for different types of clay slab projects so you know how thick to make your slabs. We’ll also cover techniques for creating thin and thick slabs, what thickness means for drying and firing your work, and tips for joining and reinforcing thinner slabs when needed.
Recommended Thickness
The typical recommended thickness for most clay slabs falls between 1/4 inch (6mm) and 1/2 inch (12mm). This provides enough thickness to withstand some minor handling and shaping without breaking or cracking while still being thin enough for intricate details and allowing the clay to dry in a reasonable timeframe.
Slabs at the thinner end around 1/4 inch are good for projects with fine details, textures, or cut-outs since the clay is more flexible at this thickness. Thicker slabs around 1/2 inch are better for large solid pieces, attaching multiple parts together, or projects needing more structural integrity.
In general, a good standard thickness to start with for most functional pieces like bowls, plates, or mugs is 3/8 inch (10mm). This provides a nice balance between durability and maneuverability.
Thickness for Specific Projects
The ideal thickness for clay slabs depends on the type of project you want to create. Here are some guidelines for common clay projects:
Bowls and Plates
For general bowls and plates, a slab thickness between 1/4″ and 1/2″ (6-12mm) tends to work well. Any thinner and these pieces may be prone to cracking or warping. Any thicker and they may get too heavy and require excess clay and drying/firing time.
Mugs and Cups
Mugs and cups are best between 3/8″ and 1/2″ (10-12mm) thick. The handle and rim areas in particular should be on the thicker side, at least 1/2″, to prevent cracking from repeated use.
Tiles
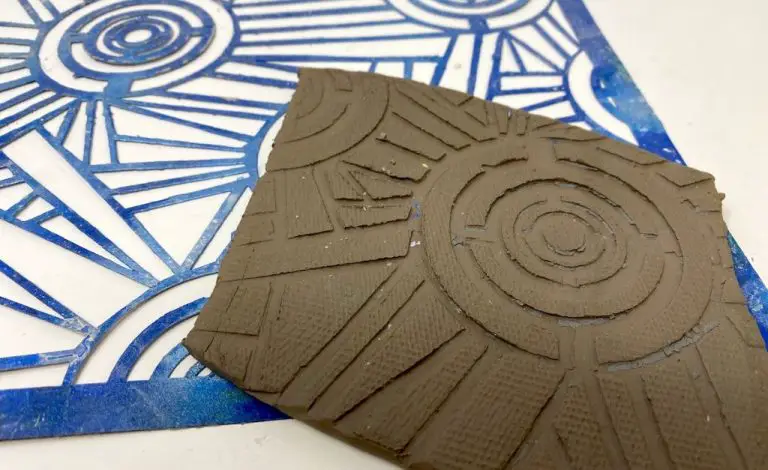
Tiles can be as thin as 1/8″ (3mm) since they have a flat, stable shape and will be well supported. However, thicker tiles up to 1/2″ will be more durable.
Figurines and Sculptures
Sculptures and figurines can vary greatly in thickness depending on the design and scale. Small details may be 1/8″ or less, while larger solid areas are often 3/4″ to 1″ thick. Let the overall size and shape of the sculpture guide the thickness.
Factors that Determine Thickness
The ideal thickness for a clay slab depends on several factors:
Strength: Thicker slabs are stronger and less prone to cracking and warping. If the finished piece will be large or bear weight, a thicker slab provides more structural integrity.
Size: Larger projects require thicker slabs to support the weight without sagging or breaking. Smaller pieces can be made with thinner clay.
Clay type: Sculpture and stoneware clays are stronger and can be rolled thinner than earthenware or porcelain clays. The plasticity and durability of the clay affects the minimum thickness.
Firing method: Slabs intended for low-temperature firing need to be thicker than high-fire slabs. The maximum temperature affects the clay’s strength.
Thin vs Thick Slabs
Clay slabs can be made in a range of thicknesses, each with their own pros and cons. Thin slabs, around 1/4″ thick, have some advantages:
- Thin slabs require less clay, making them more economical.
- They dry faster, reducing the time until you can work with them.
- They’re lighter and easier to move around.
- It’s possible to bend and drape thin slabs for some techniques.
However, thin slabs also have some limitations:
- They’re more fragile and prone to cracking and tearing.
- Thin pieces may warp more easily during drying and firing.
- There’s less room for carving/sculpting detail.
- Joints between slabs may be more visible.
Thicker slabs, around 1/2″ or more, offer their own benefits:
- Thicker clay holds detail better for sculpting.
- They resist warping and cracking more.
- Joints blend together seamlessly.
- Thick pieces have more structural integrity.
The downsides of thick slabs include:
- Requiring more clay, making them more expensive.
- Heavy and cumbersome to transport.
- Taking longer to dry thoroughly.
- Difficult or impossible to drape/bend.
In summary, the choice depends on your project needs and preferences. Thinner or thicker both have situational advantages.
Making Thin Slabs
There are a few techniques you can use to create very thin clay slabs:
Rolling Pins
Using a rolling pin is one of the simplest ways to make a thin slab. Start with a chunk of clay and begin rolling it out, applying even pressure as you work. Switch directions frequently to keep the slab even. Place the clay between two sheets of canvas or plastic while rolling to prevent it from sticking. Keep rolling and flipping the clay until you achieve the desired thinness, usually 1/8″ or less. The thinner you go, the more care you’ll need to prevent tearing. Roll slowly and gently as you approach your target thickness.
Slump Molds
Pour liquid casting slip into an open-faced plaster mold, then allow it to sit until the desired thickness is achieved as the water evaporates. The plaster will draw moisture from the slip, resulting in smooth, thin clay sheets 1/16″ or thinner. Make sure your casting slip has a creamy consistency and is free of lumps before pouring. Let the excess slip drain off and then carefully peel the slab from the mold once it holds together.
Slab Rollers
Slab rollers mechanically flatten and thin clay slabs. They typically have two rollers that you feed the clay through to compress it. Adjust the distance between the rollers to control the slab thickness. Rollers with guides can make slabs as thin as 1/16″. They take some practice to master but are much faster than hand rolling for production work. Keep your clay well lubricated and free of debris to prevent tearing.
Making Thick Slabs
When making thicker clay slabs, there are a few techniques you can use to ensure even thickness and avoid cracking:
Slab Roller: A slab roller is a specialized tool that allows you to roll out very even thick slabs. You sandwich the clay between two rollers and gradually roll it thinner as you advance through the machine. This is great for getting consistent thickness.
Squaring Off: After rolling out a slab, trim the uneven edges with a wire tool to “square” the slab into a rectangle with straight sides. This lets you achieve an even thickness across the slab.
Using Guides: As you roll out the clay, place adjustable strips of wood, metal or plastic around the slab. They will act as thickness guides to help you roll an even depth. Slowly move them in as you get the right thickness.
Layering: You can build up a thick slab by rolling out several thinner sheets and layering them on top of each other. Press seam them together well to bond them into one thicker slab.
Cutting: For very thick slabs, roll out a large square, then use a wire tool to cut and remove strips from the edges. This leaves a thick slab in the center without very thin edges.
Joining Thin Slabs
If your project requires a larger slab than you can make by rolling out a single slab, you may need to join multiple thin slabs together. Here are some strategies for seamlessly joining clay slabs:
Scored and Slipped Joints
Score or roughen the edges of the slabs you want to join together with a knife or fork. Apply water or slip to the scored edges and firmly press the slabs together, smoothing over the seam. The water/slip will soften the clay and help bond the pieces together.
Overlap Joint
Overlap the edges of the two slabs by 1/2 inch or more. Use slip or water to soften and bond the overlap. Smooth the area with your fingers, a rib, or rolling pin. This creates a strong reinforced seam.
Add Strips
Cut strips from a slab and lay them perpendicular over the seam between slabs. Use slip or water to blend the strips into the slabs. Once dried and fired, this will add strength to the joint.
Cut Keyed Joints
Cut a “keyed” edge on the slabs by notching or angling the edges. Fit the keyed edges together like a jigsaw puzzle. The grooves help align and strengthen the seam.
With careful scoring, slipping, smoothing, and reinforcing, thin clay slabs can be joined into seamless larger slabs for bigger projects.
Drying Considerations
The thickness of a clay slab can have a significant impact on its drying time. Thinner slabs typically dry much faster than thicker slabs. This is because the moisture in the clay only has to migrate a short distance to reach the surface and evaporate.
With a thicker slab, there is much more moisture trapped in the center that takes longer to make its way out as it slowly evaporates from the surface over time. Thick wet slabs are prone to cracking and warping if they dry too quickly.
For thin slabs less than 1/4 inch thick, simple air drying is often sufficient. Make sure to dry thin slabs evenly on both sides and avoid excess heat which can cause warping. For thicker slabs, you may need to take additional steps to slow the drying and prevent cracking such as:
- Covering the clay with plastic
- Misting the surface of the clay periodically
- Placing the clay inside a damp box
- Draping with damp rags or towels
Test the readiness of a thick slab by pressing on the center. If it still flexes, it needs more time to dry evenly throughout. Give thick slabs extra time in a gradual, humidity-controlled environment beforebisque firing.
Firing Considerations
The thickness of a clay slab affects how it fires in the kiln. Thinner slabs tend to dry faster and require less time in the kiln. Thicker slabs take longer to dry evenly and may require a slower ramp up time during firing to prevent cracking or exploding.
With very thin slabs under 1/4 inch, it’s important not to fire too fast or the clay can warp, crack or even melt. Slow bisque fires are recommended. For thicker slabs over 1 inch, slower temperature climbing is needed to allow heat to gradually penetrate the entire thickness without overheating the surface layers.
The center of a thick clay piece is the last part to heat up. If the temperature rises too quickly, the outside will expand before the inside has expanded, causing cracks and breakage. Thick slabs may require an overnight slow fire or a hold at a lower temperature to even out. Consult the clay manufacturer’s instructions.
Thicker pieces also retain more heat at their core and stay hot longer after the kiln turns off. Allow adequate cooling time before opening the kiln. Ramp down the temperature slowly at the end of the firing as well. Slower cooling prevents thickness-related cracking issues.

