How To Make A Clay Fighter Jet?
A clay fighter jet is a fun arts and crafts project that allows you to make a realistic model airplane out of clay. It’s a great way for aviation enthusiasts, model makers, or anyone who likes working with their hands to create an impressive decorative item. Building a clay jet is also a wonderful activity to do with kids, as it sparks creativity and keeps them engaged.
The process of sculpting a fighter jet out of clay allows you to add your own creative flair. You can choose to model an actual jet from history, or invent your own unique aircraft design. Customizing the shape, size, colors, and details makes each clay jet a one-of-a-kind creation. Displaying your finished clay jet is both satisfying and an excellent conversation piece. The hours spent crafting an intricate jet from scratch results in a handmade artwork you’ll be proud to show off.
Gather Materials
To make a clay fighter jet model, you’ll need the following materials:
-
Clay – Air-dry or polymer clay works best. Make sure you have enough to sculpt all the parts of the jet.
-
Clay sculpting tools – Things like sculpting knives, loop tools, and pottery ribs allow you to shape the clay and add fine details.
-
Paint – Acrylic craft paints are recommended. You’ll want black, gray, metallic colors like silver or gunmetal, and any other colors for details.
-
Paint brushes – Get a variety of brush sizes to handle small details as well as large surfaces.
-
Clear acrylic sealer – This will protect the finished paint job on your model.
-
Modeling clay or putty – Use this to attach clay parts together.
-
Skewer or dowel – Insert this into the model to provide internal support.
-
Sandpaper – Helpful for smoothing rough surfaces.
Before starting, make sure you have a sufficient amount of each material on hand.
Make the Fuselage
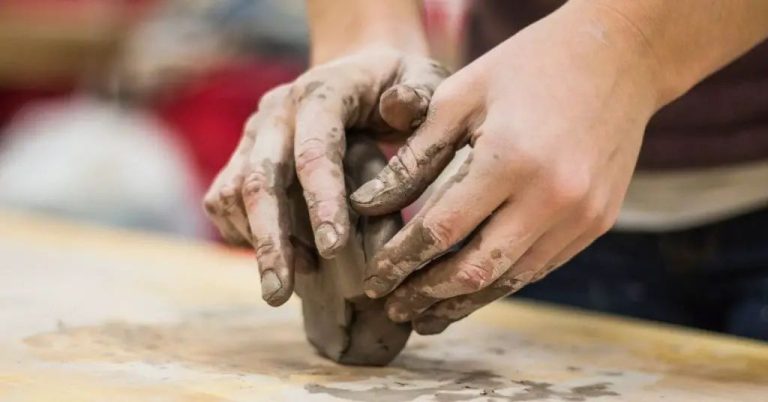
The fuselage is the main body of the jet where the cockpit and wings will attach. To make the fuselage, roll a large ball of clay into an oval or cylindrical shape. This will form the basic shape of the body.
Use your fingers to refine the shape, tapering and pointing one end to form the front of the jet. Flatten the body slightly on the bottom to create a stable base. Then use clay sculpting tools to carve out space for the cockpit area.
Make the cockpit by indenting the clay with your thumbs. Create enough depth for a pilot figurine to fit inside. Smooth and shape the cockpit area to look like a jet cockpit with a rounded canopy.
Refine the overall shape of the fuselage using your sculpting tools. Taper the rear end to a point and make sure the body is streamlined. Add any other details like windows or hatches. Once you are happy with the shape, allow it to firm up before adding the wings and other details.
Add the Wings
After the fuselage is complete, it’s time to add the wings. Before attaching the wings, consider their shape and size in proportion to the fuselage. Fighter jet wings are generally more swept back and elongated than commercial jet wings.
To attach the wings, apply slip (a mix of clay and water) to the fuselage where the wings will connect. This will act as an adhesive. Carefully press the wings onto the slippery areas, keeping them straight and aligned. Allow time for the slip to dry completely before moving on.
Add details to make the wings more realistic. Cut grooves into the wings to suggest panels and flaps. Use a toothpick or clay shaping tool to add rivets along the seams. You can also slightly bend the wingtips up to give them a sense of movement.
The wings will need time to firm up before adding the engines and moving on to painting. Set the jet aside for 24 hours so the clay fully dries and hardens.
Create the Engines
To create the engines for your clay fighter jet, you’ll want to sculpt cylinders or cones out of clay to represent the jet’s engine turbines. The size and shape of the engines can vary depending on the type of jet you want to model. For a typical single engine fighter jet, sculpt one cylinder about 1-2 inches long and 0.5 inches in diameter for each engine.
Attach the engines to the fuselage using toothpicks or wooden skewers. Insert the toothpick through the center of the engine cylinder and into the fuselage, being careful not to damage the fuselage shape. You may need to pre-drill the insertion point with a thinner skewer first. Use two toothpicks per engine, one near the front and one near the back of the cylinder, to hold the engine securely in place.
For a more realistic look, add some small details to the engines like ridges or vents using clay sculpting tools or the tip of a skewer. You can also cut out the back of the engine cylinder to represent the engine exhaust.
Include Small Details
Adding smaller features like missiles, landing gear, and other embellishments will give your model more realism and interest. Here are some ideas for fun details to include:
-
Make removable missiles out of small pieces of clay rolled into pointed cones. Carefully cut or use a toothpick to carve lines into the clay to add texture before attaching the missiles to the underside of the wings and fuselage.
-
Craft landing gear out of toothpicks, cocktail sticks, or pieces of straight wire. Insert them into the bottom of the fuselage and secure with clay. Consider painting silver with black wheels for added realism.
-
Add jet exhausts to the back of engines using leftover clay rolled into tubes. Cut or use a skewer to poke holes that mimic jet propulsion.
-
Make tiny clay pilot figurines and place them in the cockpit. Use a toothpick to add panel lines, rivets, and other surface details.
-
Consider putting your model on a simple base made of wood, plastic or sturdy cardboard to give it more height and stability for display.
Taking the time to include these types of finishing touches will give your clay fighter jet more personality. Let your creativity guide you as you add these fun embellishments!
Paint the Model
Once the clay has dried, it’s time to paint your fighter jet model. Acrylic paints work great for painting clay. Before starting, make sure to have a variety of paint colors on hand for a realistic look. Gather black, gray, white, and silver paints to depict the metal exterior of a jet. You’ll also want some green, brown, and blue paints for any detailing on the body and wings.
Designate an area to paint the model, either outside or in a well-ventilated area indoors. Lay down some newspaper or a plastic sheet to protect the surface underneath. Use a primer made for clay before painting if desired to help the acrylic paint adhere to the clay. Start by painting the main body a dark gray or black color. Use a small detail brush to paint the wings, vertical stabilizer, engines, and other sections in silver, white, or light gray.
Add accents like Browns and greens lightly dry brushed over the body to give a weathered look. Use the blue paint to depict any glass sections like the cockpit window. Let the acrylic paint fully dry before moving to the next step. The painting process allows you to add realism and your own creative flair to the clay fighter jet model.
Apply Finishing Touches
Once your model jet is fully assembled and painted, it’s time to seal and protect it. Apply a clear acrylic sealer over the entire jet using a brush or paint sprayer. Make sure to apply thin, even coats and let each coat fully dry before adding another. Allow the final coat to dry completely overnight.
Next, you may want to add a display stand. Bend a wire coat hanger into a stand and attach it to the bottom of the jet with strong glue or adhesive clay. The stand will allow your jet to be displayed upright on a shelf or desk.
Lastly, consider adding a final touch like jet streams. Cut thin strips of colored tissue paper and glue them to the back of the jet to mimic hot engine exhaust. Or, make small decals from tape or paper and affix them to the model. Now your clay fighter jet is ready for flight!
Display Your Jet
After all the hard work you put into making your clay fighter jet, you’ll want to proudly put it on display. Here are some creative ideas for showing off your masterpiece:
Make a custom stand. Use wood, plastic or even Lego bricks to create a stand for your jet. This allows you to display the jet in flight or landed on a runway. Get creative with the shaping and painting to make a stand that complements your jet model.
Display in a glass case. For the ultimate protection, have your jet encased in a glass display case. This keeps it free of dust and damage. Place it on a neutral background or even photograph it and print a background to look like the sky. Add a plaque with facts about the jet model.
Create a diorama. Surround your jet with other models and scenery to build an exciting diorama. Add an aircraft carrier, warships, hangars, control tower, and miniature human figures to depict action scenes.
Hang with fishing line. For a flying effect, hang your jet from the ceiling with clear fishing line. Angle the wings as if it’s banking in flight. Lightly secure the line so the jet can still move a bit.
Record video. Make a video of your jet and display it on a digital screen or tablet. Get creative with special effects! Film close-ups highlighting details. Add sound effects or engine noise.
No matter how you choose to show off your new jet, take pride in your creation. Let your imaginative skills shine through.
Creative Variations
A clay fighter jet model provides a great base to get creative and customize your own unique aircraft. Here are some ideas for putting your own spin on the project:
Add details and accessories – Consider adding features like missiles under the wings, a radar dish, air intake vents, a pilot in the cockpit, ejector seat, parachutes, or any other details to make your jet model more realistic.
Change up the shape – Customize the overall shape and size of your jet by making the nose cone pointier, the fuselage wider, the wings swept back, or other variations. The basic instructions can be adapted to create all kinds of experimental aircraft.
Make other aircraft – Apply the techniques used for the fighter jet to create models of passenger jets, propeller planes, helicopters, drones, futuristic concepts, or anything you can imagine. The sky’s the limit!
Paint your own design – Personalize your aircraft model by painting it with custom camouflage, nose art, markings, insignia, colors, patterns or other creative flourishes.
Add a stand – Consider making a simple stand or display base for your model out of wood, plastic or cardboard to help present your jet for play or display.
The great thing about working with clay is that it’s an extremely malleable material. Don’t be afraid to let your creativity soar and put your own personal twist on a fighter jet sculpture!

