Can You Make A Mug With Air Dry Clay?
What is Air Dry Clay?
Air dry clay, also known as clay dough, is a popular modeling and crafting material composed of water, glue, and natural clay or starch. Unlike other clays that require firing in a kiln, air dry clay dries naturally at room temperature through evaporation.
The main ingredients in air dry clay are:
- Water – provides moisture and flexibility for molding
- Glue or binder – holds the clay together as it dries
- Clay powder or starch – gives the clay body and structure
- Preservatives – prevent mold or bacteria growth
Air dry clay has a soft, malleable texture similar to dough. It doesn’t harden when exposed to air like other clays, allowing more time for shaping and detailing. The clay will dry to a strong, durable finish within 1-7 days depending on thickness.
Air dry clay differs from polymer clay which contains plasticizers and cures through oven heating instead of air drying. Polymer clay can hold finer detail but doesn’t dry as firm and solid as air dry clay. Air dry clay is also more affordable and accessible to hobbyists.
Advantages of Air Dry Clay
Air dry clay offers several advantages over other modeling clays that make it a popular choice for crafters and artists:
Doesn’t require baking or firing – One of the best things about air dry clay is that it doesn’t require an oven or kiln to set. It air dries naturally at room temperature, making it very convenient to use.
Quick drying time – Air dry clay will dry fully in 24-48 hours. This quick dry time allows you to complete projects in just a day or two.
Easy to use and affordable – Air dry clay is lightweight and malleable, making it easy to shape and form. It’s also relatively inexpensive compared to other clays.
Lightweight – Pieces made with air dry clay are very lightweight. This makes it easy to craft delicate and detailed items.
Best Air Dry Clay Brands
When choosing an air dry clay for your mug project, go with a top brand that’s known for quality and ease of use. Here are some of the best air dry clay brands to consider:
Crayola Model Magic
Crayola’s Model Magic is one of the most popular air dry clay brands. It has a soft, lightweight texture that’s easy to mold and shape. Model Magic dries completely in 24 hours with little to no cracking or chipping. It comes in a variety of bright colors, making it great for decorative projects.
Activa Air-Dry Clay
Activa Air-Dry Clay is smooth and pliable, perfect for sculpting detailed designs. It takes 1-2 days to fully cure and can be painted after drying. Activa comes in white and terra cotta colors. It’s a good choice if you need more time for shaping intricate patterns.
Hearty Clay
Hearty Clay is known for its durability and long-lasting finished products. It has a smooth, clay-like texture and dries hard in 1-3 days. Hearty Clay is available in white and natural reddish brown colors. Use it when you need a sturdy, durable clay.
Consider the drying time, variety of colors, and quality of the finished surface when choosing an air dry clay brand. Top brands like Crayola, Activa, and Hearty Clay offer versatility for all types of projects.
Making a Mug with Air Dry Clay
Making a mug with air dry clay is a fun and easy craft project. Here is a step-by-step process for shaping, smoothing, detailing and drying your air dry clay mug:
1. Form the Basic Shape
Roll out air dry clay into a thick, rectangular slab approximately 1/4 inch thick. Wrap the clay around your hand to form a basic cylinder shape for the mug. Use your fingers to smooth and pinch the seam together.
2. Refine the Shape
Gently smooth the outer surface of the cylinder with your fingers or a silicone shaping tool. Create straight sides or curve the mug shape as desired. Pinch and refine the mug’s lip shape and thickness.
3. Add Details
Use silicone shaping tools, toothpicks, or popsicle sticks to add design details like lines, patterns or textures. Add a handle if desired by rolling a clay rope and attaching it to the mug sides.
4. Allow to Dry
Allow the mug to air dry completely, which can take 24-48 hours. Flip the mug over occasionally so it dries evenly. Do not bake air dry clay.
Be creative with your shaping to make a unique finished mug! The flexibility and simplicity of air dry clay makes it a great material for crafting handmade pottery at home.
Tips and Tricks
When working with air dry clay, there are some handy tips and tricks to know that will help make the process easier and improve your results:
Spray the clay lightly with water as you smooth it – The water helps blend the clay and creates a seamless surface. Spray a light mist of water onto areas you want to smooth out and blend the clay gently with your fingers or a silicone clay shaper tool.
Use basic household tools – Items like popsicle sticks, straws, and toothpicks can be used in place of clay sculpting tools. Popsicle sticks are great for sculpting details and textures. Straws and toothpicks help with drilling holes and imprinting patterns.
Avoid cracking as it dries – Air dry clay can crack easily if it dries too quickly. To prevent cracking, only work in small sections at a time. Spray finished areas with water and cover with plastic wrap to slow drying. Store unused clay in an airtight container or plastic bag.
Fun Decorating Ideas
Getting creative with painting and decorating your air dry clay mug can result in a fun, unique piece. Here are some ideas for decorating your handmade mug:
Painting designs with acrylics – Acrylic paints work great on air dry clay. You can paint freehand designs, words, or images directly onto the surface. Allow paint to fully dry before sealing the mug. Metallic acrylic paints can add a fun, shimmery effect.
Adding texture with rolls, stamps or stencils – Impress texture and patterns into the clay by rolling over it with a texture roller, pressing in designs with custom stamps, or stenciling on shapes with a sponge brush. This gives visual interest to the mug.
Attaching decorative items – Glue on beads, buttons, rhinestones or other embellishments with a strong adhesive like E6000. Inserting items while the clay is still soft also works. Just press them in firmly to adhere.
Get creative and make your air dry clay mug truly unique with fun decorating techniques!
Making a Handle
One of the trickiest parts of making a mug out of air dry clay is creating a sturdy handle that will hold up over time. Here are some tips for shaping and attaching a handle to your air dry clay mug:
Start by rolling out a long strip of clay about 1/4-1/2 inch thick. Make the strip wide enough to fit comfortably in your hand. Taper the ends by rolling them between your fingers.
Bend the strip into a “U” shape and press the ends onto the sides of the mug. The ends of the handle should extend slightly down the sides of the mug to create a strong bond.
You can add extra reinforcement by pressing toothpicks or thin wire into the ends of the handle before attaching it to the mug. Make sure the toothpicks or wire extend at least 1/2 inch into the clay on both sides.
Smooth over any cracks or seams where the handle meets the mug. Allow time for the mug to dry completely before handling so the bond between handle and mug has time to fully harden.
With a properly attached and reinforced handle, your air dry clay mug will be sturdy enough for everyday use.
Sealing the Mug
Once your air dry clay mug is fully dry and hardened, you’ll want to seal it before using it. Sealing the mug will help make it waterproof, prevent staining, and give it a glossy finished look.
For sealing air dry clay mugs, most craft artists recommend using a water-based polyurethane or acrylic sealer like Mod Podge. Make sure to use a sealer formulated as non-toxic and food-safe. Apply 2-3 thin, even coats of the sealer, allowing it to fully dry between coats.
If you plan on using your mug for drinking, be sure to use a food-safe sealer only. Some good options are commercial food-safe epoxy resin sealers or FDA approved urethane sealants. Check that any sealer is labeled as food-safe and non-toxic once fully cured.
Applying a quality food-safe sealer will help make your air dry clay mug fully waterproof and able to withstand repeated use for beverages. Just allow the sealer to cure per the instructions before using your mug.
Other Air Dry Clay Projects
Air dry clay is extremely versatile and can be used to make all kinds of fun DIY projects in addition to mugs. Here are some other great air dry clay project ideas:
Jewelry
Air dry clay is perfect for making jewelry such as beads, pendants, earrings, rings, and more. It’s lightweight and easy to shape. Make your own custom jewelry pieces and add paints, glazes, or other embellishments.
Figurines
Sculpt miniature figurines like animals, dolls, cars, dinosaurs, and more out of air dry clay. Kids especially enjoy making their own unique figurines. The lightweight clay is easy for little hands to manipulate into any shape.
Bowls
Craft beautiful bowls from air dry clay to use for holding keys, jewelry, potpourri, candy, and more. Make sets of nesting bowls in different sizes and colors. Add texture to the clay or stamp patterns before shaping it into a bowl.
Planters
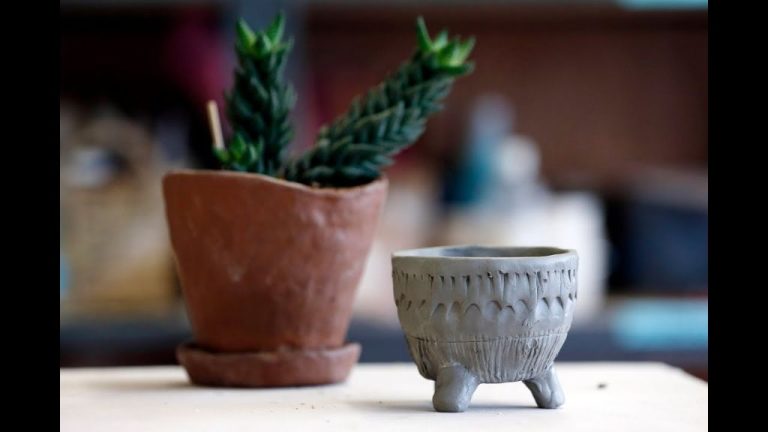
Air dry clay planters make wonderful gifts and home decor. Create planters in different shapes and sizes like rounds, ovals, squares, hearts, cylinders, and more. Decorate your planters with paint, glaze, or designs stamped into the clay before it dries.
Firing Options
After your air dry clay mug has fully dried and cured, you can choose to fire it to make it more durable for functional use. While air dry clay will harden and cure at room temperature without firing, baking or kiln firing offers a more durable, water-resistant finish.
One easy firing option is to simply bake your finished mug in a home oven. Place the mug on a baking sheet and bake at 200°F for 30 minutes. This will help harden and slightly seal the surface. Just keep in mind that oven baking can cause some minor cracking or warping in the clay.
For the most durable result, you’ll want to fire the finished mug in a kiln. Most air dry clays recommend firing to between 175°F to 300°F. Slowly ramp up the temperature, hold at the peak temp for 30 minutes, then allow to slowly cool down. Kiln firing produces a ceramic-like finish that is fully waterproof and food-safe. Just be sure to check the specific temperature guidelines for the brand of air dry clay you used.
Kiln firing requires access to a ceramic kiln but yields the most durable and finished result. Oven baking can work as a simpler at-home option. Either method of firing will harden and seal the clay beyond air drying alone.


