How Do You Make A Clay Day Of The Dead Skull?
The Day of the Dead (Día de Muertos) is a Mexican holiday celebrated on November 1st and 2nd to honor deceased loved ones. During this festive holiday, it’s customary to decorate altars and gravesites with bright flowers, food, and sugar skulls.
Sugar skulls represent the soul of the departed. They are decorated with colorful designs, feathers, beads, and the name of the deceased. Making clay skulls for Day of the Dead is a fun craft that allows you to create a personalized skull for a loved one or decorate one with festive designs.
With simple materials and some creativity, you can handmake clay sugar skulls that capture the spirit of this commemorative holiday.
Gather Materials
To make a Day of the Dead skull out of clay, you’ll need the following materials:
-
Clay – Choose an air-dry or polymer clay that allows detail work. Sculpey and Fimo are popular brands. Get at least 1-2 pounds of clay.
-
Acrylic paints – Gather a variety of bright colors like purple, pink, orange, blue, yellow, red, black and white. You’ll need these for adding color later.
-
Paint brushes – Get a set of small paint brushes to help add detail and designs.
-
Sculpting tools – Things like toothpicks, skewers, plastic forks can help shape details like teeth or flowers.
-
Decorations – Consider getting some rhinestones, feathers, beads, glitter or other embellishments to decorate your finished piece.
Having these materials ready will make the sculpting process easier.
Shape the Skull
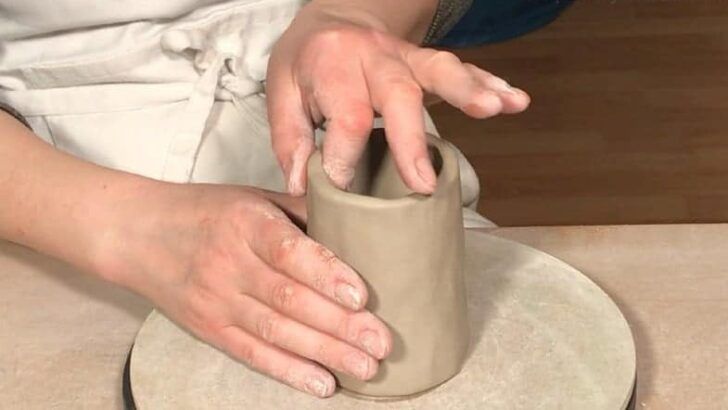
When shaping the Day of the Dead skull out of clay, start by forming a basic skull shape. First create an oval shape for the cranium or head. Then pinch the bottom of the oval to form a more skull-like shape with a chin.
Add two balls of clay for eye sockets by pressing them into the front of the skull. Make the nose hole by poking a hole between the eyes using your fingertip, a pencil eraser, or a clay tool. Roll two small balls for teeth and press into the jaw.
To get the proportions right, make sure the cranium is approximately twice as large as the jaw and chin area. The forehead should also be a little larger than the jaw. Position the eye sockets about halfway down the cranium. Check your sculpture from all angles as you work to ensure the skull looks realistic.
Use your fingers, clay sculpting tools, or improvised tools like popsicle sticks to refine the shape. Smooth the clay by rubbing with your fingers or a wet cloth. Work slowly and carefully to achieve a nicely proportioned skull.
Add Features
Now that you have the basic skull shape, it’s time to add the finer details that will bring it to life. Carefully form indentations for the eye sockets using your fingers, sculpting tools or a rounded object. Make the sockets deep enough that you have room to place artificial or real eyes later on.
Use a rounded tool or your pinky finger to create the nasal cavity. Don’t make it too deep, just enough definition to suggest a nose. For the teeth, use a small stick or toothpick to carve individual teeth marks into the upper and lower jaw. You can make as minimal or as many teeth as you like. Keep the teeth shaped as triangles pointing downward on the top jaw and upward on the bottom.
Take your time adding all the facial features as this attention to detail is what will give your Day of the Dead skull personality and character. Once you’re satisfied with the features, move on to texturing the surface.
Texture the Surface
Once the skull has dried, it’s time to add texture and designs. Authentic day of the dead sugar skulls have ornate patterns etched into the surface. To recreate this effect with clay, you’ll need some sculpting tools.
Use a straw, skewer, or dull knife to imprint dots, lines, flowers, swirls, and other designs into the clay. Gently press and drag the tools across the surface to create indented textures. Focus on the forehead, cheeks, and other large flat areas where sugar skull designs traditionally go.
You can also use small cookie cutters or clay tools to make shapes like stars, hearts, and flowers. Press these shapes gently into the clay skull to transfer the design.
Getting creative with textures and patterns is a fun way to make your skull unique. The engraved designs will also help the paint adhere better in the next steps.
Paint the Skull
Once your clay skull has dried completely, it’s time to paint it. Start by priming the entire skull with a coat of white acrylic paint. Let the white paint dry fully before moving on.
Now you can begin painting your skull’s beautiful designs. Use acrylic paints in vivid colors like bright purple, pink, yellow, green, orange, blue, and red. Paint fine details with a small brush. You may want to sketch out the designs first with a pencil.
For intricate patterns, keep your brush strokes steady and take your time. Let each color dry before painting adjacent areas to avoid smearing. Build up colors with multiple thin layers rather than one thick coat.
Add dots, stripes, flowers, spirals, or other traditional Day of the Dead motifs. Outline designs with black paint for bold definition. Allow your creativity to shine through in the painting!
Seal and Protect
Applying a sealant is an important step to help preserve your handmade Day of the Dead skull. Acrylic paint by itself is porous and prone to chipping and fading over time, especially when exposed to moisture. Sealing the paint with a protective varnish creates a moisture barrier that will protect the skull from damage.
There are a few options for sealants you can use:
-
Polyurethane – This clear varnish provides a high-gloss finish and durable protection. Use an interior grade polyurethane if the skull will be displayed indoors.
-
Matte varnish – For a non-glossy look, use an acrylic matte varnish. This seals the paint while keeping a flat, muted finish.
-
Mod Podge – The decoupage sealer Mod Podge is available in matte and gloss finishes. It adheres well to craft surfaces like clay.
Use a foam brush to apply a thin layer of your sealant of choice over the entire painted surface of the skull. Let it dry fully before applying a second coat. Two or three coats are recommended for maximum protection and durability. Avoid over-brushing as this can cause the paint to become gummy.
Once fully sealed, your Day of the Dead skull will be ready to proudly display and enjoy!
Decorate
Once your Day of the Dead skull has dried completely, you can decorate it however you’d like. Many people like to decorate their skulls in a traditional Day of the Dead style using bright colors and symbolic embellishments.
Some ideas for decorating your clay skull include:
- Gluing sugar skulls, marigolds, and other paper cutouts onto the surface
- Attaching artificial flowers around the skull with hot glue
- Adding colorful beads, sequins, or rhinestones to create patterns and designs
- Painting elaborate facial designs like spirals, dots, flowers, etc. using acrylic paint
- Wrapping strands of yarn or ribbon around the head and affixing them with glue
- Draping a rosary or garlands over the skull
- Gluing decorative paper behind the eye sockets
- Spraying glitter over areas of the skull for a sparkly effect
Feel free to get creative and make your Day of the Dead skull truly unique. The decorations you choose will add personality and honor the life of the person or pet being remembered.
Display Your Day of the Dead Skull
Once your Day of the Dead skull is complete, you’ll want to display it properly to complete the project. Here are some tips for presenting your skull:
Mount the skull on a base or stand. Place your finished skull on a pedestal, plate, or small stand to help hold it up. This prevents any damage from occurring if it tips over. Choose a neutral base that doesn’t distract from the skull. A simple black, white or natural wood base works well.
Consider the location. Decide on the perfect spot to showcase your skull. It could be on a shelf, table, mantel, or another prominent place in your home. Position it at eye level so visitors don’t miss your creative work.
Use decorations if desired. You can incorporate other decorative elements around the skull like flowers, candles, papel picado banners, sugar skulls, marigold flowers or additional Dia de Los Muertos-themed items.
Include a name or decoration. Customize your skull further by adding a name, date or decorative elements. You can write a name across the forehead or add other personal touches with paint, glitter, flowers or other creative materials.
Illuminate it. Consider placing a battery-operated tea light or small candle inside the skull so it glows. This creates an eye-catching effect. Just be sure to take the necessary fire safety precautions.
Your Day of the Dead skull makes for a wonderful handmade folk art piece to display each year. Follow these tips to complete the look and properly showcase your skull during this commemorative time.
Share Your Creation
It’s fun and rewarding to share a handmade artwork once it’s complete. After all the effort that went into making a Dia de los Muertos skull from clay, here are some ways to get the most enjoyment out of your creation:
Take high quality photos of your finished skull to commemorate your hard work. Photograph it from multiple angles with good lighting. Consider using props, background colors, or settings that complement it.
Give your skull sculpture as a heartfelt gift. Present it to loved ones or as an offering for a Day of the Dead altar. Include a note explaining its meaning and the work you put into making it.
Enter your skull in contests and exhibitions for Dia de los Muertos or ceramic art. Look for local art shows, museum exhibits, or online competitions to display your original handcrafted skull.


