How Do You Process Natural Clay For Pottery?
Natural clay is a common material found in nature that can be dug up, processed and turned into pottery. Clay is formed from the decomposition of rocks over time and is made up of fine particles and minerals. When mixed with water, clay becomes a malleable material that can be shaped and molded to make various ceramic items after drying and firing. Using natural clay for pottery making is an ancient craft that continues to thrive today. This process involves locating suitable clay, extracting it, preparing the clay body, forming pottery shapes, drying and then firing the ware. With some basic tools and knowledge, natural clay can be transformed into beautiful and functional pottery pieces.
Locating Clay
The first step in processing natural clay for pottery is locating a good clay deposit. The best places to find natural clay deposits are near water sources like rivers, streams, lakes, and ponds where centuries of water erosion has exposed the clay. Ideal clay digging sites will have creek banks or open pits where clay is visibly exposed. Clay is also commonly found in areas with volcanic soil. When prospecting for clay, look for land that is low, flat, and wet. The soil in clay deposits will feel smooth, sticky, and malleable when wet. Dig test holes about 3-4 feet deep to locate the thickest seam of clay. Look for clay deeper than the topsoil but above the bedrock. For large-scale clay mining, geological surveys are done to identify the best sites for natural clay deposits.
Digging and Extracting Clay
Once a suitable clay deposit has been located, the next step is to dig up and extract the clay. There are several tools and methods used for extracting clay:
Shovels – Standard round or square point shovels are commonly used for digging and loosening clay deposits. Shovels help break up compacted clay and are useful for digging test holes to analyze the depth and quality of the deposit.
Pickaxes – Pickaxes have a pointed end for breaking up hardened clay and a wide flattened blade for prying and lifting out clay chunks. The pickaxe is essential for hacking into tightly compacted deposits.
Mattocks – Similar to pickaxes, mattocks have a pick-like blade on one side and a wide axe or adze blade on the other. The axe blade is helpful for chopping roots and clearing vegetation when accessing a clay deposit.
Powered excavators – For large-scale commercial clay mining, heavy excavation machinery like backhoes and bulldozers are used. These powerful machines can dig deep pits and rapidly extract tonnes of clay.
Hand tools – Hand trowels, garden hoes, and tile shovels are handy for small-scale clay extraction. These let you carefully dig out select pockets of high-quality clay from a deposit.
Typically, pickaxes, mattocks, or shovels are used to break up and loosen the clay deposit. The clay is then shoveled into buckets or wheelbarrows for transport. Powered excavators greatly speed up commercial clay extraction but require significant investment.
Cleaning and Sieving
Once the clay has been extracted, it contains many impurities like rocks, roots, and organic material that need to be removed. The first step is breaking up large chunks of clay and removing any rocks, roots, or debris that is visible. It’s important to carefully pick through the clay and discard any hard materials.
Next, the clay should be sieved to remove smaller particles. Sieving involves passing the clay through a screen or mesh made of metal or nylon. Start with a coarse 1/2″ or 1″ mesh screen to remove pebbles and dirt chunks. Then use progressively finer mesh screens such as 1/4″, 1/8″, or 1/16″ to remove smaller particles like sand or silt. The sieving process allows the fine clay particles to pass through the screen while catching larger debris. Sieving may need to be done multiple times to fully remove impurities.
It’s crucial to be patient and thoroughly sieve the clay. Any remaining grit or debris can damage pottery tools and equipment or create weaknesses in finished pottery. Properly sieved clay results in a smooth, plastic consistency ideal for throwing on a potter’s wheel or handbuilding techniques.
Preparing Clay
Once the clay has been cleaned and sieved, it needs to be prepared before it can be shaped into pottery. The two key steps in preparing clay are adding water and wedging.
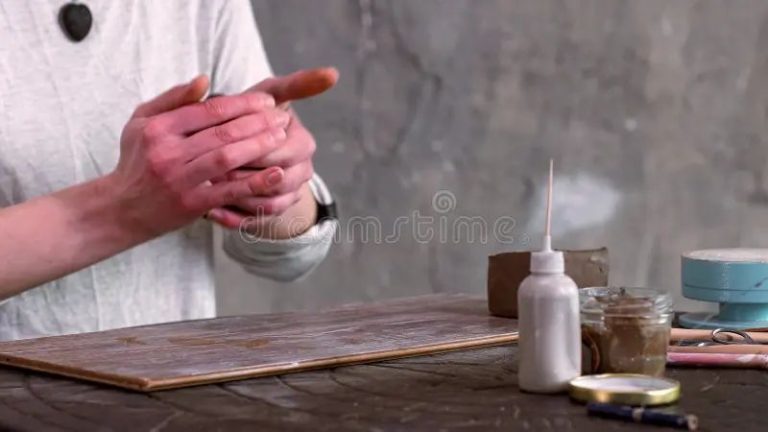
Adding water, known as “slip”, to the clay is crucial for making it malleable enough to work with. Start by sprinkling some water over the clay, then knead it in with your hands. Continue adding small amounts of water and kneading until the clay reaches an ideal consistency – pliable but not sticky. The exact amount of water needed will vary based on the clay’s composition and the climate.
Wedging is the process of kneading and working the clay to achieve an even consistency throughout. This removes any air pockets and makes the clay uniform. To wedge, cut the clay into smaller pieces. Then slam and squeeze each piece against a flat surface repeatedly. Fold and press the clay over itself, then rotate 90 degrees and repeat. Continue wedging until the clay feels smooth, elastic, and free of lumps.
Properly preparing the clay by adding adequate water and thoroughly wedging it ensures the clay is ready for shaping into pottery without cracking or breaking during forming and firing.
Forming Pottery
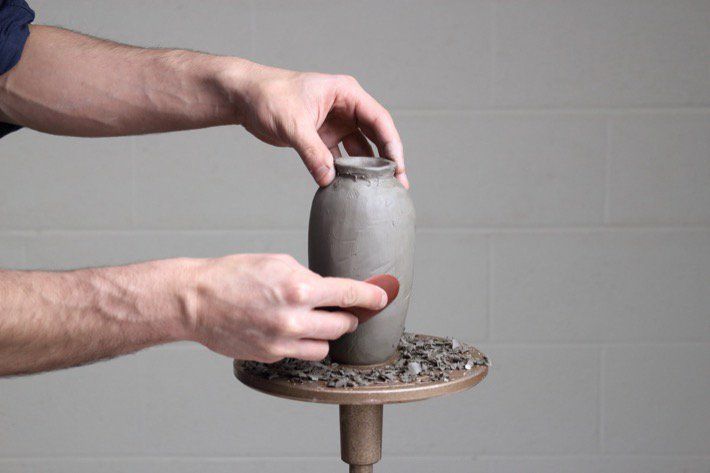
There are two main methods for forming pottery from clay – handbuilding and wheel throwing. Handbuilding involves shaping the clay by hand into the desired form. This can be done using techniques like coiling, slabbing, and pinching. Coiling involves rolling out ropes or snakes of clay and stacking them on top of each other to build up walls. Slabbing uses flat pieces or slabs of clay that are joined together. Pinch pots are made by pinching and pulling the clay into shape with your fingers.
Wheel throwing involves centering a ball of clay on a rotating pottery wheel and using your hands to shape it as it spins. This takes practice to learn how to properly center the clay and pull up the walls evenly. Wheel throwing allows creating thinner walled pieces and symmetrical round shapes. It can also be faster than handbuilding. But handbuilding gives you more control over sculpting asymmetrical and organic shaped pieces.
Both methods have their advantages and disadvantages. Handbuilding gives infinite freedom in shape but can be slower and require more skill to join pieces together. Wheelthrowing limits the shape but allows consistency and thinner walls. Many potters will use a combination of the two methods in their work.
Drying Clay
After forming the pottery, the clay pieces must be dried slowly and evenly to prevent cracking and warping. There are several methods for properly drying clay:
Air Drying: Allow the pottery to air dry slowly at room temperature. Place pieces on racks so air can circulate around all surfaces. Avoid direct sunlight or drafts during this process which can dry the clay unevenly. Expect air drying thick pieces to take a few weeks. Thinner pieces may only take 2-3 days.
Using a Dehydrator: A food dehydrator provides an enclosed space where temperature, circulation, and humidity can be controlled. The gentle heat and airflow will dry clay faster than air drying. Monitor pieces closely and rotate periodically for even drying. Drying time can be reduced to just a few hours.
Low-Heat Oven: A standard kitchen oven set to the lowest temperature (around 100-150°F) can be used to dry pottery safely. Keep the oven door propped open slightly to allow moisture to escape. As with the dehydrator method, check pieces frequently and rotate for consistent drying which may take 6-12 hours.
Regardless of the technique, the goal is to decrease moisture slowly to minimize cracking as the clay shrinks. When clay feels cool and dry to the touch it is ready for the next step – firing.
Firing Clay
Firing the pottery is one of the most critical steps in processing clay and turning it into a finished ceramic product. Proper firing allows the clay to become hard and durable through sintering, which fuses the clay particles together. There are several key considerations when firing clay:
Kiln Types
There are many different types of kilns used for firing pottery, the most common being electric and gas kilns. Electric kilns use heating elements to generate heat while gas kilns burn natural gas or propane. Both can typically reach over 2000°F, which is sufficient for most clay bodies. Some other kiln types include wood-fired kilns, raku kilns, and pit/saggar firing.
Firing Temperatures
Clays must be fired to high temperatures around 1000-2200°F to fully mature and vitrify. The exact temperature depends on the clay composition. Lower firing temperatures like earthenware (1000-1700°F) result in porous pottery, while higher temperatures like stoneware (2000-2200°F) make non-porous vitreous wares. The firing process usually follows a schedule, slowly ramping up to the peak temperature before cooling.
The Firing Process
To fire pottery, the kiln is loaded carefully with ware to ensure efficient heat circulation. The kiln is then closed and the firing program is started to control the heating rate and target temperature. It may take 10-48 hours to complete an entire firing. The cooling process is also controlled to prevent cracking and glaze defects. Once cooled, the finished ceramic pieces can be removed. Many artistic effects can be achieved by manipulating the kiln atmosphere and cooling rate.
Glazing
Glazing is the process of applying a thin coating of glaze materials to the dried clay pottery. Glazes serve both decorative and functional purposes – they can add color, texture, and shine to the finished piece, as well as make it less porous and watertight. There are many ingredients that go into making glazes, but the main components are silica, fluxes, and colorants.
Silica, often in the form of ground quartz, sand, or clay, forms the glassy matrix of the glaze when fired. Fluxes like soda ash, borax, and calcium carbonate lower the melting point of the silica so the glaze flows and fuses to the clay body at pottery firing temperatures. Colorants like metal oxides and stains introduce color and effects – cobalt makes blue, copper makes green, iron makes brown, etc. These ingredients are combined and mixed with water to form a creamy liquid glaze.
There are many techniques for applying glazes. Dipping entails fully submerging the bisqueware piece in a bucket or vat of glaze. Brushing involves using a soft brush to brush glaze onto the surface. Spraying requires a spray gun or atomizer to mist the glaze. Pouring allows pouring glaze over or into a piece. Glazes can also be applied with sponges, trailing techniques, or painting with glaze brushes. Multiple layers and combinations of techniques can create complex glaze effects.
Proper glaze application requires even coverage and the right thickness – too thick and it will run and drip, too thin and it won’t develop the proper surface quality. Typical glaze thickness for functional ware is around 1/16th of an inch. Once applied, the glazed piece is loaded into the kiln and fired to maturity to melt and fuse the glaze.
Conclusion
Working with natural clay has many benefits as well as some challenges. On the positive side, natural clay is an abundant, low-cost material that can be dug straight from the earth. It offers a diverse range of textures and colors to choose from when making pottery. When fired, natural clay produces ceramic ware that is sturdy, long-lasting, and free of chemicals or synthetic materials.
However, working with natural clays does pose some difficulties. Raw clay dug from the ground contains impurities like rocks, roots, and debris that must be laboriously removed before using the clay. The characteristics of natural clay can vary widely depending on where it is sourced, requiring testing and experimentation to understand how each batch of clay behaves. Firing natural clay also requires skill and specialty equipment like a kiln. Despite these challenges, the unique beauty and organic origins of natural clay make it a rewarding material for dedicated pottery makers.


