What Can I Use To Mold Soap?
The earliest evidence of soap-like materials dates back to around 2800 BC in ancient Babylon https://en.wikipedia.org/wiki/Soap. Soapmaking began as a way to create gentle cleansers from readily available materials like ashes, oils and fats. Over time, recipes evolved and techniques improved. Modern handmade soapmaking follows a basic saponification process that has changed little over the centuries. Oils or fats are mixed with an alkali, usually lye, to trigger a chemical reaction that transforms the ingredients into soap. Cold process is the most common handmade method today. After tracing the soap batter, it is poured into molds to solidify before being removed and cured for several weeks. The finished bars retain gentle glycerin moisture and require no further processing.
Handmade soaps provide several benefits over commercial brands. They use high-quality oils and butters carefully chosen for their skin properties. Natural colorants and scents from herbs, spices and essential oils often replace artificial fragrances and dyes. Gentle handmade soap cleanses effectively while retaining moisture balance. Each homemade batch offers the chance to customize oils, colors and scents for a personalized product.
Oils and Fats
When making soap, choosing the right oils is one of the most important steps. Different oils contribute various properties to the soap, so it’s key to select oils that align with your soapmaking goals.
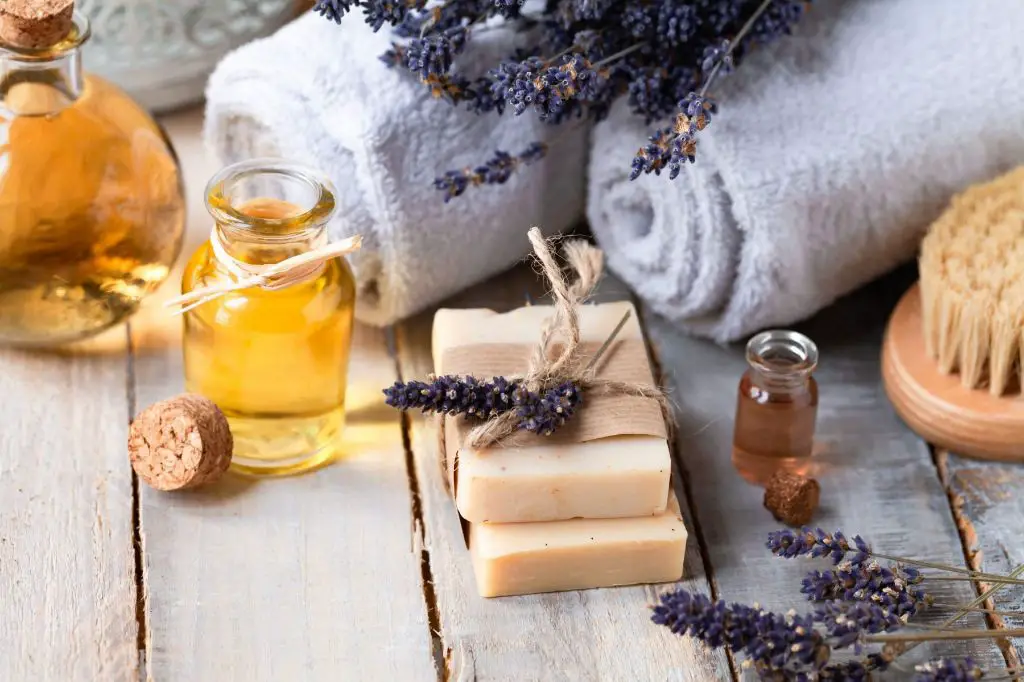
Some of the most common soapmaking oils include:
- Olive oil – produces a gentle, moisturizing bar of soap. Olive oil is great for dry or sensitive skin. Source
- Coconut oil – creates a bar with abundant lather. Coconut oil also makes the bar harder and cleans well. Source
- Palm oil – produces a hard bar with creamy lather. It’s often used along with coconut oil. Source
When selecting oils, consider properties like hardness, cleansing ability, conditioning qualities, and more. Blending oils creates a bar with balanced qualities. For example, pairing the hardness of palm oil with the moisturizing benefits of olive oil.
Refer to oil properties charts to determine which oils will create your desired bar. Oils with similar qualities can often be substituted for each other. Start with a trusted beginner recipe before customizing your own oil blends.
Lye
Lye, also known as sodium hydroxide, plays a critical role in the soap making process. When combined with oils or fats in a chemical reaction called saponification, the lye causes the molecules in the oils to transform into soap.
While lye is necessary to make soap, proper safety precautions must be taken when handling it as it can cause severe skin and eye irritation. Always wear protective gear like goggles, gloves, and long sleeves when working with lye. Work in a well-ventilated area and avoid breathing in lye dust. Make sure to never add water to lye as this can cause a violent reaction. Instead, add lye to water slowly and stir gently. Store lye in an airtight container and keep out of reach of children and pets. Thoroughly clean any surfaces that come into contact with lye.
By understanding the importance of lye in soap making and following key safety guidelines, you can safely use this chemical to create beautiful, handcrafted soaps. For more on lye safety, see the Lye Safety Guide from Bramble Berry.
Mold Materials
There are several common materials used to create soap molds, each with their own benefits and drawbacks:
Silicone molds are flexible, easy to unmold, and come in a wide variety of shapes and sizes. Silicone withstands heat well and produces cleanly shaped soaps. It may be more expensive than other options. Silicon molds can be purchased online through sites like Amazon.
Wood molds are inexpensive and easy to craft at home. They create a rustic, homemade look. However, wood absorbs moisture and can warp, mold, or crack over time with repeated use. Types of wood like pine or plywood work well for soap molds.
Plastic molds are affordable and lightweight. Transparent plastic allows you to see the soap as it cures. However, plastic tends to retain odors and may not release soap as cleanly as other materials. Recycled plastic containers make cheap, disposable molds.
Cardboard molds made from cereal boxes, shipping boxes, or thick cardstock paper can be used a few times before replacing. The cardboard may absorb some fragrance oil. Cardboard is very inexpensive and works well for simple shape soaps.[1]
[1] https://soap.club/blogs/blog/molding-soap-the-best-and-inexpensive-soap-molds-soap-club
Natural Colorants
There are many different natural ingredients that can be used to color handmade soap. Some popular options include clays, spices, herbs, and activated charcoal (Natural Soap Making Colorants).
Clays come in a variety of earthy hues like red, yellow, green, and brown. They can be mixed into a soap batter before pouring into the mold. Popular clay colorants include rose clay, French green clay, and Australian red clay (How to Naturally Color Handmade Soap + Ingredients Chart).
Many spices found in the kitchen can also be used to naturally color soap. Turmeric, paprika, cinnamon, nutmeg, and annatto seeds infuse soap with vibrant orange, red, brown, and yellow shades.
Herbs like calendula flowers, comfrey leaves, and spirulina powder lend a green hue. Other botanicals like rose petals, hibiscus, and chamomile can provide pink or purple tones.
Activated charcoal is a popular black colorant for soap. It is made by heating carbon-rich materials like coconut shells or coal in the absence of oxygen. Just a small amount of activated charcoal powder can produce a deep, dark black color.
Scent
Adding scent to homemade soap is an important part of the soap making process. There are several natural options for scenting soap:
Essential oils – Essential oils not only provide fragrance, but can also provide skin benefits. Some popular essential oils for soapmaking include lavender, lemon, peppermint, tea tree, and eucalyptus. Use 0.7 ounces of essential oil per pound of cold process soap for a strong scent. Essential oils should be added at trace. (Source: Brambleberry)
Fragrance oils – Fragrance oils are blended for use in bath and body products. They typically have stronger scents than essential oils. Use 0.7 ounces of fragrance oil per pound of cold process soap for a strong scent. Fragrance oils should also be added at trace. (Source: Brambleberry)
Dried herbs/flowers – Dried botanicals like lavender buds, rose petals, and calendula petals can be ground into a powder and added to cold process soap batter for visual interest and light scent. Use 1-2 teaspoons of dried botanicals per pound of soap. The ground dried herbs should be added to the soap oils before mixing with the lye solution. (Source: Countryside Magazine)
Designs and Techniques
There are many creative ways to design handmade soap using different techniques. Three popular techniques are layering, using embeds, and creating swirls.
Layering
Layering involves pouring successive layers of differently colored soap batter into the mold (https://www.modernsoapmaking.com/blog/cold-process-soap-design-techniques-and-tutorials). This allows you to create bars with two or more distinct layers of color. To layer, first pour a portion of soap batter into the mold, then pour the next layer on top. Tap the mold on the counter to release any air bubbles between layers. Let each layer set up slightly before pouring the next. You can create simple two-tone layers or more complex designs with three or more layers.
Embeds
Embeds are solid pieces of soap that you place into a base layer of soap batter. Embeds allow you to embed shapes, swirls, and patterns into your bars. First prepare the embed batter and pour it into a mold. Once hardened, cut into pieces and place them into the base soap batter. Embeds are useful for creating contrast, decoration, and visual interest. You can embed whole dried flowers, herbs, spices, loofah pieces, and more (https://tweakandtinker.net/4-mistakes-that-can-ruin-your-soap-design/).
Swirls
Swirls involve mixing differently colored batters in the soap mold to create patterns. There are many swirl techniques like hanger swirls, chopstick swirls, funnel swirls, etc. Generally, you pour a base color of batter into the mold, then add spoonfuls of a contrasting color across the top. Use a tool to swirl the two colors together in loops and waves. Swirls add visual appeal and each batch turns out unique.
Unmolding and Curing
After you’ve poured your soap into the mold and allowed it to setup and harden, the next step is unmolding and curing your soap. Proper curing is important for creating hard, long-lasting bars of soap. Here’s what you need to know:
The curing process allows excess moisture to evaporate from the bars over 4-6 weeks. This helps harden the bars. Curing time depends on factors like water content and environment. Curing in a dry, well-ventilated area speeds up the process. According to https://lovelygreens.com, most handmade soap should cure for at least 4 weeks.
Before unmolding, allow the soap to harden in the mold for at least 24 hours. Make sure the soap is firm yet still pliable when removing from the mold. https://www.brambleberry.com recommends using gloves for unmolding to avoid irritating skin.
Once unmolded, allow bars to continue curing for 4-6 weeks. Place them on a wire rack to allow airflow all around. Curing racks made specifically for soap are available. Wrap bars loosely in paper after 2-3 weeks to protect from dust. Then store completely cured and hardened bars in a cool, dry place.
Recipes
When making soap from scratch, following a recipe is important to ensure the ingredients are properly balanced. A basic cold process soap recipe calls for just a few key ingredients:
- Oils – This forms the basis of the soap, typically a blend of oils like olive, coconut, palm, etc.
- Lye – Sodium hydroxide mixed with water and allowed to cool. This combines with the oils in a chemical reaction to form soap.
- Scent – Essential oils or fragrance oils add nice aromas. Use sparingly as some may cause seizing.
- Colorants – Herbs, clays, or oxides can naturally color the soap.
A simple recipe may be:
– 75% olive oil
– 20% coconut oil
– 5% castor oil
– Lye solution
– Essential oils and colorants as desired
More advanced recipes can incorporate ingredients like milks, aloe vera, oats, salt, honey, etc. Each adds its own properties – milk makes a creamy gentle bar while salt can exfoliate. Testing recipes to find the right blend is key.
Using an online lye calculator is highly recommended, as it automatically accounts for the oils used and desired soap qualities. Sites like Bramble Berry make recipe development easy.
Resources
There are many helpful resources available for learning more about soap making and finding supplies.
Some recommended books for beginners include The Natural Soap Making Book for Beginners by Kelly Cable and Soap Crafting by Anne-Marie Faiola. Popular soap making blogs include Soap Making Resource, Soap Queen, and Lovin Soap Studio. On YouTube, some useful channels are Soaping101 and Royalty Soaps.
To find soap making supplies and equipment like oils, lye, colorants, fragrances, molds, cutters, and more, check out online retailers like Bramble Berry, Bulk Apothecary, Wholesale Supplies Plus, and Nurture Soap. You can also often find supplies at local craft stores.


