Can You Make Your Own Ceramic Decals?
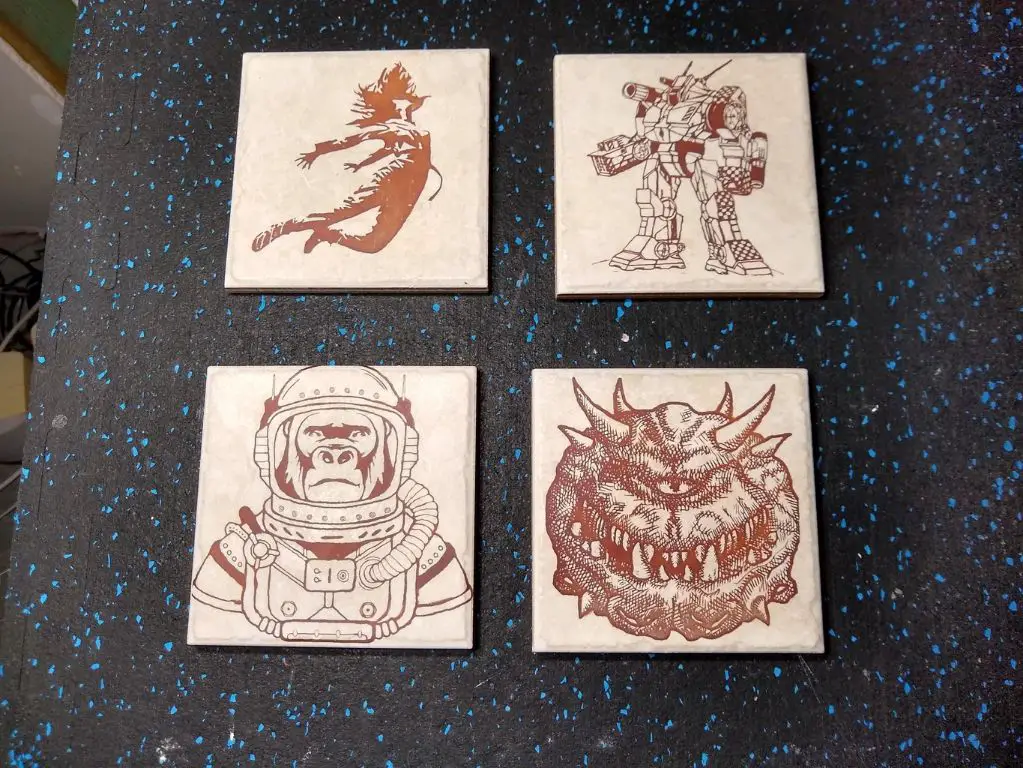
Ceramic decals are images or designs that can be transferred onto ceramic surfaces to customize mugs, plates, tiles, and more. With some simple supplies and techniques, ceramic and craft enthusiasts can make their own custom ceramic decals at home. The process allows complete creative freedom to make personalized ceramic items. DIY ceramic decals have an appeal over premade decals since you can create your own designs that are meaningful or fun. This guide will walk through the end-to-end process of designing, printing, and applying homemade ceramic decals.
Supplies Needed
Here are the basic supplies needed to make your own ceramic decals at home:
- Ceramic blanks – These can be bisqueware, glazed ceramic, or bare clay pieces. The surface needs to be smooth.
- Decal paper – Special decal paper allows you to print your designs that can then be transferred. Look for waterslide or laser decal paper.
- Printer – You’ll need a printer to print out the decal designs. Laser printers work best since they fuse the toner to the decal paper.
- Decal setting spray or sealant – A spray coating helps seal the decal before firing.
- Clear glaze – This finishes and protects the decal on the ceramic after firing.
- Squeegee or brayer – Used to burnish the decal when transferring to the ceramic.
- Scissors or X-Acto knife – To trim around the decal design.
- Water tub – For soaking the printed decal off the backing paper.
- Kiln or oven – Firing at the right temperature bonds the decal to the ceramic.

Having these basic supplies for ceramic decals allows you to create your own custom designs at home. Always check the decal paper specifics and follow kiln firing instructions.
Design the Decal
When designing your ceramic decal, you have a few different software options to choose from. The most popular options are:
-
Adobe Illustrator – This vector graphics software gives you the most flexibility and options for creating decal designs. You can design anything from simple text and shapes, to complex illustrations.
-
Microsoft Word – Surprisingly, Word has some basic design capabilities through the Drawing tools that allow you to create decals. It’s not as robust as Illustrator, but works for simple designs.
-
Online decal design tools – Some decal paper manufacturers offer free online design tools to create custom decals right in your browser. These have pre-made shapes and text options to choose from.
When designing your decal, here are some important considerations:
-
Color – Most at-home ceramic decal paper can only print white ink. So your design colors will need to be white, or transparent if you want the underlying glaze color to show through.
-
Size – Consider the size and shape of the ceramic piece you’ll be applying the decal to. Scale your design to properly fit the space.
-
Details – Fine details and small text may get lost when applying the decal, so keep important elements large and simple.
-
Sealant Space – Leave a small border of transparent space so sealant can be applied around the edges of the decal.
Taking the time to thoughtfully design your decal will result in a beautiful finished ceramic piece.
Print the Decal
Printing the decal requires the right printer and settings to ensure it transfers properly to the ceramic. The key is using a printer that can print on special decal paper, often referred to as waterslide decal paper. This paper has a coating that allows the ink to adhere correctly.
For best results, use an inkjet printer with pigment-based inks rather than dye-based inks. Pigment inks are more opaque and hold up better through the decal process. Set the printer settings to “photo paper” or “decal paper” if those options exist to optimize the ink application. Print at the highest quality setting for vivid colors and clean lines.
Let the printed decal dry completely before applying it to the ceramic, usually at least 24 hours. This prevents smudging. Gently handling the decal while transferring is also important to avoid smearing while the ink fully sets.
Apply Decal to Ceramic
Once the decal has been printed, it’s time to apply it to the ceramic surface. This is done using a water transfer method. The basic steps are:
- Thoroughly clean and dry the ceramic piece where you plan to apply the decal. Use a degreaser if needed.
- Fill a tray with room temperature water. Place the printed decal face down in the water for 20-30 seconds until it begins to loosen from the backing paper.
- Carefully slide the decal off the paper and onto the ceramic piece. You can use a spatula or your finger to do this. Position it where you want it.
- Use a sponge to gently smooth out any air bubbles or wrinkles. Let the decal sit for 2-3 minutes so it can adhere.
- Mix a decal sealer solution according to the package directions. Brush a thin layer over the decal and let it dry.
- Apply 1-2 additional thin coats of sealer, letting each coat fully dry in between. This seals the decal to the ceramic.
The sealer solution is important for protecting the decal and keeping it from cracking or fading in the kiln firing. Be patient during the application process to ensure proper adherence. Reference the decals page on Joan Brown Ceramics for more tips.
Firing the Ceramic
Once the decal has been applied to the bisqueware ceramic, it’s time to fire it. Firing is the process of heating the ceramic to a high temperature in order to fuse the decal onto the surface and finish the hardening process.
It’s crucial to fire the ceramic at the correct temperature. Every decal will have a recommended firing temperature, usually between 1500-1700°F. This temperature range is high enough to melt the decal material so it fuses with the ceramic glaze, but not so high that the ceramic itself warps or cracks.
Firing above the recommended temperature risks damaging the ceramic. Firing below the recommended temperature may result in the decal not adhering properly or fully to the ceramic. The most foolproof way is to follow the temperature guidelines provided by the decal manufacturer.
You’ll need a kiln to fire the ceramic. Kilns allow reaching the high temperatures needed for firing while controlling the heating rate. Make sure the ceramic is entirely dry before firing. Place the ceramic pieces with decals applied in the kiln and fire according to the instructions.
Once fired, the decal should be permanently fused onto the ceramic surface. Allow the kiln and ceramic to fully cool before removing. The firing process chemically bonds the decal to the glazed ceramic through vitrification.
Adding a Finish
Once your ceramic piece has been fired, you may want to add a finish to protect the decal and give the ceramic a more polished look. There are several options for finishing fired ceramic with decals:
Glaze – Glazes come in various finishes like glossy, satin, or matte. They help seal and protect the decal while also enhancing the look of the ceramic. When choosing a glaze, make sure it’s formulated for the firing temperature of the ceramic clay body and decal. Apply glaze over the top of the entire piece and decal.
Gloss – For shiny decals without color, you can apply a clear gloss finish. Gloss gives decals a smooth, glass-like coating. You can use either a water-based polyurethane gloss or a spray gloss lacquer. Apply thin, even coats and let dry completely between coats.
Sealer – Using a ceramic sealer or decal sealer will help protect decals from wear, moisture, and scratches. Sealers come in matte or gloss sheens. Apply a thin coat over the decaled surface and let it fully cure.
Wax – Wax finishes like paste wax or carnauba wax help give decals a polished look. Brush wax over the surface and buff once dry. Reapply wax regularly for continued protection.
Tips and Tricks for Successful Ceramic Decals
Here are some tips for getting the best results when making your own ceramic decals:
- Make sure your bisque ware is clean before applying the decal. Wipe down the surface with a damp sponge to remove any dust or debris (Source).
- Use a squeegee or soft rubber rib to smooth the decal and remove air bubbles underneath. Press firmly but gently to avoid tearing the decal (Source).
- Allow decals to dry thoroughly before firing, at least 24 hours. Decals that are not fully dried may bubble or burn off in the kiln.
- Fire slowly, no more than 200°F per hour. Rapid temperature changes can cause decals to crack or peel off.
- Use a clear glaze over the top of the decal if desired. This helps protect and seal the decal design.
- Store unused decal sheets flat and away from direct sunlight or heat to prevent them from drying out.
Following these tips will help ensure your homemade ceramic decals turn out looking their best.
Common Issues
Making your own ceramic decals can be tricky, and there are a few common issues that may arise:
Decal Won’t Stick to Ceramic: Make sure the ceramic is clean before applying the decal. Wipe it down with a damp cloth to remove any dust or oils. Also check that the ceramic bisque has been fired to the proper temperature. Underfired pieces won’t allow the decal to adhere correctly.
Decal Cracks During Firing: If the decal starts to crack while firing, the kiln temperature may be rising too quickly. Try slowing down the firing schedule and extending the firing time to allow the decal to fuse to the glaze more gradually.
Colors Run or Bleed: Often caused by too much moisture left in the decal during application. Make sure to let the decal dry thoroughly between each layer. Applying too much decal adhesive can also lead to bleeding colors.
Decal Washes Off Ceramic: If the decal washes off after firing, the kiln temperature was likely too low. Review the firing schedule and aim for the manufacturer’s recommended top temperature to fully fuse the decal.
Testing out different techniques and making sample tiles before applying decals to a finished piece can help identify and prevent many common issues.
Conclusion
Making your own ceramic decals at home can be a fun and rewarding process. As we’ve seen, with just a few basic supplies like blank decal paper, a laser printer, decal fixative spray, and ceramic ware, you can create completely customized decals. The ability to design them yourself on a computer gives you total creative freedom. Once fired onto a ceramic surface, these homemade decals are dishwasher safe and become a permanent part of the ware. The whole process allows you to add personal flair to mugs, plates, tiles, and more. With a bit of practice, DIY ceramic decals are an easy way to make beautifully customized ceramic items.


