How Do You Display Ice Cream Cone Cupcakes?
Ice cream cone cupcakes are a fun twist on regular cupcakes that use ice cream cones in place of cupcake liners. The cake batter is baked inside the cones, turning the cones into an edible vessel for the cupcakes.
There are many creative ways to display ice cream cone cupcakes for parties, events or just for fun. They can be displayed on a tiered cupcake stand or cake stand to showcase the unique cones. Individual paper liners or doilies can be placed under each cupcake for a polished look. The cupcakes can also be inserted into a real ice cream cone holder or stand for a cute ice cream parlor display. Using plates, platters or boards in place of stands allows the cones to be arranged creatively. No matter how they are displayed, these adorable cupcakes are sure to be a hit.
Planning Considerations
When planning to display ice cream cone cupcakes, first consider the occasion. Are you making them for a birthday party, summer bash, or other celebration? The occasion will help determine how elaborate you want the display and how many cupcakes you’ll need to make. A kids’ birthday party may only need a dozen or so, while a large summer party could call for several dozen.
Next, determine where you’ll display the cupcakes. Will they be on a table, counter, or dessert stand? The location affects how you’ll style the display. For example, displaying the cupcakes on tiered cake stands allows for a dramatic, vertical presentation. But laying them flat on a table allows guests to easily grab one.
Measure the display area to determine how many cupcakes it can accommodate. Leave some negative space around the cupcakes rather than cramming them close together. This creates a pleasing, artful look. Most experts recommend allowing for 2-4 inches between each cupcake on the display.[1]
Consider easy access when deciding on display location. Place the cupcakes where guests can conveniently pick them up without crowding or bumping into each other.[2] Finally, keep the cupcakes refrigerated until just before display to ensure freshness.
[1] https://www.pinterest.com/chefpickydiva/ice-cream-cupcake-cones/
[2] https://www.pinterest.com/chefpickydiva/ice-cream-cupcake-cones/
Styling the Cupcakes
When styling ice cream cone cupcakes, the frosting is key. You’ll want to use a stiff frosting that will hold its shape and stand up on the cones. Buttercream and whipped cream cheese frostings are great options. Flavor them with extracts, cocoa powder, or fruit purees to complement the cupcake flavors. Decorating the frosting can help the cupcakes resemble ice cream cones. Pipe swirls on top or add sprinkles, chocolate chips, or crushed cookies as “sprinkles.”
For extra height and the look of stacked scoops, add additional cones on top of the cupcake base. Pipe frosting between the cones to hold them together. Top with decorations like cherries, cookies, or candy to recreate the look of multi-scoop ice cream cones.
See examples of styled ice cream cone cupcakes on Pinterest: https://www.pinterest.com/chefpickydiva/ice-cream-cupcake-cones/
Plates and Stands
Cupcake stands are important for properly displaying the ice cream cone cupcakes and making the display visually appealing. Choose stands in fun shapes like ice cream cones, or opt for multi-tiered stands to show off the cupcakes at different heights.
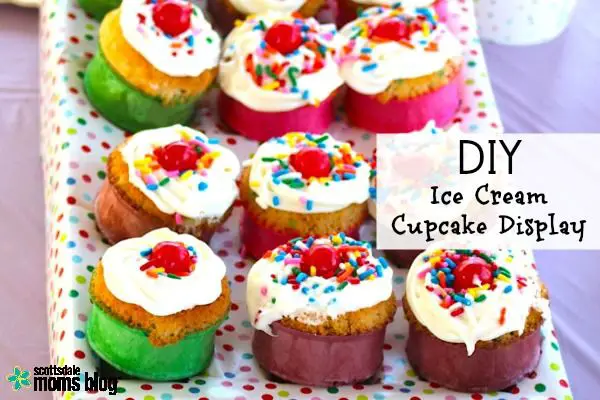
As an alternative to traditional cupcake stands, mugs or stacked boxes wrapped in patterned paper can act as creative stands for the cupcakes. Staggered-height stacks of books also work.
Coordinating plates are recommended either under each cupcake or under the displays/stands. The plates can match or coordinate with the cupcake liners to tie the display together.
For example, this DIY Ice Cream Cone Cupcake Display uses a simple white plate under a stacked display: https://www.pinterest.com/pin/easy-diy-ice-cream-cone-cupcake-display-tutorial–154600199694532431/
Table Decor
The table decor is essential for creating a beautiful and cohesive display for your ice cream cone cupcakes. Here are some ideas to consider:
Choose a tablecloth in a complementary color to your cupcake decoration. Solid colors work well such as pastels or bright cheerful hues like yellow or pink. A patterned tablecloth can also give visual interest. Play with different table runner options too, such as lace or burlap. According to source, lace runners nicely accent simple white tablecloths.
For utensils, vintage silverware adds elegance and charm. Pretty cloth napkins can continue your color scheme. Or opt for white paper napkins to let the cupcakes be the main focus. Choose plates that coordinate with the overall theme and palette. According to source, clear glass plates are great for showcasing the cupcakes while colored plates can brighten up the display.
Extras like candles, lanterns, flowers, garlands and signs also help embellish the table with personality and tie it all together beautifully.
Accompaniments
Accompaniments can enhance the display and provide guests something extra to enjoy with the cupcakes. Consider displaying small glasses of milk or lemonade, coordinating with the color theme. Mini fruit skewers also make a nice pairing — grapes, pineapple and strawberries on a stick. For a whimsical touch, hollow out oranges and fill with sherbet or sorbet. Include little spoons for easy eating.
If displaying alongside brunch foods, consider diced fruit bowls, yogurt parfaits in mini jars, or build-your-own fruit and yogurt stations for guests to customize. Dips like chocolate fondue, caramel, or marshmallow fluff in small ramekins let people dunk pieces of pound cake or fruit. Tiny cheese cubes and crackers, nuts, and chocolates also complement cupcakes well for a dessert table.
Aim for variety in flavors, colors and textures when selecting accompaniments. Coordinate the hues with your cupcakes — citrus fruits, vibrant red berries, and warm tones for fall. Reference this individual appetizer display as inspiration for color coordination. Place accompaniments around the edges of the cupcake stand or on side tables nearby.
Signage
Signage is an important part of any cupcake display. Clever and cute signs can enhance the presentation and provide useful information to guests.
Cupcake flavor signs allow guests to identify the different flavors available. These are typically done on chalkboard signs or printed cards placed in front of the respective cupcakes. Popular options include mini chalkboards, tent cards, lollipop sticks with tags, and more.
Occasion-specific signs like “Happy Birthday” or “Congratulations” help set the tone. These larger centerpiece signs are a great way to customize the display for the event. They can be printed, hand-lettered, or painted on materials like wood, chalkboard, acrylic, etc.
Chalkboard signs add a trendy, rustic vibe. These can be used for flavor signs, occasion signs, or general cupcake-related decorative wording. Chalkboard paint allows for affordable DIY signs. Alternatively, ready-made chalkboards can be incorporated into the display. A stand or easel allows versatile placement.
For more chalkboard sign ideas, see this example.
Lighting
Lighting can really make a cupcake display stand out, especially for a nighttime event. String lights are a popular option to create a festive look. Wrap them around and through the cupcake stand for a fun accent. Votive candles also add a nice glow when placed around or within the display. Just be mindful of fire safety (see Vdomus 4 Tier Square Acrylic Cupcake Stand with LED Lights). For daytime displays, natural lighting near windows or outdoors works well.
Consider lighting that complements your color scheme and overall theme. Soft white lights pair nicely with lighter, airy decor while colored lights can match bold, vibrant designs. The right lighting can highlight different elements like signage or specific cupcake tiers. Aim spotlights or strands of lights to strategically illuminate key focal points.Acrylic stands with built-in LED lights provide both form and function.
Location
When displaying cupcakes, you’ll want to consider the best location that fits your space and allows the display to really shine. Here are some popular options for cupcake display locations:
The kitchen or kitchen island provides a central, high-traffic area where the cupcake display is easily seen. Make sure to clear counter space and utilize a tiered stand or plates on risers to elevate the display. A kitchen cupcake display lends a homey, DIY feel. See more kitchen cupcake display ideas at this Pinterest board.
The dining table makes for an elegant display option. Drape the table with linens, use candlelight, and arrange cupcakes on cake stands for beautiful presentation. Stagger heights for visual interest. See examples of cupcake dining table displays at this Pinterest board.
Utilize existing counter space like buffets, drink stations, desks, and shelves to display cupcakes at multiple heights. This takes advantage of the vertical space in a room. Make sure to anchor plate stacks with non-slip pads. Get counter space cupcake display inspiration from this Pinterest board.
Outdoor displays can utilize porches, decks, patios, and other outdoor areas. Make sure cupcakes are shielded from weather and direct sunlight. Use waterproof displays. Anchor tiered platters in case of wind. See examples of outdoor cupcake displays at this Pinterest board.
Photographing the Display
Photographing a gorgeous display of cupcake cone cakes requires some planning to capture the treats at their best angle. Here are some tips for getting great photos of your cupcake cone creations:
Position your display on a solid, level surface and get low with your camera. Shoot the cupcakes straight on at eye level for impact. You can also shoot from above to highlight the variety of decorations and colors. Just avoid extreme side angles or shooting down on the cupcakes as that can distort them in unflattering ways.
Use props to accentuate the theme or colors of your cupcake cones. Florals, linens, or textured wood boards make lovely backdrops. Place decor items like ribbons or confetti near the cupcakes to tie everything together. Make sure props don’t detract from the cupcakes as the main subjects.
When editing, adjust exposure, saturation, and temperature to make decorations pop. Sharpen details or apply filters for an artistic effect. Upload your favorite pics to social media and tag the bakery or recipe you used. Display printed photos in frames or photo books so you can look back on your tasty creations.

