What Is The Best Way To Pot An African Violet?
African violets (botanical name Saintpaulia) are a genus of flowers that are native to Tanzania, Africa. They were first discovered in 1892 in the Usambara Mountains by Baron Walter von Saint Paul. Upon discovery, African violets quickly became popular houseplants around the world due to their beautiful flowers and easy care requirements.
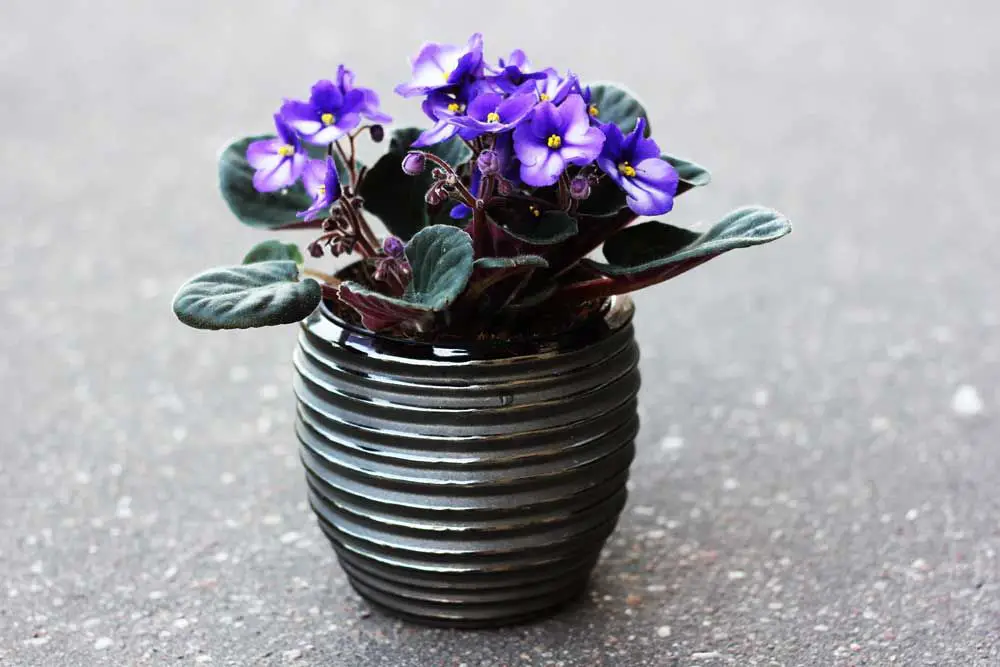
African violets are known for their velvety, deep purple blooms but through breeding come in a wide variety of flower colors and forms. They are small flowering perennials that rarely grow over 8 inches tall. Their fuzzy, rounded leaves form a compact rosette that sits close to the soil. While mostly grown indoors, some gardeners grow African violets outside in warm climates.
Choosing the Right Pot
When choosing a pot for an African violet, it’s important to select one that will provide the right conditions. The ideal pot material is porous terra cotta or plastic. Terra cotta is breathable and allows moisture to evaporate from the soil, preventing soggy conditions (Source). Plastic pots are lightweight and come in many colors and sizes. Make sure plastic pots have adequate drainage holes (Source).

The pot should be deep enough to accommodate the African violet’s roots, generally 3-4 inches deep. Shallow pots will restrict root growth. The diameter of the pot is not as important, but make sure the plant has some room and is not crammed (Source).
Good drainage is crucial for African violets. The pot should have holes in the bottom and sides near the base to provide drainage. Terra cotta pots often come with side holes, but plastic pots will need about 5-6 holes drilled in the sides 1-2 inches up from the bottom.
Soil Mixtures
African violets thrive in a lightweight, fast-draining soil mixture. The ideal soil components include:
- Peat moss – provides moisture retention
- Perlite or vermiculite – improves drainage
- Compost or leaf mold – adds organic matter
A common recipe is equal parts peat moss, perlite (or vermiculite), and leaf mold or compost (citation: https://www.babyviolets.com/how-to-prepare-african-violet-potting-mix-soil/). The peat moss helps retain moisture while the perlite/vermiculite provides drainage. The compost supplies nutrients.
Some gardeners recommend a mixture of 1 part peat moss, 1 part perlite, and 1 part vermiculite (citation: https://africanvioletresourcecenter.com/the-perfect-african-violet-potting-soil-mix/). This creates an exceptionally fast-draining mix. Adjust ratios based on local conditions – more peat moss in hot, dry climates and more perlite/vermiculite in cool, humid areas.
Pre-mixed African violet soil is also available from garden centers, containing peat moss, perlite/vermiculite, and often compost or fertilizer. Follow package instructions for optimal results.
Repotting
African violets should be repotted about every 1-2 years to refresh the potting mix and give the roots more room. More frequent repotting can shock the plant. You’ll know it’s time to repot when you see roots growing out of the drainage holes or over the surface of the soil. The plant may also become top heavy or unstable in the pot.
Repot in the spring or summer during the active growing season. Avoid repotting during winter dormancy or when the plant is blooming. Carefully remove the African violet from its pot and gently loosen any circled or matted roots. Trim off any dead or diseased roots. Repot into a pot that’s an inch or two larger than the previous pot. Make sure it has drainage holes. Use fresh, sterile potting mix and avoid packing it down too firmly.
After repotting, water thoroughly to settle the soil. Keep the plant out of direct sunlight for a few days while it adjusts. Then resume normal care. Repotting stimulates new root growth and can encourage blooming. With the fresh mix and more room, your African violet will grow vigorously.
Potting Step-by-Step
Follow these steps for potting or repotting an African violet:
- Choose a pot that is about 1-2 inches wider than the current pot. Select a pot with drainage holes in the bottom.
- Fill the new pot about 1/3 full with the soil mixture. Use an African violet specific potting mix for best results.
- Gently remove the violet from its old pot. Try to keep the root ball intact. Loosen any circled roots.
- Place the root ball in the center of the new pot. Add more soil around the sides, firming it lightly with your fingers.
- Water thoroughly after repotting to settle the soil. Allow excess water to drain from the bottom.
- Keep the violet out of direct sun for a few days to allow it to recover from repotting.
Be gentle when handling the roots and plant to prevent transplant shock. Repotting about every 2 years encourages growth and blooms.
Watering
African violets prefer to be watered from the bottom up. This protects their fuzzy leaves and delicate blossoms from damage that can occur from water dripping on them from above. It also helps prevent issues like powdery mildew that can develop when water sits on the leaves. Bottom watering ensures the plant gets hydrated without compromising its health.
A good rule of thumb for watering frequency is to water an African violet when the top inch of soil becomes dry. For most indoor plants grown in average room temps, this ends up being about once or twice a week. Allow the pot to soak in enough water to saturate through the drainage holes, then tip it upright to drain fully before returning to its saucer or cache pot (source).
Some key signs that indicate an African violet needs to be watered include drooping leaves that perk up after watering, and potting mix that looks dry on the surface. Avoid allowing the soil to become bone dry, as this stresses the plant. But also avoid keeping it constantly soggy, which leads to root rot.
Fertilizing
African violets benefit from fertilization, especially when actively growing in the spring and summer. Look for a fertilizer formulated specifically for African violets, which provides a balance of key nutrients like nitrogen, phosphorus, and potassium at lower concentrations compared to general purpose fertilizers.
Many experts recommend using a soluble or liquid African violet fertilizer at half strength once every 2-4 weeks during the growing season (spring through fall). Avoid over-fertilizing, as too much fertilizer can burn the roots. Watch for signs of fertilizer burn like brown leaf tips.
Some good options for African violet fertilizers include Jack’s Classic Blossom Booster or Miracle-Gro African Violet Food. Follow the package instructions for proper dilution rates and frequency of application.
Take a break from fertilizing in the winter when growth slows. Resume fertilizing when new leaves emerge in spring.
Light
Providing the right amount of light is crucial for growing healthy African violets. According to the African Violet Resource Center, African violets do best with 12-14 hours of bright, filtered light per day [1]. Direct sun is too intense and can scorch the leaves. Bright, indirect light from an east or west window is ideal. You can also supplement natural light with fluorescent or LED grow lights. Avoid placing violets in low light situations or they may become leggy and fail to bloom properly.
The level of light should be moderately bright – about 1,500 to 2,500 foot candles. This is about the same amount of light generated by two 40-watt fluorescent tubes from about 18 inches above the plant [2]. Measure light levels with a light meter to ensure proper illumination. Inadequate light will cause weak, leggy growth while too much direct sun will burn the leaves.
Temperature & Humidity
African violets thrive in moderate temperatures between 65-75°F during the day and 60-65°F at night. Temperatures below 55°F or above 80°F can cause issues with flowering and growth. Make sure to keep your African violet away from drafty areas, heat vents, or direct sunlight which could cause temperature fluctuations.
These plants also prefer 40-50% relative humidity. The ambient humidity in most homes is sufficient during the growing season. You can increase humidity by placing the pot on a pebble tray filled with water or use a humidifier nearby. Take care not to overdo humidity as too much moisture can lead to diseases.
Monitor your plant’s environment with a thermometer and hygrometer. Adjust temperature and humidity accordingly if needed to keep your African violet healthy and actively growing. For more details check out this care guide: https://flowersandflowerthings.com/how-to-care-for-african-violet/
Troubleshooting
African violets are beautiful but delicate plants that can develop issues. Here are some common problems and solutions for troubleshooting African violets:
Yellowing leaves – This can be caused by overwatering, low humidity, or old age. Allow the soil to dry out between waterings, use a pebble tray for humidity, and remove old leaves.[1]
Wilting/drooping leaves – This is a sign of under watering. Water the plant thoroughly when the top inch of soil is dry.[2]
Leaf spots/blemishes – This can be caused by bacteria, fungi, or pests. Isolate the plant and treat with a fungicide or insecticidal soap.
Leggy growth – This happens from insufficient light. Move the plant to a brighter location with more direct sunlight.
Flowers falling off – This can happen from stress, old blooms, or incorrect care. Address any underlying issues and remove spent blooms.
By observing your plant closely, identifying issues early, and making proper adjustments, you can keep your African violet healthy and thriving for years.


