How Do You Make Beautiful Things With Clay?
Clay is an ancient material that has been used by cultures around the world for millennia to craft both functional pottery and decorative sculptures. Clay’s unique properties make it an ideal medium for creativity.
Clay is a malleable material made from finely ground minerals, decomposed plant material, and water. When wet, clay can be shaped into intricate forms. When fired in a kiln, clay undergoes chemical changes and becomes permanently hard. The firing process sets the clay, creating a dense, durable finished product.
Evidence of early clay works dates back over 25,000 years. Some of the earliest known clay art includes Venus figurines made by prehistoric cultures. Throughout history, clay has remained an accessible and versatile material. Most early human civilizations, from Ancient Egypt and Mesopotamia to pre-Columbian societies in the Americas, used clay to produce both functional pottery and decorative art.[https://www.jamescooksculpture.com/post/clay-sculptures-unearthing-the-roots-of-an-ancient-art-form-a-journey-with-james-cook-sculptures]
Clay allows makers to shape delicate forms by hand that would be difficult to produce with other media. The firing process transforms soft clay into a permanent, solid object. These unique properties make clay an ideal material for crafting beautiful, intricate sculptures, vessels, tiles, and more.
Gathering Supplies
Before you can start sculpting beautiful things out of clay, you need to gather the right supplies. The type of clay you choose will depend on your project and skill level. Popular choices include polymer clay, air-dry clay, and oven-bake clay. Beginners may want to start with an air-dry clay as it is very forgiving and doesn’t require baking. Polymer clays like Sculpey are also a good choice as they don’t dry out quickly while you’re working.
In addition to clay, having the right tools makes sculpting much easier. Basic tools include sculpting knives, loop tools, cutters, ribs, and modeling tools. Smooth wood and rubber tools help shape softer clays without leaving marks while metal tools work for trimming and carving details. Other supplies like paint, brushes, glaze, and finishing spray will be needed for decorating and sealing your finished pieces.

Setting up a proper workspace is also important. Cover your work surface with wax paper, canvas, or a ceramic tile to keep clay from sticking. Have a basic tool kit along with water for wetting clay and paper towels for cleaning hands nearby. Good lighting and a comfortable chair will make sculpting easier on your hands and eyes.
Clay Preparation
Before you can begin sculpting with clay, you need to properly prepare and condition it. Kneading clay helps distribute moisture evenly and removes air bubbles. According to https://thepotterywheel.com/how-to-prepare-clay-for-pottery/, you can knead clay just like you would knead bread dough – by pressing, folding, and pushing it with your hands. Kneading makes the clay softer and more malleable.
Another important technique is wedging, which involves cutting the clay into sections and slamming them back together. This also removes air bubbles and makes the clay uniform. According to https://www.wikihow.com/Sculpt-Clay, wedging pushes the clay particles closer together. The clay should be kneaded and wedged until it is smooth, elastic, and lump free.
To condition clay, you can let it sit wrapped in plastic overnight. This allows the moisture to distribute evenly. Spraying water and mixing it in while kneading also conditions the clay. To mix colors, simply knead pieces of differently colored clays together until they are integrated smoothly. Properly preparing the clay makes the sculpting process much easier.
Sculpting Techniques
There are many techniques to sculpt clay into beautiful forms. Here are some of the most common sculpting methods:
Pinch pots involve shaping clay by pinching and pressing it between your fingers and thumb. This allows you to make small bowls, cups, and other round objects. Pinch pots are a great way for beginners to start working with clay. See this tutorial for how to make basic pinch pots: 8 Must-Know clay modeling techniques.
Coils are one of the most versatile clay sculpting techniques. To make coils, roll out long ropes of clay and stack or bend them to build forms. Coiling is excellent for making pots, bowls, sculptures, and more. You can also add texture by varying the size and shape of coils. Here’s more on working with coils: Clay Sculpture Techniques and Tips.
Slab building involves rolling out flat sheets or “slabs” of clay and cutting shapes to construct forms. Slabs can be stacked, bent, and joined to make boxes, cups, abstract sculptures, and more. Slab construction allows larger and more intricate hollow forms than pinch pots or coiling.
Molding involves pressing soft clay into a pre-shaped mold. This enables accurately reproducing forms. Simple molds can be made from everyday objects or you can purchase flexible rubber molds. Drape molding is a technique for covering an object with slab-rolled clay to make a mold.
Carving and sculpting techniques remove clay rather than building up form. Subtractive methods create concave surfaces and details. Cut away clay using loop tools, ribbon tools, wooden sculpting tools, or even your hands.
Texturing clay adds visual interest. Try pressing in leaves, rope, or other objects to transfer patterns. Use loop tools, clay shapers, and toothbrushes to scratch lines and textures. Add clay elements like coils, ropes, and appliqués to create contrasting textures.
Appendages like handles and spouts can be created with pinch, coil, and slab techniques. Attach them securely by scoring and slipping wet clay surfaces before joining. Use cardboard or foam supports inside handles and spouts until the piece dries.
Surface Decoration
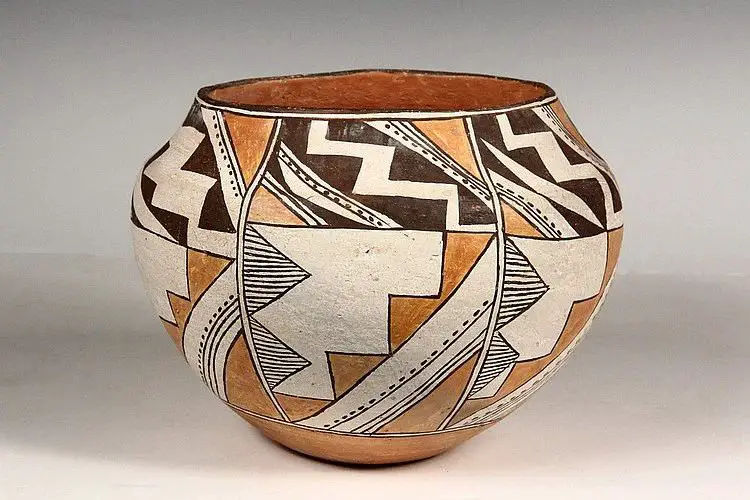
After the clay has been shaped and formed, the next step is decorating and adding color, texture, and visual interest to the surface. There are many techniques for decorating clay to make it more beautiful.
Glazing
Glazes are mixtures of minerals and chemicals that are applied to bisqueware clay and fuse to the surface when fired in a kiln. Glazes come in endless colors and finishes like glossy, satin, matte, metallic, and more. They can completely cover the clay item or be applied selectively to create patterns and designs.
Painting
Acrylic and ceramic paints are specially formulated to bond to raw, greenware, or bisque clay. Painting allows for colorful designs, intricate patterns, and images to be added to the clay surface. The paint becomes permanent after firing.
Textures
Interesting textures can be impressed into the clay by pressing objects into it, like lace, burlap, leaves, or textured rollers. Clay tools can also incise patterns and textures. Adding texture makes the clay more visually interesting and gives it an artisan feel.
Stamping
Rubber stamps pressed into the clay create repetitive imprints and patterns. Stamping is an easy decoration technique and allows makers to quickly add intricate designs. Stamped patterns look great when paired with glazing or painting.
Drying and Firing
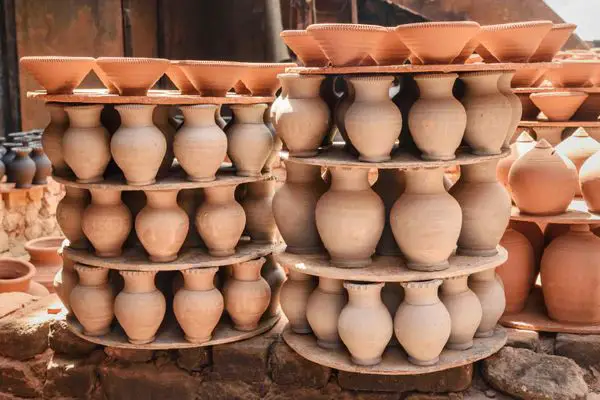
Proper drying and firing are essential steps for creating durable clay pieces that will stand the test of time. Letting clay air dry fully before firing is crucial to avoid cracks and explosions in the kiln. Clay dries from the outside in, so pay attention to the thickness of your pieces. Thinner pieces will dry faster than thicker ones. Allow adequate drying time, usually at least 1-2 weeks for handbuilt pieces and longer for wheel-thrown pots with thick walls.
Set your artwork in a warm (not hot), dry, indoor area out of direct sunlight when drying. Drafty areas or excessive heat can dry the surface too quickly before the interior has dried, causing cracks. Covering your work with plastic helps retain moisture, slowing the drying. Avoid wrapping greenware in newspaper since the ink can transfer.
To promote even drying, periodically turn or flip pieces during the first few days. Prop up wall pieces at a slight angle for stability. Hollow out solid sculptures like coils pots so the interior can dry too. Bisque fire clay once thoroughly dry; firing too soon risks cracking and explosions from trapped moisture. Bisque firing further hardens the clay in preparation for applying glazes. Use the right bisque temperature for your clay body, generally ranging from Cone 04 to Cone 6 (1757°F-2232°F).
Glaze firing melts the glasslike glaze layer to a glossy finish. Make sure bisqued pieces are fully dry before glazing to prevent glaze flaws. Fire to the required temperature for the glaze, typically between Cone 6-10 (2232°F-2345°F). Cool gradually after firing, about 100°F per hour. Let pieces fully cool before removing them from the kiln.
Making Functional Items
Some of the most common functional pottery pieces to make are mugs, bowls, plates, and vases. When creating functional pottery, it’s important to consider both aesthetics and utility.
“Functional pottery requires conscious decision making about design, form, surface integration, materials, and techniques at every step in the process. Whether you are making a cup, pitcher, casserole dish, platter, lamp base, or tile, the piece has a job to do” (https://ceramicartsnetwork.org/daily/functional-pottery).
Function should inform the form of the piece. For example, wide shallow bowls are good for serving salads, while deeper bowls work well for soup. The size and shape of the mug’s handle is determined by how it feels to grip it and lift to your mouth. The vessel’s opening is designed based on how it will be filled and emptied. Decoration and glazing choices also relate to the item’s function. A plate may have a smooth glazed interior for easy cleaning, while the decorative exterior glaze doesn’t touch food surfaces (http://swfineart.weebly.com/form-and-function.html).
When making functional pottery, focus on usability, comfort, and meeting the user’s needs while also creating something beautiful. Test pieces out by using them as intended to evaluate the design.
Making Sculptures
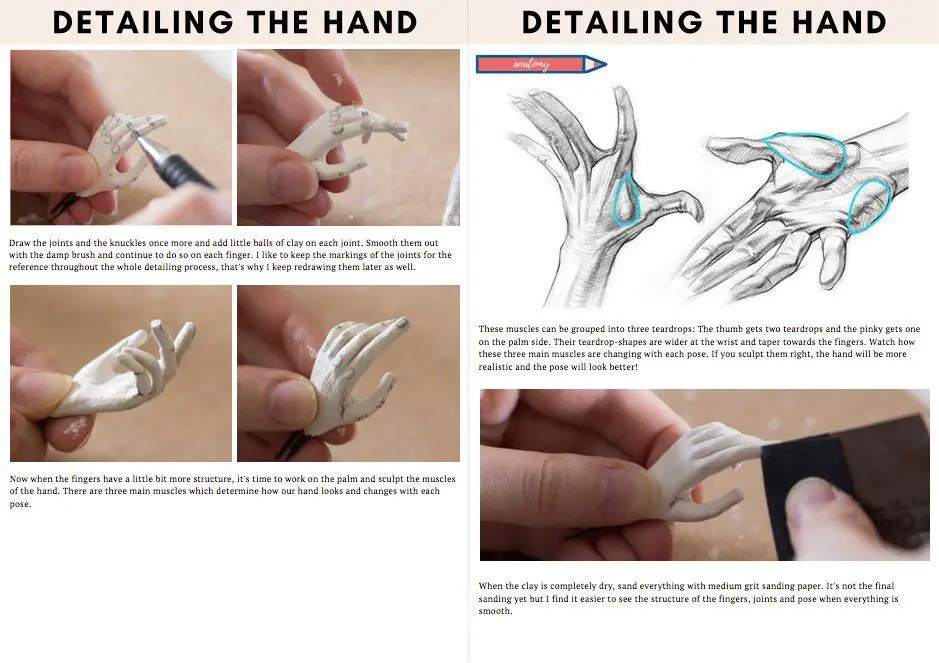
Ceramic sculpture allows you to create a wide variety of 3D artworks. Some popular subjects for ceramic sculpture are figurines, animals, abstract shapes, masks, and decorative pieces. When working on a sculpture, start by conceptualizing your idea and sketching it out. Consider the shape, form, texture, and other visual elements you want to portray.
According to ceramic artist Susan Halls, some key techniques for sculpting include:
- Using an armature or wire frame to support more complex shapes
- Building up the sculpture gradually using coils, slabs or solid clay
- Smoothing and blending the clay using your fingers, metal tools and sponges
- Letting the sculpture firm up slightly between working sessions
- Hollowing out any sections that would trap air during firing
Potter Katherine Martinko recommends practicing sculpting organic shapes and textures like leaves, feathers, fur, scales, etc. This helps build skills for sculpting figurative works. Pay attention to proportions and visual balance in your sculpture too.
Once your sculpture is complete, allow it to fully dry before bisque firing. Then apply glazes or other decorative finishes prior to a final firing. With some creativity and practice, you can produce beautiful ceramic sculptures to display in your home or give as gifts.
Troubleshooting
Clay artwork is susceptible to cracking and breakage, especially during the drying and firing stages. Here are some common issues and how to resolve them:
If cracks appear during drying, the clay body may have lost too much moisture too quickly. Slow down drying by storing pieces in plastic bags or containers. Small cracks can be filled with watered-down clay slip. For large cracks, moisten the piece and compress the cracks gently together. Allow to dry slowly. (Source)
Glazes can crack or craze during firing if they are incompatible with the clay body. Make sure to use glazes formulated for the specific type of clay. Underfired or overfired glazes will also crack. Follow the glaze manufacturer’s instructions carefully for firing temperature and cycles. (Source)
Broken pieces can often be repaired with adhesive and careful positioning of fragments. A two-part epoxy or cyanoacrylate “super glue” works well. Make sure the repair is stable and secure before continuing work on the piece. (Source)
Pinholes in glazed surfaces can be caused by improper clay preparation, glaze thickness issues, or gases escaping during firing. Try better wedging and kneading techniques when preparing clay. Apply an even layer of glaze. Do multiple glaze firings at gradually increasing temperatures. (Source)
Inspiration and Tips
Clay is an incredibly versatile medium that allows artists to create stunning works of art. Looking at beautiful examples of clay art can provide beginners with inspiration for their own projects. According to ceramic artist Samantha Henneke, “I’m constantly looking at other artists for inspiration. Sometimes just seeing an unexpected use of color or texture sparks a new idea” (Fox Run Pottery). When you find a style or technique you love, try emulating it in your own unique way.
Expert ceramic artists also have tips for working with clay. Ceramic sculptor Christie Goodwin recommends, “Let the clay guide you. Don’t force it. If you want a leg to bend a certain way but the clay starts to crack, reconsider the pose” (Clay Inspiration). Pay attention to the clay’s limits and work with it, not against it. Have patience through trial and error. Creative expression in clay is a journey of discovery.
Browse clay inspiration boards on sites like Pinterest to spark your imagination. Follow expert ceramic artists to learn techniques and approaches for bringing your vision to life in clay. With practice and persistence, you too can create beautiful art from this natural, moldable medium.


