How Do You Stick Tile To A Wood Table?
Tiling a wooden table can add a stylish, durable surface that is easy to clean and maintain. This article will provide a step-by-step guide to tiling a wood table properly, from assessing the table’s surface to choosing tiles, preparing the wood, adhering tile, grouting, and sealing. Proper preparation and technique are key to ensuring the tile adheres well and lasts over time. We’ll cover how to lay out a tile pattern, use spacers, apply adhesive, grout lines, and protect the finish. With some planning and care, you can transform a basic wooden table into a showpiece that looks like it came straight from a high-end store.
Assess the Table Surface
Before starting your tile project, thoroughly inspect the tabletop that you plan to tile over. Look for any existing damage, warping, or uneven surfaces, which can prevent the tiles from properly adhering. Wood surfaces in particular can warp over time from moisture exposure or the natural expansion and contraction of the wood fibers.
Use a straight edge tool like a level or long ruler to check for flatness across the tabletop. There should be no gaps between the straight edge and table surface. Also look closely for any cracks, holes, or other imperfections that may need repairing prior to tiling. The surface underneath the tile must be as smooth and level as possible for the best installation results.
If there are any uneven spots or warping present, you may need to sand down high points or use wood filler in low spots to level out the surface. Severely warped or damaged tabletops may require more extensive repairs before tiling. Taking the time to properly assess and prepare your table surface will lead to a long-lasting quality tile installation.
Choose Your Tile
When selecting tile for a tabletop, you’ll want to consider the tile’s material, size, and shape.
For material, porcelain and ceramic tiles are popular choices as they are durable, easy to clean, and come in a wide variety of colors and designs. Natural stone tiles like marble, granite, or slate can also work well but may require more maintenance. Avoid very porous tiles like terra cotta which can stain easily. Consider the table’s purpose when choosing – for a kitchen table, prioritize durability and cleanability, while for a decorative table, focus more on aesthetics.
In terms of size, small mosaics or tiles around 1-4 inches work best for tabletops so grout lines don’t dominate the surface. Large tile requires fewer grout lines but is harder to cut and lay out. Square, rectangular, or hexagon shaped tiles tend to fit best on tabletops. Make sure your tile is large enough so you don’t have to lay hundreds of tiny tiles.
Browse tile stores and home improvement centers to view your options in person. Bring home samples to compare next to your table and with other kitchen or room finishes.
Adhere a Backerboard
Before laying the tile, it’s important to adhere a backerboard to the wood table surface. Backerboards like cement board or foam backer board provide a stable, waterproof surface for the tile to adhere to. Backerboard helps prevent warping or damage to the wood from moisture. It also creates a perfectly flat, smooth surface for the tile to be laid on.
Cement backerboard is a common choice as it’s rigid and cement-based. It should be cut to fit the tabletop and then screwed into place using backerboard screws, spaced 4-6 inches apart across the entire surface. Apply a thinset mortar to the back of the backerboard before pressing it into place on the table. This helps create a strong bond.
Foam backer board is lightweight and easy to cut to size. It can be adhered with thinset mortar or construction adhesive. The key is making sure the backerboard is fully supported and bonded across the entire table surface before tiling.
Taking this important step provides a stable foundation and helps ensure the tile installation will be long-lasting, preventing cracks or loose tiles over time.
Prepare the Surface
Properly preparing the wood surface is crucial for the tiles to adhere correctly. Start by sanding the table top with 120-150 grit sandpaper to remove any existing finish or glossy layer and give the surface some texture. Make sure to sand evenly across the entire surface. After sanding, thoroughly clean the table top with a tack cloth to remove all dust particles left behind from sanding. The surface needs to be completely clean and free of debris.
Most bare wood surfaces should be primed before tiling to prevent staining and provide an extra layer of adhesion. Use a primer specifically made for tile like Mapei ECO Prim Grip or Zinsser Bulls Eye 1-2-3. Apply an even coat across the surface with a paint brush or roller. Let the primer dry completely per manufacturer’s instructions before moving on to tile installation. Priming gives the adhesive and grout something to grip onto and prevents moisture from seeping into the wood over time.
Lay Out Your Tile Pattern
When laying tile on a tabletop, planning the layout and spacing of the tiles is an important first step. Using spacers will help maintain even grout lines between tiles for a consistent look. Here are some tips for laying out your tile pattern:
Decide on the orientation of the tiles. Laying them diagonally or in a herringbone pattern can add visual interest. Line up one of the edges of the first tile with the table edge for a balanced layout.
Mix up tiles from several boxes so any color variations are distributed evenly. Place tiles on the tabletop and move them around until you achieve the desired pattern.
Use plastic spacers between tiles to maintain even grout lines, typically 1/8″ to 1/4″ wide. The spacers allow room for the grout and account for variances in tile size.
Focus tiles in the center and align the perimeter tiles last. Cut border tiles to fit if needed using a wet saw. Balance the layout so cut tiles aren’t too small.
Once satisfied with the pattern, remove the spacers and numbering system. You’re ready to permanently adhere the tiles in place.
Apply the Adhesive
After preparing the table surface, you’ll need to apply the adhesive before setting the tiles. When tiling a tabletop, it’s best to use a high-quality thinset mortar adhesive designed for bonding tile to wood surfaces. Some good options are Premixed Thinset Mortar or Mapei Ultralite Mortar Source.

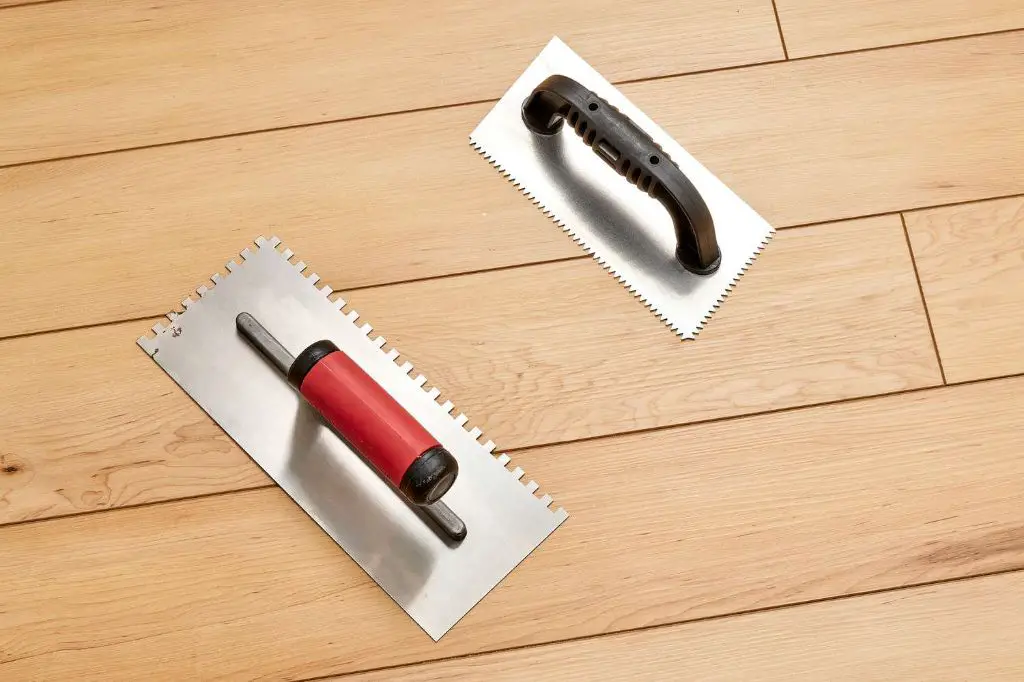
To apply the mortar, use a notched trowel at a 45 degree angle to spread it evenly across the surface. Apply enough to be able to see ridges from the trowel teeth. It’s important to use the proper trowel size and maintain an even depth across the whole surface. Work in manageable sections so the mortar doesn’t dry out before setting tiles. Spread the adhesive mortar evenly in one section, then set tiles into that area before moving onto the next section.
Set the Tiles
Once you have applied the adhesive, you can start setting the tiles in place. It’s important to work methodically and carefully during this step. According to How to Tile a Table Top With Your Own Ceramic Tiles, you’ll want to press each tile firmly into the adhesive using a slight twisting motion to ensure maximum contact and adhesion.
As you set the tiles, be sure to check that they are level and evenly spaced. If the tiles are not perfectly aligned, it will be obvious once the project is complete. Use spacers between the tiles to help maintain consistent spacing. You may need to make minor adjustments as you go to keep everything aligned. Work slowly and carefully, and double check the levelness periodically. With some patience, you can achieve a professional-looking tiled tabletop surface.
Grout the Tile
After all the tiles are set in place, it’s time to grout them. Grout is a cement-based material that fills the spaces between the tiles. This not only finishes the look, but also seals the tiles in place.
Apply the grout using a rubber grout float or squeegee, pressing it down firmly into the gaps between tiles. Work in small sections so the grout doesn’t dry before you can clean it off. Let it set just until a light haze forms on the tile surface. Then use a damp sponge to wipe off the excess grout and shape the grout lines (source).
Be sure to go over the tile surface multiple times with a damp sponge or towel to get it completely clean. Any remaining grout film can be brushed off once it’s dry. Taking your time to clean off excess grout thoroughly will give you nice clean grout lines and a professional looking tile surface.
Seal and Protect
After the tile has been laid and grouted, it is important to apply a sealant to protect it and help keep it looking its best. According to Ceramic Tile Sealer – Everything You Need To Know, sealing tile serves to protect it from staining, wear and tear, and makes cleaning and maintenance easier. Sealing is especially recommended for natural stone tiles which are porous and susceptible to staining from spills.
Use a high-quality penetrating sealer designed for the specific type of tile in your project. Apply the sealer evenly across the tiles and grout according to the product directions, typically using a paintbrush, roller, or sprayer. Allow proper drying time before using the surface. Sealing provides a protective barrier that prevents stains from penetrating into the tile and grout. It makes the surface more stain-resistant and easier to keep clean with regular maintenance.
Sealing may need to be reapplied periodically, such as once a year or as needed depending on usage and wear. Well-sealed tile maintains its beauty and lasts longer. Properly sealing your newly installed tile gives it durability and helps keep it looking like new.


