Can I Make A Ashtray Out Of Air Dry Clay?
Air dry clay, also known as pottery clay or modeling clay, is a versatile clay material that dries naturally at room temperature. It contains clay minerals, sand or grog (ground fired clay), and binders that allow it to retain its shape when air dried. Some key properties of air dry clay include:
- It’s pliable and easy to shape when moist
- It hardens as it dries through evaporation
- It doesn’t require baking or firing to set
- It’s reusable – moistened pieces can be kneaded back together
- It’s non-toxic and safe for kids and adults
With simple molding and shaping techniques, air dry clay can be used to create various decorative, functional, and artistic pieces. Its versatility and ease of use make it a great choice for beginning crafters and artists.
Suitability of Air Dry Clay for Ashtrays
Air dry clay is generally suitable for making ashtrays. The clay is often made from a mix of natural ingredients like clay, cornstarch, and minerals. When cured, it forms a sturdy ceramic material capable of withstanding high temperatures. Ashtrays made from air dry clay can resist heat from cigarette embers and ash without cracking or melting.
However, results can vary based on the specific clay recipe. Some air dry clays may be more delicate or porous after drying. It’s a good idea to test a small piece in an oven at 300-400°F to see if it withstands heat without issues before committing to make an entire ashtray. Denser clays with generous amounts of minerals like silica or grog tend to hold up better.
Air dry clay remains permeable after drying, so a sealant should be applied to the finished ashtray. This helps protect the surface from absorbing stains and odors over time. With an appropriate seal, air dry clay makes a lightweight, durable material for ashtrays that can be customized in any shape.
Shaping and Molding
When working with air dry clay to create an ashtray, there are several techniques you can use to shape and mold the clay:
Pinching and pulling the clay is a simple but effective way to manipulate the clay into shape. Gently pinch the clay between your fingers and pull upwards to raise walls. Pinch the clay into peaks and valleys to create decorative effects around the edges of the ashtray.
You can also roll the clay into coils or balls. Roll pieces into long coils, or balls of various sizes, then attach them together by pressing and smoothing the seams. Use coils to make the outer walls and rim of the ashtray.
Use basic clay shaping tools for added control. A knife or skew can cut through clay to remove sections or create grooves. A rib tool smooths and blends seams together. Loop tools make indentations and refine edges and details.
Consider making a basic mold with cardboard or tin foil to help form the basic shape, then refine the details by hand. Press the clay into the mold, then continue molding it using your fingers and tools.
Allow the shaped clay to firm up slightly before handling further. Clay can be re-wetted and reworked as needed. Work slowly and gently to avoid cracking and tearing the clay.
Texturing the Surface
One of the great things about working with air dry clay is that you can easily add texture to the surface before the clay cures. This is especially useful for functional pieces like ashtrays, since it can help improve grip and prevent slipping.
Here are some techniques for texturing the clay:
- Use a rolling pin that has texture – Lines, waves, dots, etc. will be imprinted onto the clay surface as you roll out the clay.
- Press items into the clay – Try things like seashells, leaves, lace, or crinkled aluminum foil.
- Use clay tools – Clay shapers, loop tools, and texture mats/rollers can create patterns.
- Carve patterns – Use clay sculpting tools, popsicle sticks, or even paper clips to etch designs into the clay.
- Add sprinkles/sand – Applying coarse materials like sand or decorative sprinkles will create grip.
Experiment with different textures and patterns for an original ashtray design. Just be sure to add texture before the clay fully cures.
Applying a Protective Seal
Applying a protective seal to an air dry clay ashtray is recommended to help protect the clay from heat damage and increase durability. The porous nature of air dry clay means it can be prone to staining and absorbing odors over time if left unsealed.
A water-based acrylic sealant or varnish is ideal for sealing air dry clay. Polyurethane can also be used. Avoid oil-based products like lacquer since they can interact poorly with clay. Apply 2-3 thin, even coats of sealant with a soft brush, allowing each coat to fully dry before adding the next.
Sealing will help prevent smoke, ash and other residue from penetrating the clay surface over repeated use. It also provides an extra barrier against heat damage from cigarettes. An unsealed ashtray made from air dry clay runs the risk of becoming stained, brittle or cracked with extensive use.
Overall, taking the time to properly seal an air dry clay ashtray is recommended. The small effort helps safeguard the ashtray and improves its durability and longevity.
Painting and Coloring
Air dry clay is an extremely versatile material that can be painted or colored in a variety of ways. Unlike ceramic clay that needs to be fired in a kiln, air dry clay simply hardens as it dries through evaporation. This means you don’t have to worry about choosing special heat-resistant paints or glazes. Acrylic paint is the most popular and readily available option for painting air dry clay.
Acrylic paint adheres well to the air dry clay surface and dries fast. It comes in just about any color imaginable, allowing for endless decorative options. Acrylic paint can be applied directly or diluted with water for a stained effect. Another good option is alcohol inks, which produce vibrant colors on air dry clay. You can also mix acrylic paint with glaze medium or varnish to give painted pieces a glossy coat.
For coloring air dry clay, oil-based modeling clays like Sculpey can be kneaded together with oil pastels. This allows you to blend and marble multiple colors together. Chalk pastels can also be shaved or blended directly into the surface. Air dry clay can be tinted before shaping by mixing in acrylic paint. Just be sure not to add too much liquid. An easy way to add color is by layering thin sheets or coils of different colored clays.
With the right paints and coloring techniques, air dry clay becomes the perfect blank canvas for creating custom ashtrays and other decorative or functional pieces. The finished look can be smooth and uniform or deliberately varied by blending and layering colors.
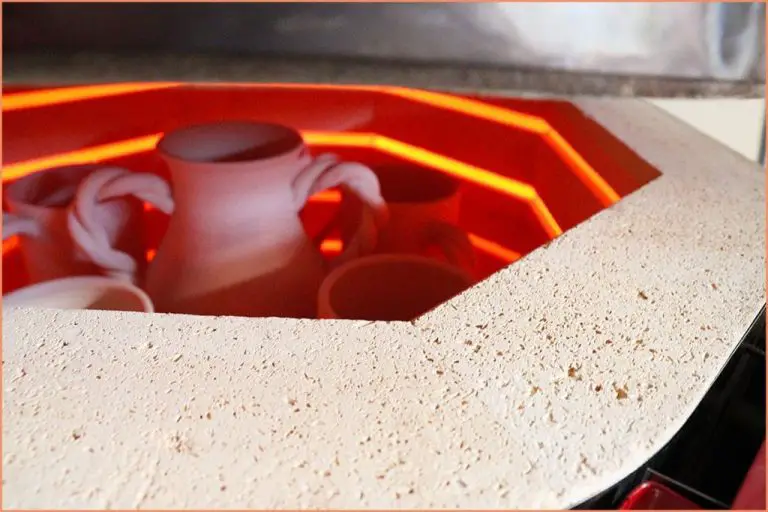
Baking and Curing
One of the main benefits of air dry clay is that it does not require baking to harden and cure. The clay dries and hardens at room temperature through a process called “air drying”. This makes air dry clay a great choice for projects where you don’t have access to a kiln for firing clay at high temperatures.
However, while baking isn’t strictly necessary, you can optionally choose to bake air dry clay creations to further harden and strengthen the material. Baking at around 130°C for 10-15 minutes can help cure air dry clay even more firmly. Just keep in mind that baking at high temperatures may cause the material to become more brittle.
In terms of curing time, air dry clay typically takes 1-7 days to fully cure depending on factors like the thickness of the clay and humidity/temperature conditions. To speed up drying, you can use a hair dryer on a cool setting to gently blow air over the clay. Storing air dry clay creations in a dry environment can also accelerate the curing process.
So in summary – no, baking is not mandatory for air dry clay. But you can optionally bake pieces at low temperatures to further set the material. And be patient as full curing can take several days without additional drying techniques.
Making a Mold
Using a mold is a great way to create consistent shapes and sizes for your clay ashtrays. To make a simple mold, start by shaping a base out of clay that will be the perfect shape and size for your ashtray. Let this base piece dry completely.
Once dried, apply a thin layer of petroleum jelly to the clay base. This will act as a release agent. Next, mix up a small batch of plaster of paris and pour it over the clay base. Let the plaster fully set and harden overnight. Carefully remove the clay from the plaster mold. You can now use this plaster mold to shape all your future ashtray bases.
To use the mold, press a ball of clay into the mold, smoothing it out evenly to fill the shape. Unmold the clay and add indentations for cigarettes before allowing to dry. Using a mold results in perfectly shaped ashtray bases every time. Adjust the mold size as needed to create small or large ashtrays.
Safety Tips
When working with air dry clay, it’s important to follow some basic safety tips:
Wear gloves when handling the clay. The dust from air dry clay can be drying to your hands. Gloves prevent irritation.
Work in a well-ventilated area. Opening a window can help circulate fresh air and prevent dust buildup.
Avoid breathing in clay dust particles. Wear a dust mask if you find the clay is creating a lot of fine dust when shaping or sanding.
Keep clay work surfaces clean. Wipe down tables and tools frequently to prevent lingering clay dust.
Avoid contact with eyes. Air dry clay could potentially irritate eyes. Be careful not to rub your eyes if you have clay residue on your hands.
Store clay properly when not in use. Keep it sealed in an airtight container or bag.
Prevent accidental ingestion. Make sure to wash hands after working with clay, especially before eating.
Check the clay packaging for any specific safety instructions related to that brand.
In general, air dry clay is non-toxic. Follow basic studio hygiene practices and you can safely work on your ashtray project.
Conclusion
In summary, air dry clay can absolutely be used to create unique, handmade ashtrays with a bit of skill and creativity. The clay is easy to shape by hand or with basic molds, and finishes beautifully when decorated. Key steps are minding the thickness so it cures properly, sealing the surface so it won’t deteriorate, and baking at a low temperature to fully harden it. With simple tools like acrylic paint, glaze, or polymer clay for embellishments, you can make ashtrays with any look you wish. The finished pieces will be lightweight yet sturdy, perfect for personal use or gifts. Just be sure to follow basic safety precautions. In the end, air dry clay is an extremely versatile, beginner-friendly material for crafting ashtrays and other items by hand.