Can I Make Fused Glass At Home?
Fused glass is a type of artwork created by fusing together pieces of glass in a kiln. The glass pieces are arranged in a design and then heated to high temperatures, causing them to adhere to one another. This creates a solid pane of glass with an embedded design. The process of fusing glass originated over 3,500 years ago in ancient Egypt, where artisans along the Nile River learned they could create decorative objects by heating together colored glass chips. Since then, fused glass techniques have continued to evolve and increase in popularity.
The basic process of making fused glass involves selecting compatible glasses, cutting them into your desired shapes, arranging them in a design, and firing them in a kiln to fuse the glass together. Several firings at different temperatures may be required to fully melt and shape the glass. Once cooled, the solid glass piece can be polished, edged, and displayed. Fused glass allows endless creativity and customization for making decorative glass panels, dishes, jewelry, garden art, and more.
Creating fused glass at home has become more accessible than ever, thanks to safer, more affordable hobbyist kilns and a wide selection of fusible art glass. With some basic equipment and materials, you can explore this satisfying art form from the comfort of your own studio. The process provides a creative hands-on experience and allows you to produce beautiful custom glass pieces.
Basic Supplies Needed
To get started with fused glass, you’ll need some basic supplies and equipment. The most essential item is a small kiln designed for fusing and slumping glass. You’ll also need a glass cutter, mold materials, fiber paper, glass glue, safety equipment, and of course, glass itself. It’s important to use compatible types of glass that have similar coefficients of expansion. A compatibility chart can help guide glass selection. Some key supplies include:
- Kiln – A small countertop or tabletop kiln that reaches temperatures between 1300-1500°F is ideal for fusing glass. Look for a kiln with adjustable temperature controls.
- Glass cutter – A handheld cutter with an oil reservoir and quality cutting wheel is essential for scoring and cutting glass.
- Glass compatibility chart – These charts indicate the coefficient of expansion and compatibility between different types of glass.
- Mold materials – Ceramic fiber paper, kiln posts, or other materials serve as a base to contain the glass shape in the kiln.
- Fiber paper – Used for separating glass layers and preventing pieces from fusing together.
- Glass glue – A specialty glue helps join glass pieces and hold the design together.
- Safety equipment – Safety glasses, gloves, and a mask protect from sharp glass edges and any dust.
Choosing a Kiln
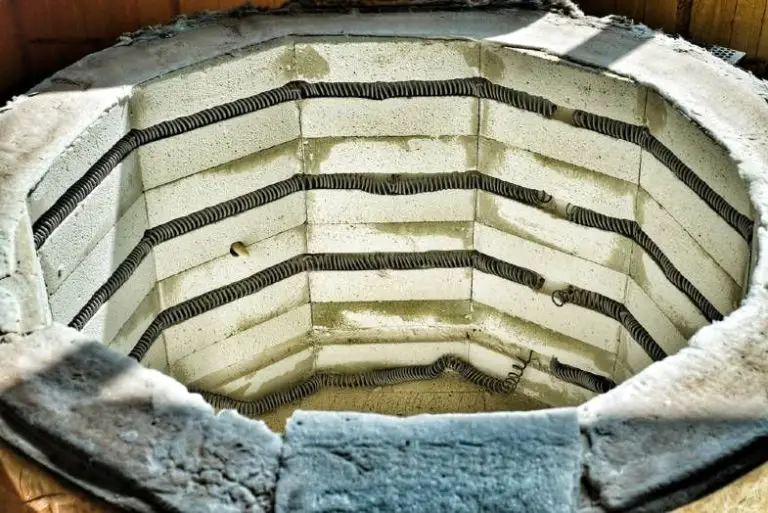
There are two main types of kilns that can be used for fusing glass at home – electric and gas-fired. Electric kilns are the most common choice for home hobbyists as they are relatively affordable, convenient, and safe to use. Gas-fired kilns reach higher temperatures faster but require ventilation and more safety precautions.

When selecting an electric kiln, an important consideration is the size. Small tabletop kilns with 6-10 inch chambers are suitable for making smaller projects. For larger pieces or producing multiple items at once, a medium 12-18 inch kiln is recommended. Size will impact what can be created and productivity.
Popular kiln brands for home fused glass work include Paragon, Skutt, and Olympic. These companies offer a range of models with different features and prices. Entry-level Paragon kilns start around $300 while larger capacity Skutt kilns run $1200-$1500. Do research to find a kiln in your budget that still provides adequate power and performance.
Investing in a quality kiln with sufficient size for your needs and projects will ensure safe, reliable fusing results. While more expensive models have added functionality, even basic kilns allow creating unique fused glass at home.
Selecting Glass
There are two main types of glass used for fusing – COE 96 and COE 90. COE refers to the coefficient of expansion, which is the measurement of how much the glass expands when heated and contracts when cooled. COE 96 glass has a higher COE and is generally easier to work with for beginners. COE 90 glass is more finicky but allows for more intricate designs (Source: https://fusemusefusedglass.com/).
Glass comes in a huge variety of colors, ranging from transparent to opaque. Consider the overall color palette and look you want to achieve. Popular colors include transparent blues, greens, and purples which allow light to pass through. Opaque whites and blacks create contrast. Mixing colors and textures creates visual interest. Most suppliers sell glass both individually by color or in assorted variety packs (Source: https://www.pinterest.com/crackeddish/fused-glass-molds/).
Glass can be purchased online through specialty retailers or local craft and art supply stores. Buy only as much as you need for a project to avoid waste. Price and amount will vary depending on the type, size, color, and quantity of glass. Expect to pay $5-20 for enough glass to create one small fused glass piece.
Cutting the Glass
Cutting glass for fused glass projects requires using special glass cutting tools and techniques. The most common tool is the glass cutter which has a small cutting wheel made of hardened steel or tungsten carbide. It is important to apply consistent pressure and use a straightedge for straight cuts. A glass scorer can also be used to scratch the surface before using pliers to snap the glass along the score line.
There are a few techniques for cutting glass. The most basic is scoring and breaking, where the wheel creates a scratch on the surface and the glass snaps on that line when gentle pressure is applied. The tap method involves tapping the scratch to start the break. Grinding involves using an abrasive wheel to cut all the way through the glass. A glass saw can also cut intricate shapes and curves. It’s critical to have a steady hand, keep the cutter lubricated, and score smoothly.
Safety should always be the top priority when handling and cutting glass. Use eye protection, gloves, and long sleeves. Only cut on a stable surface and watch out for sharp edges after cutting. Make smooth cuts to avoid cracks or shards. Clean up debris and dispose of waste glass properly to avoid injury. With care and the right tools, glass can be cut cleanly and precisely for fused glass projects. https://nabazaree.online/en29229567
Arranging the Design
When starting out with fused glass, planning your design in advance is crucial for success. Consider the colors and shapes of glass you want to use and how they will layer together. Simple designs with solid colors or basic patterns are best for beginners according to The Crucible (https://www.thecrucible.org/guides/glass-fusing-3/).
Molds provide helpful guidance when arranging glass pieces. Shallow molds work well for new fused glass artists. Lay your glass pieces inside the mold, building up layers as desired. Everything Stained Glass recommends trying a basic sunflower design in a round mold to start (https://everythingstainedglass.com/fused-glass).
Layering multiple pieces of glass vertically creates depth and interest. Stack at least two layers, using coordinating colors in each level. Offset the pieces to peek through to the bottom layer. Elements like stringers, frit and dichroic glass add extra dimensions layered between base colors.
Preparing for Firing
Before firing your fused glass project in the kiln, it’s important to take a few preparatory steps.
First, thoroughly clean each piece of glass that will be used with a mild detergent solution. Any debris, dust, or oils left on the glass can create imperfections when fired. Wipe each piece completely clean and allow to fully dry before moving to the next step (Source: https://www.thecrucible.org/guides/glass-fusing-3/).
Next, prepare a kiln shelf or priming base for your project using either kiln wash or fiber frax paper. The smooth, porous surface of fiber paper allows the glass to move and spread slightly when fired without sticking or causing distortion. Ensure the paper fully covers the shelf and fold up the edges (Source: https://www.soulceramics.com/pages/glass-fusing-at-home).
Lastly, if working with a new kiln, follow the manufacturer’s instructions to properly prime or recalibrate the kiln before its first firing. This helps burn off any residues and ensures it heats evenly at the desired temperatures. Test fire the empty primed kiln before fusing any glass in it.
Firing the Kiln
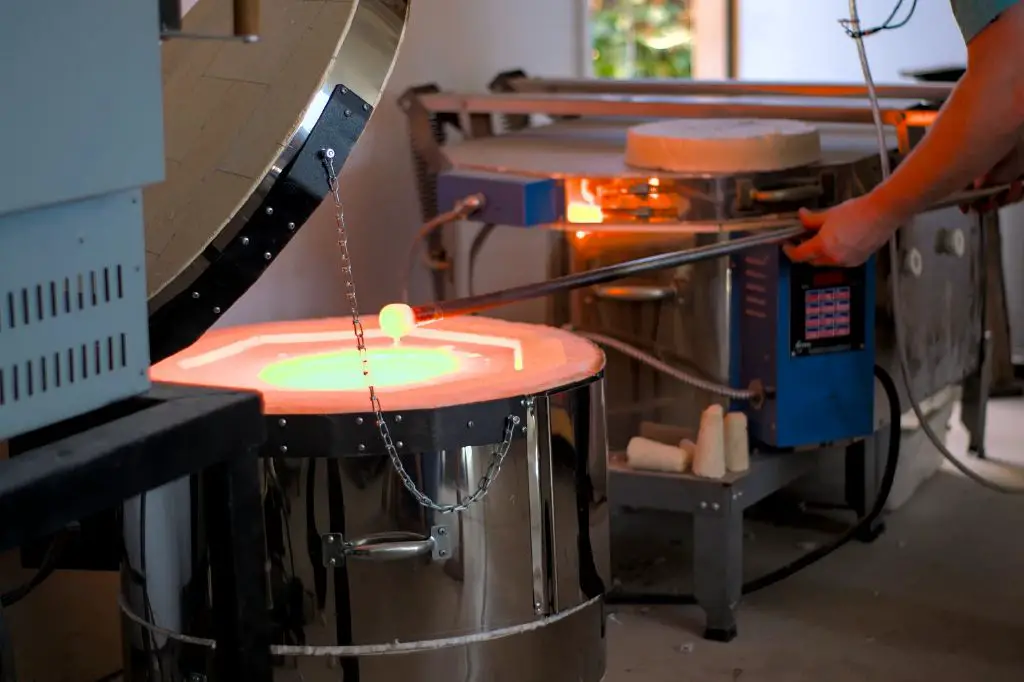
Properly firing the glass is one of the most important steps in fusing glass at home. Firing refers to heating up the glass pieces in the kiln to around 1480°F so that the glass softens and fuses together. There are a few key things to focus on during the firing process:
Firing Schedule
It’s important to follow the correct firing schedule based on the type of glass and project you are working on. Firing too fast or too slow can lead to cracking or weak fusing. Refer to your kiln’s manual for recommended ramp speeds and target temperatures. A typical firing schedule includes three stages:
- Ramping up to about 1000°F to slowly bring the glass to an annealing temperature.
- Heating to the target fusing temperature around 1480°F and holding for 15-60 minutes so the glass flows together.
- Cooling back down slowly over several hours to anneal the glass and prevent stresses.
The total firing time can range from 6-12 hours for a small fused glass project [1].
Monitoring Temperature
Keep a close eye on the temperature display to ensure your kiln is following the programmed schedule. Look for consistent, gradual heating without spikes. Place extra thermocouples near the glass to double check accuracy. If needed, manually control the firing for more precision.
Safety
Firing a kiln requires caution to avoid burns or fire. Wear heat-resistant gloves when loading/unloading the kiln. Ensure your kiln is on a nonflammable surface. Never open the kiln above 1000°F. Have a fire extinguisher nearby. Proper ventilation is also important to avoid breathing glass particles or fumes.
[1] https://www.thecrucible.org/guides/glass-fusing-3/
Polishing and Finishing
After firing, fused glass often has sharp edges and an uneven surface that needs polishing. There are several finishing techniques to polish and smooth the glass.
Grinding involves manually wearing down sharp edges and rough patches using a succession of grits, usually starting with a coarse 60 or 80 grit sandpaper or silicon carbide stone before moving to finer grits up to 3000. Each finer grit will smooth out the previous scratches. See this article for more on grinding tools and techniques: https://glasswithapast.com/knowledgebase/coldworking-and-fire-polishing/
Fire polishing uses a kiln firing to melt the sharp glass edges for a smooth, glossy finish. Firing schedules usually involve ramping up to 1400-1500°F then dropping quickly to about 960°F before annealing. The heat rounds the edges and softens the texture. Proper fire polishing can eliminate the need to grind. See this guide for more details on the process: https://www.jewelry-making-how-to.com/glass-fire-polishing.html
Applying standoffs creates space between the glass and the surface it will be displayed on. This prevents scratches and allows light to shine through. Standoffs can be glued to the corners or edges of the piece. Use special glues designed for high temperatures.
Displaying Fused Glass
There are several creative ways to display your fused glass artworks. One popular method is hanging glass art on the wall or in a window using specialized hangers made just for that purpose. Companies like Ken’s Glass (https://www.facebook.com/groups/kilnformedglassclub/posts/3295815410726850/) sell fused glass hangers designed to securely display art while allowing light to shine through.
Fused glass can also be showcased in specialized displays like light boxes, sculpture stands, or rotating stands. These accentuate the glass and allow people to appreciate it from different angles. Companies like”(?)https://www.phoenixstainedglass.co.uk/gallery” offer a variety of custom displays.
For crafters interested in selling their fused glass art, local art shows, craft fairs, and online marketplaces like Etsy provide great opportunities. When preparing pieces for sale, aim for consistent sizing, unique designs, and professional packaging to attract buyers.


