Can I Make My Own Clay Pots?
Pottery, clay vessels and vessels made of fired clay, refers to objects produced using a molding technique like coiling or throwing on a wheel, and hardened through high-temperature firing. Clay pots have long been utilized by cultures around the world for cooking, storage, and as decorative art due to their durability and low porosity. Making your own clay pots allows you to create functional and aesthetically-pleasing works, develop artistic skills, and connect with traditions that date back thousands of years. The process of making clay pots, from preparing the clay to firing the finished vessel, offers a highly versatile, engaging, and rewarding form of creative expression.
Benefits of Making Your Own Clay Pots
Making your own clay pots can be a rewarding and enjoyable hobby. Here are some of the key benefits of creating your own ceramic pieces at home:
Creative Outlet and Self-Expression
Working with clay allows you to express your creativity in a tactile, hands-on medium. You can make functional pieces like mugs or bowls, or sculpt free-form art pieces. The possibilities are endless when you make your own clay creations. It’s a great way to challenge yourself artistically.
Cost Savings
Clay is an affordable art material, especially when you dig and process your own clay rather than buying pre-made pottery clay. You can create an endless array of pieces with just a bag of clay. Making your own pots and sculptures at home saves you money compared to purchasing ceramic art.
Customization
When you make it yourself, you can create pieces that match your personal style and home décor. You can customize the shape, size, color, and finishing details. Handmade clay pieces make great gifts too since they have that special homemade touch.
Types of Clay
There are several types of clay that are commonly used for handmade pottery and ceramic arts. Each type has distinct properties that make them suitable for different applications.
Earthenware
Earthenware is a porous, opaque clay that fires at lower temperatures, typically between 1700°F-2100°F. It’s easy to work with and good for beginners. Earthenware can come in various colors like red, brown, and orange. It absorbs water, so earthenware objects are not suitable for holding liquids unless glazed. Common uses include flower pots, decorative tiles, and terra cotta.
Stoneware
Stoneware is dense, nonporous clay that becomes vitrified and watertight when fired around 2200°F. The higher firing temperature makes it stronger and more durable than earthenware. Stoneware clay can be tan, grey, or red-brown. It’s often used to create functional tableware like mugs, plates, bowls, and vases. The nonporous nature also allows coloring from underglazes.
Porcelain
Porcelain is a fine, white, translucent clay made from kaolin. It fires at very high temperatures up to 2462°F, resulting in a vitreous, glass-like product that is nonporous and highly durable. The high kaolin content gives porcelain a smooth, delicate appearance that is ideal for tableware or objets d’art. However, it requires more specialized skill to work with due to its finicky nature.
Terracotta
Terracotta is an orange-red earthenware made from naturally colored clay. It dates back thousands of years and often features a distinctive rough surface texture. Terracotta is ideal for hand-sculpting and low-temperature firing. It’s commonly used for flower pots, water jugs, statues, and other decorative items. The clay color permeates any glaze, limiting color options.
Required Supplies
Making your own clay pots requires a few key supplies:
Clay – The type of modeling clay you choose will depend on your project and preferred working properties. Polymer clay stays malleable and cures through baking. Air-dry clay dries hard at room temperature. Earthenware, stoneware, and porcelain are pottery clays that require firing in a kiln.
Kiln or other firing method – If working with pottery clay, you will need access to a kiln to properly fire and harden the clay at high temperatures. Without a kiln, air dry clays can be hardened using a conventional oven or toaster oven. Firing clay permanently sets it.
Molding and sculpting tools – Based on your desired shaping techniques, you may need basic sculpting tools like loop tools, ribs, cutting wires, rolling pins, texture mats and sponges. Plastic sculpting tools are gentler on soft clay. Metallic tools like ribs and loop tools are for precision.
Clay Preparation
Properly preparing your clay is an important step before you start shaping your pottery. Here are some key aspects of working with clay:
Wedging and Kneading
Wedging and kneading your clay serves multiple purposes – it removes air bubbles to prevent cracking or bursting in the kiln, blends reused clay, and makes the clay uniform in texture.
Getting the Right Consistency
The consistency of your clay affects how well you’ll be able to shape your pottery. Adding water makes clay more malleable, while letting it sit makes it stiffer. The right consistency should allow you to form smooth surfaces without cracking or becoming too sticky.
Shaping and Molding
There are a few different techniques you can use to shape and mold your clay into pots and other creations:
Using a Pottery Wheel
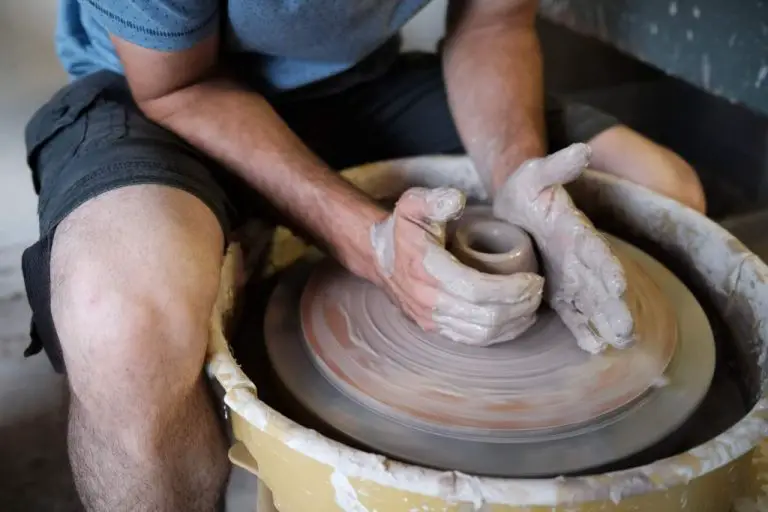
The pottery wheel allows you to shape clay into symmetrical pieces. Center your ball of clay on the wheel and apply pressure as it spins slowly. Use your hands and pottery tools to lift and shape the walls of the clay. This takes practice to master, but it enables you to create uniform bowls, cups, vases and other round pieces.
Handbuilding Techniques
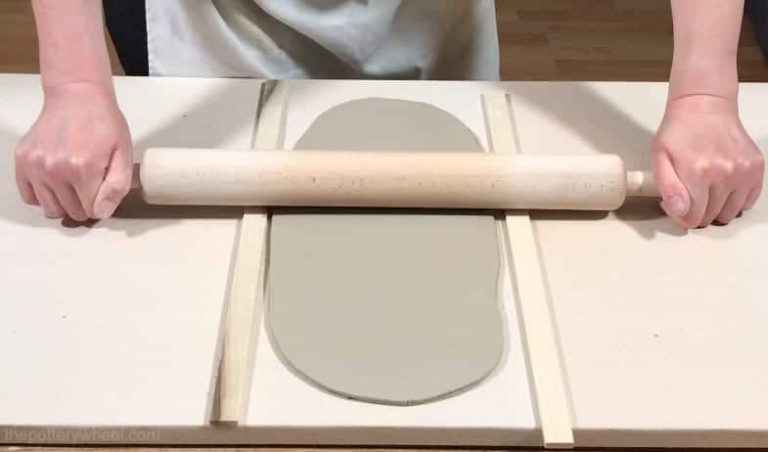
Handbuilding involves sculpting clay freeform using your hands and simple tools. Techniques like pinch pots, coils, and slabs allow you to create unique asymmetrical and organic shapes. Pinch pots are made by pinching and squeezing a ball of clay into shape. Coil building involves rolling out and stacking ropes of clay then smoothing them together. Slabs can be rolled, cut and joined to form enclosures.
Molds and Stamps
For repetitive shapes or decorative patterns, press clay into molds or stamp shapes into clay. Simple molds let you make multiple pieces in the same shape. Rubber stamps can impart textures and designs. You can also repurpose household items as improvised stamps and molds, getting creative with textures.
Drying and Firing
Once your clay pots have been shaped, they will need time to dry thoroughly before firing. How long air drying takes depends on factors like humidity and thickness of the clay, but can take between a few days and a couple weeks. Check the item periodically – when it’s dried through, it will feel lighter and should have a lighter color.
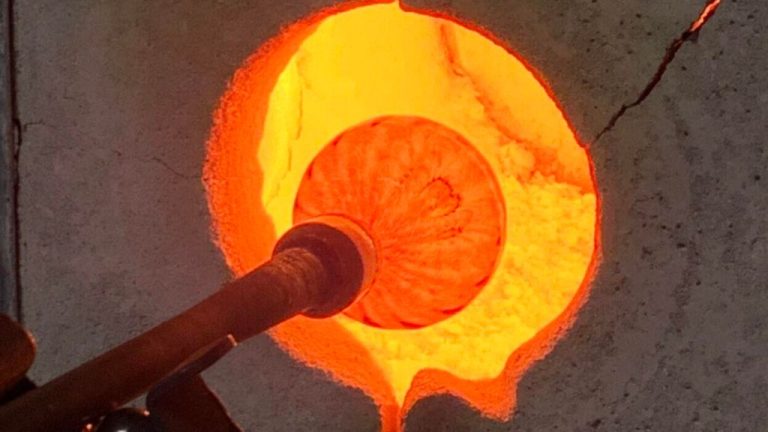
The next step is the bisque firing, which further hardens the clay. For cone 04 bisque firing, slowly increase the temperature to 1800°F/982°C and hold for 30 minutes. Make sure the kiln has good ventilation, and allow plenty of cooling time after firing. The bisque-fired pieces will now be ready for glazing.
Glazes are applied to bisque ware before a second glaze firing. You can apply liquid, brush-on glazes or dip pieces in buckets of colored glazes for full coverage. Use multiple coats for best results. When glazed, pieces should be fired to between 2100-2200°F/1149-1204°C, following the specific glaze manufacturer recommendations. Allow slow cooling before handling the finished pottery.
Glazing Your Clay Pots
Glazing is an optional but highly recommended final step when making your own clay pots. Glazes are solutions of minerals and chemicals that are applied to bisqueware pottery before the final firing. Glazing serves several purposes:
- It makes the pottery impermeable to water, allowing you to use glazed pots for drinking or storing liquids without the contents seeping through the clay.
- It gives pots a glossy, professional-looking finish and feel.
- Glazes come in various colors and effects to decorate your finished pieces.
There are many types of glazes available for pottery:
- Commercial premixed glazes – These are convenient to use and give consistent results.
- Custom glaze recipes – For more variety, you can mix up your own custom glazes by combining various minerals, other ingredients, and colors as desired.
- Specialty glazes like raku – Different recipes and firing methods create unique “crackle” and metallic glazes.
Glazes can be applied by dipping or pouring the entire piece in glaze, or using a brush or sponge to intentionally cover only parts of the piece. Try layering multiple complementary glazes on a single piece for artistic effects. Be sure to clean off any drips from the bottom or areas you want unglazed. Let pieces fully dry before final firing up to glazing temperature.
Tips and Tricks
Working with clay to make your own pots takes some practice. Here are some tips for getting better results:
Smoothing Surfaces
If your clay is drying and starting to crack while you’re working it, you can smooth it by rubbing a wet sponge across the surface. You can also use clay shaping tools to smooth surfaces. Wood and metal ribs are useful for compressing and smoothing clay. Plastic scrapers can remove excess clay and even out surfaces.
Achieving Desired Shapes
Start by visualizing the shape you want to create. Drawing a simple sketch can help. As you mold the clay, turn it slowly and look at it from all sides to ensure symmetry. Add or remove clay as needed. Use your fingers, hands and tools to gently shape and coax the clay into the desired form.
Fixing Cracking
As clay dries it will start to crack. Press a damp sponge on cracks to soften the clay and then smooth over with your fingers or a metal rib. Cracks can be filled in with clay slip or fresh clay before smoothing. Pay attention during the drying process and fix cracks right away to prevent them from getting bigger.
Getting Started
If you’re new to pottery and excited to make your first homemade clay pot, here are some tips on where to begin:
Beginner Equipment & Supplies
To start, you’ll need some basic supplies like clay, a pottery wheel or sculpting tools, a surface to work on, and a kiln or oven for firing finished pieces. Good beginner clay choices include low-fire clays like stoneware or earthenware. Start with manageable handbuilding tools like basic wood and rubber sculpting tools, or a small kick wheel. Protect your work surface with canvas or butcher paper. For firing, a standard home oven, toaster oven, or small hobby kiln will do.
First Project Ideas
Great starter projects using handbuilding techniques include pinch pots, coil pots, clay slab boxes, beads, tiles, or simple animal figures. Throw simple forms on the wheel like cylinders or bowls. Bisque fire pieces before glazing if you intend to use your home oven or kiln. Start with just one color of glaze or simple wax resist designs. Frequent beginner issues like cracking and breaking can be avoided by following good clay prep, drying, and firing guidelines.
Online Resources
There are many helpful sites and channels dedicated to beginner pottery. YouTube tutorials break down techniques like throwing, handbuilding, glazing and more step-by-step. Active pottery forums allow you to ask questions and troubleshoot issues with experienced makers. Local community studios also frequently offer starter wheel throwing and handbuilding classes at reasonable rates.


