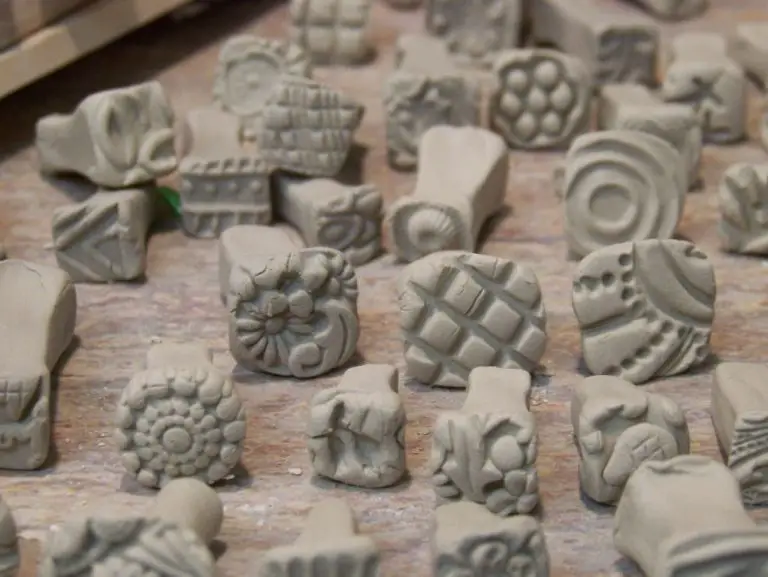
Can Molding Clay Be Hardened?
Molding clay, also known as modeling clay, is a type of clay that can be shaped and molded when wet. The clay remains soft and pliable until it is hardened, allowing artists and hobbyists to shape it into sculptures, crafts, jewelry, and more. The most common types of molding clay are polymer clay, ceramic modeling clay, and homemade or natural clay such as playdough.
Molding clay must be hardened or cured to finalize a sculpture or craft project. Hardening stabilizes the shape, adds strength and durability, and prevents fingerprints and damage. There are several ways to harden molding clay depending on the type of clay and desired finished texture. The curing process varies from simple air drying to baking in an oven or using chemical hardeners.
Knowing how to properly harden modeling clay allows artists to create permanent, solid clay objects that can be displayed, used, or gifted without deforming. Hardened clay also enables sanding, polishing, painting, and sealing the finished pieces.
Air Drying Clay
Air drying clay is modeling clay that hardens naturally when left exposed to air. It contains substances like glue, cornstarch, and/or wood pulp that cause the clay to harden as the water evaporates. Air drying clays do not require baking, firing, or other methods to set the clay.
Common types of air drying clay include:
- Crayola Model Magic
- Activa Air Dry Clay
- Hearty Clay
On average, air drying clay takes 24-48 hours to completely harden. Thinner pieces may dry faster while thicker pieces can take a few days to fully cure. There are some tips to achieve the best results when using air drying clay:
- Keep unused clay sealed in an airtight container
- Work on an nonstick surface and keep your hands damp while sculpting
- Allow the clay air exposure while drying
- Consider using a fan to accelerate drying time
Oven Baking
One of the most common ways to harden modeling clay is by baking it in a conventional oven. When exposed to heat, the compounds in the clay undergo a chemical reaction that causes the clay to permanently harden. Using an oven is an easy and effective method for both air dry and polymer clays.
For optimal results, clay should be baked at temperatures between 130°F to 275°F. The exact temperature will depend on the specific type of clay you are using, so check the packaging for the manufacturer’s recommendation. In general, lower temperatures around 130°F are suitable for air dry clays while polymer clays require higher temperatures around 275°F to fully cure.
Baking times can range from 15 minutes to over an hour. Thinner pieces will require less time while thicker clay sculptures may need longer baking times to fully harden. Start checking clay after the minimum recommended time and continue baking until the clay has firmed up completely. The clay should be solid all the way through with no sticky or soft spots.
To prevent cracking or warping, avoid over-baking the clay. Baking at too high of a temperature or for too long can cause moisture to rapidly evaporate, leading to cracks. Go low and slow, especially for larger pieces. Letting the clay cool down slowly inside the oven also minimizes cracks from temperature changes.
Microwave
Microwaving is a quick and easy way to harden modeling clay sculptures and pieces. By using a typical household microwave, you can rapidly dry and set the clay in just a few minutes.
When microwaving modeling clay, it’s important to use short bursts on low power settings to avoid overheating. Start with 30 seconds at 10% power and check the clay. If still soft, continue microwaving in 10-20 second intervals until hardened.
Be very careful not to microwave the clay for too long. This can cause cracking or burning. If you see any smoke or scorch marks, stop immediately. Clay can get extremely hot in the microwave, so use caution when removing pieces and allow them to cool before handling.
To achieve the best results, microwave in short intervals and allow the clay to rest between sessions. This allows the heat to distribute evenly. Rotation and flipping the clay periodically will also help it harden uniformly without hot spots.
With some trial and error to determine ideal timing, the microwave provides a fast and convenient way to harden modeling clay quickly when needed.
Freezing
Freezing modeling clay is an easy and effective way to harden it. The cold temperatures cause the water in the clay to freeze, forming ice crystals that help set the clay. Some key benefits of freezing clay include:
- It works well for air dry clays that harden as water evaporates.
- Freezing drives out excess moisture, speeding up the drying process.
- It helps strengthen delicate pieces made with soft clay.
- Freezing is inexpensive and accessible using any home freezer.
When freezing modeling clay, it’s best to keep it in the freezer overnight or up to 24 hours. Longer freezing times aren’t necessary and can potentially damage the clay. To prevent moisture damage, carefully package the clay first by wrapping it in plastic wrap or putting it in a resealable plastic bag. Allow the clay to return to room temperature before unwrapping to prevent condensation from forming on the surface.
With proper handling, freezing can quickly and reliably harden modeling clays without the need for other equipment or materials. It’s an easy go-to technique for both air dry and polymer clays.
Using Hardeners
One of the most popular and effective ways to harden modeling clay is by using a liquid clay hardener. These specially formulated products work by penetrating the clay and undergoing a chemical reaction that hardens and strengthens the material. There are several types of clay hardeners available:
– Acrylic-based hardeners – These liquid hardeners contain acrylic polymer which hardens modeling clay by plasticizing and bonding the particles. Acrylic hardeners work on both oil-based and water-based clays.
– Sulfur clay hardeners – These products use sulfur as the active ingredient to harden the clay. They bind the clay particles together through vulcanization.
– Cement-based hardeners – Cement is used as a binder to harden and strengthen the clay by forming rigid calcium silicate matrix within the material.
Clay hardeners are typically applied by brushing or spraying the liquid onto the surface of the modeling clay piece. The products are water-based and provide good penetration into the clay. For the hardening reaction to occur, the clay piece should be baked at low temperature after application of the hardener as per the manufacturer’s instructions.
Liquid clay hardeners effectively harden a wide variety of clay types while retaining their flexural strength. The result is durable clay pieces that maintain much of the workability and non-brittle characteristics of polymer clay. Products with acrylic polymer tend to provide the best performance in terms of hardness and strength gain.
Heating With Hairdryer
One way to speed up the air drying process for molding clay is to use a hairdryer. The gentle, warm air from the hairdryer can help to dry clay more quickly than air drying alone. When using a hairdryer, it’s important not to hold it too close to the clay or use too high of a heat setting. This can cause cracking or scorching of the clay surface.
The ideal temperature setting for a hairdryer when drying clay is the low or medium/warm setting. High heat risks drying the outer surface too quickly before the inner moisture has had time to evaporate. Hold the hairdryer at least 6 inches or more above the clay to avoid concentrated heat in one spot.
Move the hairdryer back and forth over the entire surface of the clay, stopping to rotate or flip over sections. Periodically check to see if the clay still feels cold in the center before continuing to dry. Take care not to overheat or dry too aggressively. With the right distance and temperature, a hairdryer can cut air drying time significantly while minimizing any cracking or damage to the clay.
Two-Part Epoxy Resin
Applying a two-part epoxy resin is an extremely effective way to harden and seal molded clay pieces. Epoxy resin is available at most craft stores and comes in two parts – the resin and the hardener. It is crucial to properly mix these two parts together according to the manufacturer’s instructions, usually at a 1:1 ratio.
Once mixed, the epoxy resin can be brushed or poured directly onto the surface of the clay. It will act to harden and waterproof the clay as it cures. Be sure to apply the resin generously to ensure it fully penetrates and seals the entire piece. Applying too thin of a coat may result in soft or unhardened sections. Allow the resin to fully cure as directed, which may take 24-48 hours before handling the now hardened clay.
Varnish/Sealants
Using a varnish or sealant is a great way to harden modeling clay while also giving it a shiny, glossy finish. Varnishes and sealants work by forming a protective layer on the surface of the clay that hardens as it dries. Some key benefits of using varnishes or sealants on modeling clay include:
- They harden the clay, making pieces more durable and longer lasting.
- They provide a smooth, glossy finish that brings out colors and designs.
- They protect the clay from moisture, dust, and dirt.
- Pieces can be handled and played with without damaging them.
- If only applied to parts of a piece, a varnish can create interesting glossy effects.
The best types of varnish or sealant to use with modeling clay are those specially formulated for clays and ceramics, such as acrylic polymer varnishes. These are designed to flex with the clay rather than become brittle. Mod Podge, decoupage medium, and polyurethane are also suitable options. Avoid using oil-based varnishes, as they can react poorly with the clay.
To apply a varnish or sealant, first ensure the clay is clean and free of dust. Use a brush to coat the entire surface of the clay in a thin, even layer. Let the piece dry fully between coats, applying 2-3 coats for best protection. Spray sealants can also be used for convenience and an even finish. Allow the final coat to dry 24-48 hours before handling the hardened clay piece.
Conclusion
In summary, the most effective methods for hardening modeling clay are oven baking and using commercial clay hardeners. Oven baking at low temperatures between 130-275°F is ideal for hardening clay without risking cracks. Meanwhile, liquid hardeners specially formulated for clay hardening provide an easy and convenient solution with reliable results. Other methods like air drying, microwaving, and freezing can also work but may take longer or pose risks like cracking.
The hardness and durability achieved will depend on factors like the clay type, thickness, drying/baking time, and brand of hardener used. When oven baking, thinner pieces will harden faster while thicker sculpts may require longer times at lower temps. With liquid hardeners, following the product directions is crucial. In general, slowly drying and curing clay produces the most durable results.
To maintain the longevity of hardened clay, apply a clear acrylic sealer, varnish or glaze. This seals the clay to help prevent moisture damage, chips and cracks. Proper storage by avoiding direct sunlight and humidity will also extend the life of finished clay pieces. With the right techniques, modeling clay can be effectively hardened for lasting creations.