Can You Do Glass Fusing At Home?
What is Glass Fusing?
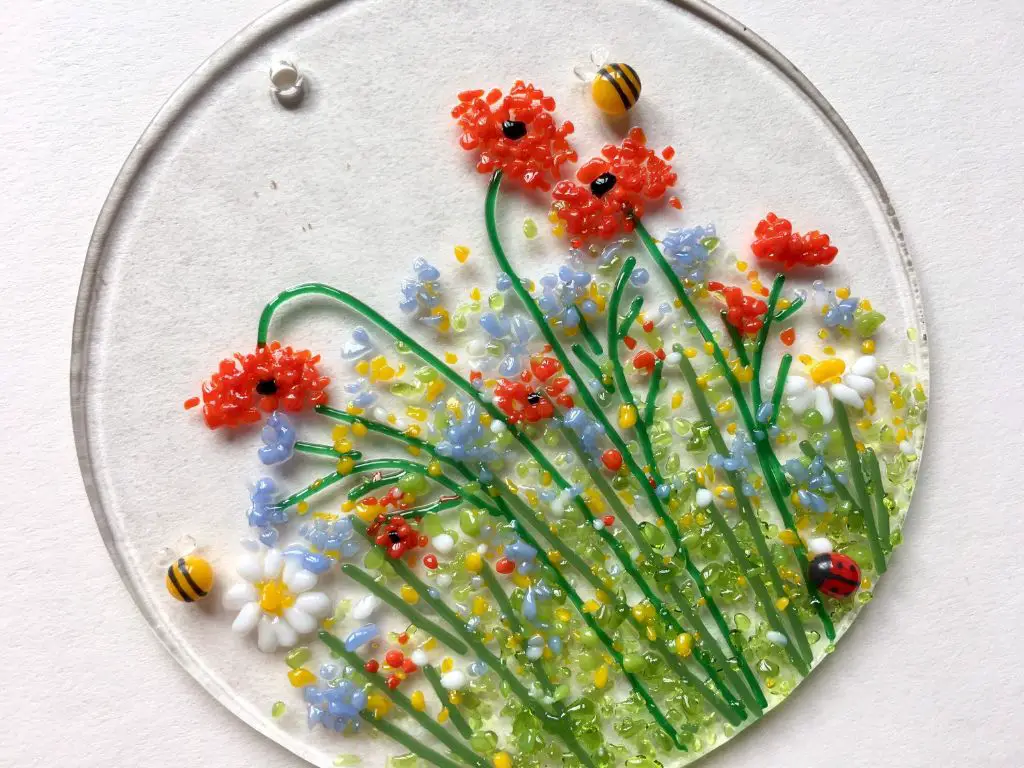
Glass fusing is an art form that involves joining, or fusing, pieces of glass together using heat. The artwork is created by arranging separate pieces of glass and then fusing them in a kiln heated to high temperatures. This allows the glass pieces to bond together to form a single object.
The history of glass fusing dates back thousands of years. Evidence shows ancient Egyptians and Romans were creating fused glass artworks around 2000 BC – 500 AD. They likely discovered the process accidentally when working with glass near high heat. Over time, glass fusing evolved into an intentional artistic process for creating decorative glass objects.
Today, glass fusing remains a popular technique to create unique glass artwork, jewelry, dishes, and more. The availability of small kilns makes glass fusing accessible as a hobby for artists working from home.
Benefits of Glass Fusing
Glass fusing provides many benefits that make it an enjoyable and rewarding hobby. Some of the key benefits include:
Creative outlet – Glass fusing allows you to tap into your creativity. It’s a fun way to make unique works of art, jewelry, dishes, coasters and more. You can experiment with colors, patterns and textures to produce one-of-a-kind pieces.
Makes great gifts – The handmade glass items you create through fusing make wonderful gifts for family and friends. Your personalized creations are sure to be cherished. Fused glass also allows you to make custom pieces based on the recipient’s style and interests.
Satisfying hobby – The entire glass fusing process from design to completion is hands-on and engaging. Seeing your vision come to life piece by piece provides a sense of achievement. It’s an absorbing hobby that lets you destress while producing beautiful works of art.
Fun learning experience – As you advance, there’s always more to learn about glass fusing techniques. The learning process itself can be highly enjoyable and rewarding. Fusing glass allows you to keep expanding your skills over time.
Relaxing activity – Working with glass allows you to focus your attention in a calming, meditative way. The creative process provides relaxation and stress relief from daily life.
Types of Glass for Fusing
When it comes to glass fusing, it’s important to use the proper type of glass that is formulated specifically for fusing and not regular glass. Fusible glass is made to withstand the high temperatures required for fusing without cracking or breaking apart. There are a few main types of fusible glass:
Frit – Small granules of colored glass that can be arranged into designs and patterns before fusing.
Stringers – Long, thin strands of colored glass that are placed on the base glass surface. Stringers melt into vivid lines when fused.
Sheet Glass – Sheets of colored fusible glass that serve as a base for fusing projects. Sheet glass comes in various sizes and thicknesses.
The key difference between regular glass and fusible glass is that regular glass contains impurities and cannot withstand the heat shock of rapid temperature changes during fusing. Fusible glass is specially formulated with minimal impurities so it can be heated to high fusing temperatures and then cooled slowly without breaking (The Fusing Shop). Choosing the right fusible glass materials ensures successful fusing results.
Essential Tools and Equipment
There are several essential tools needed to start fusing glass at home. The most important is a small kiln, which is used to heat the glass through multiple stages to fuse the pieces together. Kilns designed specifically for glass fusing are recommended, as they allow for precise temperature control. Common sizes for home use are 4.5 inches cubic feet or smaller (1).
Molds made of stainless steel or kiln shelves are necessary to hold the glass pieces while firing. Molds come in simple geometric shapes as well as detailed designs. Kiln shelves support glass items during the firing process. Fiber paper is placed between the glass and the kiln shelf to prevent sticking. Glass cutters and grinders are used to size and shape each glass piece before fusing. A quality cutter allows for straight, clean cuts while grinders smooth sharp edges (2).
Safety gear like kiln gloves and glasses are essential. Fusing involves handling extremely hot materials. Thick, fire-resistant gloves and glasses protect hands and eyes from burns. A well-ventilated workspace is also critical, as kilns release fumes during firing.
Setting up a Workspace
Setting up a proper workspace is crucial for glass fusing safely at home. When designating space for fusing, make sure to choose an area away from high traffic zones and flammable materials. A garage, basement, shed, or spare room works well.
Proper ventilation is also essential, as fumes can be released from the kiln during firing. Installing a vent hood over the kiln is ideal. If that’s not possible, situating the kiln near an open window or door to allow fumes to dissipate is recommended. Avoid fusing in enclosed spaces [1].
Safety should also be considered when arranging your workspace. Keep a fire extinguisher and first aid kit nearby. Have a stable, non-flammable work surface for handling glass, like a stainless steel table. Keepyoung children and pets away from equipment. Arrange tools convenientlywithin reach. Allow adequate spacing around the kiln for access [2].
With mindful planning, you can create a functional, safe fused glass workspace at home suitable for beginners to experts.
Basic Fusing Techniques
Basic glass fusing techniques involve cutting glass, layering it, using molds, and firing the glass. Some of the most common beginning techniques include:
-
Cutting glass: Use glass cutting tools to cut sheet glass to the desired shape and size. A glass cutter is essential to get clean cuts. You’ll also need a pair of breaking pliers to snap the glass cleanly along the scored line made by the cutter. Refer to this guide on glass cutting techniques for more details.
-
Layering: Arrange separate pieces of cut glass in layers to create effects. Usingbullseye glasses like clear, iridized and colored opaque glasses work well. Check out this layering guide to learn design techniques.
-
Using molds: Place cut glass inside Kiln molds to slump and form 3D shapes. Everything from bowls to jewelry pendants can be shaped. Dust molds with kiln wash first to prevent glass sticking. Read about mold use in fusing.
-
Firing process: The glass pieces are fired in a kiln according to specific ramp up and cool down schedules. Full fusing involves heating glass to around 1480°F to fuse it fully. The firing schedule depends on the project thickness and type of glass used. Get details on firing techniques here.
Intermediate Fusing Techniques
Once you have mastered the basics of glass fusing, you can move on to more advanced techniques like slumping, tack fusing, and forming 3D shapes. These techniques allow you to create more complex and intricate fused glass projects.
Slumping involves heating glass in or over a mold so it softens and conforms to the mold’s shape. This is great for making bowls, plates, and other vessels with your fused glass. Slumping requires a kiln with a top heating element. You can find slumping molds made of steel, fiberclay, or other materials. Be sure to use a mold rated for the temperature your glass needs to fuse properly. According to Studio 34 Artists, popular slumping projects are platters, bowls, plates, and wall sconces.
Tack fusing involves only partially melting glass together, so the pieces remain somewhat movable and flexible when cool. This allows you to shape and mold the glass into 3D forms. Tack fusing requires heating the glass to around 1300-1400°F. You can drape tack fused glass over molds to create shapes like vessels or sculptures. Tack fusing multiple pieces together allows you to assemble more intricate 3D creations. Just be sure to support the glass properly while shaping it when hot.
The key with intermediate fusing techniques is learning the precise time and temperature needed to achieve the effect you want. It takes practice to get a feel for slumping and tack fusing. Take detailed notes each time to improve your skills. With some experimentation, you can master these techniques and expand your fused glass abilities.
Inspiring Project Ideas
Glass fusing opens up a world of creative possibilities. From jewelry to dishes to garden art, there are endless inspiring project ideas for the home fuser. Here are some of the most popular projects to try:
Jewelry is one of the most common and rewarding glass fusing projects. Pendants, earrings, bracelets, and rings can all be created by fusing dichroic glass, frit, or small glass components. Glass jewelry has a beautiful, one-of-a-kind aesthetic. Check out this fused glass jewelry tutorial for inspiration: https://www.pinterest.com/pin/509329039104507188/
Fused glass dishes like plates, bowls, and platters add a gorgeous pop of color and texture to any table setting. Layer colored glass and frit to create stunning designs. Add dimensional elements like stringers or inclusions for extra interest. See this guide on how to make fused glass dishes: https://www.hotshotovens.com/blogs/glass-art-blog/glass-fusing-temperature-chart
Coasters are a simple but fun beginner fusing project. They can be made in batches and customized with names or monograms. Try using dichroic glass to create cool color shifting effects. Check out this tutorial on how to fuse glass coasters at home: https://www.pinterest.com/ideas/fused-glass-flamingo/922670526071/
Add a pop of color to your garden or patio with fused glass garden art. Wind chimes, bird feeders and baths, stepping stones, and sculptures are all options. Incorporate found objects like shells or stones. Get inspired by these garden fused glass project ideas: https://www.pinterest.com/ideas/fused-glass-flamingo/922670526071/
Troubleshooting Common Issues
Some common issues that can arise when glass fusing at home include bubbles, cracks, and warping. Here are some tips for troubleshooting:
Bubbles
Bubbles can form when air gets trapped between layers of glass or when firing too quickly. To prevent bubbles:
- Avoid trapping air when layering glass pieces
- Fire slowly, with long ramp up and cool down times
- Consider a vacuum kiln to remove trapped air
Small bubbles can be smoothed over in the kiln by “fire polishing.” Refire the piece just below its slump temperature. The bubbles should smooth out.
Cracks
Cracks typically occur due to thermal shock from improper firing. To prevent cracks:
- Follow recommended ramp up/cool down rates for your glass
- Don’t open kiln suddenly when hot; allow gradual cooling
- Use compatible COEs of glass to avoid stress
Warping
Warping happens when glass slumps unevenly. To prevent warping:
- Use kiln furniture designed for slumping
- Prop up edges of glass so it slumps evenly
- Fire symmetrical pieces evenly on kiln shelf
Careful firing, along with experience, will help minimize common fusing issues. Be patient and keep trying!
Getting Started with Glass Fusing
For beginners, it’s essential to familiarize yourself with the basics before diving into more complex projects. Many local art studios and community centers offer introductory glass fusing classes that provide hands-on instruction in a safe environment with all the necessary equipment and materials. These classes allow you to learn techniques like cutting glass, arranging design elements, and firing finished pieces in a kiln under expert supervision (1).
Beginner kits are another great option that provide all the basic tools and materials needed to start fusing glass at home. Look for kits that include an assortment of compatible glass types, a firing surface like a microwave kiln, and safety essentials like kiln gloves and glass cutters. Consider starting with simple pendant or coaster kits to learn fundamental skills before advancing to more intricate projects (2).
Safety should always be the number one priority when glass fusing. Be sure to work in a clean, uncluttered area and wear protective gear like safety goggles and gloves. Only use glass types that are compatible with your kiln, and closely follow the kiln’s firing instructions. Make sure your workspace is well-ventilated, as some materials may produce fumes. And take care when handling broken glass to avoid cuts (3).
Finding inspiration for glass fusing projects is easy with sites like Pinterest, Etsy, and Instagram. Search for fused glass hashtags and accounts to discover beautiful creations. Let the works of others spark your creativity as you get started on your own glass fusing journey.

