Can You Glaze Over Terra Sigillata?
What is terra sigillata?
Terra sigillata is a type of ancient Roman slipware pottery characterized by its bright red glossy surface and decorative stamped designs. The term “terra sigillata” comes from Latin meaning “sealed earth” or “clay bearing little images”, referring to the stamped designs on the surface of the ware.
The earliest origins of terra sigillata date back to the Greek Hellenistic period. However, the technique was further developed and popularized by potters in ancient Italy, particularly in the region of Arretium (present-day Arezzo). The pottery was mass-produced and widely exported across the Roman Empire from the 1st century BC to 3rd century AD. At its height during the 1st century AD, it was the most popular tableware in the Roman world.[1]
The clay used for terra sigillata production was extremely refined and fired at high temperatures resulting in a smooth red polished surface able to take delicate stamped and barbotine relief decoration. The glossy red slip was achieved by polishing the unfired ware with a smooth pebble.[2] The signature stamps and designs gave each piece a standardized look that was recognizable throughout the territories of the Roman Empire.
Making terra sigillata
Terra sigillata is made by mixing a suitable clay body with water and a small amount of deflocculant. Common deflocculants used include sodium silicate, Darvan 7, or magnesium carbonate[1]. The deflocculant helps break down the clay particles into an ultra-fine slip or slurry.
A good clay to use for terra sigillata is a plastic modeling clay or ball clay. The clay should be in a powdered form to dissolve readily in water. To make the slip, start by mixing the powdered clay with water at a ratio of around 1 part clay to 5 parts water. Then add a small amount of deflocculant, starting with 1-2% of the dry clay weight. Mix thoroughly to dissolve the clay powder. Allow the mixture to sit overnight. The next day, carefully pour off the top section of the terra sigillata, leaving any sediment behind. This thin mixture is now ready to apply as a terra sigillata slip[2].
Terra sigillata is usually applied in 2-4 layers, allowing each layer to dry in between applications. It can be brushed on, poured on, or dipped to coat the bisqueware surface. Let the final layer dry thoroughly before firing. Terra sigillata reaches a leatherhard state when dry and ready for the kiln.
[1] https://thepotterywheel.com/how-to-make-terra-sigillata/
Glazing terra sigillata
Glazing terra sigillata provides multiple benefits and serves various purposes. Applying a glaze over terra sigillata can enhance the depth, shine, and color of the final surface. Glazes also provide protection and durability to the relatively soft and porous terra sigillata layer. Additionally, glazing creates exciting visual effects as the glaze interacts with the texture and color variations of the terra sigillata beneath it.
Glazes commonly used over terra sigillata include transparent, semi-transparent, and even opaque glazes. Transparent glazes help bring out the natural colors of the terra sigillata while adding gloss. Popular options are celadons, tenmokus, and clear glazes. Semi-transparent glazes like chun or oatmeal glazes add subtle colors. Opaque glazes can entirely cover the terra sigillata to achieve solid colors. However, opaque glazes should be applied thinly to prevent masking the terra sigillata’s subtle character. Experimenting with different glazes over test tiles is recommended to achieve the desired visual effects.
Overall, glazing terra sigillata opens up many creative possibilities. It allows ceramic artists to enhance the prized qualities of depth and sheen in terra sigillata while offering durability and exciting visual interactions between the terra sigillata and glaze layers.
Glaze materials and recipes
There are a variety of glaze materials that work well with terra sigillata to enhance the finish and add color. Some common glaze materials used with terra sigillata include:1
- Zinc oxide – Adds a matte finish
- Titanium dioxide – Creates a brighter, whiter surface
- Clay – Using the same firing clay as the terra sigillata creates good compatibility
- Feldspar – Lowers melting temperature and promotes glassy surface
- Silica – Adds durability and stability
- Kaolin – Builds texture and acts as a filler
- Bentonite – Provides suspension and viscosity
There are many recipes for glazes that work well with terra sigillata. Here are a few sample recipes:2
Glossy Opal Glaze
- 50% frit 3124
- 25% kaolin
- 20% silica
- 5% bentonite
Blue Celadon Glaze
- 25% nepheline syenite
- 10% dolomite
- 35% EP kaolin
- 25% silica
- 5% bentonite
- 1-3% cobalt carbonate
The key is finding glaze materials that melt and fuse well at the same temperature as the terra sigillata firing. Testing small batches is recommended to achieve the desired effects.
Glaze Application Techniques
There are several methods for applying glaze to terra sigillata. Here are some of the most common techniques:
Dipping
Dipping the terra sigillata piece into a container of liquid glaze is one of the easiest application methods. Carefully lower the piece into the glaze and lift straight up for an even coat. Allow excess glaze to drip back into the container. Dipping works best for smooth, rounded surfaces. For more control, use tongs or a glaze handle (Ceramic Arts Network).
Pouring
Pouring glaze directly onto the surface of the terra sigillata allows it to flow smoothly and evenly. Tilt and turn the piece to guide the glaze into crevices and textures. Remove drips from the bottom. Be cautious of thick glazes that do not pour well. Best for flat surfaces.
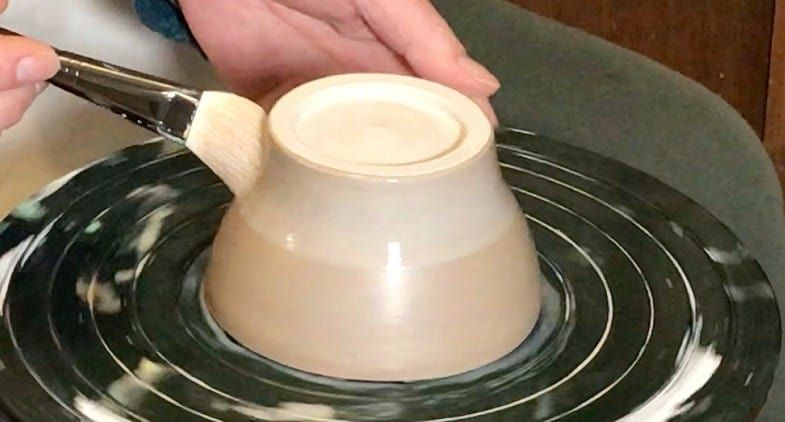
Brushing
Using a soft brush to gently apply glaze coat-by-coat gives the most control. Dip the brush into the glaze and lightly sweep across the surface. Overlap strokes to prevent bare spots. Multiple thin layers will build to an even coating. Angle the brush to reach crevices. Rinse and blot brush between coats.
Spraying
Spraying glaze through an airbrush or spray gun creates a fine mist that can coat intricate shapes evenly. Several light passes will build up layers without drips. Mask areas you do not want glazed. Use spray booths or outdoor areas to prevent overspray. Be cautious with coarse glazes that can clog sprayers.
Regardless of technique, the goal is to achieve full, even coverage without bare spots or drips. Multiple thin coats are better than a single thick layer. Allow each layer to dry before adding more. Inspect closely and touch up if needed. With patience, any application method can produce flawless results.
Firing glazed terra sigillata
When firing glazed terra sigillata, it’s important to use the optimal temperatures and cycles to achieve the desired results. Terra sigillata is typically fired between cone 04 and cone 6, with cone 06 being the most common target temperature according to this source. Firing too low below cone 04 can lead to underfired results where the glaze doesn’t mature properly. Conversely, firing too high above cone 6 risks over-firing the clay body.
A slow, gradual temperature climb is recommended, holding between cone 018 – cone 06 to allow volatiles to escape and prevent bloating or cracking. Long holds in this range can help the glaze and terra sigillata fully mature. It’s also important to cool slowly. Quick cooling can lead to cracks or crazing.
Some common firing flaws to avoid with glazed terra sigillata include:
- Pinholes – from trapped air bubbles in the glaze or humid conditions
- Crawling – Glaze shrinks away from areas of clay due to high clay absorption or contamination.
- Crazing – Fine crackling in glaze due to clay and glaze mismatch or quick cooling.
- Blistering – Bubbles under glaze from too rapid water escape.
Paying close attention to glaze fit, firing temps, and cooling cycles can help minimize flaws. Test rings are recommended to dial in the optimal glaze firing approach.
Achieving different looks
Glazing with terra sigillata allows for a wide range of aesthetic effects, from matte to glossy finishes. Adding materials like kaolin or ball clay to the sigillata slip will create a more matte look, while increasing the proportion of feldspar promotes glossiness. There are also colored glaze options to create vibrant hues.
For a matte finish, aim for a glaze with around 20-30% feldspar and higher proportions of kaolin and/or ball clay. Matte glazes tend to accentuate the subtleties in texture and form. A satin matte glaze can be achieved with around 50% feldspar. As the feldspar percentage increases towards 70-80%, the terra sigillata develops a glossy surface.
Incorporating metal oxides like cobalt, copper, or iron produces rich colors in glazes over terra sigillata. A small amount of coloring oxide goes a long way, usually 1-3% of the total glaze recipe. Low-fire glazes with oxides yield vibrant hues, while mid-range glazes produce more subtle earthy tones. Colored glazing is an excellent way to make decorative finishes like ombré gradients. Always test glaze recipes on test tiles before applying to finished work.
Glaze Recipes by Clay Color
The color of the terra sigillata clay body impacts the look of the glaze and allows for certain color combinations. Here are some suggested glaze colors for different terra sigillata clay bodies:
For red terra sigillata, try:
- Blue, green or turquoise glazes to contrast the red clay
- Purple or lavender glazes for an earthy, complementary look
- Neutral glazes like white, tan or gray to allow the red clay to stand out
For black terra sigillata, go for:
- Bright, vibrant glazes in blues, greens, yellows or oranges to pop against the black
- Metallic luster glazes like copper, silver or gold for a striking look
- White or light glazes to create dramatic contrast
With buff or white terra sigillata, try:
- Deep saturated glazes in any color since the buff clay acts as a neutral backdrop
- Natural, earthy glazes like light blues, greens, tans or browns that complement the buff color
- Darker glazes like black, deep purple or navy blue to make them stand out
Some particularly striking combinations include a turquoise glaze on red clay, a bronze metallic glaze on black clay, or a teal blue glaze on buff clay. Experiment with layering multiple complementary glazed layers for even more visual depth and interest.
Tips for success
When glazing terra sigillata, there are some key tips to follow for achieving the best results:
Troubleshooting flaws – Terra sigillata is very thin and sensitive to application technique. Brush marks, cracking, peeling, and uneven coverage are common issues. To prevent brush marks, apply in overlapping layers with a soft brush. For cracking and peeling, the cause is often too thick of an application or drying too fast. Apply thinner layers and allow plenty of slow drying time. Uneven coverage can result from a gloppy mix – add a few drops of water and remix to thin it out. Refer to this guide for troubleshooting terra sigillata issues.
Ensuring adhesion, even coverage, right glaze thickness – For proper adhesion, the clay body must be smooth, clean, and free of dust before applying the terra sigillata. Use 400+ grit sandpaper or a stone to smooth any rough areas first. Apply 2-4 thin coats for even coverage, allowing each coat to fully dry. The final glaze layer should be very thin, almost imperceptible. Too thick of an application can lead to cracking and peeling. Refer to this guide for tips on glaze thickness and application.
Inspiring examples
Terra sigillata offers endless possibilities for creative expression. When skillfully combined with diverse glazes, the results can be stunning. Here are some inspiring examples of beautifully glazed terra sigillata pieces:
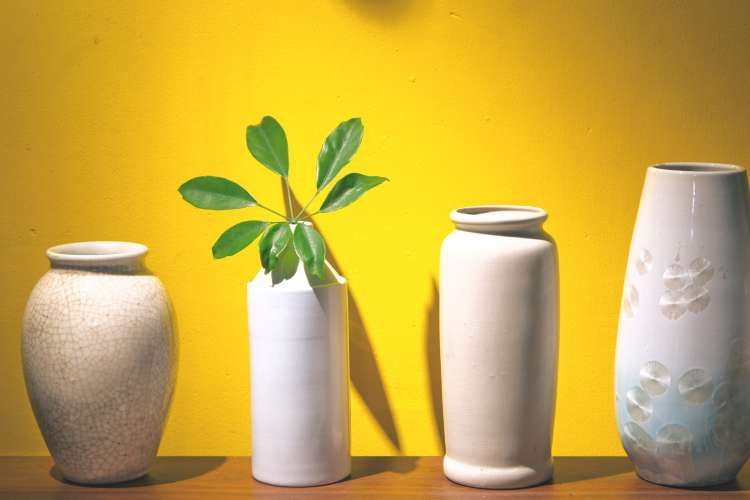
This elegant modern vase features a matte oxblood glaze over a red terra sigillata, creating a striking visual contrast. The unique glaze application allows the terra sigillata to peek through in places, showcasing the depth of color.
This 16th century majolica plate from Italy exemplifies the terra sigillata tradition. A creamy white glaze is expertly applied over the terra sigillata in delicate brushstrokes, leaving some areas untouched to reveal the rich orange-red hue underneath.
Contemporary artists like Jen Mecca often layer different glazes over terra sigillata to achieve multi-dimensional effects. The crimson and amber glazes on this piece contrast beautifully with the black terra sigillata ground.
Glazing terra sigillata opens up many avenues for creativity and innovation. With thoughtful glaze choices and application techniques, ceramic artists can produce unique works that artfully transform and enhance the natural beauty of the terra sigillata surface.