Can You Make A Mortar And Pestle From Clay?
A mortar and pestle are a set of two tools used for grinding, crushing, and mixing substances. The mortar is the bowl, usually made of hard wood, heavy plastic or stone such as granite or marble. The pestle is the bat-shaped hand tool that goes with the mortar, made of the same material as the mortar.
Mortars and pestles have been used for centuries as both traditional tool in cooking and as a small-scale grinding tool for laboratory use. They are used for grinding and mixing spices, herbs, and other food items, as well as crushing pills. The mortar and pestle work by applying pressure and friction to crush and mix items placed between the mortar and pestle by grinding and pounding motions.
Mortars and pestles can also be made from materials like clay. Making them from clay allows for customization of size, shape, color, and other aesthetic qualities. Clay mortars and pestles, once shaped properly, dried, and fired at high temperatures become hard, durable tools that can be used just like traditional wooden or stone versions.
Selecting the Clay
The type of clay you select for making a mortar and pestle is important, as different clays have different properties that make them more or less suitable. The ideal clay should be relatively smooth and free of impurities, as well as be somewhat porous and absorbent. Here are some of the best clay options:
Stoneware clay – This very dense and smooth clay is an excellent choice. It creates a strong, hard mortar and pestle that won’t easily chip or crack with use. The smooth texture also allows for easy grinding and mixing.
Terracotta – While more porous and prone to chipping than stoneware, terracotta still creates a usable mortar and pestle set. It provides good absorption and friction.
Earthenware – Very porous clays like earthenware are not the best choice for frequent use as they can break down over time with abrasion. But they can work in a pinch.
Porcelain – While porcelain is incredibly smooth and refined, it is likely too fragile for grinding and mashing with a mortar and pestle. It would chip and crack easily. Best to avoid porcelain clays.
The most important characteristics to evaluate are density, smoothness, absorbency, and durability. Test any clay thoroughly before committing to a large project. Stoneware and terracotta clays offer the best balance of these properties for long-lasting, functional mortar and pestle sets made at home.
Shaping the Mortar
When sculpting the mortar bowl out of clay, there are a few key techniques to keep in mind for optimal performance. The mortar bowl should have a wide base and curved sides that slope gently inward. This shape promotes efficient grinding and mixing of ingredients. The interior surface of the bowl should be smooth with no cracks or grooves that could harbor bacteria.
Aim for a mortar that is around 4-6 inches wide at the base. The ideal height is usually around 2-3 inches tall. The walls of the bowl should be approximately 1/2 inch thick to withstand repeated use without cracking. Consider making the exterior base slightly thicker for added stability.
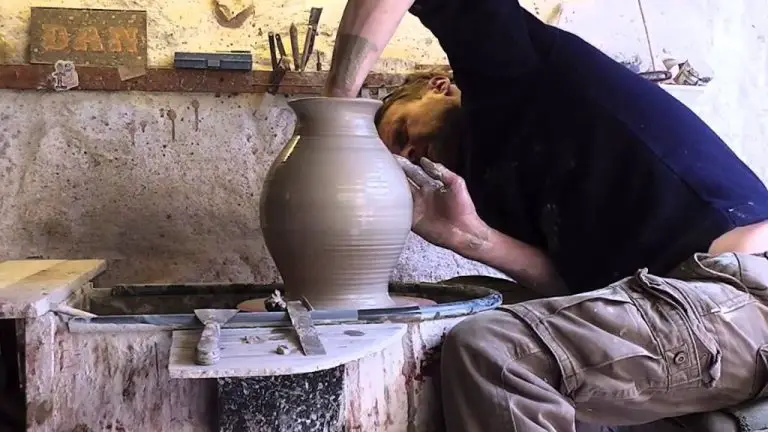
Use your fingers, basic hand tools, loop tools, or a rib tool to shape the clay into the rounded bowl form. Work slowly and carefully to thin the walls and smooth the interior surface as you shape it. Check frequently with a ruler or template to ensure the proportions are correct. Allow the clay to firm up slightly between stages to hold its shape without deforming.
Creating an ideal mortar shape may take some trial and error. Start with basic tools and techniques, then refine your process as you gain experience working with clay. With practice, you’ll be able to efficiently sculpt high-quality, durable mortars. The perfect mortar form will lead to better performance and results when grinding spices, herbs, and other ingredients.
Shaping the Pestle
The pestle is the club-shaped tool that is used along with the mortar bowl for grinding. When shaping your clay pestle, it’s important to create a design that is functional and comfortable to grip.
Aim for a pestle that has some weight to it, as the momentum of a heavier pestle makes grinding easier. A standard pestle is usually 6-8 inches long. The pestle’s head, which is the part you grip, should be approximately 2 inches in diameter. Shape the head so it fits comfortably in your hand.
Below the head, taper the pestle’s body smoothly down to a blunt or rounded end. Having a blunt grinding end helps crush material, while a more rounded end is better for grinding smoothly. The shape you choose depends on what you intend to grind. Make sure the pestle remains thick enough at the bottom to withstand forceful grinding without breaking.
Creating a textured surface on the grinding end of the pestle can help it pulverize material more efficiently. Adding grooves, small points, or bumps gives the pestle some grip on the substance being ground in the mortar.
Take your time sculpting and smoothing your clay pestle into the shape and size you desire. Allow the clay to dry adequately between sculpting sessions to hold its shape. Your patience in shaping the pestle will pay off in creating a reliable, efficient grinding tool.
Drying Process
Proper drying is critical for ensuring your homemade clay mortar and pestle do not crack or break during use. When working with clay, you must allow adequate time for the moisture to fully evaporate to avoid cracks from forming as the clay shrinks during drying.
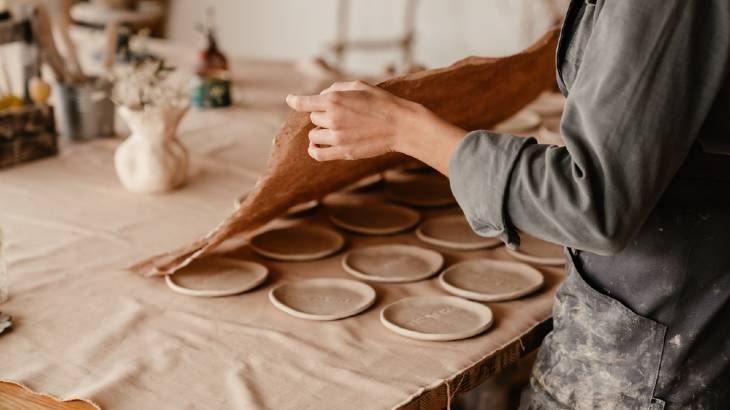
Air drying clay works well for small projects. Place the shaped mortar and pestle in a warm, dry area out of direct sunlight and allow 1-2 weeks for thorough drying. Turn the pieces periodically to ensure even drying. For quicker results, you can place the clay creations on a drying rack near a fan or heating vent to circulate air.
Larger clay pieces may require oven drying at low temperatures. After the clay has air dried until hard to the touch, place it in a cold oven and slowly increase the temperature to 180-200°F. Allow the clay to dry for 6-12 hours. Turn off the oven and let the pieces cool completely before removal.
No matter the drying method, resist any urge to speed up drying. Uneven or rushed drying causes interior moisture to become trapped, leading to cracks as the exterior continues to dry. Patience is key for properly drying your homemade clay mortar and pestle.
Firing/Baking
Firing or baking the clay mortar and pestle is a critical step to harden and strengthen the clay. When working with clay, it’s important to fire it at the proper temperature based on the type of clay used. Firing too hot or too fast can cause cracking or warping. Here are some tips for proper firing:
For earthenware clays, aim for a final kiln temperature of 1800°F – 2100°F. Bisque fire the clay pieces first to harden them before applying any glaze. The bisque firing temperature is usually around 1500°F – 1800°F. Ramp up the temperature slowly at first, around 200°F per hour until 1000°F. Then ramp up 100°F per hour until reaching bisque temperature. Hold at peak temperature for 2-4 hours.
For stoneware clays, the final kiln temperature should reach 2200°F – 2300°F. Do a bisque firing first, around 1900°F. Use a similar ramp up schedule, starting around 200°F per hour then slowing ramping up by 100°F near bisque temperature. Hold for 3-6 hours at peak bisque temperature before glaze firing.
Monitor kiln temperatures closely using cones or kiln controllers. Place cones inside the kiln to double check temperature accuracy. Carefully load pieces with space between them and use kiln posts or stilts if needed. Allow proper air circulation inside the kiln and exhaust venting.
Firing too fast can risk cracking or exploding pots. Take time to properly dry any handmade clay pieces before firing as well. With good clay preparation, slow ramp up times, and target peak temperatures, you can successfully fire your homemade clay mortar and pestle.
Sealing/Treating
After the mortar and pestle has been fired or baked, you may want to consider sealing or treating the surfaces. This can help improve the durability and protect the clay materials from damage during use. There are a few options for sealing and treating a homemade clay mortar and pestle:
Food-Safe Sealant
Applying a food-safe sealant is one good option for sealing the mortar and pestle. Look for sealants that are FDA-approved for direct food contact. A food-safe resin or wax can be brushed on or dipped over the surfaces to seal them. This will make the mortar and pestle impervious to moisture and prevent ingredients from being absorbed into the clay. It also gives an attractive sheen. Reapply the sealant periodically as needed.
Mineral Oil
Rubbing the surfaces with mineral oil is another food-safe way to seal and maintain a clay mortar and pestle. The mineral oil penetrates the clay to make it nonporous. Reapply occasionally to restore the protective coating. Just be sure to use pure mineral oil with no additives.
Beeswax
Melting pure beeswax and brushing it on the mortar and pestle will also seal and protect the surfaces. Beeswax has natural antibacterial properties too. Reheat and reapply the beeswax as needed for upkeep.
Vegetable Oils
For occasional sealing, you can rub unsaturated vegetable oils like olive oil, flaxseed oil or walnut oil into the clay. These will provide a temporary food-safe protective coating and need to be reapplied regularly with each use.
Any of these food-safe sealants or oils will help protect and extend the life of your homemade clay mortar and pestle. Apply the sealant of your choice and be sure to maintain it by reapplying as needed. Proper sealing and care will help ensure your handcrafted mortar and pestle can be enjoyed for many years.
Testing Materials
Once your clay mortar and pestle are complete, you’ll want to test them to make sure they function properly before regular use. Here are some tips for testing:
- Start with dry ingredients like peppercorns, allspice, or cinnamon sticks. Use a generous amount of the spice and grind it with your pestle against the mortar in a circular motion. The clay should abrasively break down the spices into a fine powder.
- Try grinding small batches of herbs like thyme, rosemary, or oregano. The leaves and soft stems should crush easily. Check for any sticks or hard stems getting caught in the clay surface.
- For ultimate testing, try grinding or mashing wet ingredients like garlic cloves, ginger root, or lemongrass. The mortar should withstand the pressure and friction without crumbling. Watch for any moisture absorption issues.
- Inspect the inside surface of the mortar bowl and the grinding end of the pestle after testing. There should be minimal wear, chipping, cracks, or scratches. Any damages will impact performance and longevity.
- Consider testing with dyes or pigments to check for any staining issues, especially if appearance is a concern. Some natural clays can absorb colors over time.
The goal is to ensure your handmade clay mortar and pestle can withstand repeated use with a variety of spices, herbs, and other ingredients without damage. Test thoroughly before relying on them for regular kitchen use.
Maintenance
Proper maintenance is key to keeping your clay mortar and pestle in good working order. Here are some tips:
- Always handwash – don’t put clay in the dishwasher!
- Use a soft sponge, cloth, or brush to gently scrub the mortar and pestle.
- Avoid abrasive scouring pads or powders which can scratch the clay surface.
- For stubborn residue, let the item soak for 10-15 minutes in warm water before scrubbing.
- Dry thoroughly after each use to prevent moisture damage over time.
- Apply a food-safe mineral oil periodically to protect and maintain the clay finish.
- Avoid exposing clay to extreme temperature changes, as this can cause cracks.
- Store in a dry location when not in use.
- Avoid banging or dropping, as clay can chip and crack.
- With proper care and maintenance, a clay mortar and pestle can last for years!
Conclusion
To summarize, creating a functional mortar and pestle from clay involves several key steps. First, select an appropriate clay that will be sturdy once fired. Next, shape the bowl of the mortar and the pestle using the desired techniques – whether throwing on a wheel, handbuilding, or molding. Allow time for thorough drying before the bisque firing, which hardens the clay. The higher the firing temperature, the stronger the finished mortar and pestle will be. After firing, consider sealing or treating the surfaces. Test that the materials work effectively together by grinding spices, herbs or other ingredients. With proper clay selection, shaping, firing, and maintenance, a homemade clay mortar and pestle can be a unique and useful addition to any kitchen.


