Can You Make A Mould Out Of Clay?
A mold or mould is a hollowed-out block that is filled with a liquid or pliable material such as plastic, glass, metal, or ceramic raw material in order to produce a specific shape once the material hardens. Molds have many uses and applications in processes like casting, injection molding, and glassblowing. They can be made from various materials, but clays are commonly used to create molds due to their malleability and ability to retain shape.
Clay is an excellent material to make molds and casts from. With the proper clay body and preparation, clays can capture fine detail and be used multiple times for casting or forming. There are several considerations when making a clay mold, such as choosing an appropriate clay, ensuring proper thickness and strength, cutting the mold properly before casting, and allowing adequate drying time. Overall, clay provides an accessible and versatile way to create molds and casted shapes and forms.
Types of Clay for Mould Making
There are a few different types of clay that can be used for making moulds:
Earthenware Clay
Earthenware clay is a low-fire clay that is very porous. It’s not the best choice for mould making as it can absorb moisture which can affect the finished cast. However, earthenware clay is inexpensive and easy to find (Source).
Stoneware Clay
Stoneware clay is stronger and less porous than earthenware clay, making it a better choice for mould making. It fires to a higher temperature which makes it more durable. However, it can still be prone to absorbing moisture so sealing the mould is recommended (Source).
Porcelain Clay
Porcelain clay is the strongest, most durable and lowest porosity option. It can withstand casting materials and release agents without deterioration. Porcelain has excellent dimensional stability for capturing fine details. This makes it the best choice for mould making (Source).
Preparing the Clay
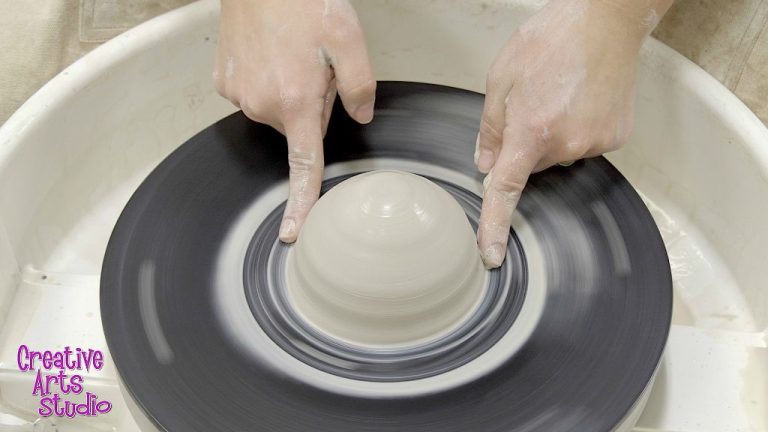
Properly preparing the clay is an essential first step when making a clay mold. The clay needs to be wedged and kneaded thoroughly to achieve the right consistency. Wedging involves folding and pressing the clay to remove air bubbles and create a uniform texture. Kneading helps warm up and soften the clay by working it with your hands.
The clay should feel smooth, pliable, and not too sticky or dry when ready for mold making. Having the right moisture level is key. If the clay is too wet, it can become misshapen as you shape the mold. If too dry, it can crack and be difficult to work with. Adding a few drops of water and continuing to wedge and knead will help moisten the clay. Allowing overly wet clay to air dry for a bit can reduce excess moisture.
Take your time preparing the clay. Proper wedging and kneading removes air pockets, blends ingredients evenly, and creates a workable texture. The clay should be soft but firm enough to hold its shape when handling. Test the consistency by shaping a ball. The prepared clay should smoothly mold without sticking too much or cracking at the edges. Once the clay is ready, you can begin sculpting the actual mold.
Shaping the Mould
Once you have prepared your clay, the next step is to shape it into the desired mould. This involves sculpting the clay to create the exact form you want your finished cast to take. There are a few techniques that can help when shaping your clay mould:
Using sculpting tools like loop tools, ribs, and pottery knives can help shape details and smooth surfaces. These tools allow you to refine edges, add textures, and create intricate shapes in the clay. As you sculpt, periodically use a soft rib tool to gently smooth away fingerprints and imperfections. This helps create a clean finished surface for casting. Refer to sculpting tutorials for guidance on using clay tools effectively [1].
Smoothing the surfaces with your fingers or tools gives the mould a uniform surface texture. This prevents air bubbles and gives a smooth finish to the final cast. Mist the clay lightly with water as you smooth to prevent sticking. Pay close attention to smoothing seam lines and joints where two pieces of clay meet. Blend these together thoroughly.
Work methodically and take your time to perfect every detail. Sculpting the mould properly ensures your finished cast will capture every nuance.
Letting it Dry
After you have shaped your clay mould, it needs sufficient time to dry before you can use it for casting. With air-drying clays, the drying time can take anywhere from 24 hours to several days depending on factors like the size and thickness of the mould, clay composition, and drying conditions.
For small, thin moulds made from rapidly air-drying clays like paper clay, drying time may only be 4-6 hours if placed in a warm, dry area with good airflow according to [https://www.youtube.com/watch?v=4jOEYiFvD-c]. However, larger or thicker clay moulds will likely take at least 24-48 hours to become leather hard, and another day or two to dry fully.
To speed up drying, place moulds in an area with circulating air, like near a fan or air vent. Avoid drying clay moulds in humid environments or covered areas, which can trap moisture and extend drying. You can also use a food dehydrator or low-temperature oven to accelerate drying, but make sure to follow safety precautions and monitor closely to prevent cracking.
For clays that require firing, such as earthenware or stoneware, the mould must be fully dried before placing in the kiln. Firing too soon can cause cracks or breaking. Allow moulds made from these clays to air dry for at least one week before firing according to manufacturer recommendations.
Making the Cast
Once your clay mould has dried completely, it’s time to make the cast. There are a few casting materials you can use including plaster, concrete, resin or metal depending on the application. Here are some of the most common options:
Plaster is an easy casting material to work with. Simply mix the plaster powder with water according to the manufacturer’s instructions until you achieve a smooth consistency. Slowly pour the plaster into the mould, tapping the sides gently to release any air bubbles. Let the plaster fully cure before unmoulding, usually 24-48 hours.
For concrete, use a concrete mixture blended for casting rather than construction. Mix it with water per the instructions and pour slowly into the mould as described above. Concrete takes longer to cure, around 3-7 days, before you can unmould.
Resins make high quality castings that pick up great detail from the mould. Epoxy resins are commonly used. Be sure to follow all safety precautions when working with resins. Mix the resin and hardener as directed and pour slowly into the mould. Resins cure more quickly than concrete or plaster, often within 24 hours.
For metal casting, clay moulds can be used to create simple jewelry pieces or small parts. Specialized casting metal alloys must be used. The metal is melted at high heat and then poured carefully into the mould to solidify.
No matter what material you use, make sure to let it fully cure and harden before attempting to unmould your cast piece. This will ensure the clay mould stays intact and avoids damaging your finished casting.
Unmoulding
Knowing when and how to safely remove your cast from the mould is a key step. If you unmould too soon, the cast may not come out cleanly or could become damaged. Waiting too long increases the chance of the cast getting stuck. The drying times will vary based on factors like the size and thickness of your cast, the type of material used, and the environmental humidity and temperature.
Test the edges gently first. If the cast moves freely from the mould, it is likely ready for removal. Be very careful when initially separating the two pieces. Once you create some space between them, you can work slowly around the edges until the cast comes free. Clay moulds are sturdy but still fragile, so work deliberately to avoid cracking or deforming the mould. According to wikiHow, letting a jelly mould stand in warm water for a few seconds can help loosen the contents for easy removal. This technique may work for other materials cast in clay as well.
Finishing the Cast
Once the cast has been removed from the mould and allowed to dry fully, some finishing work can help refine it. Cleaning up any small imperfections and adding decorative touches are typical finishing steps.
One important finishing step is smoothing out the cast surface. Any small bumps or rough patches should be gently sanded down. Start with a coarse grit sandpaper to remove bigger irregularities, then move to progressively finer grits to polish the surface. Be careful not to sand away desired texture or detail. Wipe away any dust between sanding sessions.
Applying paint, glaze or other coloring can significantly enhance the appearance of a plaster cast. Acrylic craft paints work well for hand-painting designs. Glazes formulated for ceramics can be brushed on or dipped to coat the entire piece with color and add gloss. Clear acrylic sealer can provide protection and light sheen. Allow sufficient drying time between coats. Creative finishes like antiquing, dry brushing and sponging effects can also be done.
Sources:
How to make a solid plaster cast from your clay sculpture.
Caring for the Mould
Properly caring for your clay moulds will help them last longer and make higher quality casts. After making a mould, there are some key steps to follow for storage and maintenance.
To store an unused mould, wrap it in plastic wrap or put it in a sealed plastic bag or airtight container. This prevents the clay from drying out and cracking over time. Store moulds in a cool, dry place out of direct sunlight. Keep the pouring hole faced down so excess moisture doesn’t collect inside the mould (Ceramic Arts Daily).
Before reusing a clay mould, inspect it for any cracks or defects. Use a damp sponge to gently clean the mould’s surface. Avoid soaking the mould or using harsh chemicals which could degrade the clay. Let the mould fully dry before pouring material into it. Apply a thin layer of cooking oil or mold release spray to prevent sticking. Handle the clay mould carefully when unpacking casts to prevent damage.
With proper storage and cleaning between uses, a high quality clay mould can be used for multiple casts over time. Just be sure to monitor its condition and remake it if the integrity declines.
Conclusion
In summary, making a mould out of clay can be a fun and rewarding craft project. With the proper clay and some basic techniques, you can create detailed moulds to make plaster, resin, or concrete casts. Clay moulds are inexpensive, reusable, and easy to work with. They allow you to reproduce complex shapes and details that would be difficult to achieve with other mould making methods.
Some of the benefits of working with clay moulds include:
- Clay is very affordable and accessible.
- Moulds can capture fine details and textures.
- The moulds are durable and can be used multiple times if cared for properly.
- Clay is flexible and easy to work with by hand.
- Moulds can be made quickly without special tools.
- Casts pick up impression of the clay’s surface texture.
With some creativity and practice, clay moulds open up many possibilities for DIY casting projects and handmade items. The process of making the original mould is enjoyable and artistic. Overall, clay offers an unparalleled versatility for mould making at home.


