Can You Make Anime Figures With Clay?
Anime figures have become increasingly popular collectibles among anime fans and pop culture enthusiasts. Though factory-produced PVC figures dominate the market, many fans enjoy the creative challenge of sculpting their own custom anime figures out of clay.
Clay sculpting allows artists to handcraft unique characters or recreate their favorite manga/anime designs. The history of clay figures ties back to Japan’s rich pottery traditions, but became more widespread as anime gained international popularity in the 1970s-80s. Fans now sculpt figures as a creative hobby, small business, or professional craft.
With some simple supplies and techniques, clay can be an accessible and fun medium for creating miniature anime sculptures at home. This guide will walk through the end-to-end process of sculpting and finishing an anime figure with polymer clay or air-dry clay.
Needed Supplies
To make anime figures from clay, you will need the following supplies:
Clay
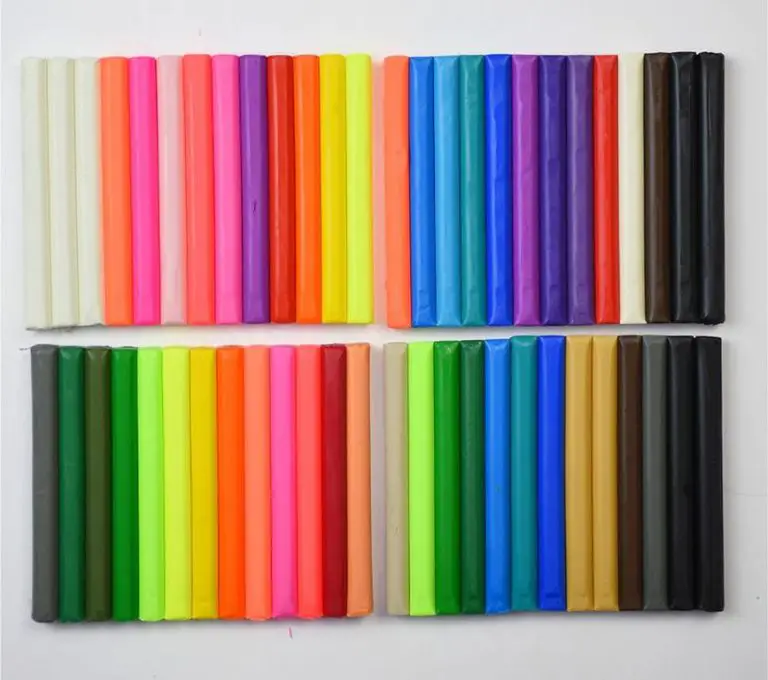
The type of clay you use depends on your personal preference and needs. Popular options include:
- Polymer clay – oven-bake clay that comes in colorful blocks. Well-suited for small, detailed sculptures like anime figures.
- Oil-based clay – Non-drying clay that stays malleable. Requires a clay oven or kiln to harden.
- Air-dry clay – Clay that dries and hardens at room temperature. Quick and easy to use.
Choose a clay brand and type designed for sculpting small, detailed pieces.
Sculpting Tools
Having the right sculpting and carving tools allows you to add finer details and textures to your clay figures. Useful tools include:
- Clay sculpting knives and loops
- Silicone sculpting tools
- Needle tools
- Clay shapers and brushes
Paint
Acrylic and enamel model paints are commonly used to hand-paint clay figures. You’ll need a variety of colors to match the designs and textures you want to create.
Clear Coat
A clear acrylic sealer or varnish will protect the finished paint job on your clay sculptures.
Sculpting Process
The sculpting process is the key to creating a unique, high quality anime figure from clay. It involves building up the basic shape and then adding intricate details and textures to bring the character to life. Here are the main steps:
Starting with an armature/frame
It’s best to start with an armature or wire frame to support the clay while sculpting. This involves bending thin wire into the rough pose and proportions you want, acting as the skeleton. Aluminum foil can also be wrapped around the frame to quickly build up basic shape.
Sculpting the basic shape
Once the frame is ready, you can start adding clay to sculpt the overall forms and proportions. Work from large masses to smaller details. Focus on the major body parts, clothing folds and hair shape first. Smooth and blend the clay as you build up the figure to get the basic anatomy and look established.
Adding details and textures
This is where you can really bring your anime character to life. Add finer details like facial features, hair strands, intricate clothing patterns and props. Use clay sculpting tools to etch textures into clothing, hair and props. Refine shapes and blend edges for a polished finish. Work carefully at this stage to capture the unique details of your character.
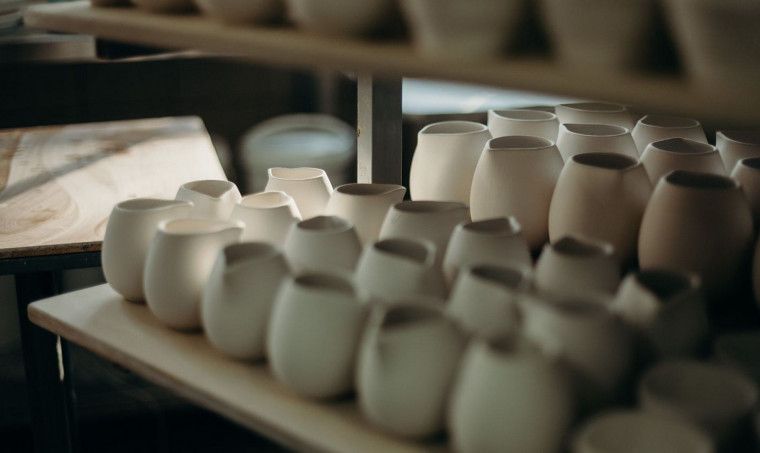
Baking/Drying
Properly baking or drying your clay anime figures is an essential step to ensure they maintain their shape over time. The process varies slightly depending on the type of clay used.
For polymer clay, carefully follow the baking instructions on the packaging. Typically, you’ll bake it in a conventional oven at temperatures ranging from 130°C to 150°C for 15 to 30 minutes. The clay must be heated to the proper temperature throughout to fully cure and harden. Baking for too short or at too low of a temperature risks figures becoming misshapen over time.
Air-dry and oil-based clays require longer drying time at room temperature. Oil-based clays may take anywhere from 24-48 hours to fully cure. Avoid handling the figures before they are completely hardened or you risk damaging the clay. You can test if oil or air-dry clay is ready by touching the surface lightly to check for softness.
Proper baking and drying ensures your DIY anime figures will maintain their shape and details once completed. Be patient and allow the clay to fully cure before displaying or painting them.
Painting
After the clay figure has been baked to harden, it is ready for painting. Proper preparation is crucial before applying paints. First, prime the entire figure with gesso or acrylic primer. This provides a smooth, uniform surface for the paint to adhere to.
Acrylic and enamel paints work well for handcrafted figures. Acrylics are water-based, making them easy to thin and clean up. Enamels are oil-based with very vivid colors, but require odorless mineral spirits for thinning and cleaning. Start with a basecoat of the main colors, then use techniques like washing and dry brushing to add details:
- Washing involves heavily diluting paints to a wash consistency and applying over an area. The wash settles into crevices for natural shading.
- Dry brushing loads a small amount of paint on the brush and wipes most of it off before lightly brushing over raised areas. This creates a textured, highlighted look.
Take your time and apply multiple thin layers to build up shading, textures, and a clean finish. Sealing with matte or gloss varnishes will also protect the paint.
Protective Coating
After your anime figure has been painted and given adequate time to fully cure, it’s crucial to apply some type of protective coating. This will guard the paint job against damage and wear over time. There are a few options for protective coatings to consider:
Varnish or Gloss – An acrylic varnish or gloss provides a nice sheen and protective barrier. Make sure to use an acrylic varnish formulated for models/figures, as this won’t yellow over time like some oil-based options. Apply in a well-ventilated area using thin coats. Let dry fully between coats.
Sealant – Modelling sealants create a durable, flexible protective layer. This prevents chipping or cracking as the clay naturally contracts a bit during curing. Water-based options like liquitex work well. Apply multiple thin coats and allow to fully dry in between.
No matter what product you choose, read the label closely and follow instructions. And remember – only apply a protective coating after the clay has fully cured, to prevent possible reactions with the paint. This will help ensure your homemade anime figure stays looking its best for years to come.
Advanced Techniques
Once you have mastered the basics of sculpting anime figures with clay, there are some advanced techniques you can try to take your creations to the next level:
Using Molds: For characters or objects you want to recreate precisely, make a mold using silicone or other molding compounds. Press your clay into the mold to efficiently recreate the same shape repeatedly.
Mixing Mediums: Try incorporating other materials like wool for hair, wire for structure and posing, or wood and fabric scraps for bases. This adds realism and durability to your finished figures.
Making Bases/Dioramas: Elevate your figures by sculpting an environment for them. Make a base resembling grass, pavement, or other terrain. Or go bigger by creating an elaborate diorama scene with various figures and scenery.
Sculpting a custom anime figure takes patience and practice, but incorporating advanced techniques opens up creative possibilities. With some imagination and the right materials, you can make professional-looking clay figures to proudly display.
Troubleshooting
When working with clay, especially for intricate figures, you may encounter some issues like cracking, paint rubbing off, or mistakes in the sculpting process. Here are some tips for troubleshooting common problems with clay anime figures:
Cracking or Breakage
If your clay sculpture develops cracks or breaks, there are a couple possible causes. Using clay that is too thin or fragile can result in cracks forming as it dries. Make sure to use polymer or oil-based clays which remain flexible when dry. Also, letting the clay sculpture dry too quickly by using high heat can cause cracking. Dry sculptures slowly at low temperatures.
For minor cracks, you can fill them in with liquid clay. For major breaks, you may need to re-join the broken sections using clay as adhesive and insert pins to hold it together while drying.
Paint Rubbing Off
If paint rubs off the clay surface, the paint may not have adhered well. Make sure to use acrylic paints designed for clay and mineral spirits for thinning. Apply in thin layers and seal each layer. Let dry fully between coats. Also, avoid handling the figure before the paint has fully cured.
You can fix paint that rubs off by cleaning the area then re-painting. Apply a clear acrylic spray sealant over the whole sculpture when finished painting to protect it.
Fixing Mistakes
Clay offers the advantage of being able to fix mistakes in the sculpting process. For small mistakes in the shaping, you can carefully smooth them out by massaging the clay. For larger mistakes, you may need to cut away the flawed section and re-sculpt it. Extra clay can be baked and then attached to fill in gaps or re-shape areas.
Take your time and make incremental changes to avoid over-correcting. Use sculpting tools to refine details. Mistakes can be fixed, so don’t be afraid to re-work sections until you’re satisfied with the finished figure.
Displaying Figures
After putting in the time and effort to create anime figures with clay, you’ll want to display them proudly and keep them looking their best. Here are some tips for effectively displaying clay anime figures:
Protecting from Dust and Sunlight
Dust can easily accumulate on anime figures and dull painted details. Display them inside a glass cabinet or shelving with doors to limit dust exposure. Keep them out of direct sunlight which can potentially fade colors over time.
Arranging Displays
Carefully arrange multiple anime figures together into appealing displays. Space them out evenly and position them interacting with each other. Rotate figures or prop them up with clear plastic stands for more dynamic and engaging displays.
Lighting
Strategic lighting can really make anime figures pop. Use accent lighting focused on the display to illuminate details and colors. Go for lighting that offers warm, natural color tones to enhance the figures.
Conclusion
Making anime figures out of clay can be a fun and rewarding hobby. This process allows you to tap into your creativity to design custom figures of your favorite characters. With some sculpting practice, the right supplies, and by following the key steps outlined here for sculpting, baking, painting, and protective coating, you can create beautiful clay anime figures to display.
The great thing about clay is that you can continuously refine and adjust a figure as you sculpt it. Clay provides a very flexible and forgiving medium to work with. If you make a mistake or want to alter something, you can simply rework the clay. And if you’re unhappy with a completed figure, you can always flatten it out and start over.
For those interested in diving deeper into this hobby, there are many online resources, books, and communities focused on sculpting anime figures with clay. Mastering the skills takes time and practice, but the payoff is having custom anime figures you created yourself. With a combination of patience, creativity, and persistence, clay can be an amazing medium for bringing your favorite anime characters to life.