Can You Make Candle Jars Out Of Clay?
Making candles jars out of clay at home can be a fun project and a great way to create custom, beautiful candle holders. With some basic ceramic skills and the right clay, you can shape and design the perfect vessel for your candles. Creating your own candle jars allows you to customize the size, shape, colors, and decorative details. Plus, making them yourself is often less expensive than purchasing expensive candle jars or containers. The process involves choosing the appropriate clay, hand-shaping the jars, allowing time to dry, firing the clay in a kiln, glazing or staining as desired, finishing the inside surface, and then finally pouring wax into the completed jar. With a little time and effort, you’ll have charming clay candle holders you made from start to finish.
Suitable Clay Types
When making candle jars out of clay, the type of clay you choose is important. The three main options are earthenware, stoneware, and porcelain.
Earthenware is the most common and readily available type of clay. It fires at lower temperatures, making it easy to work with. However, earthenware is porous and less durable than stoneware or porcelain. The finished piece will be more delicate.
Stoneware clay is stronger and less porous than earthenware due to higher firing temperatures. This makes stoneware jars more durable and watertight. Stoneware has a nice heft and feels substantial in the hand. It’s an excellent choice for candle vessels.
Porcelain clay is fired at the highest temperatures, resulting in a dense, vitrified, and non-porous finished product. Porcelain jars are thin, lightweight, and translucent. However, porcelain requires more specialized skills and is prone to cracking. It’s not the best choice for beginners.
For candle making, stoneware is likely the best balance of strength, durability, and ease of use. But earthenware can also work well with proper sealing. Porcelain looks beautiful but requires greater skill to work with successfully.
Shaping the Clay
There are a few different techniques you can use to shape your clay into a candle jar form with smooth, flat sides:
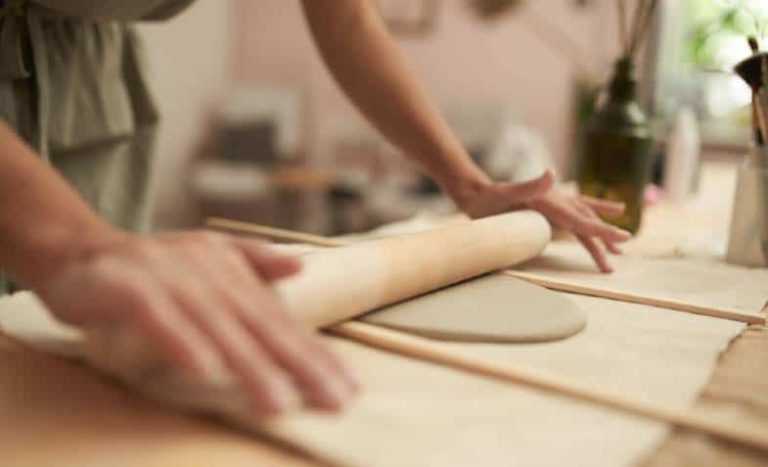
Rolling: One of the easiest ways is to roll out slabs of clay using a rolling pin on a flat surface. Roll the clay out to an even thickness of around 1/4-1/2 inch. Then you can cut out rectangular pieces that can be wrapped around a cylindrical object or form to create your jar shape. Smooth the seams well.
Molding: You can press the clay into a mold or cylinder shape to form the sides of the jar. Smooth the clay with your fingers or a rib tool to even out the surface. The mold will help establish the basic form.
Wheel Throwing: If you have experience with a pottery wheel, you can also throw a basic cylindrical shape to form the jar. Then trim and smooth the sides with a knife and rib tools. Throwing enables sculpting smooth, flat sides with ease.
The key for all these techniques is taking the time to smooth out the clay and create crisp corners and flat surfaces where the sides of the jar will be. This will help the candle jar maintain a clean cylindrical shape when fired.
Drying the Clay
Properly drying the clay is an important step to prevent cracking and ensure your candle jars remain structurally sound. There are two main methods for drying clay: air drying and kiln drying.
Air drying involves leaving the shaped clay out at room temperature until all the moisture evaporates. This is the slower method, but causes less stress on the clay. Place the jars in a dust-free space out of direct sunlight. Turn the jars periodically so they dry evenly. Air drying can take 1-2 weeks depending on the clay thickness.
Kiln drying uses a ceramic kiln to rapidly dry the clay jars. While faster, kiln drying can cause cracking if rushed. Heat the kiln no more than 200°F and allow plenty of ventilation. Slowly increase the temperature in increments of 50°F per hour. Rotate the jars and check for cracks frequently. Kiln drying may take 6-12 hours.
No matter the drying method, some key tips will help prevent cracking:
– Allow even, gradual drying rather than quick drying.
– Avoid overly thick clay walls, which take longer to dry.
– Keep jars covered when not drying to retain moisture.
– Consider adding grog (ground firebrick) to strengthen clay.
With care and patience during the drying process, your homemade clay candle jars will turn out perfectly crack-free and ready for firing.
Firing the Clay
Once the clay jars are fully air dried, the next step is to fire them in a kiln to harden the clay through a process called sintering. The required firing temperature depends on the type of clay used:
- Earthenware clays like terracotta require lower firing temperatures of around 1100°F to 2100°F.
- Stoneware clays require higher temperatures between 2200°F to 2400°F.
- Porcelain clays need to be fired at the highest temperatures above 2300°F.
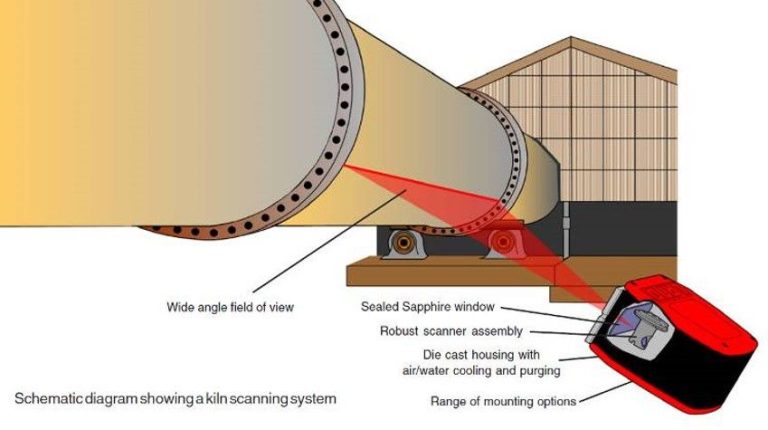
Firing can be done in an electric or gas-fueled kiln, which allows for precise control over temperature and heating time. Pit firing is another option that involves placing the clay pieces in a fire pit and burning wood or other organic materials. This more primitive firing method makes it harder to achieve the high temperatures and uniform heat needed for stoneware and porcelain.
It’s important to monitor the temperature inside the kiln or fire pit and heat the pieces slowly to avoid cracking. Pieces should be fired long enough at the peak temperature to fully harden the clay, which can take several hours. Allow the pieces to cool down gradually inside the closed kiln or pit after firing.
Applying a Glaze
Adding a glaze to the clay candle jar serves two key purposes – it improves the jar’s appearance with color and decoration, and it seals the clay to make the vessel non-porous and watertight. Glazing isn’t strictly necessary, but it enhances the look of the finished product and makes it more functional for holding candles.
There are many glaze recipes and techniques to explore when making clay candle jars. The most common is a clear glaze, often with a glossy or satin finish, in a neutral color like white, beige or gray. Tinted glazes in colors like light blue, green, yellow or pink can add a subtle pop of color. Metallic glazes with gold, silver or copper create an eye-catching shimmer. Layering or mixing glazes allows for custom color blends.
Glazes can be applied with several methods – dipping, pouring, brushing, or spraying. Ensure the bisqueware jar is free of dust before glazing. Apply in thin, even coats, taking care to fully cover the inside and outside surfaces. Use a test tile first to check that the glaze application technique and thickness will produce the desired results. Allow the glaze to dry fully before a second coat. Firing the glazed piece according to the clay and glaze manufacturer’s instructions will melt and fuse the glaze.
Preparing the Inside
Before the candle jar can be filled with wax, the inside surface needs to be properly prepared. This involves smoothing out any irregularities and sealing the porous clay.
Use fine grit sandpaper to smooth the interior walls of the jar, rubbing in a circular motion. Be sure to sand away any drips or rough edges. It’s also a good idea at this point to clean away any dust or debris. You can wipe the inside with a damp paper towel or cloth.
With the interior sanded smooth, you’ll need to seal the porous clay so wax doesn’t seep into it. There are a few options for sealing:
- Apply a thin coat of polyurethane or other sealant with a small paintbrush. Allow to fully dry.
- Brush a layer of melted wax on the interior walls. Let cool completely before pouring candle wax.
- Use a spray sealant formulated for ceramics and clay. Apply an even coating and let dry fully.
Sealing the interior properly will prevent the clay from absorbing the candle wax. This allows the wax to pool properly and prevents drips down the sides when the candle burns.
Making the Candle
One of the most important parts of making a candle in a clay jar is properly preparing and placing the wick. The wick size should be proportional to the size of the jar, as a wick that is too small will not burn efficiently and a wick that is too large could create overly tall flames. Generally, a good rule of thumb is to use a wick approximately 1/3 the diameter of the jar opening.
The wick should be centered in the jar, held taut and straight. Some candle makers recommend adhering the base of the wick to a penny or washer at the bottom of the jar with hot glue to help weigh it down. Others prefer looping the base of the wick around a chopstick or skewer laid across the top of the jar while the wax hardens to hold it in place.
When it comes time to pour the wax into the candle jar, the wax should be heated to 180 to 200°F to ensure proper melting and a smooth pour. The wax will need to be melted in a double boiler or slow cooker to reach the proper temperature. Carefully pour the wax into the jar, leaving approximately 1⁄4 inch of headspace to allow for expansion as the wax cools. Allow the candle to cool completely before trimming the wick to 1⁄4 inch length.
Troubleshooting
Making homemade candle jars out of clay can be tricky. Here are some tips for troubleshooting common issues:
Preventing Leaking
If your candle jar leaks wax, there are a few things you can try:
- Make sure the inside walls of the jar are smooth with no cracks or imperfections that wax could seep through.
- Apply multiple thin coats of glaze on the inside to fully seal and waterproof the surface.
- Allow the jar to fully cure and dry after bisque firing before pouring wax to prevent the clay from absorbing any moisture.
- Use a candle wax with a higher melting point so it remains solid at room temperature.
- Add a few drops of oil to the wax to make it more viscous and less likely to leak.
Preventing Cracking
To prevent your clay jar from cracking:
- Avoid making the walls too thin, which increases risk of cracks. 3/4″-1″ thick is ideal.
- Dry the jar slowly and evenly to prevent uneven shrinkage.
- Fire the jar at the ideal temperature recommended for the clay type to fully harden and vitrify it.
- Allow jars to cool slowly in the kiln after firing.
- Apply glaze smoothly and evenly to prevent drips that could pool and expand.
Preventing Burning
To prevent scorching or burning:
- Use a natural clay without any organic matter that could burn out.
- Fire at a high enough temperature to fully combust any organics.
- Test the kiln’s top and bottom temperatures to ensure even heat distribution.
- Elevate jars on stilts to avoid direct contact with kiln shelves.
- Keep wicks trimmed to 1⁄4” to prevent large, sooty flames.
Decorating the Jars
Once your clay candle jars have been fired and glazed, you can further customize them by decorating the outside. There are many creative ways to personalize your handmade candle vessels.
Paints
Acrylic and oil-based paints work well on bisqueware clay. Paint pens also allow you to add fine details and intricate designs. Let your creativity run wild with colors and patterns. Paint names, inspirational words, flowers, animals, landscapes, or abstract art onto your candles jars.
Carvings
Use clay carving tools to incise designs into the surface of the jars before firing. This imprints texture and fanciful etched patterns into the clay. Consider geometric shapes, nature motifs, or custom monograms.
Embossing
Emboss clay with rubber stamps or hand-carved patterns to create raised designs. Press braided cords into the surface to get an embossed look as well. Emboss names, dates, stars, leaves, or other images to make your candle jars one-of-a-kind.
Personalization
Monogram the jars with initials, names, or short texts for a thoughtful personalized gift. The options are endless when it comes to adding your own special adornments. Let the candles reflect the intended recipient’s style, interests, or favorite motifs.


