Can You Make Pottery With Red Clay?
Pottery refers to ceramic material that has been shaped and then hardened by firing at high temperatures. The term encompasses a wide variety of wares, including tableware, art objects, building products, and industrial ceramics.
Red clay is a natural clay material that has high iron oxide content, giving it a distinctive red color. It is one of the most commonly used types of modeling and pottery clay. When fired at high temperatures, red clay acquires a terracotta red-orange color.
This article provides an overview of making pottery using red clay. It will cover the properties and characteristics of red clay, steps for preparing it, tools and techniques for working with it, methods for firing red clay pieces, examples of red clay pottery, and tips for achieving the best results.
The purpose is to inform readers who are interested in making their own pottery using red clay. The article aims to give potters an understanding of how to work successfully with red clay and troubleshoot any issues that may arise when firing and finishing red clay pottery.
Properties of Red Clay
Red clay is a very common type of modeling clay that has been used for centuries to create pottery, sculptures, tiles, and other objects. The unique properties of red clay make it an excellent material to work with.
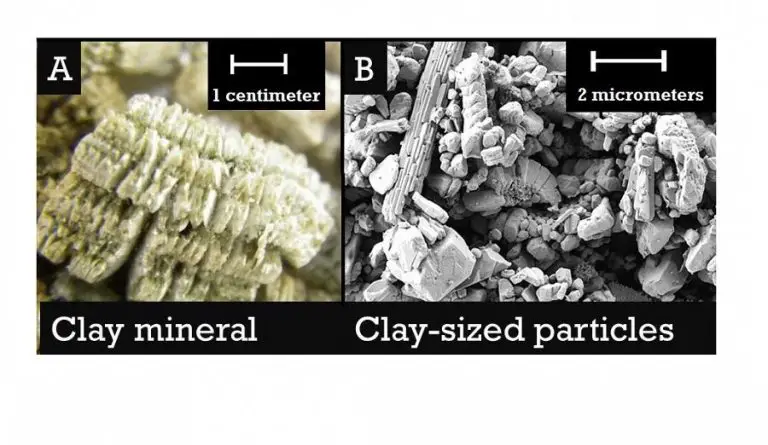
Composition: Red clay consists primarily of iron oxide, which gives it its distinctive red hue. It also contains various amounts of silica, alumina, and water. The varying mineral content affects the clay’s plasticity and firing characteristics.
Plasticity: Red clay is generally highly plastic and flexible when wet, which makes it easy to shape and mold. Plasticity refers to a clay’s ability to be deformed and coiled without cracking or breaking.
Firing Temperature: Red clay becomes dense and hard after firing or baking at high temperatures ranging from 1800°F to 2200°F. At these temperatures, chemical reactions occur that permanently set the clay body.
Coloration: The red color intensifies and becomes permanent once the clay is fired. The shade of red can vary from orange-red to burgundy depending on the mineral composition and the maximum firing temperature.
Advantages of Red Clay
Red clay offers several advantages that make it a popular choice for pottery and ceramic work. Here are some of the main benefits of using red clay:
Availability – Red clay is one of the most abundant and widely available natural clays. It can be readily found and sourced in many locations, making it easy to obtain for pottery projects. This accessibility and availability helps keep costs down.
Lower Firing Temperature – Compared to other clays like stoneware or porcelain, red clay requires lower kiln firing temperatures, generally in the range of 1800°F to 2100°F. This makes the firing process more accessible and economical. The lower temperatures also means faster firing times.
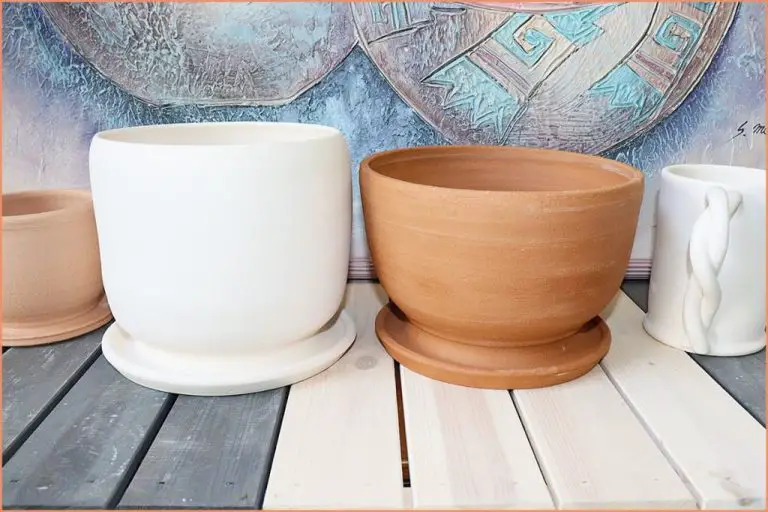
Vibrant Colors – When fired, red clay produces a beautiful terracotta or orange-red finish. The natural iron oxide content in the clay results in rich, deep red hues. Red clay’s ability to produce vibrant reddish colors makes it desirable for decorative ceramic ware.
Disadvantages of Red Clay
While red clay has many benefits for pottery making, it also comes with some drawbacks to be aware of. Some key disadvantages of working with red clay include:
Less Plasticity
Red clay tends to be less plastic and workable than other clays. Plasticity refers to a clay’s ability to be molded without cracking or crumbling. The high iron oxide content in red clay reduces its plasticity, making it more difficult to throw on the potter’s wheel successfully.
Higher Shrinkage
During drying and firing, red clay shrinks more than other clay bodies, usually around 8-12%. This high shrinkage rate can lead to increased cracking and warping. Managing the drying and firing process carefully is important when working with red clay.
Difficulty Getting Pure White
The iron oxide that gives red clay its distinctive color also makes achieving a pure white surface difficult. Even with the use of slips and glazes, red clay tends to give an off-white, beige, or pinkish tone rather than a bright white finish.
Preparing the Clay
Proper preparation of red clay is an essential first step before throwing or handbuilding pottery. Red clay in its natural state is usually too stiff and dense to work with directly. Some key techniques for preparing red clay include:
Processing
Processing refers to the initial steps taken to prepare raw clay after it has been mined or harvested. This involves removing any large rocks, debris, or contaminants. The clay is then further ground and sieved to achieve a uniform consistency.
Wedging
Wedging involves kneading and working the clay to achieve an even distribution of moisture and a homogeneous texture. This is done by cutting the clay into chunks and then slamming and folding it on a wedging table.
Mixing
Red clay can be mixed with other clay types or additives to modify its properties. For example, adding grog or sand makes it less sticky and easier to work with. Mixing in a small amount of ball clay improves its plasticity and throwing ability.
It’s important that any added materials are thoroughly incorporated to avoid weak spots or cracking during drying and firing. Test blends should be made first before mixing large batches.
Tools and Techniques for Red Clay Pottery
When working with red clay, having the right tools and mastering key techniques will help you craft beautiful pieces. Here are some recommendations:
Recommended Tools
For shaping and smoothing red clay, basic pottery tools like ribs, loop tools, and sponges work well. Ribs are rigid tools used to compress walls and smooth surfaces. Loop tools help enlarge openings and refine details. Sponges smooth surfaces and soften textures. You’ll also need cutting wires for trimming excess clay from bases and wheel throwing tools like bats and banding wheels if using a pottery wheel.
Shaping Techniques
Handbuilding techniques like pinch pots, coils, and slabs allow you to shape red clay without a wheel. Score clay surfaces before joining pieces so they adhere properly. Let pieces firm up partially before refining shapes. For wheel throwing, center clay properly and open walls gradually while maintaining an even shape. Use ribbon tools to refine walls, sponges to smooth surfaces, and wires to trim bases.
Surface Treatments
Consider layered glazes, colored slips, burnishing, sgraffito textures, or impression techniques to enhance red clay surfaces. Test combinations on test tiles before applying to finished pieces. Allow proper drying time between surface layers. Use clear glazes over red clay to enhance its natural color. Consider graphite or metallic buffing for an alternative finish.
Firing Red Clay
Properly firing red clay is essential for creating durable pottery. Red clay becomes vitrified and non-porous through firing, which strengthens the material. Firing temperature significantly affects the final color and properties of red clay.
The ideal firing range for red clay is around 2,000-2,300°F. Firing to higher temperatures results in a darker, richer red color. Lower firing temperatures around 1,800°F produce a lighter, brighter red. The clay needs to reach at least 1800°F to become fully vitrified.
Firing environment also affects color. Oxidation firing involves exposing the clay to oxygen during the firing process. This accentuates the redness of the clay. Reduction firing limits oxygen exposure, creating darker grays and browns.
It’s recommended to fire red clay in an electric kiln for the best control over temperature and atmosphere. Ramp up the temperature slowly at first, around 200°F per hour, to allow any moisture in the clay to evaporate. The final ramp up to maximum temperature can be faster, around 400°F per hour.
Test tiles should be included in each firing to check the effects of time and temperature on the clay body. This helps dial in the ideal firing cycle. Cool the kiln slowly after firing, around 150°F per hour, to prevent cracking from thermal shock.
With the right firing process, red clay can result in beautiful, durable pottery with a distinctive terra cotta red color.
Examples of Red Clay Pottery
Red clay has been used around the world for making pottery for thousands of years with unique styles and traditions associated with different cultures. Here are some examples:
Greek Red Figure Pottery
 A defining style of ancient Greek pottery made between 600 – 300 BCE involved painting black figures on a red clay ground. Intricate details and fluid lines characterize these red figure vases and kraters that often depict mythological scenes.
Minoan Terracotta Figurines
 Advanced pottery techniques allowed the Minoans on Crete to create detailed red clay terracotta figurines like the bare-breasted snake goddess around 1600 BCE. These figures give insight into Minoan religious practices.
Pueblo Pottery
 Native American Pueblo tribes like the Hopi perfected the use of red clay for making ollas, bowls, and other vessels. Their pottery features hand-painted ancestral designs representing animals and spiritual images.
Chinese Yixing Teapots
 In China’s Yixing region, artisans have crafted teapots, cups, and other tea vessels from red clay called zisha since the 15th century. Yixing teapots are prized for enhancing the tea drinking experience.
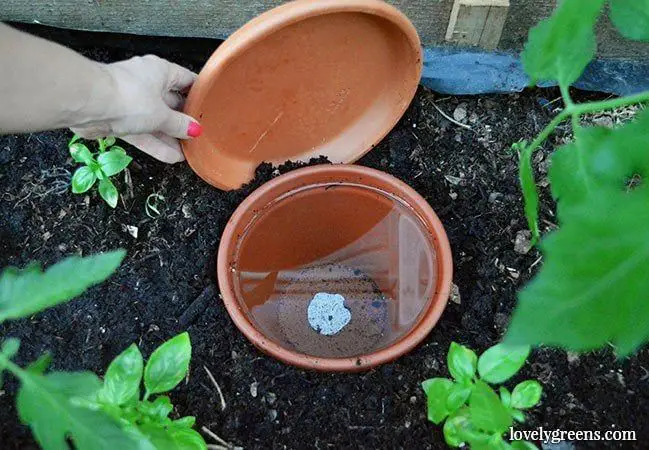
Native American Pinch Pots
 Simple hand-molded forms like coils, pinch pots, and other small vessels have been fashioned from red clay by Native American tribes for centuries as both functional pottery and ceremonial art.
Tips for Working with Red Clay
Red clay can be more challenging to work with than other clays, but with some tips and tricks, you can achieve beautiful results.
Avoid Cracks
Red clay has high iron content which can cause cracking during drying and firing. To prevent cracks:
- Avoid making pieces with thick and thin sections – keep walls evenly thick.
- Dry pottery slowly and evenly.
- Fire cautiously and optimize kiln temperatures.
Address Sticking and Resistance
Red clay’s sticky nature can make throwing challenging on the wheel. To make throwing easier:
- Keep clay very soft and knead well before using.
- Frequently sponge and keep hands/tools damp.
- Use plenty of clay lubricant such as vegetable oil.
- Avoid pressing down with too much force.
Improve Workability
You can improve red clay’s stiffness and dryness by:
- Letting clay age after wedging – waiting 7-10 days allows moisture to evenly penetrate clay.
- Mixing in small amounts of bentonite or ball clay.
- Misting work area while throwing to add humidity.
With patience and care, red clay’s natural beauty makes the extra effort worth it for finished pieces with deep rich tones.
Conclusion
Making pottery with red clay can produce beautiful and functional pieces for both novice and experienced potters. Red clay’s accessibility, workability, and bold color make it an ideal clay body to use. However, red clay’s high iron content and porous nature require proper drying, firing, and glazing techniques. When working with red clay, use the right tools, clay preparation, and firing methods to bring out the best results. Test different finishing techniques like burnishing versus glazing. With practice, red clay can make stunning pottery like bricked terra-cotta pots or richly saturated red vessels. Ultimately, red clay is a versatile, dynamic, and highly approachable clay that opens up creative possibilities for potters of all skill levels.