Can You Make Rings From Clay?
Clay is an incredibly versatile material that has been used for centuries to create both functional pottery and decorative sculptures and jewelry. The natural properties of clay make it an ideal medium for crafting rings. Clay is moldable and pliable when wet, allowing it to be shaped into any form. When dried and fired at high temperatures, clay becomes hard and durable while still retaining its molded shape.
There are many types of modeling clays and pottery clays to choose from when making clay rings, each with their own characteristics. An air-dry clay dries naturally at room temperature over time. Polymer clay bakes and hardens when cured in a regular oven at low temperatures. Traditional pottery clays require firing in a high-heat kiln at over 1000°F to fully vitrify and harden. The finished look of the clay ring depends on the type of clay as well as the glazes, paints, or textures applied.
Jewelry clay enables endless creative possibilities for designing rings. From simple bands to elaborate carved pieces, clay allows you to make completely customizable rings to your exact taste and size. The hands-on process of sculpting the ring makes it an even more meaningful and personal accessory to wear.
Types of Clay for Jewelry Making
When it comes to making clay rings, there are a few main types of clay that work well:
Polymer Clay – This extremely versatile clay maintains its shape after baking and comes in a wide variety of colors. Polymer clay can be conditioned and blended to create custom colors. It’s smooth, non-sticky texture makes it easy to work with. Popular brands like Sculpey and Fimo are readily available.
Air-Dry Clay – As the name suggests, this clay dries and hardens at room temperature, without requiring heat from an oven. It’s an accessible choice for beginners. Air-dry clay is lightweight and easy to reshape as needed before drying. However, it can dry out quickly while working with it.
Oven-Bake Clay – With a texture similar to polymer clay, oven-bake clays harden when exposed to low heat in a standard oven. They allow for very detailed shaping. Oven-bake clays like Sculpto-Firm hold their shape nicely for handling before baking.
Whichever clay type you choose, make sure it’s intended for making jewelry pieces. The clay needs to be strong enough to maintain intricate shapes without cracking or breaking easily. Polymer clays and oven-bake clays tend to be the best choices for stunning and sturdy handmade clay rings.
Tools and Supplies Needed
Making clay rings requires just a few essential tools and supplies:
- Clay tools: clay roller, cutters, mold, carving tools, etc. to shape the ring
- Baking supplies: baking paper, clay firing surface or kiln
- Finishing supplies: sandpaper, glaze, varnish, sealant
- Decorating supplies: stamps, texture sheets, paints
- Others: ring blank, ring mandrel, popsicle stick, toothpick, water
Having the right basic tools and supplies makes clay ring making much easier. Invest in a few key items like a roller, cutters, mold, etc. to shape the rings. Baking paper prevents sticking. Glazes and varnishes add color and seal the clay. With the essentials, you’ll be able to craft beautiful polymer clay rings.
Making the Clay
Before you can start shaping your clay rings, you need to properly prepare the clay. This involves a process called “wedging” which softens the clay and removes any air bubbles. Here are the steps:
Start with a lump of clay and cut it into smaller sections if needed. Flatten each section into a slab using a rolling pin or your palm. Then fold the clay slab in half and press down firmly to push out any air pockets. Give the clay a quarter turn and repeat the folding/pressing process. Continue wedging, turning and folding the clay until it feels soft, smooth and pliable.
You can also wedge clay by kneading it with your hands. Flatten the clay into a slab then gather it up into a ball shape. Use the palms of your hands to push into the ball and knead it like bread dough. Keep kneading and turning the clay until it reaches the desired consistency.
Properly wedged clay should be smooth, elastic and have no cracks or air bubbles. A graduated color throughout the clay indicates thorough wedging. Take your time with this step, as properly prepared clay is essential for constructing smooth rings.
Shaping the Ring
Once you have prepared your clay, it’s time to start shaping it into a ring. There are a few different techniques you can use to form the basic ring shape before decorating and baking.
One option is to press the clay into a ring mold. Ring molds come in many different sizes and shapes, allowing you to easily create a perfect band. Lightly rub a thin layer of oil into the mold, then firmly press your clay into it, making sure to fill all edges. Carefully remove the clay and you’ll have a uniform ring form ready for baking.
You can also shape the ring freehand. Roll balls or snakes of clay between your palms until they are the desired thickness. Connect the ends together, blending them smoothly. Use your fingers to refine the shape and size. This takes practice, but allows you to create more organic, handcrafted designs.
For a uniform shape, roll out a slab of clay with an acrylic roller on a smooth surface. Cut ring band shapes using cookie cutters or trace a ring blank template. Use a craft knife to cut out the shape. Add an inlay or decorative elements before baking.
Take your time shaping the ring to get a comfortable, consistent band. Refine and smooth the shape by rubbing gently with your fingers. Allow the clay to firm up slightly before handling.
Texturing and Decorating
After the basic ring shape has been formed, the fun part begins – adding unique textures, patterns, and embellishments. There are endless options for personalizing a handmade polymer clay ring.
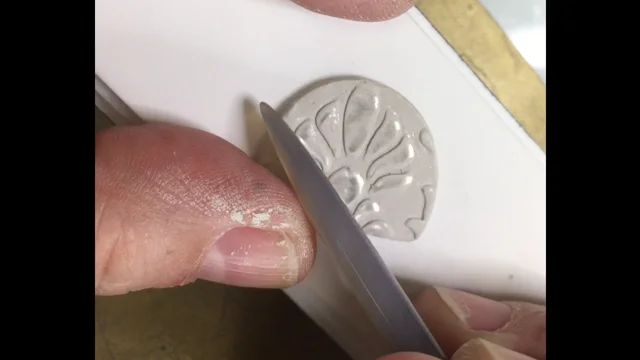
One easy technique is simply pressing the clay with objects around the house to imprint textures and designs. You can try pressing with coins, seashells, leaves, doilies, cheesecloth, rubber stamps, or anything with an interesting pattern. Get creative with household items!
Clay tools like rollers, molds, cutters, and shape shapers can also add organized patterns like stripes, polka dots, flowers, stars, etc. Clay extruders are useful for making beads and decorative shapes to attach onto the ring band.
Consider applying liquid polymer clay as an adhesive to affix flat or dimensional embellishments. This could include beads, charms, mini clay sculptures or canes, rhinestones, glitter, ribbons, lace, hemp cord, etc. The design options are endless.
Paints, powders, and alcohol inks can be used to add color and designs. Metallic rub-ons supply an eye-catching shimmer, while chalk pastels can provide a soft, blended effect.
Lastly, glazes and finishes like pearl ex powder, transparency liquid, or gloss varnish can be brushed over the top to seal and amplify the beauty of your personalized design.
Baking/Curing the Clay
Once your clay ring is shaped and decorated, it needs to be properly cured through baking or air drying to harden and finish the piece. The required baking temperature and time will depend on the type of clay used.
Polymer clay rings require baking in a conventional or toaster oven at relatively low temperatures, usually between 265-275°F. Bake polymer clay for 15-30 minutes per 1⁄4 inch of thickness. Check on the clay a few times as it bakes to ensure it doesn’t burn. The clay should be firm when fully cured.
Air dry clays will not require baking, simply allow the finished pieces to air dry for 24-48 hours. Ensure the climate is relatively warm and dry. Dropping a few pieces of dry spaghetti into the damp clay can help speed up drying time. Once hardened the surface can be sanded smooth.
Other clays like resin or paper clay have different temperature requirements based on brand specifics. Follow manufacturer guidelines closely. Start with shorter baking times for these homemade clays, testing for doneness occasionally to avoid over-baking.
Allow all clay rings to fully cool and harden before wearing or handling further. Proper curing is key for durability and safe wear.
Finishing Touches
Once the clay ring has been properly baked and cured according to the manufacturer’s instructions, there are some finishing touches that can enhance its appearance and durability:
Sanding – Lightly sanding the ring with fine grit sandpaper will smooth any rough edges and create a more polished look. Start with a 400 grit sandpaper and work up to 600 or 800 grit for the smoothest finish.
Sealing – Applying a sealant like polyurethane, beeswax, or a matte sealer will protect the clay from moisture and give it a nice sheen. Choose a water-based sealer for polymer clay. Brush or wipe the sealer on evenly and let it fully dry.
Buffing – Use a soft polishing wheel or cloth with a jewelry polishing compound to buff the ring to a bright luster. Take care not to over-buff, which can cause excess heat and damage the clay.
Applying a Protective Coating – For extra durability, a clear nail polish or spray acrylic sealer can be applied as a protective top coat. This helps protect the finish from scratches and seals in any painted or stained designs.
With these finishing touches, your polymer clay ring will have a beautiful, smooth finish and professional-looking shine that highlights the colors and textures of the design.
Wearing and Caring for Clay Rings
Clay rings can be delicate, so it’s important to take proper care of them to prevent chips, cracks, and breakage. Here are some tips for keeping your clay rings looking their best:
Avoid wearing clay rings when doing household chores or activities that are rough on the hands. The clay can chip if banged around too much. Save clay rings for special occasions or days at the office.
Apply a protective sealant like polyurethane or epoxy resin to make the clay more durable and water-resistant. Multiple thin coats allow the clay to remain flexible.
Store clay rings carefully when not being worn. Wrap them individually in soft cloth or place inside a ring box to prevent them rubbing against each other.
Remove clay rings when washing hands, showering, applying lotions, or coming into contact with chemicals like chlorine. Water and other materials can stain the clay.
Clean clay rings by wiping gently with a soft, dry cloth. Avoid submerging them in water or using soap and water which can degrade the clay over time.
Avoid extreme temperature changes like leaving clay rings next to a hot window or in a cold car. Heat and cold can cause cracking.
Examine clay rings frequently for any cracks or damage. Small cracks can be repaired with liquid clay. Refrain from wearing damaged rings until repaired.
Handle clay rings with care to prevent drops, impacts, or pressure that can chip and crack the clay. Clay is durable but not invincible.
With proper care and handling, clay rings can provide years of stylish wear. Follow these tips and enjoy your handcrafted clay jewelry creations.
Inspiring Clay Ring Designs
Clay rings allow for endless creativity in shapes, textures, and designs. Here are some unique and inspiring clay ring ideas to spark your imagination:
Natural Elements – Incorporate natural items like dried flowers, leaves, seeds, twigs, sand, or tiny seashells. Press them gently into the clay or attach with liquid clay. This adds organic texture and a touch of nature to your ring.
Patterns and Shapes – Cut custom shapes from colored clay like stars, hearts, triangles, squares, etc. Arrange into patterns for geometric interest. Stripes, polka dots, chevron, and moroccan-inspired patterns work beautifully.
Words and Letters – Spell out words, names, dates, or inspirational phrases using thin coils of contrasting colored clay. Add meaning and personalization to your one-of-a-kind ring.
Quirky Charms – Mini animal charms, game pieces, toy cars, or tiny plastic objects make for fun and quirky accents. Slightly press them into the top or sides of the band.
Texture Play – Experiment with clay texture tools, rubber stamps, or household objects to imprint patterns. Try mesh bags, bubble wrap, doilies, sequins, etc. for unique effects.
Layering – Stack and adhere multiple thin bands of clay in different colors and widths. This gives depth and a striped look when viewed from the side.
Mosaic – Cut the clay into tiny pieces to arrange into a mosaic pattern. Use a variety of colors and shapes for visual interest. Perfect for geometric, abstract or nature-inspired designs.
Embellishments – Add sparkle or color with beads, glitter, mica powders, alcohol inks, decals, charms, etc. The options for embellishing clay rings is endless!