Can You Make Your Own Terracotta?
Terracotta, meaning “baked earth” in Italian, refers to clay-based ceramics that have been fired at high temperatures. Terracotta pottery and sculptures have been crafted for thousands of years across many cultures. Today, terracotta remains a popular material for pots, vases, tiles, and decorative objects due to its rustic reddish-orange color, porous texture, durability, and artisanal appeal. With some basic materials and techniques, it’s possible to make your own terracotta creations at home. The DIY process allows you to customize pieces exactly how you want. Making your own also costs a fraction of purchasing mass-produced terracotta.
Benefits of Making Your Own
Making your own terracotta pots at home has several advantages over purchasing mass-produced pots. One of the main benefits is significant cost savings. Store-bought terracotta pots can range from $5-$50 each depending on size and quality. Creating them yourself allows you to produce many pots for just the cost of clay, which is very affordable. According to The Garden Journal, handcrafting terracotta at home saves at least 50% compared to buying pre-made pots.
Another benefit is the ability to customize and personalize your pots. Mass-produced pots only come in set sizes and shapes, but homemade ones allow you to experiment with different designs. You can press textures into the wet clay, add handles or feet, create unique glazes, and make just the right shape and size you need for each plant. The satisfaction and pride that comes from creating something yourself is another major advantage. The process of designing, sculpting, and firing your very own pots that you grew plants in is incredibly rewarding.
Materials Needed
The main material needed to make your own terracotta is the clay. Terracotta clay has high iron content which gives it its distinctive red-orange color when fired (https://www.soulceramics.com/pages/what-is-terracotta-clay-made-of). It can be purchased from art supply stores, ceramic suppliers, or online retailers. Look for clay labeled as ‘terracotta’ or ‘red clay’.
In addition to the clay, you’ll need some basic pottery tools like a potter’s wheel or slab roller for shaping, cutting wires, ribs and loop tools for smoothing, and sculpting tools like knives and ribs. Water and slip are used to condition and join pieces of clay.
Glazes will provide color and finish after firing. You can purchase premade glazes or mix your own from raw materials. Clear glazes work well on terracotta to enhance the natural color.
Finally, you’ll need access to a high temperature kiln or oven that can reach over 2100°F to fully fire the clay (https://thepotterywheel.com/what-is-terracotta-made-of/). Kilns allow more control and uniform heating than a standard oven.
Clay Selection
There are many types of clay that can be used to make your own terracotta at home. Some key properties to look for when selecting clay include:
- Plasticity – The clay needs to be moldable and able to hold its shape when worked.
- Porosity – More porous clays will absorb more water which can lead to cracking.
- Firing Temperature – Lower firing clays (earthenware) are easier to fire at home than higher firing clays like stoneware or porcelain.
- Color/Appearance – The natural color of the clay body will affect the final look.
Some common clays used for terracotta include:
- Terracotta Clay – An earthenware clay that fires to a reddish orange color. It has good plasticity and fires at a lower temperature.
- Queen Terracotta – A pre-mixed clay ready for handbuilding and firing to cone 06.
- Red Earthenware – Has a denser body than terracotta and fires to a deeper red/brown.
- White Earthenware – Can be left unglazed for a light terra cotta look. Lower plasticity.
Choose a clay body suited to your project and availability of firing temperatures.
Preparing the Clay
Before clay can be shaped into a piece of pottery, it must be prepared properly. The main goals in preparing clay are to remove any air bubbles and achieve an even, workable consistency. The two main techniques for preparing clay are kneading and wedging.
Kneading clay is much like kneading bread dough. It involves pressing, folding, and pushing the clay to work it until smooth and pliable. Kneading by hand warms the clay and makes it more malleable. It also pushes any trapped air bubbles to the surface where they can be removed. Kneading is best for small amounts of clay. For larger amounts, wedging is more practical.
Wedging involves cutting the clay into chunks and then throwing it down onto a hard surface. This process squeezes out air pockets and integrates water evenly throughout the clay. Repeating the process over and over, while forming the clay back into a ball shape, readies it for throwing on the potter’s wheel or handbuilding. The clay should end up with a smooth, elastic, lump-free texture. Consistency is key – too wet and the clay will be sticky and prone to collapse, too dry and it will crack during shaping.
With practice, you’ll learn the right moisture level for clay. Prepared clay should feel cool, firm but supple, and not sticky. If needed, mist water on dry clay or allow wet clay to air dry slightly before use. Take time to properly knead and wedge your clay, as it makes the rest of the pottery process much easier. (Source: https://thepotterywheel.com/how-to-prepare-clay-for-pottery/)
Shaping Methods
There are several techniques that can be used to shape terracotta clay. Some of the most common methods include:
Pinching
Pinching is one of the most basic clay sculpting techniques. It involves squeezing and pinching the clay between your fingers and thumbs to form different shapes. This method works well for making small handbuilt pieces like cups, bowls, and figurines. Pinch pots are a common beginner project to learn this technique. For more on getting started, see this pinching tutorial from Ceramic Arts Network.
Coiling
The coiling technique involves rolling out ropes or coils of clay and stacking them on top of each other to build up height. Coiling is great for making tall vessels like vases, jars, and cylinders. To coil build, roll clay into long snake-like coils, then stack the coils vertically while smoothing each seam together. This tutorial from Instructables shows the coiling process step-by-step.
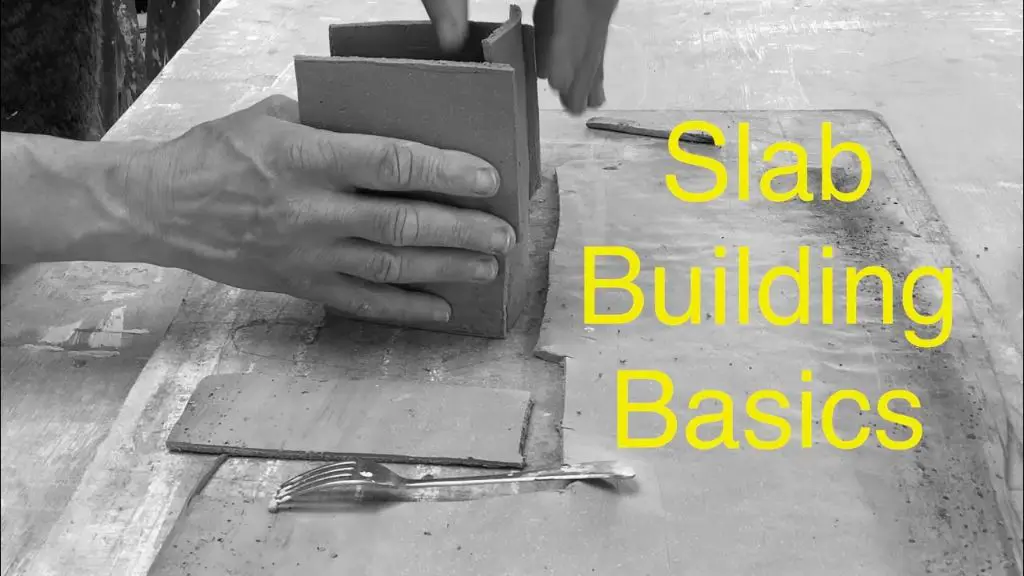
Slab Building
Slab building involves rolling out flat, even sheets or slabs of clay that can be cut into shapes and assembled. This technique is commonly used to make flat surfaces like tiles, plaques, and tableware. To slab build, use a rolling pin to roll out clay to an even thickness. Cut out shapes using cookie cutters or a knife. Decorate and assemble pieces using slip and score techniques. Get started with slab building from this Ceramic Arts Network tutorial.
Wheel Throwing
Wheel throwing involves working clay on a pottery wheel to form symmetrical round shapes. This technique takes practice but allows creating refined vessels with thin, even walls. Center clay on the wheel and open up the form as the wheel spins. Use your thumbs to shape the interior and fingers to smooth the exterior. Learn wheel throwing basics in this step-by-step Ceramic Arts Network tutorial.
Drying & Firing
After shaping your terracotta clay creations, you’ll need to slowly dry them before firing. Drying too quickly can cause cracking or warping. Allow pieces to air dry for several days in a cool, dry location away from direct sunlight. You can also use a food dehydrator on the lowest setting. According to https://community.ceramicartsdaily.org/topic/1954-how-to-fire-terracotta-can-bisque-be-skipped/, terracotta does not require a bisque firing, but bisque firing at a low temperature like
1650°F can help strengthen pieces before the final firing.
For the final firing, fire terracotta between Cone 06 and Cone 02 which is approximately 1723°F to 2012°F. Ramp up the kiln slowly at about 200°F per hour. Add 10-15 minutes of hold time once reaching the target temperature before shutting off the kiln. Allow the kiln to cool completely before removing fired pieces.
Applying Glazes
Glazing your homemade terracotta gives it a finished look and seals the surface. There are various low-fire glazes specially formulated for terracotta and earthenware that work beautifully. According to ceramicartsdaily.org[1], popular glaze choices include matte glazes, crystalline glazes, and low-fire reactive glazes which create interesting effects.
When applying glazes, make sure the terracotta is completely dry first. Use a soft brush to apply one or two thin, even coats of your chosen glaze. Let each coat dry fully before adding another. Too many thick layers of glaze may cause cracking or crazing when fired. If using multiple glazes, apply them separately in layered coats rather than mixing.
For best results, follow the manufacturer’s instructions for application and firing. Low-fire glazes usually require firing between Cone 05-02 which is 1650-1800°F. After firing, the glazed terracotta will have a durable, glassy finish.
[1] https://community.ceramicartsdaily.org/topic/14478-glazing-terracotta/
Tips & Tricks
When making your own terracotta pottery, there are some tips and tricks to follow for the best results. According to ruralhandmade.com, focusing on a smooth surface, consistent thickness, and test tiles can help improve your homemade terracotta.
After wedging and preparing your clay, try to maintain an even thickness as you shape your terracotta. Using a guide like a rolling pin can assist with keeping the thickness consistent. Smoothing the outer and inner surfaces will also create a nicer finished product. Use your fingers, a ribs, or a metal kidney tool on leather hard clay to gently compress and smooth the terracotta surfaces.
It’s a good idea to make some test tiles before attempting your first large terracotta project. Test tiles will show you how the clay responds to shaping and what happens during the drying and firing stages. You can troubleshoot any cracking or warping issues with test tiles before making your final pieces.
Conclusion
Making your own terracotta at home can be a fun, creative, and rewarding hobby or craft. With a bit of practice, you can shape beautiful pots, sculptures, tiles, and more using simple materials like clay, water, and glazes. The process allows you to work with your hands to bring your artistic visions to life.
Through this guide, we covered the key steps for making your own terracotta successfully. From choosing and preparing the clay, to different shaping methods, proper drying and firing, and applying glazes for finishing touches. While it takes some trial and error, you now have the core knowledge needed to start creating your own terracotta pieces.
If you want to take your skills further, there are many resources available. Look for books, videos, and classes on pottery at local art centers. Joining a ceramics studio with communal kiln access can make firing your creations much easier. Start simple and don’t get discouraged – with a bit of practice, you’ll be amazed at the beautiful terracotta objects you can craft yourself.