Can You Mix Different Glazes Together?
Glazes are coatings applied to pottery and ceramic ware that create a glassy, non-porous surface after firing. Glazes come in different colors, textures, and effects. They serve both aesthetic and functional purposes by decorating the piece and sealing the surface.
When it comes to glazes, many potters wonder if they can mix different glaze recipes together to create custom colors and textures. This article will explore the ins and outs of glaze mixing. We’ll discuss reasons to mix glazes, factors that affect compatibility, proper mixing techniques, and tips for avoiding common problems. You’ll also find a selection of interesting mixed glaze recipes to try in your own studio.
Reasons to Mix Glazes
There are several good reasons why a potter or ceramic artist may want to mix different glazes together rather than using them straight from the container:
Mixing glazes allows artists to achieve new colors and effects that may not be available in a commercial single glaze. By blending different glazes, unique combinations of colorants and opacifiers interact to produce new hues and visual qualities. The mixing process provides more control over the final look. For example, mixing a
transparent glaze with an opaque white glaze will soften and lighten the color (source).
Another reason to mix glazes is to use up leftovers. Most glazes are sold in larger quantities than a potter may need for a single project or set of pieces. By combining and remixing excess glaze rather than throwing it out, the shelf life can be extended and less product goes to waste.
Finally, mixing glazes allows for creative experimentation. Half the fun of ceramic arts can be testing different layerings and blend ratios to discover exciting new finishes. The mixing process lets artists unleash their creativity.
Factors that Affect Glaze Mixing
There are several key factors that impact how glazes will interact when mixed together. According to Digitalfire, the most significant are: glaze chemistry, base glazes used, and ratios mixed.
Glaze chemistry refers to the oxide composition and molecular structure of the glazes. Glazes with similar chemistry and ingredients tend to be more compatible. However, small differences in oxides like SiO2, Al2O3, B2O3, Na2O, and K2O can cause major issues when mixed, as explained by ceramic chemist Olivia Aspegren.
The specific base glazes used also matter. Mixing a cone 6 and cone 10 base may cause crawling or other defects. Using bases from the same manufacturer and designed to be mixed helps increase compatibility. According to Aspegren, bases should have chemistry profiles within the same range.
Finally, the ratios used when mixing glazes is key. Ratios of 50/50, 75/25, or minimal additions vs. overpowering amounts impact results. Gradually mixing test amounts first is advisable. Overall, an awareness of chemistry, bases, and ratios sets up successful glaze mixing.
Compatible vs Incompatible Glazes
Not all glazes will work well when mixed together. Some glaze combinations are incompatible and can cause issues like crazing, shivering, blistering, crawling, and flaking https://thepotterywheel.com/mixing-different-types-of-glaze/. In general, mixing glazes with similar chemistry and thermal expansion is key for compatibility.
Analyzing the oxide makeup of glazes can help determine compatibility. Glazes high in silica, alumina, and fluxes like soda and potash tend to have higher expansion rates and work best together. High-calcium glazes with lime and dolomite have lower expansion rates. Mixing high-expansion and low-expansion glazes often causes crazing and shivering https://digitalfire.com/article/crazing+in+stoneware+glazes%3A+treating+the+causes%2C+not+the+symptoms.
The safest approach is to test combinations on test tiles before applying them to finished pieces. Layering test strips and firing to observe reactions like crawling, crazing, and excessive bubbling is key. It’s also helpful to test layering order, as the underlying glaze can impact the overlying one.
Mixing Process
Proper glaze mixing technique is crucial for achieving consistent results. Here are some key steps to follow:

Start by ensuring all tools and containers used for measuring and mixing are clean. Any contaminants or residues can throw off the glaze chemistry and cause unpredictable results. It’s best to use containers dedicated just for glazes to avoid cross-contamination.
When measuring out glaze ingredients, accuracy is vital. Use an accurate scale for dry materials like oxides and carbonates. For liquids like water or vinegar, carefully measure amounts in graduated cylinders or measuring cups. Even small measurement errors can alter the fired outcome.
Once ingredients are measured, mix thoroughly to fully incorporate all components. Dry powders should be blended completely so there are no streaks or uneven patches. Adding liquid to powders requires especially vigorous agitation to break up any clumps and hydrate all particles. Insufficient mixing can lead to crawling, cratering, or other defects.
Mixing equipment like blenders, drill attachments, and whisks can speed the process. But hand mixing with a paddle or spatula works too with some elbow grease. The key is taking enough time to achieve an even, homogeneous mixture.
Following meticulous measuring and mixing steps helps remove variability from the process. This allows the glaze chemistry itself to fully determine the results.
Test Mixes Before Using
Before using a glaze mixture in your artwork, it is important to first test it out on sample tiles. As noted in this article, “Even for well-known glazes, it’s important to first make small tests. For these tests, I use 50g or 100g of material and apply the test glaze…” (Source). There are a few key steps in the testing process:
Test tiles – Make some plain test tiles out of clay and bisque fire them. Then apply small samples of your glaze mix to the test tiles. This will allow you to see how the mix interacts with the clay and handles in firing without ruining a piece.
Observe firing results – Fire the test tiles according to the intended glaze firing temperature. Closely observe the results – look for color, texture, breaking, crawling, etc. As one source advises, “Seeing the visual results of this test is really helpful to demonstrate the importance of mixing well.” (Source)
Adjust ratios if needed – If the test results are not what you expected or intended, you can tweak the glaze mix ratios. Re-test until you achieve your desired results. “This allows the use of cross multiplication to figure out how to adjust a glaze that is too dark or too light.” (Source)
Taking the time to properly test your glaze mixes will ensure you don’t ruin your finished ceramic pieces. Test tiles and firing provide valuable information to perfect your glaze mixture.
Tips for Successful Mixing
When mixing glazes, it is important to take things slowly and methodically to achieve the best results. Here are some tips:
Go slow – Mixing glazes requires patience. Add ingredients gradually and stir thoroughly between each addition. Rushing through the process can lead to uneven mixing and inconsistent results in the finished glaze. Taking your time ensures even blending and distribution of ingredients.
Take notes – Documenting the specific ingredients, ratios, mixing process and results is crucial for reproducing successful glaze mixes. Develop a system for recording glaze recipes, adjustments made, test tiles, firing results, etc. Detailed notes make tweaking and perfecting mixes much easier.
Consider chemistry – Understanding glaze chemistry helps identify compatible ingredients. Some compounds require specific mixing techniques or sequences to properly combine. Consider solubility, molecule sizes, binders, fluxes, etc. Reading about glaze chemistry aids the mixing process.
Common Issues to Avoid
There are some common mistakes that can lead to problems when mixing glazes. Being aware of these potential issues can help avoid undesirable results.
Contamination
One problem that can occur is contamination. This happens when unintended materials get into the glaze mixture. Even small amounts of contamination can alter the chemical makeup of a glaze and cause issues like crawling, blistering, or discoloration. To avoid contamination, make sure all equipment used for mixing is clean. Dedicate tools like buckets or mixers to specific glazes. And avoid mixing in areas where dust or other materials could blow into the glaze.
Uneven mixing
It’s important to mix glaze batches thoroughly so all ingredients are evenly distributed. According to expert Sue McLeod, insufficient mixing is a common cause of glaze defects. When mixing powdered glaze, scrape the sides and bottom of the container to make sure no dry powder remains. With premixed liquid glaze, stir continuously to evenly blend.
Incorrect ratios
Following the correct proportions for a glaze recipe is critical. Adding too much or too little of a certain ingredient can alter the glaze chemistry. This may cause the glaze to flux improperly or create undesirable visual effects. Carefully measure ingredients using a scale. And don’t eyedball amounts or make substitutions without understanding the chemistry involved.
Interesting Mixes to Try
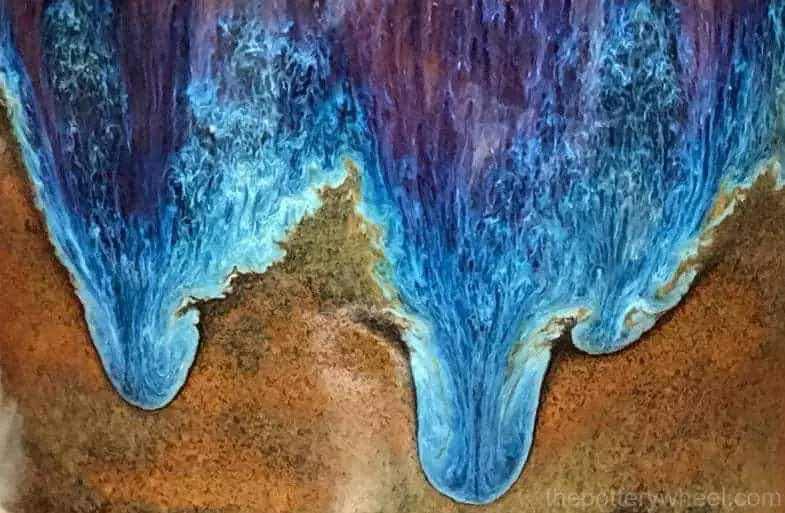
When mixing glazes, using complementary colors can create visually striking results. For example, pairing a blue glaze with an orange one results in a vibrant color combination. To try this, mix a celadon or turquoise glaze with a red or orange glaze on your piece (Mayco). The contrast pops when fired.
Combining matte and glossy glazes also adds dimension. Try dipping the top half of a piece in a matte white glaze and the bottom in glossy clear glaze for an ombré effect. Or brush stripes of matte black glaze over a glossy blue glazed background (Amaco). The matte glaze will break up the shine.
To add physical texture, layer a coarse glaze over a smooth glaze. Bumpier glazes like crystalline work well for this. The rough glaze will contrast with the smooth glaze underneath. You can also sprinkle glaze additives like sand or glass beads between layers. This creates visible texture when you mix glazes.
Conclusion
Mixing glazes can offer exciting opportunities for artists to explore new visual effects through the chemical interactions between different materials. As discussed, factors like compatibility, glaze chemistry, firing temperatures, and application methods are key considerations when combining glazes in unique ways. While mixing glazes does require care and testing, the payoff can be stunning original results.
The main benefits of mixing glazes include achieving colors, textures, and visual effects beyond what any single glaze can produce. Blending matte and glossy glazes, layering transparent and opaque glazes, or combining high and low fire glazes can all lead to distinctive finished pieces. With so many possible glaze combinations yet to be tried, experimenting with mixed glazes provides a creative adventure for potters and ceramic artists.
In closing, every ceramicist should feel empowered to explore glaze mixing as an avenue for innovation and self-expression. Start slowly, test thoroughly, and delight in the serendipitous discoveries along the way. Be bold, be curious, and relish the journeys that mixed glazes can take you on.

