Can You Put Paper On Clay?
Clay is an ancient and versatile material that has been used for artistic expression and practical purposes for thousands of years. Archaeological evidence shows that prehistoric cultures used clay for creating figurines, vessels, and other objects as far back as 25,000 BCE (Clay Sculptures: Unearthing the Roots of an Ancient Art Form). The unique plasticity and workability of clay made it an ideal medium for crafting both decorative and functional items.
Clay continues to be a popular choice for pottery, sculpture, and other crafts today. Its accessibility, affordability, and ability to be shaped, dried, decorated, and fired make it an appealing material for artistic creation. Many art forms such as pottery, ceramics, and sculpture have origins rooted in the use of clay. Understanding the fundamentals of working with clay provides a foundation for crafting a diverse array of artistic objects.
Why Put Paper on Clay?
Adding paper to clay can provide several benefits for artists and crafters. The main reasons to incorporate paper into clay art include:
- Adding texture – Paper can create interesting visual and tactile textures in the clay surface. Crumpled, layered, or embedded paper pieces bring depth and complexity.
- Strengthening – Paper pulp integrated into clay makes it stronger and less prone to cracking and breakage. This is especially helpful for large or fragile sculptures. https://ceramicartsnetwork.org/daily/article/Adding-Strength-to-Your-Clay-Work-with-Paperclay
- Reducing shrinkage – Paper fibers help minimize the shrinkage of clay when drying and firing. This allows for better precision.
- Adding layers – Paper can be used to build up multiple thin layers of texture and color in clay surfaces.
- Lightening – Paper makes clay lighter in weight, which is useful for larger sculptures. The air spaces in paper make clay less dense.
- Economical – Paper is an inexpensive, accessible material to incorporate into clay rather than using only clay.

In summary, paper creates intriguing effects in clay and helps overcome some inherent limitations of clay for sculpting and modeling. Artists utilize paper to open up more possibilities for their ceramic creations.
Challenges of Using Paper on Clay
While paper clay offers many benefits, there are some challenges to be aware of when working with it. One of the most common issues is the paper burning out in the kiln. Paper has a lower burning temperature than clay, so it will combust before the clay vitrifies if fired too quickly. This can leave the finished piece with cracks or weak spots where the paper burned out.
Another potential challenge is warping. Because paper clay contains a significant amount of paper pulp, it can be prone to warping or cracking during drying and firing. The paper shrinks at a different rate than the clay, which creates internal stresses. Proper drying and firing practices are essential to minimize warping.
According to this article, limited awareness and availability of paper clay in some regions can also be a challenge. As a relatively new clay body, paper clay is less known than traditional clays. Finding supplies may require ordering online or locating specialty art stores.
Preparing the Clay
Properly preparing the clay is an essential first step before adhering paper. The clay must be properly conditioned and scored to allow the paper and clay to bind together.
To condition clay, knead it until it is soft and pliable. If the clay is too firm, it will resist accepting the paper. Conditioning aligns the clay particles and removes air pockets. For paper clay, it’s best to use clay with some grog or filler content, as this provides texture for the paper to grip.
Scoring or scratching the surface creates grooves for the paper and slip to seep into. Use a serrated rib tool, knife, or fork to score lines into the surface, about 1/8” apart. Scoring allows the liquid clay slip to penetrate the dry clay beneath. The paper can then seep into the scored grooves as the slip dries.
Mix up some clay slip to use as an adhesive. Clay slip is liquid clay made by mixing scrap clay trimmings with water. Apply a thin layer of slip where the paper will be placed. The water in the slip will soften the scored clay so the paper can adhere.
Let the prepared clay dry slightly before applying paper so it’s not slippery. Properly conditioning, scoring, and applying slip are key preparations that allow paper and clay to bind tightly together. (Source)
Choosing the Right Paper
When working with paper clay, it’s important to choose a paper that will properly absorb moisture and blend well into the clay body. According to the Ceramic Arts Network, some good options include toilet paper, stationery, brochures, and leaflets printed on non-glossy paper. These types of paper contain natural fibers that break down well in the clay mixture.
On the other hand, glossy papers and cardboard do not absorb moisture easily and can leave lumps when mixed into the clay. The glossy coating makes it difficult for the paper fibers to blend and bond with the clay particles. Likewise, cardboard has a very high wood pulp content which does not soften adequately in the wet clay mixture. It’s best to avoid these paper types when making paper clay.
In general, look for papers made from natural plant fibers like cotton and avoid coated papers. Soft, absorbent papers will mix in thoroughly while crisp papers may leave chunks. Test any new paper by mixing a small amount into a clay sample to ensure it combines smoothly before using it for larger projects.
Applying Paper to Clay
There are a few different techniques for applying paper to clay:
Slip: Mix up some clay slip by adding water to leftover clay scraps until it reaches a yogurt-like consistency. Brush or paint the slip onto the surface of the clay piece where you want the paper to stick. Then place the paper on the slip and use your fingers or a roller to smooth it out and adhere it. The slip will dry and act as a glue to hold the paper in place.[https://my100yearoldhome.com/how-to-use-paper-clay/]
Paste: Make a paste out of flour and water, white glue, or even paper pulp. Spread the paste on the clay surface or on the back of the paper using a brush or sponge. Then apply the paper and smooth to adhere. Paste creates a good bond between the clay and paper.[https://my100yearoldhome.com/how-to-use-paper-clay/]
Direct Applique: Dampen the surface of the clay slightly. Place strips or pieces of paper directly onto the surface and smooth down. The moisture from the clay will adhere the paper. This is the quickest method but may result in some lifting or uneven adhesion.
Sealing and Strengthening
Once the paper clay sculpture is complete, it is important to seal it to strengthen it and make it water resistant. Some common sealants used for paper clay art include:
Polyurethane sealer – This clear, water-based sealer soaks into the clay to strengthen it and provide a protective barrier. According to gathered.how, polyurethane sealers are a top recommendation for sealing air dry clays [1].
Acrylic sealer or varnish – Acrylic polymer sealers protect the clay and give it a uniform sheen. Multiple thin coats allow the sealer to fully soak in. Acrylics are another often recommended option for sealing sculptures made with paper clay [1].
Glazes – Ceramic glazes can be used to seal and decorate paper clay pieces. The glaze helps protect and waterproof the clay. Low-fire glazes formulated for air-dry clays tend to work best.
Waxes – Wax sealants like paste wax can be buffed onto the surface to give a nice sheen. However, wax may not fully penetrate and waterproof the sculpture. Polyurethane or acrylic sealers are usually a better choice for proper water resistance.
Multiple thin layers of sealer allow for full saturation and protection. Avoid brushing on too thick of a coat, as excess sealant may end up peeling off. Read the manufacturer’s directions for proper application and drying times.
Firing Considerations
When firing paper clay, it’s important to use lower temperatures and slower ramp speeds compared to regular clay. This is because the paper content in paper clay burns out at lower temperatures, around 200-300°F (The Magic of Paper Clay | Big Ceramic Store). If heated too quickly, steam can build up inside the piece and cause cracks or explosions.
For electric kilns, aim to fire paper clay no higher than cone 06, around 1922°F. Use a slowbisque firing schedule, taking at least 12-14 hours to reach top temperature (firing paperclays :oxidation or reduction, electric, natural gas …). Take extra time ramping from 200-400°F to allow the paper to fully burn out. Natural gas kilns can be fired slightly hotter to cone 04. Test small pieces first to ensure the clay body and paper content can withstand the heat.
Firing too hot may cause bloating, cracking, or weakening of the final piece. Go slow and low, and paper clay can yield stunning results. Monitor temperature carefully and adjust programming accordingly.
Troubleshooting Issues
When working with paper clay, there are a couple common issues that may arise during drying, firing, and finishing. Being aware of these potential problems and how to address them will help ensure a successful outcome.
One problem is bubbling or blistering in the clay surface. This happens when moisture gets trapped between layers of paper or clay as it dries. To prevent bubbling, make sure to blend slip thoroughly into the paper fibers when adding it to clay. Allow adequate drying time between layers. Smooth out surfaces while leather hard. If blisters form, gently pierce them with a needle tool to release trapped moisture before firing.
Another issue is paper burning out during firing, which can leave behind dark spots or holes. To avoid this, limit paper content to no more than 25% of the clay body’s dry weight. Ramp up kiln temperature gradually, no faster than 200°F per hour. Firing too fast causes rapid expansion of clay that tears paper fibers apart. A slower firing schedule allows paper to carbonize slowly and evenly. Test-fire new paper clay recipes to ensure proper burnout.
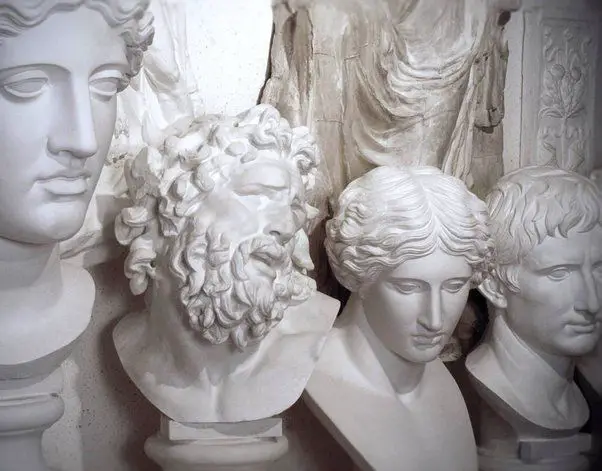
Inspiring Paper Clay Art Examples
Paper clay opens up exciting possibilities for sculpture and 3D art. Many artists use this versatile medium to create stunning works. Here are some inspiring paper clay art examples:
Teresa Gironés – This Spanish artist sculpts exquisite figurative works from paper clay. Her portrait sculptures capture subtle emotions and personality. See more of her paper clay art at https://www.pinterest.com/ashadizadeh83/teresa-girones/.
Debra Fritts – Based in California, Fritts creates beautiful nature-inspired paper clay pieces. Her realistic animals and flowers showcase the medium’s sculptability. View her paper clay artwork at https://www.debramfritts.com.
Rachel Gould – This UK artist handbuilds intricate paper clay sculptures. She often incorporates found objects into whimsical animal creations. Check out her paper clay menagerie at https://rachelgouldceramics.com/.
Exploring these artists’ works will offer inspiration for your own paper clay art. Their innovative techniques and creative vision expand the possibilities of the medium.