Can You Set Up A Pottery Studio At Home?
Setting up a pottery studio at home can be an enjoyable and rewarding hobby for many people. Pottery offers a range of benefits, from creative satisfaction to relaxation and improved dexterity. However, there are also some challenges to consider when creating a home pottery space.
Pottery provides a tactile, engaging creative outlet that allows you to craft beautiful and functional pieces out of clay (Top 10 Health Benefits of Pottery). The process of sculpting clay is known to have therapeutic benefits by lowering stress levels and encouraging mindfulness. Pottery also helps strengthen fine motor skills and hand-eye coordination. Having access to a home studio makes it convenient to fit pottery into your schedule without traveling elsewhere.
However, setting up a functional pottery studio requires adequate space, equipment, materials, and safety considerations. Firing kilns to high temperatures produces heat and fumes, so ventilation is key. Dedicated space is needed for wedging clay, sculpting pieces, glazing, and storing supplies. Startup costs can add up quickly between a potter’s wheel, kiln, tools, clay, and more. Ongoing expenses include electricity, clay, glazes, and maintenance. While establishing a home pottery studio takes effort, the creative possibilities make it rewarding for many ceramic artists.
Space Requirements
When setting up a pottery studio at home, one of the most important considerations is having enough space. According to sources, the ideal size for a functional home pottery studio is around 200-300 square feet (https://www.ceraspace.com/blog/ceramics-studio-square-footage). This allows room for essential equipment like a pottery wheel, work table, storage shelves, and a clay preparation area.
To accommodate a pottery wheel, allot a 6-8 foot square section of the studio, with enough clearance to fully extend your arms while throwing. Position the wheel near a wall to maximize open floor space (https://www.homesteadpottery.com/articles-homestead-pottery/setting-up-a-pottery-studio/).
You’ll also need a sturdy work table, at least 2 x 4 feet in size, preferably with storage shelves underneath. Shelves should be deep enough to hold bins of clay and tools. Locate the work table near your wheel for efficient workflow.
Additionally, have dedicated space for wedging clay and storing raw materials. Flat open counters or tables work well for wedging. Clay storage will vary based on quantity, but options include shelves, cabinets, and lidded buckets.
Configuring the studio thoughtfully from the start will maximize your working area and create an efficient pottery workspace at home.
Equipment Needed
To set up a functional pottery studio at home, there are several essential pieces of equipment you will need:
Pottery Wheel
The pottery wheel is the main tool used for throwing and shaping clay. Invest in a quality electric wheel with variable speed control. Brands like Brent, Shimpo, and Soldner make reliable pottery wheels starting around $1000.
Kiln
You need a kiln to fire clay work at high temperatures for hardening and glazing. Look for a kiln with enough size and interior space to fit your projects, such as a medium-sized front-loading electric kiln. Prices range from $1500-$3000.
Worktables
Have sturdy worktables for wedging clay, sculpting hand-built pieces, glazing, and other tasks. Tables sized at least 2′ x 4′ will provide ample workspace. Cover with canvas or another non-porous surface.[1]
Storage Solutions
Invest in storage and organization solutions to keep tools, glazes, clay, and works-in-progress accessible yet protected. Shelving, cabinets, bins, and other solutions help maximize space efficiently.
Clay Tools
Gather a range of clay sculpting and decorating tools like ribs, loops, cutters, sponges, brushes, stamps, etc. Quality tools will provide precision and ease of use with clay.
Clay and Materials
There are several types of clay you can use in a home pottery studio, each with their own properties and characteristics:
Stoneware clay – This is a very common clay type for beginners. It’s durable, can be used on the wheel or for handbuilding, and fires to a gray/brown color. Stoneware clays are good for functional pieces like mugs, bowls, and plates.
Earthenware clay – Earthenware fires at lower temperatures and has a more porous nature. It comes in a range of colors from red to brown to white. Best for handbuilding and decorative pieces.
Porcelain clay – Porcelain is known for its pure white color and translucency after firing. It’s smooth with excellent workability. However, it requires higher firing temperatures than stoneware or earthenware.
In addition to clay, you’ll need glazes and slips to decorate and finish your pottery. Glazes are glass-like coatings that create a watertight surface when fired. Slips are fluid clay suspensions used to add color and texture. Purchase them premixed or make your own recipes.
Other helpful materials include bats (canvas covered boards for throwing), ribs (metal scraping tools), and clay cutting wires. Have sponges, plastic bags, and buckets on hand too for working with clay and cleaning up.
Clay Preparation
Properly preparing your clay is an essential first step before you begin any pottery project. The clay preparation process, known as “wedging”, serves several important purposes: it removes air pockets, blends and homogenizes the clay, and makes the clay more plastic and workable. Wedging by hand involves cutting the clay in half, slamming it back together, and repeating this process over and over. You can also use a wedging table or commercial clay wedger to prepare your clay. It’s important not to over-wedge the clay, as this can make it become too stiff. Only wedge as much clay as you plan to immediately use.
Proper clay storage between projects is also important. Clay should be stored in a sealed plastic bag or airtight container to prevent it from drying out. Avoid exposing clay to freezing temperatures, and store it at room temperature between 60-80 degrees Fahrenheit. To recycle clay scraps, you can wedge in the scraps when preparing new clay. You can also rehydrate dried clay by soaking it in water. However wedging rehydrated clay is not recommended more than once or twice as it will degrade the clay over time. Always wedge in some new moisture and clay when recycling old clay.
References:
https://thepotterywheel.com/how-to-prepare-clay-for-pottery/
https://www.ehow.com/how_5032982_prepare-clay-pottery.html
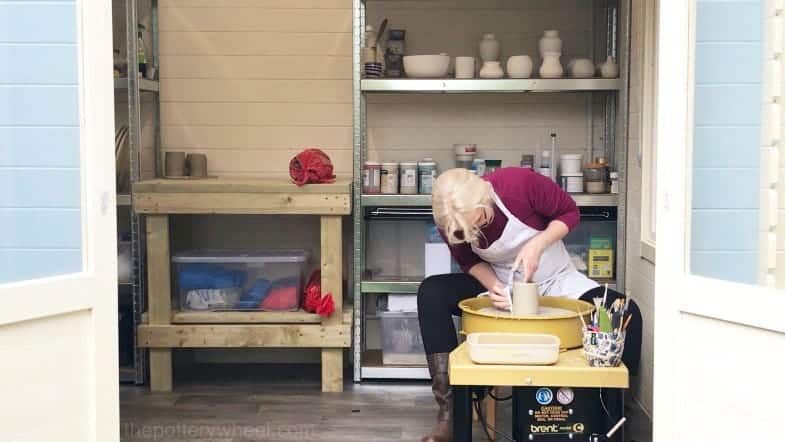
Studio Setup
Setting up your home pottery studio requires careful planning and preparation to create a safe and functional workspace. Proper lighting, ventilation, flooring, and access to water are key considerations.
Lighting is crucial for pottery work. Both natural light from windows and adjustable overhead lighting allow you to clearly see your work while throwing clay on the wheel or handbuilding pieces. Track lighting or shop lights provide bright, direct lighting without shadows (Source).
Ventilation helps control air quality when working with clay dust. An exhaust fan, air filter, or opening windows provides airflow. Avoid fabric items which may capture dust particles. You may also wear a dust mask while working (Source).
Choose a flooring material that is easy to clean such as concrete, tile, vinyl, or laminate flooring. This prevents clay from staining carpet or hardwood floors. Sweeping followed by mopping keeps the studio space clean.
Having access to water enables you to keep clay moist and wash hands, tools, and surfaces. Install a utility sink or set up a water container with a spigot. You’ll also need adequate drainage.
Safety
Safety should be a top priority when setting up a pottery studio at home. Proper precautions need to be taken to avoid injuries and exposure to hazardous materials.
Using the pottery wheel requires focus and care. Sit with proper posture and keep fingers away from moving parts. Avoid distractions and never leave a spinning wheel unattended (20 Ways to Stay Safe in the Pottery Studio).
Ventilation is critical when working with clay dust, glazes and chemicals. Use dust masks, respirators, gloves and protective eyewear. Install exhaust fans and air filters to remove contaminated air. Keep doors and windows open for airflow. Avoid eating or drinking in the studio.
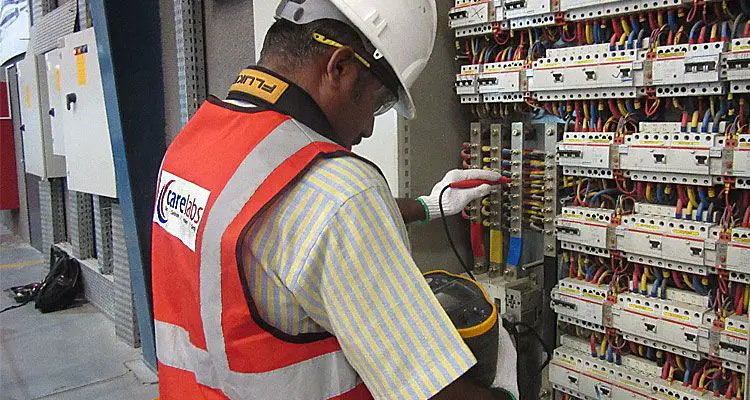
First aid kits, eyewash stations, and fire extinguishers should be on hand. Know the location of circuit breakers in case equipment needs to be powered down quickly. Post emergency numbers visibly. Take a first aid course to be prepared for injuries.
With vigilance and proper precautions, potters can stay safe while enjoying the creative process.
Firing and Glazing
Probably the most challenging part of setting up a pottery studio at home is having the proper equipment to fire and glaze your pottery pieces. Firing pottery requires exposing it to very high temperatures in order to permanently harden the clay through a process called sintering. This typically requires a kiln that can reach over 2,000°F.
For a home studio, a small electric kiln in the 1-3 cubic feet range can work well. These kilns allow firing pottery to mid-range temperatures between 1,800°F – 2,300°F. It’s best to place the kiln in a garage, shed, basement or outdoors as it will produce some fumes when firing. Be sure to follow all safety guidelines and maintenance for your kiln to keep it in proper working condition. Refer to the kiln manufacturer’s instructions for specifics on firing and upkeep. https://thepotterywheel.com/how-to-glaze-pottery-at-home/
Glazing is the process of applying colored glaze materials to bisqueware pottery that has already been fired once. The glaze melts and fuses to the clay body during the firing process to create a glass-like coating. There are many types of glazes available premixed or as powders to mix with water. Start with just a few basic glazes and apply them using brushes, sponges or spraying. Always follow instructions for the glaze firing temperature and specialized application or mixing directions. Let pieces fully dry before a second firing. The glaze will melt and create beautiful colors during this final firing. For help getting started with glazing, see this guide: https://www.thecrucible.org/guides/ceramics/how-to-glaze/
Cleanup
Keeping a pottery studio clean is crucial for safety and efficiency. Clay particles and dust can accumulate quickly and make a mess if not properly contained. Here are some tips for cleaning up a home pottery studio:
Clay recycling is an important part of any studio cleanup routine. As you trim and shape clay pieces, the excess scraps and particles should be collected and reused. Store clay scraps in airtight containers or plastic bags to keep them from drying out. Recondition old clay by mixing it with water to make a reusable clay slip. Recycling clay reduces waste and saves money on materials.
Controlling dust is vital for health and avoiding cross-contamination between materials. Use a shop vacuum with a HEPA filter regularly to clean dust from shelves, floors, and equipment. Wipe down surfaces frequently with a damp cloth to pick up residual clay particles. You may also invest in an air filtration system to trap airborne dust and particles.
Keep your studio organized by storing tools and supplies neatly on shelves and racks. Label containers clearly and keep different types of clay separate. Sweep floors daily and mop weekly. Having an orderly, dust-free studio makes working there much more efficient and enjoyable.
Costs of Setting Up a Home Pottery Studio
Setting up a pottery studio at home does require some initial investment. However, once the initial equipment and materials are purchased, ongoing costs can be relatively minimal if production is small-scale. According to this Quora thread, the starting budget for a basic home studio can range from $300 to $1000.
The main costs are equipment like a potter’s wheel, kiln, and tools. A new electric pottery wheel can cost $300-$600. Small table-top kilns start around $300, while larger standing kilns are $800+. Essential tools like clay sculpting tools, trimming tools, and brushes can be around $150 total. Other one-time costs are setting up worktables, shelves, a ventilation hood, and any lighting or electrical improvements.
Ongoing costs include clay, glazes, stains, and other consumable materials. A 25 lb bag of pottery clay costs $20-$30 and lasts for many projects. Glazes and stains are also affordable at $10-$20 per pint. Building a community with other local potters can help share materials costs. Electricity and maintenance costs for the wheel and kiln may run $10-$30 per month depending on usage. Overall, after the initial investment, regular costs remain low for small-scale home studios.