Can You Stain Wood Red?
Staining wood red is a popular technique to change the color and give an aged, antique look to wood furniture and surfaces. Red stains can completely transform the appearance of woods like pine, oak, maple, cherry, and more by infusing them with warm, rich red tones. From a classic cherry finish to a bold mahogany hue, red stains allow you to customize the color of your wood projects.
With the right preparation, application techniques, and sealing, red wood stain can provide a durable, vibrant finish that enhances the wood’s grain and texture beautifully. In this guide, we’ll look at the most popular types of red wood stains, which woods take stain best, how to prepare and apply it, and tips for protecting and maintaining that eye-catching red stained woodwork for years to come.
Reasons to Stain Wood Red
There are a few key reasons why staining wood red is a popular choice:
Desired Look – Many people simply prefer the warm, rich look of red-stained wood. Red stains come in a range of shades from lighter cherry tones to deep mahogany hues. The color can evoke a traditional, rustic or sophisticated style depending on the exact stain used.
Matches Decor – Red wood stain can be an ideal way to coordinate with existing decor. For example, if your color scheme makes use of red accents, stained wood elements can complement that nicely. Red also pairs well with colors like black, brown and tan.
According to “8 Most Popular Best Red Wood Stains for 2024” (https://www.jpost.com/advisor/tools-and-home-improvement/8-most-popular-best-red-wood-stains-759388), red wood stain helps create a warm, inviting look and works with many design aesthetics.
Types of Red Wood Stains
When staining wood red, there are two main types of stains to consider – dye stains and pigmented stains. Each has their own advantages and disadvantages.
Dye Stains
Dye stains are made up of tiny molecules that are able to penetrate deep into the wood grain. This allows the color to soak into the wood and highlights the natural patterns and markings of the grain. Dye stains create a transparent or semi-transparent finish that allows some of the natural wood color to show through.
The pros of dye stains are that they provide vibrant, rich color by fully saturating the wood. They bring out a lot of depth and character. The cons are that dye stains are not very protective on their own and need to be sealed with a top coat.
Pigmented Stains
Pigmented stains contain colored pigment particles suspended in a liquid carrier. The pigments do not penetrate the wood but form a layer on the surface. This creates a solid, opaque color without revealing much of the wood grain below.
The advantage of pigmented stains is that they help hide imperfections and provide good protection on their own. The downside is that they produce a flatter, painted-on look compared to dye stains. Too many coats can start to look artificial.
Many red wood stains are actually a blend of dye and pigmented stains, offering some of the benefits of both. Overall, dye stains tend to produce the most natural, vibrant reds.
What Woods Work Best
When choosing wood to stain red, it’s important to consider both softwoods and hardwoods. The 5 Best Woods for Staining notes that softwoods like pine tend to absorb stain more evenly since they have less pronounced grain patterns. The softness of the wood allows the stain to penetrate deeply and create a rich, saturated color. Pine is an economical choice that can give great results with a red stain.
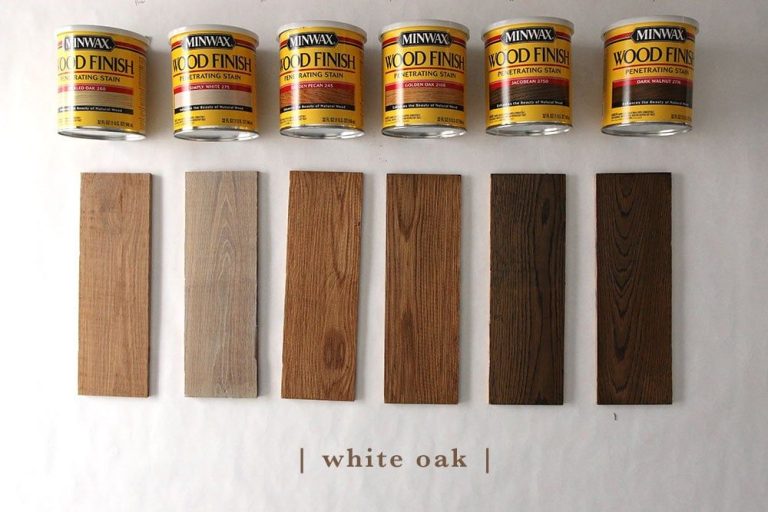
Hardwoods like oak are also excellent candidates for red stain. How 6 Different Stains Look On 5 Popular Types of Wood explains that oak has beautiful grain patterns that stand out boldly when stained. The tannins in oak give it warm, red undertones that complement and accentuate the hue of a red stain. Red oak is particularly striking, as its name implies. Other hardwoods like maple and ash also take red stain nicely.
When choosing wood for a red stain, consider whether you want a more uniform, saturated color (pine) or striking grain patterns (oak). Both softwoods and hardwoods can achieve gorgeous red hues when properly prepped and stained.
Preparing the Wood
Properly preparing the wood surface is crucial for achieving an even, consistent stain application. This involves sanding the wood, cleaning it, and optionally applying a wood conditioner.
Start by sanding the wood with coarse 80-100 grit sandpaper to remove any existing finish or surface imperfections, then gradually move up to finer 120-150 grit paper for a smooth surface. Always sand with the grain of the wood. Thoroughly sand all surfaces that will be stained, removing mill glaze and loose fibers, as recommended by The Craftsman Blog. Wipe away any dust with a dry cloth.
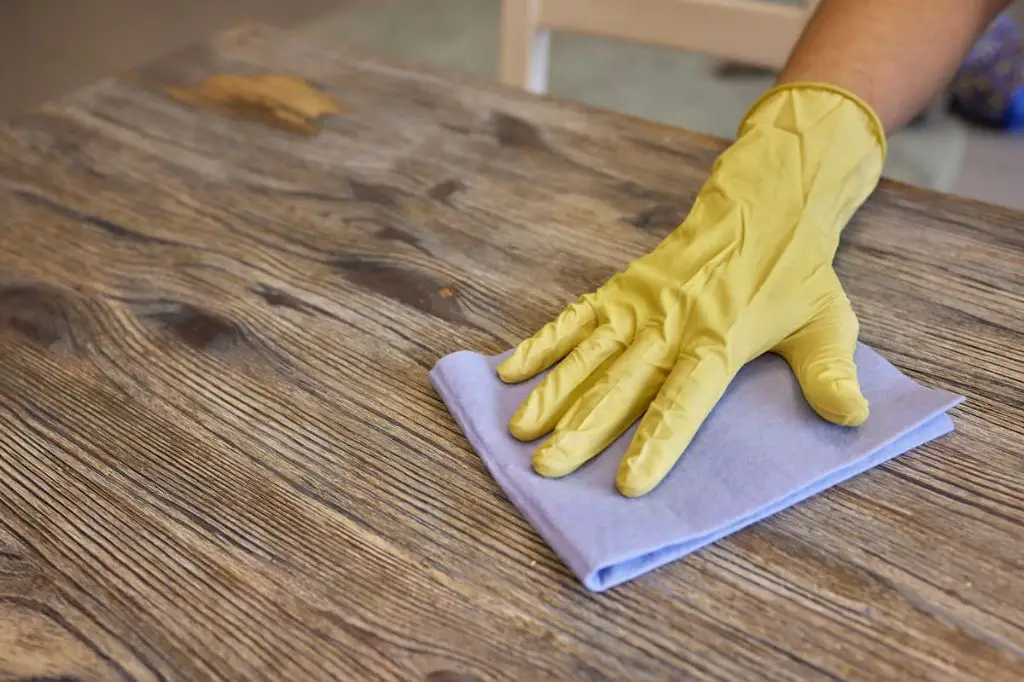
Clean the sanded surface using a rag dampened with mineral spirits, as suggested by ZAR Wood Stains. Let the wood dry completely before applying stain. This removes grease, dirt, and other contaminants that could interfere with stain absorption.
For soft or porous woods like pine, apply a wood conditioner according to the manufacturer’s directions. This helps regulate absorption to prevent blotchy or uneven staining.
Staining Techniques
When applying a red wood stain, you have three main techniques to choose from – brushing, wiping, and spraying.
Brushing
Using a high-quality natural bristle brush is the most common way to apply wood stains. Dip the brush into the stain and apply it in the direction of the wood grain, maintaining a wet edge as you work. Overlap the edges of each stroke to ensure even coverage. Let the stain sit for 5-15 minutes before wiping off any excess.
Wiping
Wiping stains allows for greater control over the depth of color. Pour some stain onto a lint-free cloth or rag. Wipe the stain onto the wood following the direction of the grain. Use circular motions to work the stain into the pores. Leave the stain on for 2-5 minutes before wiping off any excess.
Spraying
For large surfaces, spraying stain from a paint sprayer or HVLP system can save time and effort. Use light, even passes while slightly overlapping each stroke. Wait 10-20 minutes before wiping off excess stain for deeper penetration. Spraying works best outdoors or in a well-ventilated area.
Sealing and Protecting
After you have stained your wood project red, it is crucial to seal and protect the wood with a clear finish. This seals the wood grains and prevents damage from moisture, scratches, fading, and more. There are a few common options for sealing red stained wood:
Polyurethane
Polyurethane is the most popular finish for protecting wood. It forms a plastic-like coating that is highly durable and protective. Polyurethane comes in various sheens from matte to high gloss. It resists water, chemicals, and abrasion. Poly should be applied in thin coats, lightly sanding between each coat with fine grit sandpaper. Typically 2-3 coats are needed for good protection. Allow proper drying time between coats as specified on the product instructions [1].
Varnish
Varnish is another excellent protective finish for stained wood. It provides a transparent, hardwearing coating that is resistant to moisture, spills, and scratches. Varnish comes in gloss, satin, and matte finishes. Apply thin coats following the manufacturer’s instructions, lightly sanding between coats. Oil-based varnish provides the most durable finish. Allow proper curing time between coats [1].
Wax
Wax is commonly used over stained wood finishes like polyurethane or varnish for extra protection. The wax fills in microscopic pores and provides a smooth, low-luster sheen. Be sure to use paste wax specifically formulated for wood. Apply a thin coat, allow to haze, then buff to a satin sheen. Wax will need to be reapplied periodically to maintain the protective finish [1].
Maintaining the Finish
Regularly cleaning and caring for your red stained wood is key to keeping it looking its best over time. Use a damp microfiber cloth to gently wipe down the wood, removing any dust or dirt (Source 1). Avoid using harsh cleaners, abrasive pads, or excessive moisture which could damage the stain.
When the color starts to fade or appear dull, consider re-applying a red wood stain. Lightly sand the wood with 220 grit sandpaper to help the stain adhere. Apply thin coats of stain moving with the grain, letting each coat fully dry before adding another. Adding too much stain or failing to properly prep the wood can lead to an uneven, blotchy appearance (Source 2).
With proper care, your red stained wood can maintain its vibrant color and keep looking beautiful for years.
Troubleshooting Issues
When staining wood red, two common issues that can occur are blotchiness and uneven coloring. Certain woods, like oak and pine, are prone to blotchiness due to their porous nature. The uneven absorption of stain can leave some areas darker than others.
There are a few ways to prevent or minimize blotchiness when staining wood red:
- Use a wood conditioner first – Conditioners fill the pores of the wood for more even staining.
- Sand to a very smooth finish – Sanding removes the soft earlywood that absorbs more stain.
- Apply a washcoat – A thinned varnish coat evens out absorption before applying stain.
- Use a gel stain – Gel stains sit on the surface rather than absorbing deeply.
- Wipe off stain quickly – Leaving stain on too long increases blotchiness.
Uneven coloring can also occur if preparation is inadequate or application is inconsistent. Ensure the wood is properly sanded, cleaned, and dry before staining. Maintain a wet edge and apply stain smoothly and systematically to prevent lap marks and variations in color.
Test stain on scrap pieces first to check for blotchiness and make adjustments. With proper preparation and careful application, quality red wood stains can be applied successfully.
Conclusion
Staining wood red can bring warmth and visual interest to furniture, flooring, cabinets, and other wood projects. With the right preparation, techniques, and maintenance, a red wood stain can stand the test of time and enhance the natural beauty of the wood. While the staining process takes some time and effort, the rich red tones make it well worth it in the end. Test samples, proper sanding and cleaning, and thin even coats will help achieve an optimal result. Allowing adequate drying and curing time between coats ensures proper adhesion and color depth. Sealing the wood after staining locks in the color and provides protection from damage. With proper care, a red wood stain can last for many years before needing to be refreshed. Following the recommendations outlined here will allow DIYers to successfully stain their next woodworking project an eye-catching red.