Can You Use Clay To Make A Smoking Pipe?
Making a functional smoking pipe out of clay is an interesting DIY project for both novice and experienced ceramic artists. This article will provide a step-by-step guide to selecting the right type of clay, shaping it into a pipe form, drying and firing the clay, adding decorations if desired, creating the pipe bore, and tips for use and care.
Types of Clay
There are several types of clay that can be used for making a clay smoking pipe. The most common types include:
- Earthenware Clay – This includes terracotta clay and other low-fire clays that are usually red to brown in color after firing. Earthenware clays are porous and not vitrified. They are soft and will absorb moisture over time.
- Stoneware Clay – Stoneware clays are fired at higher temperatures, usually between 2,200 – 2,400°F. This makes them stronger and less porous than earthenware clays while still maintaining some absorbency. Stoneware clays are great for making pipes as they have good plasticity and workability.
- Porcelain – Porcelain clays are very fine and white firing. They are fired at over 2,400°F making them vitrified and non-porous. Porcelain is a delicate clay that requires precision when shaping a pipe.
When selecting a clay for pipe making, stoneware and earthenware clays are most commonly used. Their absorbency helps pull moisture into the tobacco while their density makes them durable. Porcelain can also work but must be handled with care given its delicate nature.
Clay Properties
Clay is an ideal material for making smoking pipes due to its unique properties. The key properties that make clay suitable for pipe making include:
Moldability – Clay is highly moldable when wet, maintaining its shape as it dries. This allows pipes to be hand-shaped or made using molds into virtually any design imaginable. The moldability of clay enables intricate shapes and decorative details.
Durability – When fired at high temperatures, clay undergoes a chemical change and becomes very hard and durable. Fired clay pipes are resistant to chipping and cracking, withstanding repeated use over time.
Fire Resistance – As clay is inherently fire resistant, fired clay pipes will not burn or melt when used for smoking. The material can withstand repeated exposure to flame when the pipe is lit.
Porosity – Clay can be somewhat porous after firing, which helps absorb moisture during use, preventing a wet smoke. The porosity also cools the smoke slightly before inhalation.
In summary, clay’s moldability allows forming pipes in limitless shapes and designs. When fired, the resulting durability and fire resistance provide a sturdy, long-lasting pipe material that holds up well over time.
Shaping the Pipe
Once you have chosen the type of clay you want to use, it’s time to start shaping your pipe. There are a few techniques you can use to hand shape or mold the basic pipe form:
Pinching – This is done by pinching and pulling the clay into the desired shape. Start with a ball of clay and create the bowl area by pinching the clay outward. Form the stem by rolling the clay into a cylinder shape. Then attach the stem to the bowl section by blending the clay together.
Coiling – Roll clay coils and stack or attach them together to build up the form. Wrap coils around your finger to create rings for the bowl area. Use longer coiled pieces for the stem and attach to the bowl.
Slab Building – Roll out slabs of clay and cut shapes that can be assembled into the pipe form. Cut out bowl and stem pieces from clay slabs and blend the seams together.
Molds – Press clay into a mold or form to achieve the pipe shape. Plaster molds can be made from an existing pipe form and used to duplicate the shape.
Take your time shaping the clay and smooth any seams or attachments between coils/slabs. Let the clay firm up slightly before handling to avoid distortion. Refine the shape and add any desired decorative details.
Drying the Clay
Once the pipe has been shaped, it is crucial to let it dry properly before firing. If there is moisture still present in the clay during firing, it can cause cracking or even explosions from the rapid expansion of steam.
Air drying is the most common method. Allow the shaped clay to sit undisturbed at room temperature for at least 24-48 hours. Ensure the environment is free of drafts during the drying process. The clay must dry slowly and evenly to prevent uneven shrinkage and cracks. Using a plastic bag or plastic wrap to cover the clay can help retain even moisture levels.
Another option is to dry the pipe in an electric or gas oven on the lowest possible temperature setting, around 100-150°F. Place the pipe on a tray or plate in the oven and prop the door slightly open with a wooden spoon to allow moisture to escape. Drying in an oven accelerates the process, but be sure to check it frequently to prevent over-drying. The clay should have a uniform leather-hard consistency when ready for firing.
Rushing the drying stage can easily ruin a handmade clay pipe, so patience is key. Allow sufficient drying time based on the size and thickness of the clay piece. When in doubt, slow drying is preferable to prevent defects. Proper drying is an essential step before successfully firing a functional clay pipe.
Firing the Pipe
Once the clay pipe has been shaped and thoroughly dried, the next step is firing it in a kiln. Firing serves to harden the clay permanently into a useable pipe through a process called sintering. During sintering, the clay particles bond together when heated to high temperatures.
For firing clay pipes, a kiln temperature between 1800-2200°F is typically used. Specific clay types and additives will determine the ideal firing temperature – this should be researched to choose the appropriate range. The kiln should be allowed to heat up slowly, over 8-12 hours, until it reaches the peak temperature. It’s important to avoid rapid heating or cooling of the kiln, which could cause cracks in the pipe.
As the pipe is fired, chemical and physical changes occur in the clay. First, any remaining water is evaporated from the clay. Next, at higher temperatures the clay particles start to soften and bond together through vitrification. Organic material burns off, while additives melt and fill in pores. The end result is a hardened, non-porous material that has become the finished ceramic pipe.
Firing for the proper time and temperature is essential for creating a sturdy, usable pipe. Underfired pipes will remain porous and prone to breakage. Overfiring can cause bloating or warping. With careful kiln firing, the clay is permanently transformed into a pipe that can withstand repeated use.
Adding Decorations
Decorating your homemade clay pipe can give it a more artistic, personalized touch. Here are some options for decorating clay pipes:
Glazes – Glazes are mixtures of minerals and chemicals that produce a glassy coating when fired on clay. There are many types of glazes in different colors that can be brushed or dipped onto the clay pipe before firing. Glazes allow for motifs, patterns, and designs to be painted onto the pipe.
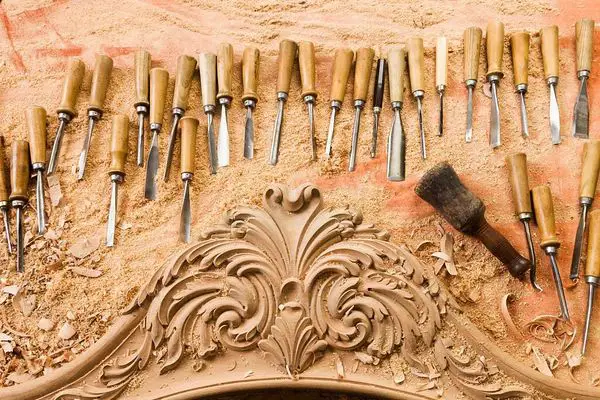
Carvings – Unfired clay can be carved and inscribed using wooden or metal tools to create patterns, textures, and designs. Intricate carvings are possible for those with artistic skill and patience. Carvings will show through glazes when the pipe is fired.
Attachments – Items can be attached to the pipe with slurry or glue before firing for decorative effect. This could include beads, stones, feathers, or other embellishments. Keep in mind any items attached need to be able to withstand the high heat of the firing process.
Decorating the clay pipe adds creative flair and personalization to the handmade smoking pipe. Glazes, carvings, and attachments allow for artistic customization.
Creating the Bore
The bore, also known as the smoking channel, is the passageway that runs through the pipe from the bowl to the mouthpiece. This is what allows the smoke to travel through the pipe. Creating the bore is one of the most important steps in making a functional smoking pipe out of clay.
There are a couple different methods you can use to create the bore:
- You can insert a dowel or pipe cleaner while the clay is still soft. Twist it through the clay to create the hollow airway, then remove it once the clay has dried.
- You can also wait until the clay has partially hardened in the leather-hard stage, then use a drill bit, knitting needle, or other tool with a small diameter to pierce a hole through the center of the pipe.
- Another option is to form two halves of the pipe separately, cut a groove in the center of each piece to create a channel, then join the halves together once the clay has hardened.
The bore should be around 5/64 – 3/16 inches (2-5 mm) in diameter for optimal airflow. Make sure to create a smooth passage without any kinks or obstructions. Test the bore gently by blowing through it to ensure it is fully open before firing the finished pipe. This will allow proper airflow and prevent issues when smoking tobacco through your handmade clay pipe.
Using and Caring for Your Clay Pipe
To get the most enjoyment and longevity out of your homemade clay pipe, follow these tips for proper use and care:
– Let the pipe fully dry after shaping and before firing. Using a pipe too early can cause cracks or breakage.
– Avoid extremely hot or cold temperatures during use. Allow the pipe to slowly adjust to ambient temperature before smoking to prevent thermal shock.
– Smoke gently and avoid aggressively puffing, which can generate too much heat. Let the pipe cool between smoking sessions.
– Clean the pipe after each use once cool, wiping away ash and residue with a pipe cleaner or soft cloth. Avoid moisture inside the pipe bowl or stem.
– Store the pipe in a safe place where it won’t get knocked over or damaged. Consider a dedicated pipe stand or case.
– Inspect regularly for cracks or cloudiness that could indicate potential breakage, and stop using if any appear. A well-fired and cared for pipe should last for years.
– Avoid dropping or exposing the pipe to extreme shock, as clay can chip or shatter if abused. Handle carefully.
– Enjoy your handmade clay pipe, but use responsibly and in moderation. The pipe itself requires minimal care when used properly.
Conclusion
In summary, clay can absolutely be used to create a fully functional smoking pipe. The process involves choosing an appropriate clay body, shaping it into the form of a pipe, allowing it to dry thoroughly, and then firing it at high temperatures to harden and vitrify the clay. With careful attention to details like wall thickness, bore size, airflow, and glaze options, an attractive and durable clay smoking pipe can be handcrafted in a home studio.
Clay is an extremely versatile material to work with, and the full process of designing, sculpting, drying, firing, and finishing allows for ample artistic expression. With some practice and patience, clay pipes can be shaped into all sorts of styles, customized with added decorations, and made into personalized works of art. The finished result will provide a sturdy, safe smoking pipe that brings satisfaction and enjoyment for years to come.
Overall, clay is an optimal material for handmaking smoking pipes. The entire process allows for creativity and personalization. With a focus on sound techniques, clay can be shaped into pipes that are both functional for smoking and beautiful as art objects.


