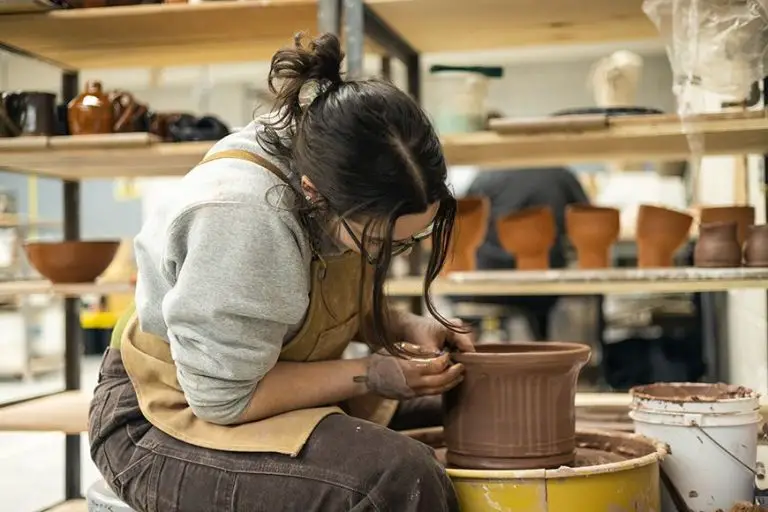
Clay Art Workshop For Kids: Hands-On Learning And Fun
Clay is an excellent art medium for children to explore their creativity and develop a range of skills. Playing with clay offers a wide variety of benefits when it comes to early childhood development and education. Clay art workshops provide a hands-on learning experience where kids can engage their senses of touch and sight while expressing themselves artistically.
According to research, working with clay stimulates curiosity and motivates problem-solving as children craft unique projects. The tactile nature of clay promotes fine motor development and hand-eye coordination. Creating clay art also boosts self-esteem, spatial reasoning, and visual learning (source). Overall, clay is an open-ended artistic medium that encourages creativity, discovery, and skill-building in children.
Supplies Needed
A clay art workshop for kids requires a range of supplies to sculpt, detail, and paint their creations. The primary supply is clay. Air-dry clays like Model Magic or Crayola Model Magic are easy to work with and do not require special firing or baking at high temperatures. Polymer clays that cure in a regular oven, like Sculpey or Fimo, are another good option for beginners.
Kids will need sculpting and detailing tools to shape the clay and add texture. Skewers, forks, chopsticks, and toothpicks work well for imprinting patterns. Popsicle sticks, modeling tools, and acrylic rollers help shape and smooth the clay. Texture pads, sequins, beads, and bits of fabric can be pressed into the clay to add visual interest.
Paints and brushes allow kids to add color once their clay art is cured. Acrylic craft paints work well on cured polymer clay and are easy for children to control. Fine-tipped paint brushes allow for adding details. Water-based glazes can be painted onto air-dry clay finishes for a glossy look.
An art smock or oversized t-shirt protects clothing from smudges. Plastic tablecloths over the workspace make for easy clean-up. Baby wipes and paper towels are useful for keeping hands and tools clean while working.
Choosing Clay
There are several types of clay that work well for kids’ art projects. Two of the main categories are air-dry clay and firing clay.
Air-dry clays are clays that harden and dry at room temperature over time. Some common types of air-dry clay include:
- Play-Doh – very soft, colorful, non-toxic clay made by Hasbro
- Modeling clay – available in various colors, flexible when warm, hardens when cool (such as Crayola’s Model Magic)
- Polymer clay – oven-bake clay that hardens when heated at low temperatures (like Sculpey and Fimo)
Air-dry clays are easy to use, require no special tools, and are inexpensive. Kids can start creating right away. The downside is that air-dry clay projects may not hold up over time as well as clay that has been fired in a kiln. Sculptures can become brittle and fragile.
Firing clays require high temperatures in a kiln to fully harden, but they create strong, durable finished clay products. Some common firing clays are:
- Earthenware – lower firing temperature, porous clay that comes in various colors
- Stoneware – vitreous and less porous, fired at higher temperatures
- Porcelain – delicate, fine clay that becomes glass-like when fired
Firing clay takes more time, skill, and specialized equipment, so it may not be the best choice for casual kids’ projects. But firing allows clay art to last for many years. Finished pieces can even be used outdoors.
When deciding on clay type, consider the age and skill level of the child, the complexity of the project, and whether the creation is meant to be decorative or functional. Air-dry clays work well for simpler kids’ projects while firing clays allow more intricate, durable art.
Preparing the Workspace
When hosting a clay workshop for kids, it’s important to prepare the workspace properly to keep the area clean and organized. Start by covering all tables and floors with plastic tablecloths, butcher paper, or canvas drop cloths to protect surfaces from water, clay residue, and paint. Tape down the edges of coverings to keep them in place.
Set up individual workstations for each child, providing about 2-3 feet of table space per child. Cover stations with wax paper, plastic placemats, or extra canvas. Include a rolling pin, clay tools, paints, brushes, and a cup of water at each station. Set up additional tables or counters as needed for displaying samples, holding clay, and keeping other shared supplies readily available.
Have kids wear old shirts backwards as smocks or provide large art aprons to cover their clothing. Paper plates also work well as inexpensive throwaway “palettes” for squeezing out paints. Lay paper towels, wipes, and trash bags around the workspace for easy cleanup.
Make sure sinks and hand washing areas are accessible. Consider putting down floor mats or cardboard around stations if doing an outdoor workshop. With some preparation and organization, the workspace will be kid-friendly for creating with clay!
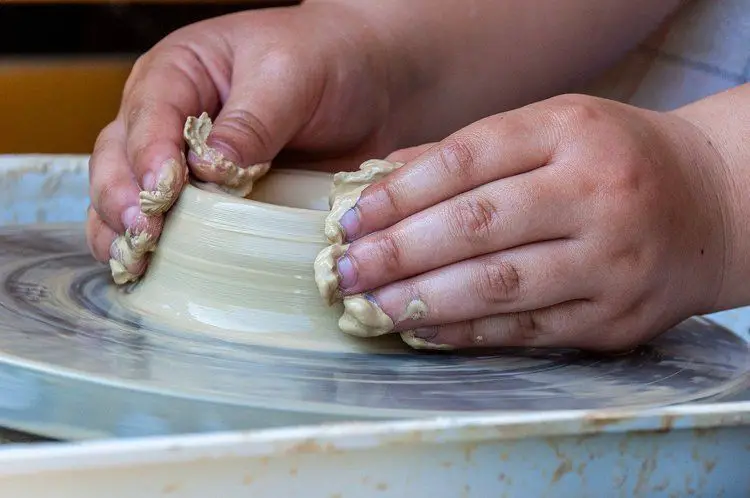
Clay Shaping Techniques
There are several fundamental clay shaping techniques that are perfect for kids to start learning. These hands-on techniques help develop fine motor skills, creativity, and confidence working with clay.
Pinching is one of the easiest clay shaping techniques for kids. Simply take a ball of clay and pinch it between the fingers and thumbs to form shapes like bowls, cups or pinch pots. Pinching allows total creative freedom and develops hand strength and dexterity (How We Montessori).
Another fun technique is coiling. To coil, roll clay into long snake-like pieces. Then, coil the snakes around to build bowls, vases, or other shapes. Coiling teaches fine motor control and problem solving as kids figure out how to attach and blend the coils (EduArt4Kids).
Slab building involves rolling out flat, even pieces of clay which can then be cut, assembled, and joined into sculptures. Kids can use cookie cutters or household objects to cut shapes that can be decorated and pieced together. Slab building allows kids to think in 2D before forming a 3D object.
Finally, sculpting engages imagination as kids sculpt shapes, animals, characters or anything they dream up. Simple sculpting starts with a ball of clay transformed using fingers to indent, pull, and manipulate into unique creations.
Clay Sculpting
Clay is a fun, creative medium that allows kids to sculpt anything their imaginations can dream up. Some popular subjects for clay sculpting include:
Animals: Kids love sculpting animals like dogs, cats, turtles, snakes, pandas, lions, elephants, and more. Start with basic shapes like balls or coils for the body, adding legs, tails, ears, noses and other details. Sculpt familiar pets or exotic zoo animals.
Nature scenes: Clay is great for creating sculptures of nature like trees, flowers, butterflies, ladybugs, mushrooms, and landscapes. Add texture to tree bark, flower petals, and more using clay tools. Create a garden scene or forest environment.
Imaginary creatures: Let kids’ imaginations run wild sculpting dragons, unicorns, monsters, fairies, wizards, knights, robots, aliens, superheroes, and anything else they can dream up. Mix real and imaginary features together, like a bird with a dragon head and tail.
Encourage kids to plan their clay sculpture with a sketch first. Provide armatures like wire, clay pots, or cardboard tubes for support when sculpting more complex figures. Let sculptures dry fully before painting. Be creative and have fun with clay!
(Source: https://www.pinterest.com/lezleehustad/clay-projects-for-kids/)
Adding Texture and Details
Adding texture and details to clay sculptures can really make them come alive. There are lots of fun and easy ways to add interest to clay art using tools and household items.
One technique is pressing objects with texture into the clay to leave an imprint. Things like lace, bubble wrap, and burlap can create cool patterns. Forks or combs can make lines. Leaves and other natural items like pinecones can add organic texture.1
Cookie cutters, bottle caps, and other shaped items make great stamps for pressing into clay. Sponges can also stamp shapes and textures. Old gift cards or library cards can be cut into shapes and used like custom stamps.
Kids can roll little balls of clay to make dots, press fingernails in to create half moons, or use clay sculpting tools to carve lines and patterns. Let them experiment pressing different household objects into their clay sculptures to come up with unique textures.
Adding fun details gives kids a chance to get creative with their clay. Encourage them to look around for interesting items to imprint. The textures and patterns will make their clay creations special.
Pottery takes time and patience. Generally, air-dry clay will take around a week to dry fully. However, the relative humidity in the air and thickness of the clay art determines how long the drying process will take.
The drying of air-dry clay in high humidity climates like Florida and Hawaii will take longer, potentially requiring 1 to 2 weeks. Conversely, arid climates like Arizona and California will dry clay faster, anywhere from 3 to 5 days. Check if clay is fully dry by looking for any moist or sticky spots. Handle the clay to ensure it has fully hardened.
Drying and Firing
After shaping the clay, set it aside and allow it to air dry fully before painting or firing. Air-dry clay dries through evaporation, hardening as the water content decreases over time. Placing clay art in a well-ventilated area out of direct sunlight will prevent cracking or warping.
While air-dry clay will harden naturally, kiln firing is required for real pottery clay. Make sure clay is completely dry before putting pieces in the kiln. Slowly ramp up kiln temperatures no more than 100 degrees Fahrenheit per hour, up to a maximum temperature of cone 04 (1945°F) for earthenware clays. Hold at peak temperature for at least 30 minutes before cooling.
Kiln-fired pieces may require a bisque firing before applying glazes and a second glaze firing. Remember to allow ample time for clay to fully dry and cool between firings. With care and patience, you’ll have beautiful finished clay art ready for display!
Painting the Clay Sculptures
Once the clay sculptures are fully dry, it’s time for the fun part – painting! There are a few different types of paint that can be used:
Acrylic Paint – Acrylic is an excellent choice for painting clay. It adheres very well to the clay surface and dries quickly. According to How to Paint Air-Dry Clay – The Best Tutorial for DIY, acrylic is considered the top pick for painting clay. Acrylic paint is water-based, so it cleans up easily from skin and surfaces.
Tempera Paint – Tempera is a popular paint for kids’ projects because it is non-toxic and washes off easily. Some sources recommend avoiding tempera on 3D clay projects as it does not adhere as well and can chip or flake off the sculpture over time. However, using a sealer over tempera paint can help it adhere better.
Glazes – Ceramic glazes provide a glossy, glass-like finish when fired in a kiln. For air dry clay, acrylic glazes can be used to give sculptures a polished look. Glazes help smooth over brush strokes and imperfections.
When painting the clay, have kids use a combination of painting techniques like dabbing, splattering, and smoothing to add visual interest. Add final details like glitter or gemstones after the paint has dried.
Displaying Creations
After spending time crafting unique clay pieces, kids will be eager to showcase their artwork for all to see. Whether keeping them at home or taking them on the road to craft shows and exhibits, properly displaying finished clay creations helps highlight the children’s hard work and creativity.
For displaying artwork at home, parents can get creative with their setup. Hang sculptures from the ceiling with fishing line to give a floating effect. Use shelves, bookcases or tabletops to neatly line up smaller pieces. Group similar items together in sets for a cohesive look. For larger installations, use a blank wall as the backdrop and arrange sculptures on the floor in front.
To make clay artwork a focal point, set aside a dedicated display area like a corner, cabinet or table that can be decorated. Add accent lighting for dramatic effect. Rotate pieces out periodically so a variety can be shown over time.
For entering clay projects into local craft shows and exhibits, carefully pack sculptures so they are protected during transport. Once there, make sure pieces are securely positioned and won’t fall over. Choose an eye-catching yet simple backdrop that doesn’t distract from the artwork. Use risers like blocks of wood or small boxes so sculptures placed toward the back can be seen. Have business cards or information about clay classes available for interested customers.
With thoughtful effort, displaying children’s clay artwork can be almost as rewarding as creating it. Their handmade creations deserve to be shown off with pride.