Clay Playtime: Fun And Easy Projects For Kids
Clay play provides many benefits for a child’s development and creativity. Working with clay engages a child’s senses of touch, sight, and smell. The tactile experience helps develop fine motor skills, coordination, spatial awareness and strength.
As children pound, roll, squeeze, and shape clay, they are developing dexterity, problem solving skills, and eye-hand coordination. The open-ended nature of clay play encourages imagination and self-expression as children create unique sculptures, jewelry, and other clay artworks.
The sensory qualities of clay can have a calming effect on children. The repetitive motions of clay play are soothing and can help relieve stress. Creating with clay boosts self-esteem and allows children to practice decision making as they determine what to make and how to decorate it.
Clay play also provides opportunities for language development, math learning, and social interactions. Overall, playing with clay stimulates cognitive, physical, and emotional growth in fun, hands-on ways.
Basic Clay Recipes
Making your own homemade clay is a fun activity to do with kids using ingredients you likely already have around the house. The simplest clay recipes require just a few basic household items that are easy to mix together.
One of the most popular homemade clay recipes uses just baking soda, cornstarch, and water. Simply mix together 1 cup baking soda, 1 1⁄2 cups cornstarch, and 1 1⁄4 cups water in a pot over medium heat, stirring constantly until it forms a ball you can knead. Let it cool before using (Source: https://onelittleproject.com/how-to-make-clay/). This baking soda clay air dries hard and makes great sculptures.
For colored clay, you can add a few drops of food coloring or acrylic paint. Kool-aid powder also infuses fun fruity scents and vibrant colors. Let kids explore mixing custom colors and scents. Store unused clay in an airtight container or plastic bag.
Another easy homemade clay uses flour, salt, and water. Mix together 1 cup flour, 1/2 cup salt, and 1/3 cup water. Cook over medium heat until it forms a dough ball. This basic edible clay is perfect for making clay jewelry, beads, and more since it air dries hard (Source: https://parents.highlights.com/how-to-make-clay).
Experiment with different homemade clay recipes to find your favorite textures and properties. The key is using ingredients you likely already have on hand for affordable, simple clay playtime.
Clay Tools and Materials
Kids can get started with just their hands to mold and shape clay creations, but some basic tools will help open up more possibilities. Here are some essentials:
Rolling Pin – A basic rolling pin allows kids to roll out slabs of clay and flatten their sculptures. Acrylic or wooden rolling pins work well. Look for small sizes made for kids (cite: Clay Tools For Kids).
Modeling Tools – Basic modeling tools help shape, sculpt, carve, and refine details. Look for starter packs with an assortment of loops, ribs, balls, and other shaped tips (cite: Kids Polymer Clay Products).
Cookie Cutters – Metal cookie cutters make it easy to cut out consistent clay shapes. Collect an assortment of fun shapes and sizes (cite: Caydo 17 Pieces Plastic Kids Clay Tools Ceramic).
Toothpicks – These are great for making holes and details. Plastic cocktail sticks can substitute.
Some other fun items for kids to use include plastic knives, straws, stamps, alphabet letter cutters, and even Legos!
Clay Safety
Supervision is extremely important when kids are working with clay to ensure safety and avoid potential hazards. Clay should never be consumed, so adult supervision helps prevent kids from putting clay in their mouths. Additionally, some clay products contain toxic materials, so supervision prevents exposure to lead and other harmful substances. Proper storage of clay is also key – keep clay in sealed containers and avoid cross-contamination with food. Clean hands and work surfaces thoroughly after working with clay.
According to dowlingart.weebly.com, some basic clay safety tips include:
- Do not misuse clay tools
- Keep clay moist while working to avoid dust
- Store dry or unworkable clay in sealed bags
- Clean hands and surfaces after clay work
With supervision and common sense precautions, creating with clay can be fun and safe for kids of all ages.
Clay Texture Experiments
One of the best ways for kids to learn about working with clay is to experiment with different clay handbuilding techniques like slab, coil, and pinch pots. These techniques allow kids to explore different textures and forms while developing fine motor skills.
Pinch pots are a great introductory technique where kids use their fingers and thumbs to pinch and stretch the clay into a simple pot form. Pinching clay helps kids strengthen their finger muscles while learning how to hollow out a form.[1] Coil building involves rolling out “snakes” from clay and stacking or attaching them to build pottery shapes. Coiling teaches kids about working carefully and methodically as they build up their creation. For slab building, kids can roll out a flat “pancake” of clay with a rolling pin and then cut shapes out of the slab to construct objects.[2] Sculpting solid forms from clay slabs helps develop spatial reasoning.
Experimenting with these techniques allows kids to compare the textures and forms they can create. And it builds excitement to see what they can make by combining pinching, coiling, and slabs in fun new ways.
Themed Sculptures
Kids love making clay sculptures shaped like their favorite animals, foods, vehicles, and more. Sculpting themed creations helps develop fine motor skills and creativity. Here are some fun ideas for themed clay sculptures:
Animals: Clay is perfect for sculpting animals like dogs, cats, turtles, frogs, and more. Encourage kids to pay attention to details like eyes, ears, tails, and texture. Let them use toothpicks or clay tools to add lines for fur or scales. For stability, sculpt animals on all fours. Source
Food: Making food out of clay allows kids to get creative in the kitchen without the mess! Pizza, ice cream cones, fruit slices, and donuts are all fun options. Add clay “toppings” to pizza or make stacked scoops of ice cream. Brightly colored clay mimics real fruit. Source
Vehicles: Craft clay cars, trucks, trains, planes, and more. These are great small-scale projects or can be made larger by shaping clay around recycled materials like toilet paper tubes for axles. Let kids make their dream vehicles with wings, flames, and other fun details.
Encourage kids to make themed clay sculptures from their own imaginations too. Provide inspiration with picture books, nature items, or toys, then step back and let their creativity flow!
Basic Shapes
One of the first things to teach kids when working with clay is how to form basic shapes like balls, snakes, and pancakes. Rolling balls helps strengthen hand muscles and develops hand-eye coordination. Snakes teach fine motor skills and how to roll clay into a long, cylindrical shape. Flattening clay into pancakes introduces them to using fingers, palms, and tools to change the clay’s form.
To teach basic clay shapes:
- Balls – have kids roll clay between their palms into a smooth, rounded shape. Encourage using both hands. Balls can be various sizes from marble to baseball sized.
- Snakes – roll clay with both hands moving back and forth, applying light pressure. Stretch snakes to make them longer. Curl snakes into spirals, letters, or numbers.
- Pancakes – use palms to flatten clay, applying even pressure. Make thin pancakes using fingertips or wide ones with two hands. Cut shapes like circles or squares.
Practicing these shapes builds fine motor control for preschoolers. Roll the clay as thin or thick as desired. Combine shapes to form simple objects like fruit, animals, or letters. Let kids get creative flattening, squeezing, and shaping the clay. For more ideas see: https://www.howwemontessori.com/how-we-montessori/2022/01/clay-skills-techniques-to-teach-children.html
Clay Painting
An easy way for kids to decorate their clay creations is by painting them with acrylic paints or glazes. Once clay has been baked or dried, it becomes hard and can no longer be molded. But this is the perfect time to add color and designs using paint!
Acrylic paint works great on cured polymer clay and air-dry clay. Be sure to use acrylic paint formulated for clay, ceramics or other porous materials so it adheres properly. Apply acrylics in thin layers and allow them to dry completely before adding another coat or layer of paint. Acrylics will dry with a matte finish. For a shiny look, you can apply a clear acrylic glaze over the top.
Another decorative option is to use ceramic glazes on baked clay made from natural ingredients like clay and water. Glazes help fill in pores and create a glossy, glass-like finish when fired at high temperatures. Low-fire glazes specially designed for oven-baked clays are also available. Have kids use a small paint brush to paint on glaze designs.
Here are some fun ways kids can paint clay creations:
- Paint landscapes, patterns, animals or abstract art using a variety of acrylic paint colors
- Add polka dots, stripes, swirls and other designs with glazes
- Use templates or stickers to create shapes, letters or images
- Try sponge painting, splatter painting or marbleizing effects
- Mix colors on a painter’s palette to make new shades
- Use paint pens, glitter glues or puffy paints for 3D effects
- Experiment with mixing glazes together
The colors and designs kids add using paints and glazes will give their completed clay projects a vibrant, personal touch. Display painted clay creations around the home or give them as homemade gifts.
Source: https://www.scholastic.com/parents/school-success/learning-toolkit-blog/painting-clay.html
Clay Jewelry
Making jewelry with clay is a fun way for kids to get creative and make unique accessories. Clay is very versatile and can be shaped into beads, pendants, charms, rings, earrings, and more. Here are some tips for making clay jewelry with kids:
To make beads, roll small balls or cubes of clay between your palms or on a flat surface. Add texture by pressing designs into the clay with stamps, toothpicks, or other tools. Use a skewer to pierce a hole for stringing before baking. Let beads cool completely after baking before threading them (Source: https://www.pinterest.com/cshackley/my-kids-polymer-clay-jewelry/).
Pendants can be made by flattening a piece of clay into a circle or shape, then using cookie cutters or clay tools to cut out designs. Make a hole with a skewer before baking. Cool completely before adding a cord. Encourage kids to press designs or textures into the clay to make unique pendants (Source: https://www.pinterest.co.uk/carajaneuk/polymer-clay-projects-for-kids/).
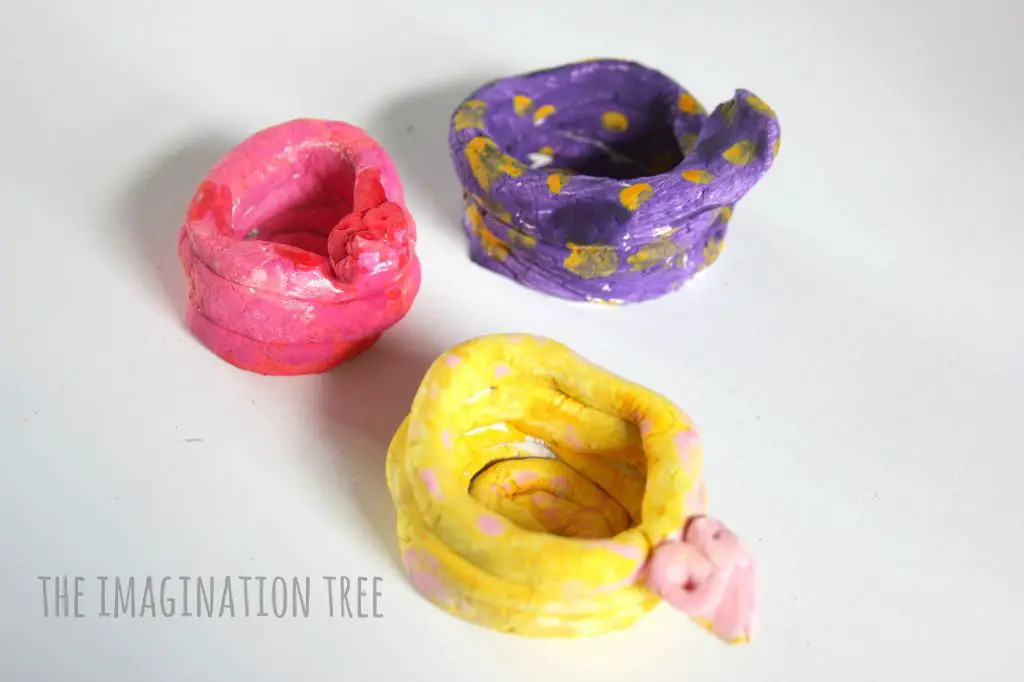
Simple rings are easy to make by rolling a snake of clay into a coil, pressing the ends together to form a ring shape, then baking. For durability, insert a ring blank before baking. Rings can also be decorated by attaching clay shapes or pressing texture into the band (Source: https://www.pinterest.com/cshackley/my-kids-polymer-clay-jewelry/).
Earrings can be made using light-weight clay blends. Roll balls or sculpt shapes for dangle earrings, or cut simple circles or shapes for studs. Use cookie cutters to make interesting stud shapes. Add a finding before baking or glue one on after baking to finish the earrings.
Displaying Clay Creations
Kids can take great pride in the clay creations they make, so displaying their finished pieces becomes an important part of the clay experience. There are many creative ways to exhibit clay artwork made by children around the home that enable them to share their creations with others. Some ideas include:
- Setting up a dedicated display shelf or table. Make sure it’s sturdy enough to hold clay pieces without tipping over.
- Hanging clay creations on the wall or fridge using removable adhesive strips or magnets. Magnets work great for flat items like clay jewelry or plaques.
- Placing pieces on windowsills around the house to create a colorful clay exhibit.
- Using wire or string to create mini clotheslines for hanging 3D clay sculptures.
- Stacking pieces inside jars or clear containers to show them off.
- Turning clay bowls, cups, and dishes into functional kitchenware or bathroom accessories.
- Photographing finished pieces and collecting them in a memory book or online album to preserve the artwork.
- Entering extra special clay creations into kids’ art competitions or exhibits.
- Giving clay gifts like jewelry or figurines to loved ones.
The key is finding display methods that keep fragile clay artwork safe while allowing kids to feel proud of their hard work. Get the whole family involved in finding creative ways to show off your child’s unique clay masterpieces.