Clay Sculpture For Beginners: Tips And Tricks
Clay has been used for sculptural purposes for thousands of years, with some of the earliest known clay sculptures dating back over 25,000 years. Some of the earliest clay sculptures include the Venus of Dolní Věstonice, a ceramic figurine from the Pavlovian culture of the Upper Paleolithic period, and simple clay animal and human figurines from ancient Mesopotamia.
Clay sculpture remains a popular art form today due to the accessibility and workability of clay. Clay is an inexpensive, easy to find material that can be molded into endless forms. It’s also a very forgiving medium – unwanted clay parts can simply be cut away or smooshed back into the original clay block for reuse. These qualities make clay sculpture an approachable art form for beginners and hobbyists.
There are many techniques used in clay sculpture. These include pinching, coiling, slab construction, wheel-throwing, and modeling with solid clay blocks. Clay sculptures may incorporate additional mixed media elements as well. Once completed, clay sculptures are often fired in a kiln to harden and preserve the artwork. Common types of clay used for sculpting include earthenware, stoneware, and porcelain.
Benefits of Sculpting with Clay
Clay sculpture can be a fun, relaxing hobby that provides many benefits. Some key benefits of sculpting with clay include:
Creative and relaxing hobby – Clay is an incredibly versatile and malleable material that allows complete freedom of expression. The process of sculpting is relaxing and meditative, providing a soothing creative outlet to reduce stress and anxiety.
Develops fine motor skills – Sculpting clay is a tactile experience requiring hand-eye coordination and dexterity. Manipulating the clay engages fingers, hands and wrist muscles, improving fine motor control.
Allows for creative expression – Clay enables sculptors to give physical form to their imagination. It’s a medium for bringing creative ideas and emotions to life in 3D. The endless possibilities allow for individual creative expression.
Fun social activity – Creating with clay can be enjoyed alone or as a shared social experience. Group classes provide an opportunity to learn, create communally and socialize. For children, playing together with clay encourages social development.
According to research, clay sculpting provides therapeutic benefits including stress relief, improved mood, and creative self-expression. The physicality of manipulating clay engages the mind and body in a relaxing, rewarding way.
Types of Clay
There are two main categories of clay used for sculpting – polymer clay and ceramic clay. Polymer clay is made from polymers, fillers, and pigments that allow it to be molded when raw and hardens when baked at relatively low temperatures. Ceramic clay is made from natural components like clay minerals and requires higher firing temperatures to harden it.
Polymer clays come in both pre-colored and neutral/natural varieties. Pre-colored clays allow you to sculpt final pieces without having to paint them. Popular brands of pre-colored polymer clay include Sculpey and Fimo. Neutral polymer clays like Cernit and Kato Polyclay can be mixed with colors or painted after sculpting and baking. Ceramic clays are traditionally natural earthen tones, but can also be found in gray or white. Well-known ceramic clay brands include Pottery Plaster and Laguna Clay.
The main differences come down to polymer clays being easy to mold at room temperature, while ceramic clays require more effort. Polymer clays produce lightweight finished pieces, while ceramic has more weight. Consider the desired use and feel when choosing between them. Both offer versatility for sculpting detailed and durable clay artworks.
Essential Tools
Having the right sculpting tools is key for effectively shaping and detailing your clay sculptures. Here are some of the most essential tools for clay sculpting beginners:
A sculpting knife is a versatile tool used for cutting, smoothing, and slicing clay. Often made with thin, flexible steel blades, sculpting knives allow you to make precision cuts and finely detail your sculpture 1.
A rolling pin is useful for flattening and thinning clay for bases or backgrounds. An acrylic rolling pin that won’t stick to the clay works best 2.
Clay shapers have rounded, blunt ends that let you smooth and shape clay without leaving marks. Having a variety of tipped clay shapers allows for detailed sculpting.
Cutting wires make it easy to slice through clay and cut pieces off your sculpture as needed.
A sculpting stand or turntable provides a rotating surface to sculpt on, allowing you to easily turn and view your work from all angles.
Clay Sculpting Techniques
There are a variety of techniques to sculpt with clay as a beginner. The basic techniques to start with include:
Pinching
Pinching is done by squeezing and pulling the clay with your fingers and thumbs. It’s a great way to make simple organic shapes and details. Pinch pots are a common beginner project.
(Source)
Coiling
Coiling involves rolling out “snakes” of clay into coils, then stacking the coils to build up 3D forms. Coiling allows you to gradually build up height in a sculpture. Hollow coils can be used to create vessels.
(Source)
Slab Construction
For slab building, roll out a flat “slab” of clay with a rolling pin. Cut out shapes from the slab and join them together, or drape slabs over an armature. Slab construction is good for making flat surfaces and angular forms.
Sculpting Solid Figures
Beginner sculptors can make solid figures by starting with a large ball or egg shape for the body. Use pinch and pull motions to form the head, limbs and features. Faces can be sculpted using simple shapes like balls and coils. (Source)
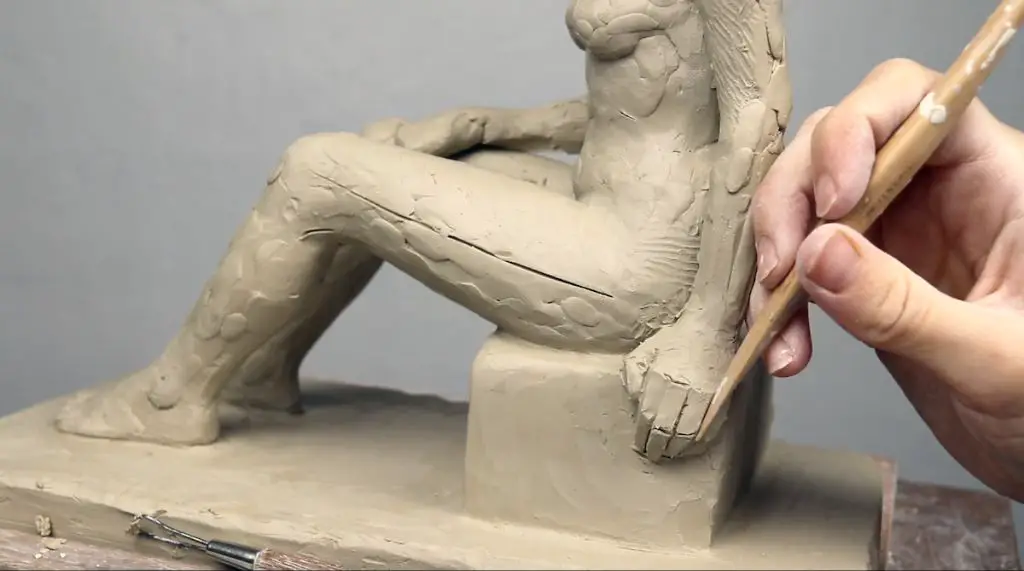
Sculpting the Human Figure
One of the most rewarding subjects to sculpt as a beginner is the human figure. Paying attention to body proportions, positions, and facial features will help you create a realistic human figure sculpture.
When sculpting a human figure, it’s important to understand the basic anatomical proportions. A general rule is that the figure should be 7-8 heads tall. The head itself can be divided into thirds – the chin to nose, nose to brow, and brow to top of head. The torso is about 3 heads long. Other guidelines are that the width of the shoulders is 2 heads wide, while the hips are about 1 head wide. The hands should be the same length as the face.
Think about the pose and position the figure will be sculpted in. Sculpting a standing figure versus a seated figure will require adjusting proportions and considering balance. Pay attention to how the weight is distributed and how the body’s contours curve at various angles.
Facial features bring a sculpture to life. Eyes are generally halfway between the bottom of the chin and top of the forehead. Use calipers or a ruler to measure equal distances between features. Note highlights and shadows to create realistic details. Be patient sculpting the fine details of eyes, nose, lips and ears.
Refer to anatomy books or take a life drawing class to deepen your understanding of the human form. Start with simple poses and gestures before attempting more complex compositions. Take your time to observe and measure as you sculpt.
With some guidance on proportions, thoughtful posing, and care sculpting facial features, you can create realistic and dynamic human figure sculptures out of clay. For a helpful visual guide through the process, check out this video on sculpting the human figure: https://www.sculptureatelier.com/blog/how-to-sculpt-the-figure
Sculpting Animals
When sculpting animals in clay, paying close attention to anatomy, movement, and texture can help make your sculptures look more realistic and lifelike. Here are some tips for sculpting animals in clay:
Observe anatomy. Look at photos and videos of the animal you want to sculpt and take note of the proportions, muscle structure, and skeletal anatomy. Capturing the proper proportions from head to tail will help make your sculpture look natural.
Capture movement. Sculpt the animal in a dynamic pose, like mid-run or mid-jump, rather than just standing still. Consider the direction of the limbs, position of the head, and flow of the body to suggest motion.
Focus on textures. Use clay tools to add textures like fur, scales, feathers, or wrinkled skin. For short fur, make small indentations with a tool. For feathers, make thin coils. Research reference images to see how to recreate different textures.
According to Kness, when sculpting animals, start by sculpting the major forms and proportions before adding finer details like fur or feathers. Building up textures layer by layer can create realistic effects.
Finishing Techniques
Once your clay sculpture is complete, there are several finishing techniques to make it look polished and professional. Proper finishing is essential for preserving your artwork and bringing out the best qualities in the clay.
Sanding
Sanding smoothes the surface of the clay and removes any fingerprints or imperfections. Start with a coarse grit sandpaper like 120 grit to quickly shape and smooth the surface. Then use progressively finer grits like 220, 400, and 600 to achieve a silky smooth finish. Always sand in small circular motions and clean the sculpture of dust between sanding sessions.
Painting
Painting brings color and life into a clay sculpture. Acrylic paints are recommended for clay as they fully cure and adhere well to the surface. Use thin layers of paint and allow each coat to dry fully before adding the next. Pay special attention to hard-to-reach areas so paint covers evenly. Let the paint cure for several days before applying a protective sealant.
Varnishing
Varnish provides a glossy, protective seal for painted clay sculptures. Polyurethane is commonly used as it resists yellowing and lasts for many years. Use a foam brush to apply 2-3 thin, even coats of varnish, allowing each to dry fully. The varnish preserves the paint, provides UV protection, and gives the sculpture a finished look.
Baking
Baking hardens and strengthens clay artwork. Follow the temperature guidelines for your particular clay. Place the sculpture on a ceramic tile or baking sheet and bake for the recommended time. Baking makes the clay more durable and improves the finish. Let the sculpture cool fully before removing it from the oven.
Troubleshooting Common Issues
Clay sculpture can be a fickle medium, and problems like cracking, breakage, and paint adhesion issues are common. Here are some tips for troubleshooting the most frequent problems:
Cracks
Cracks often form as clay dries and shrinks. To minimize cracking, avoid thick sections and let clay dry slowly and evenly. Seal cracks immediately with water or slip. For cracks wider than 1 mm, patch with fresh clay and blend into surface[1]. Also, make sure your clay moisture content is optimal – not too wet or dry.
Breakage
Fragile protrusions like limbs are prone to breakage. Use armatures for support and avoid overly thin sections. Attach protrusions with slip and score surfaces for better adhesion. If a piece breaks, repair immediately with slip or liquid clay. Let dry fully before proceeding.
Paint Not Adhering
For paint to bond well, ensure clay is fully dry and clean off dust. Always use a primer coat first. Acrylic polymer medium mixed with paint also improves adhesion. Try roughing up very smooth surfaces before painting. If paint rubs off, touch up with more paint mixed with medium.
[1] https://study.com/academy/lesson/common-problems-solutions-in-sculpting.html
Displaying and Storing Clay Sculptures
When it comes to displaying your clay sculptures, you have several options. Here are some tips for effective display:
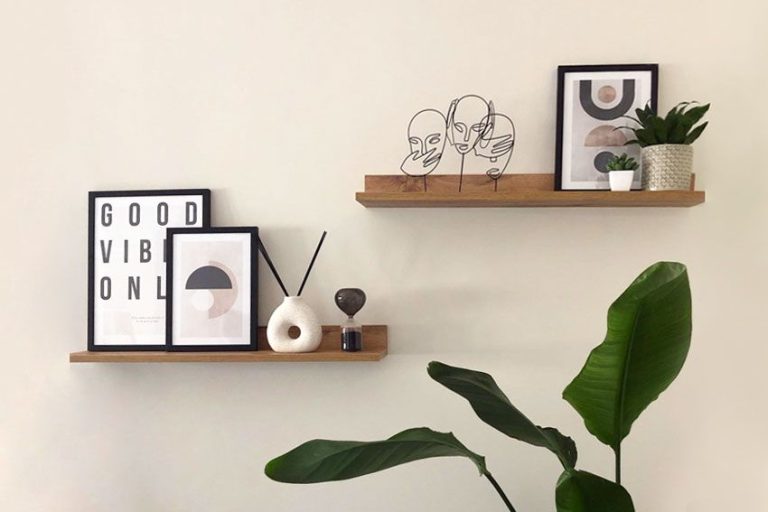
Shelves are a great way to showcase your sculptures. You can use open shelves, glass cabinet shelving, or specialized sculpture stands. Make sure to position your sculptures so they can be viewed from all angles. Leave enough space between pieces so they don’t crowd each other. According to tips from experienced clay artists, use risers or shelves at varying heights to create an appealing display.
For more protected storage, display your clay sculptures in glass cabinets or curio cabinets. The glass allows visitors to view the artwork while keeping it safe from accidental bumps and dust. Place small sculptures on glass shelves with felt or foam to prevent scratching. Hang wall sculptures using museum wax or other removable adhesive. Remember to open the cabinet doors frequently for air circulation to prevent moisture buildup.
Take measures to protect your clay sculptures from direct sunlight, excessive heat, and humidity. UV rays from the sun can cause fading and degradation over time. Avoid placing pieces near heating/cooling vents that blow hot or cold air directly on them. Extreme swings in humidity can impact dried clay. According to sculpture experts, the best storage has consistent, moderate temperature and humidity.