15+ Best Concrete Kitchen Countertops
Making concrete countertops is a multi-step process, with the most challenging part being the creation of the mold. Once the mold is built, the rest of the process involves manual labor and patient finishing techniques. There are two common methods for making concrete countertops: pouring the mixture directly onto existing cabinetry or creating a mold and completing the installation off-site before placing it on top of the cabinets.
In this article, we’ll focus on the latter method and provide an overview of the basic process involved in building concrete countertop molds. The process begins with the creation of knockouts and openings within the mold to accommodate any necessary plumbing or electrical components. Next, the sides of the mold are attached and sealed to ensure a watertight seal. With the mold complete, it’s then possible to pour the concrete mixture into the mold and allow it to set.
The resulting countertop can be finished in various ways, including grinding and polishing, as well as addressing any pinholes or voids that may have formed during the curing process. This article will provide a comprehensive guide on how to cure, grind, and polish a concrete countertop, giving you the knowledge and confidence to tackle this project yourself.
A. Building the Concrete Counter Top Mold
To create a countertop mold, start by building a reverse pattern of what the finished countertop will look like. This is because the concrete will be poured into the mold and then left to sit for a couple of days before being turned over and out of the mold. The bottom of the mold will become the finished surface of the installed countertop.
Begin by laying down strips of cardboard or thin wood along the perimeter of existing cabinetry, allowing for an overhang over the front of the cabinets.
Use a hot glue gun to attach the strips together, leaving a 1/8-inch gap between the mold pattern and any walls to allow for some wiggle room during installation. Mark where any openings for sinks will be with additional strips.
Label the pattern carefully, indicating the top, left, right, front, and back of the countertop, as well as the location of faucets or soap dispensers and the centerlines of sink knockouts.
Since each length of counter will require its own mold, ideally no molds should be longer than ten feet long.
White 3/4-inch melamine-covered particle board is an ideal material for making molds. The final countertop surface will be very smooth without any troweling required. Flip the pattern upside down onto a piece of melamine and trace the outline with an eraseable pencil. Saw along the outline with a saw blade appropriate for melamine.
Be careful not to scratch or nick the melamine, as any imperfections will transfer to the countertop surface. Transfer the pattern’s markings of left, right, front, and back, and label inside with an arrow on the edges of the mold. Every five feet or so, create a break in the concrete by vertically inserting a piece of painted aluminum flashing into the mold. Cut the flashing so that its top is flush with the side walls of the mold.
Creating Concrete Countertop Knockouts and Openings
When preparing for undermount sink installations, start by tracing the pattern piece onto dense styrofoam, ensuring it matches the thickness of your desired countertop finish. Use a band saw to carefully cut along the line, taking care to keep the edge as smooth as possible if an undermount sink is involved. Wrap the sawn edge with packing tape, applying it evenly and starting and ending the strip on the edge of the sink knockout closest to the front of the counter.
This will help minimize any imperfections in the finished exposed sink edge, which are unlikely to be noticeable. For faucet, soap dispenser, and mold knockouts, opt for PVC pipe or wood, selecting diameters that accommodate your fixtures’ hardware and installation tools. In some cases, you may need to use stacked pipes of different sizes – a narrower inner pipe fitting the actual hardware, and an outer pipe providing space for wrenches during installation.
Attaching the Concrete Counter Top Mold Sides and Sealing
Before moving on to attach the side walls, ensure the voids are secured to the mold surface and evenly spaced. Cut melamine sidewall pieces to fit the perimeter of the counter mold, with a height that matches the desired countertop thickness. Pre-drill holes and screw drywall screws every 6 inches along the outer edge and corner butt joints.
To prevent water from seeping out during the concrete pouring process, apply a silicone seal around the inner edges of both the mold surface and sidewalls, leaving about 1/16 inch gap between the tape and edges. Using painter’s masking tape, create a barrier that wraps around the entire mold. Once you’ve applied an adequate amount of silicone using a caulk gun, smooth it out with your finger to achieve a subtle convex shape.
Be cautious not to work too slowly, as the silicone will start to skin over time and become unworkable. After smoothing, remove the tape to reveal a seamless seal.
Pouring the Concrete Kitchen Countertop
The effort invested in crafting an immaculately accurate and well-sealed mold has a direct bearing on the final quality of the concrete countertops. With the mold now ready, attention can shift to pouring the concrete, marking the start of the next crucial stage in this process.
B. 15+ Concrete Kitchen Countertops
#1. Mid-sized trendy limestone floor and gray floor open concept kitchen design
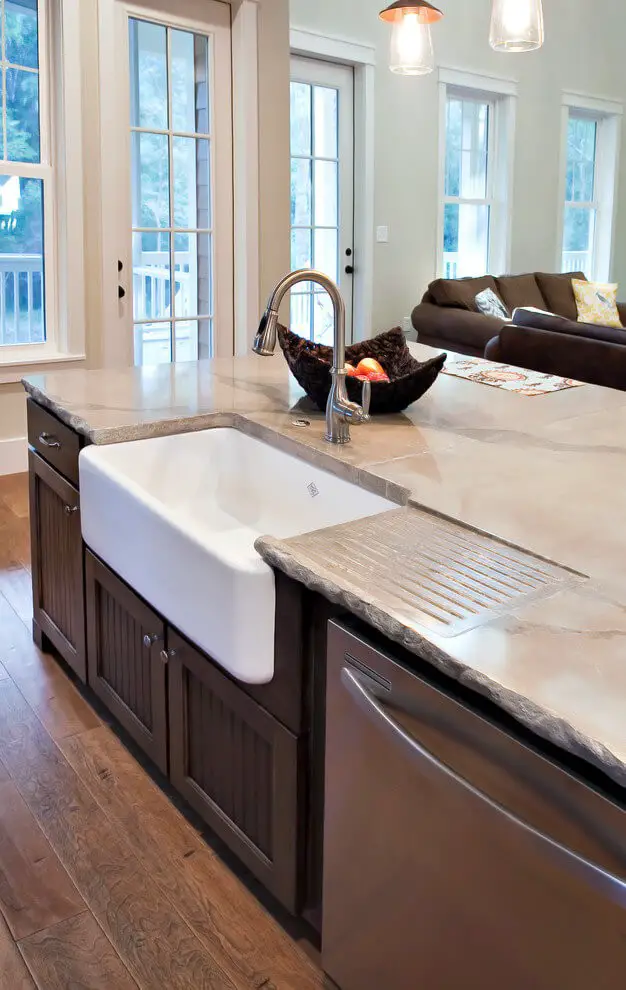
#2. Farmhouse kitchen

#3. Contemporary kitchen

#4. Rustic kitchen idea with light wood cabinets and concrete countertops
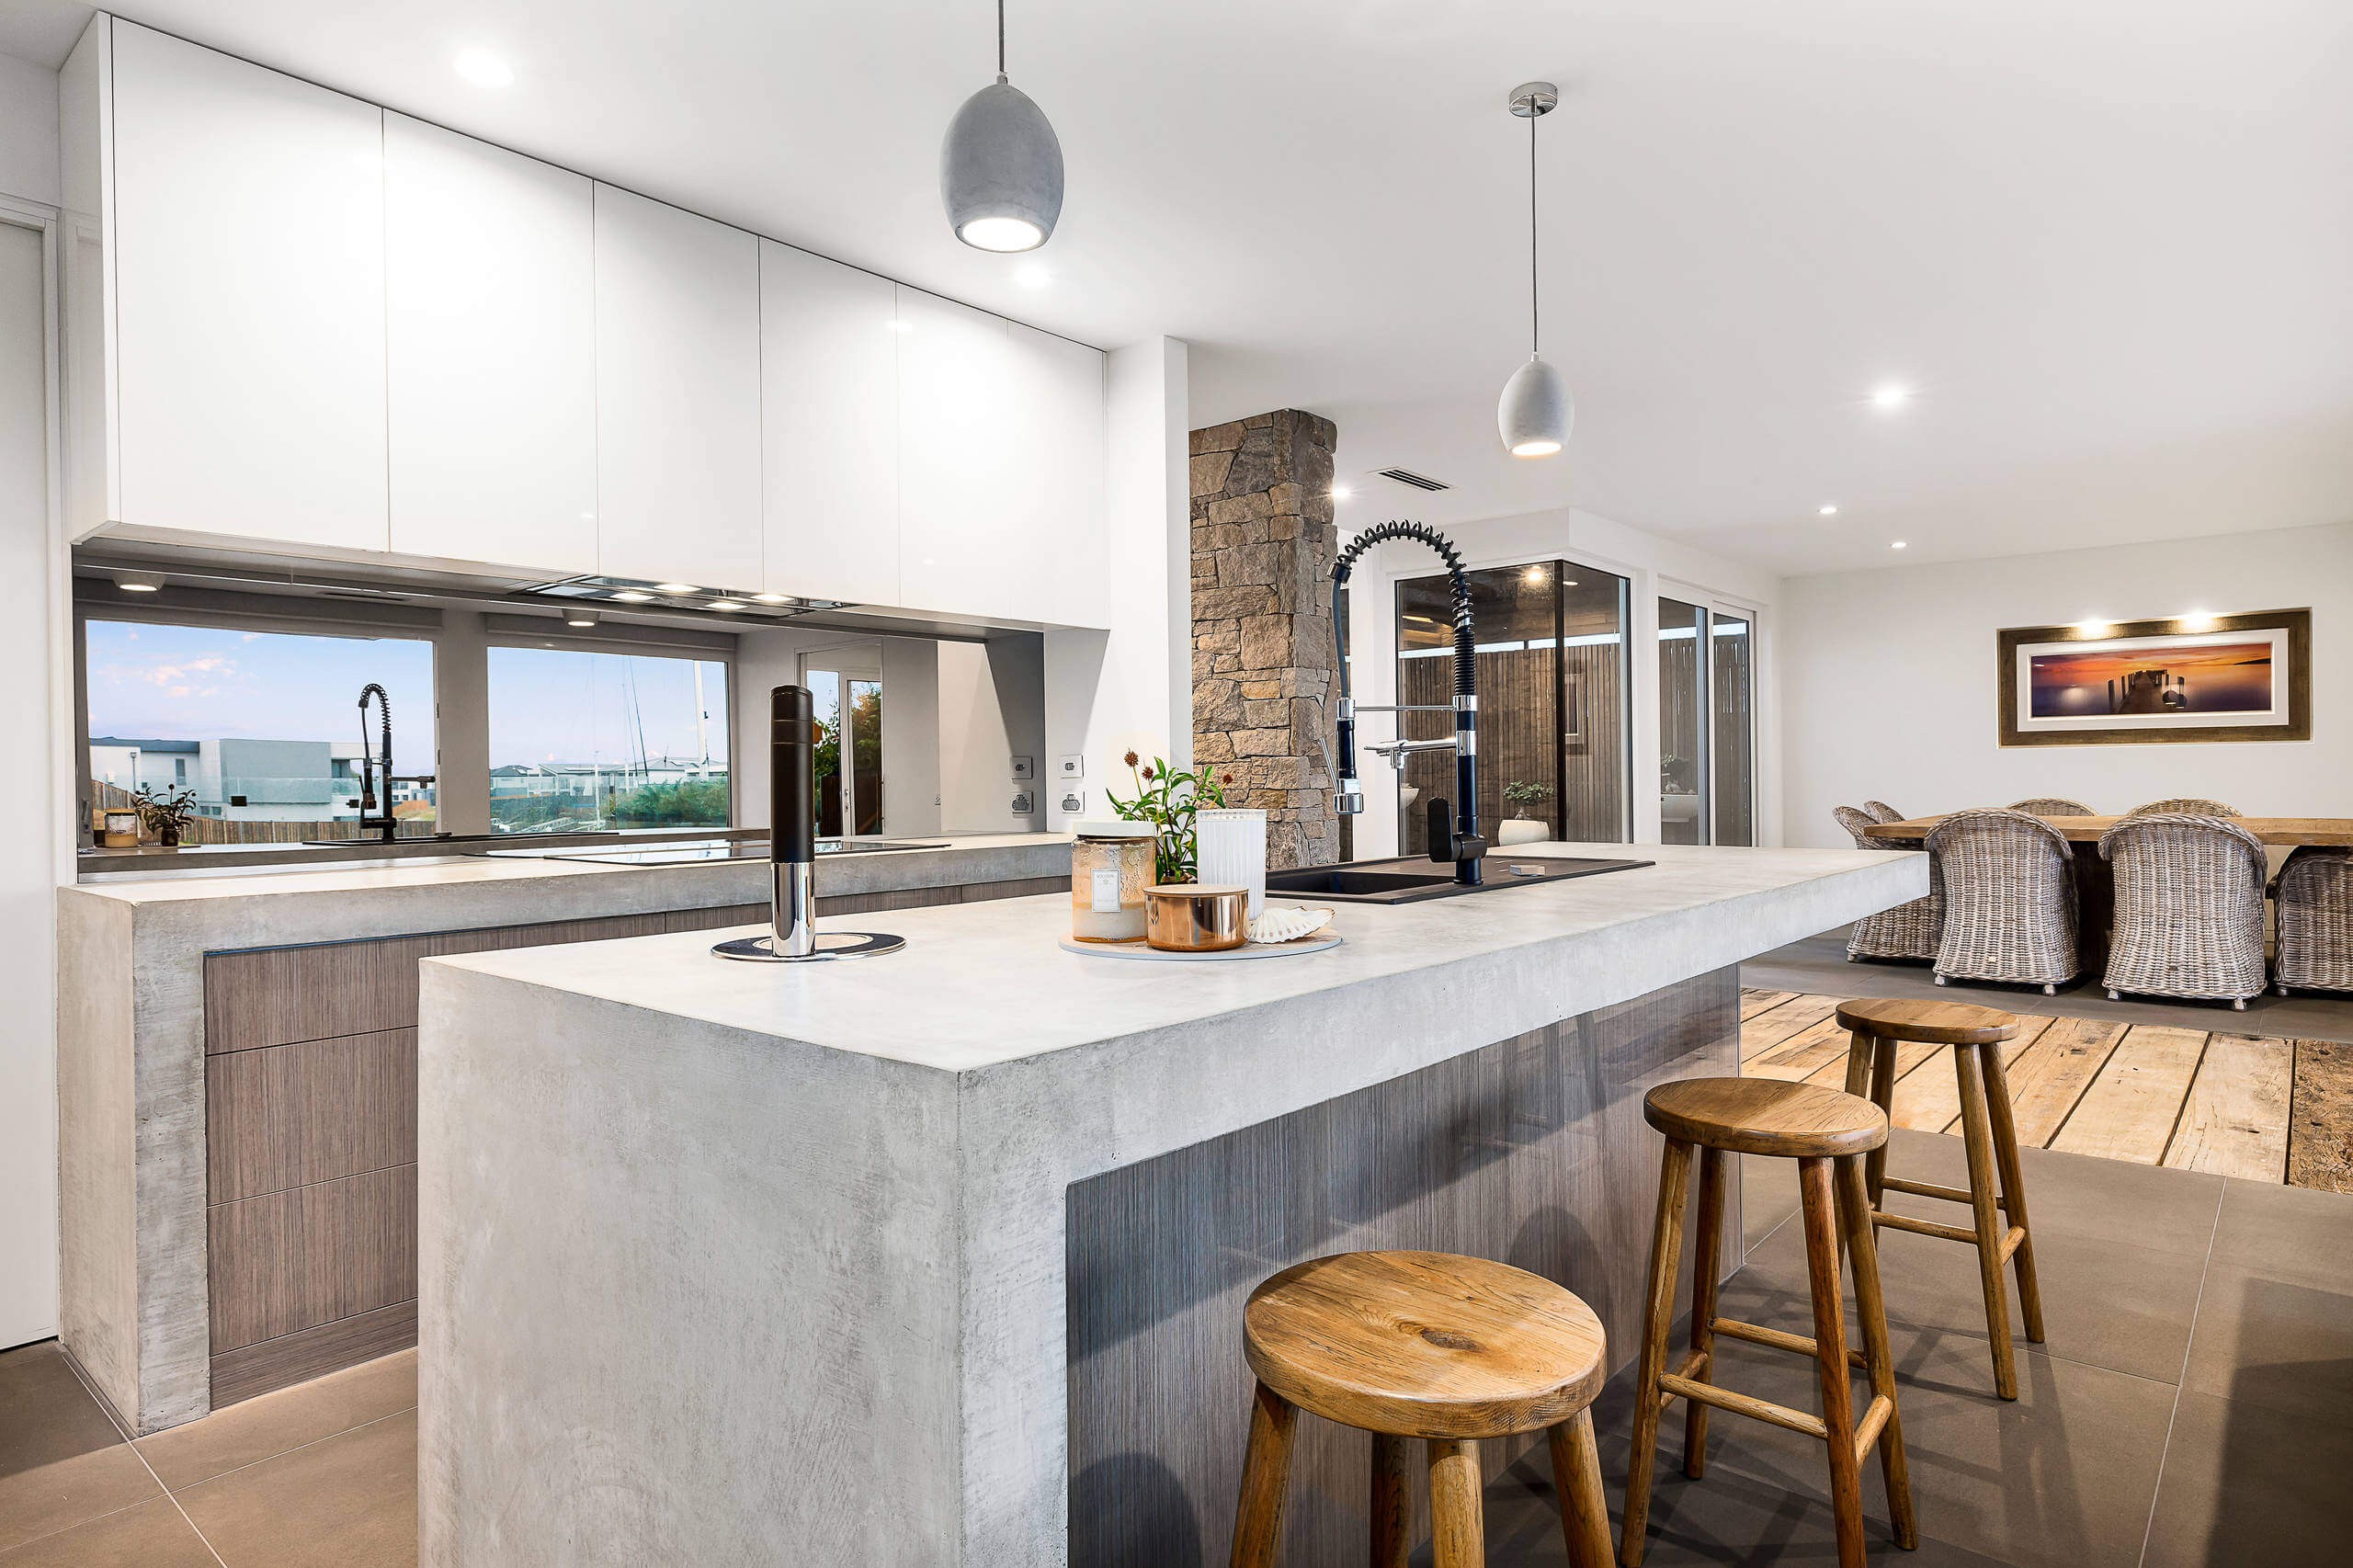
#5. Contemporary kitchen idea with concrete countertops and stainless steel appliances

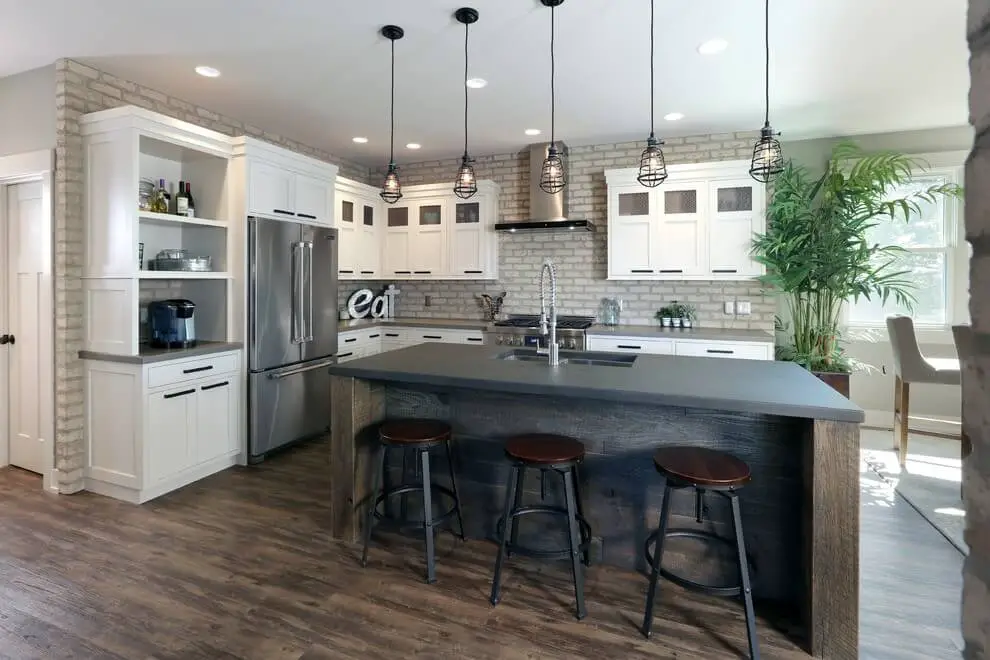
#6. Contemporary dark wood floor eat-in kitchen remodel with flat-panel cabinets and white cabinets

#7. Urban l-shaped dark wood floor kitchen with concrete countertops, stainless steel appliances and an island
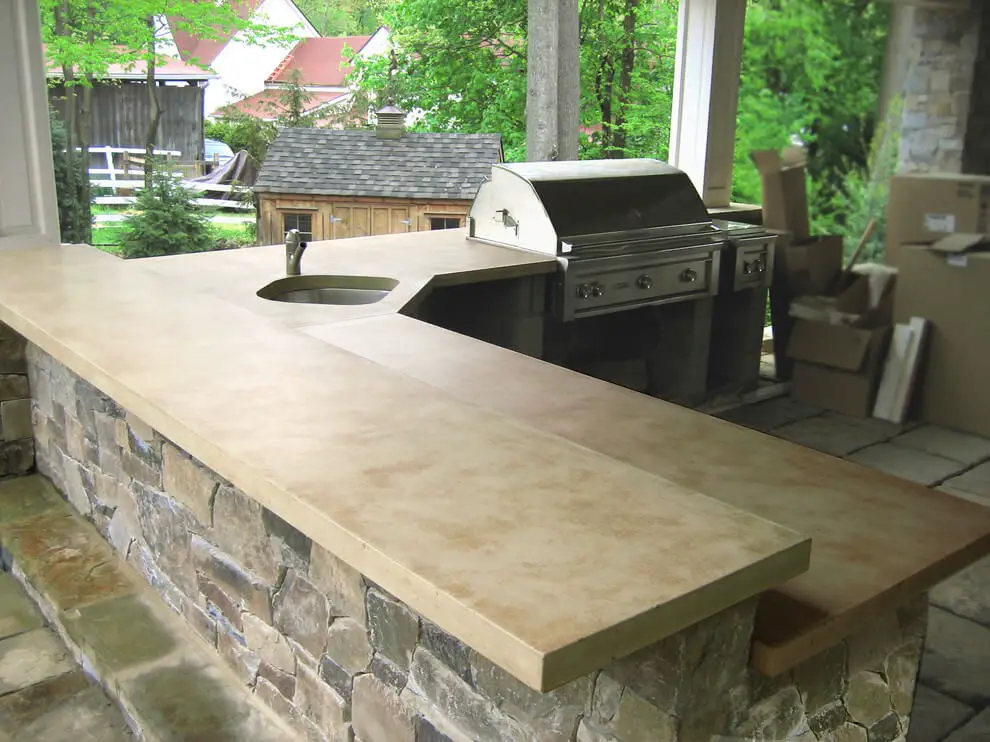
#8. Outdoor Light Brown Concrete Kitchen Countertops
#9. Rustic kitchen with distressed cabinets, stainless steel appliances, an integrated sink and shaker cabinets

#10. Mountain style

#11. Inspiration for a timeless kitchen remodel with concrete countertops

#12. Mid-sized industrial single-wall concrete floor and gray floor kitchen idea

#13. Elegant kitchen with concrete countertops
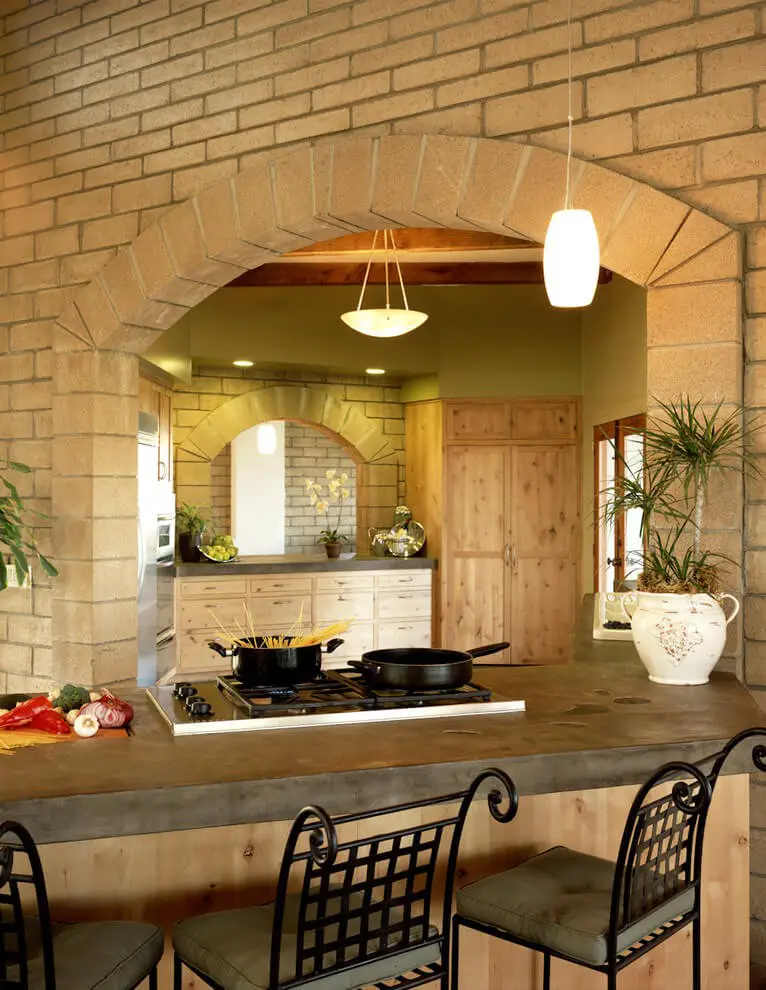
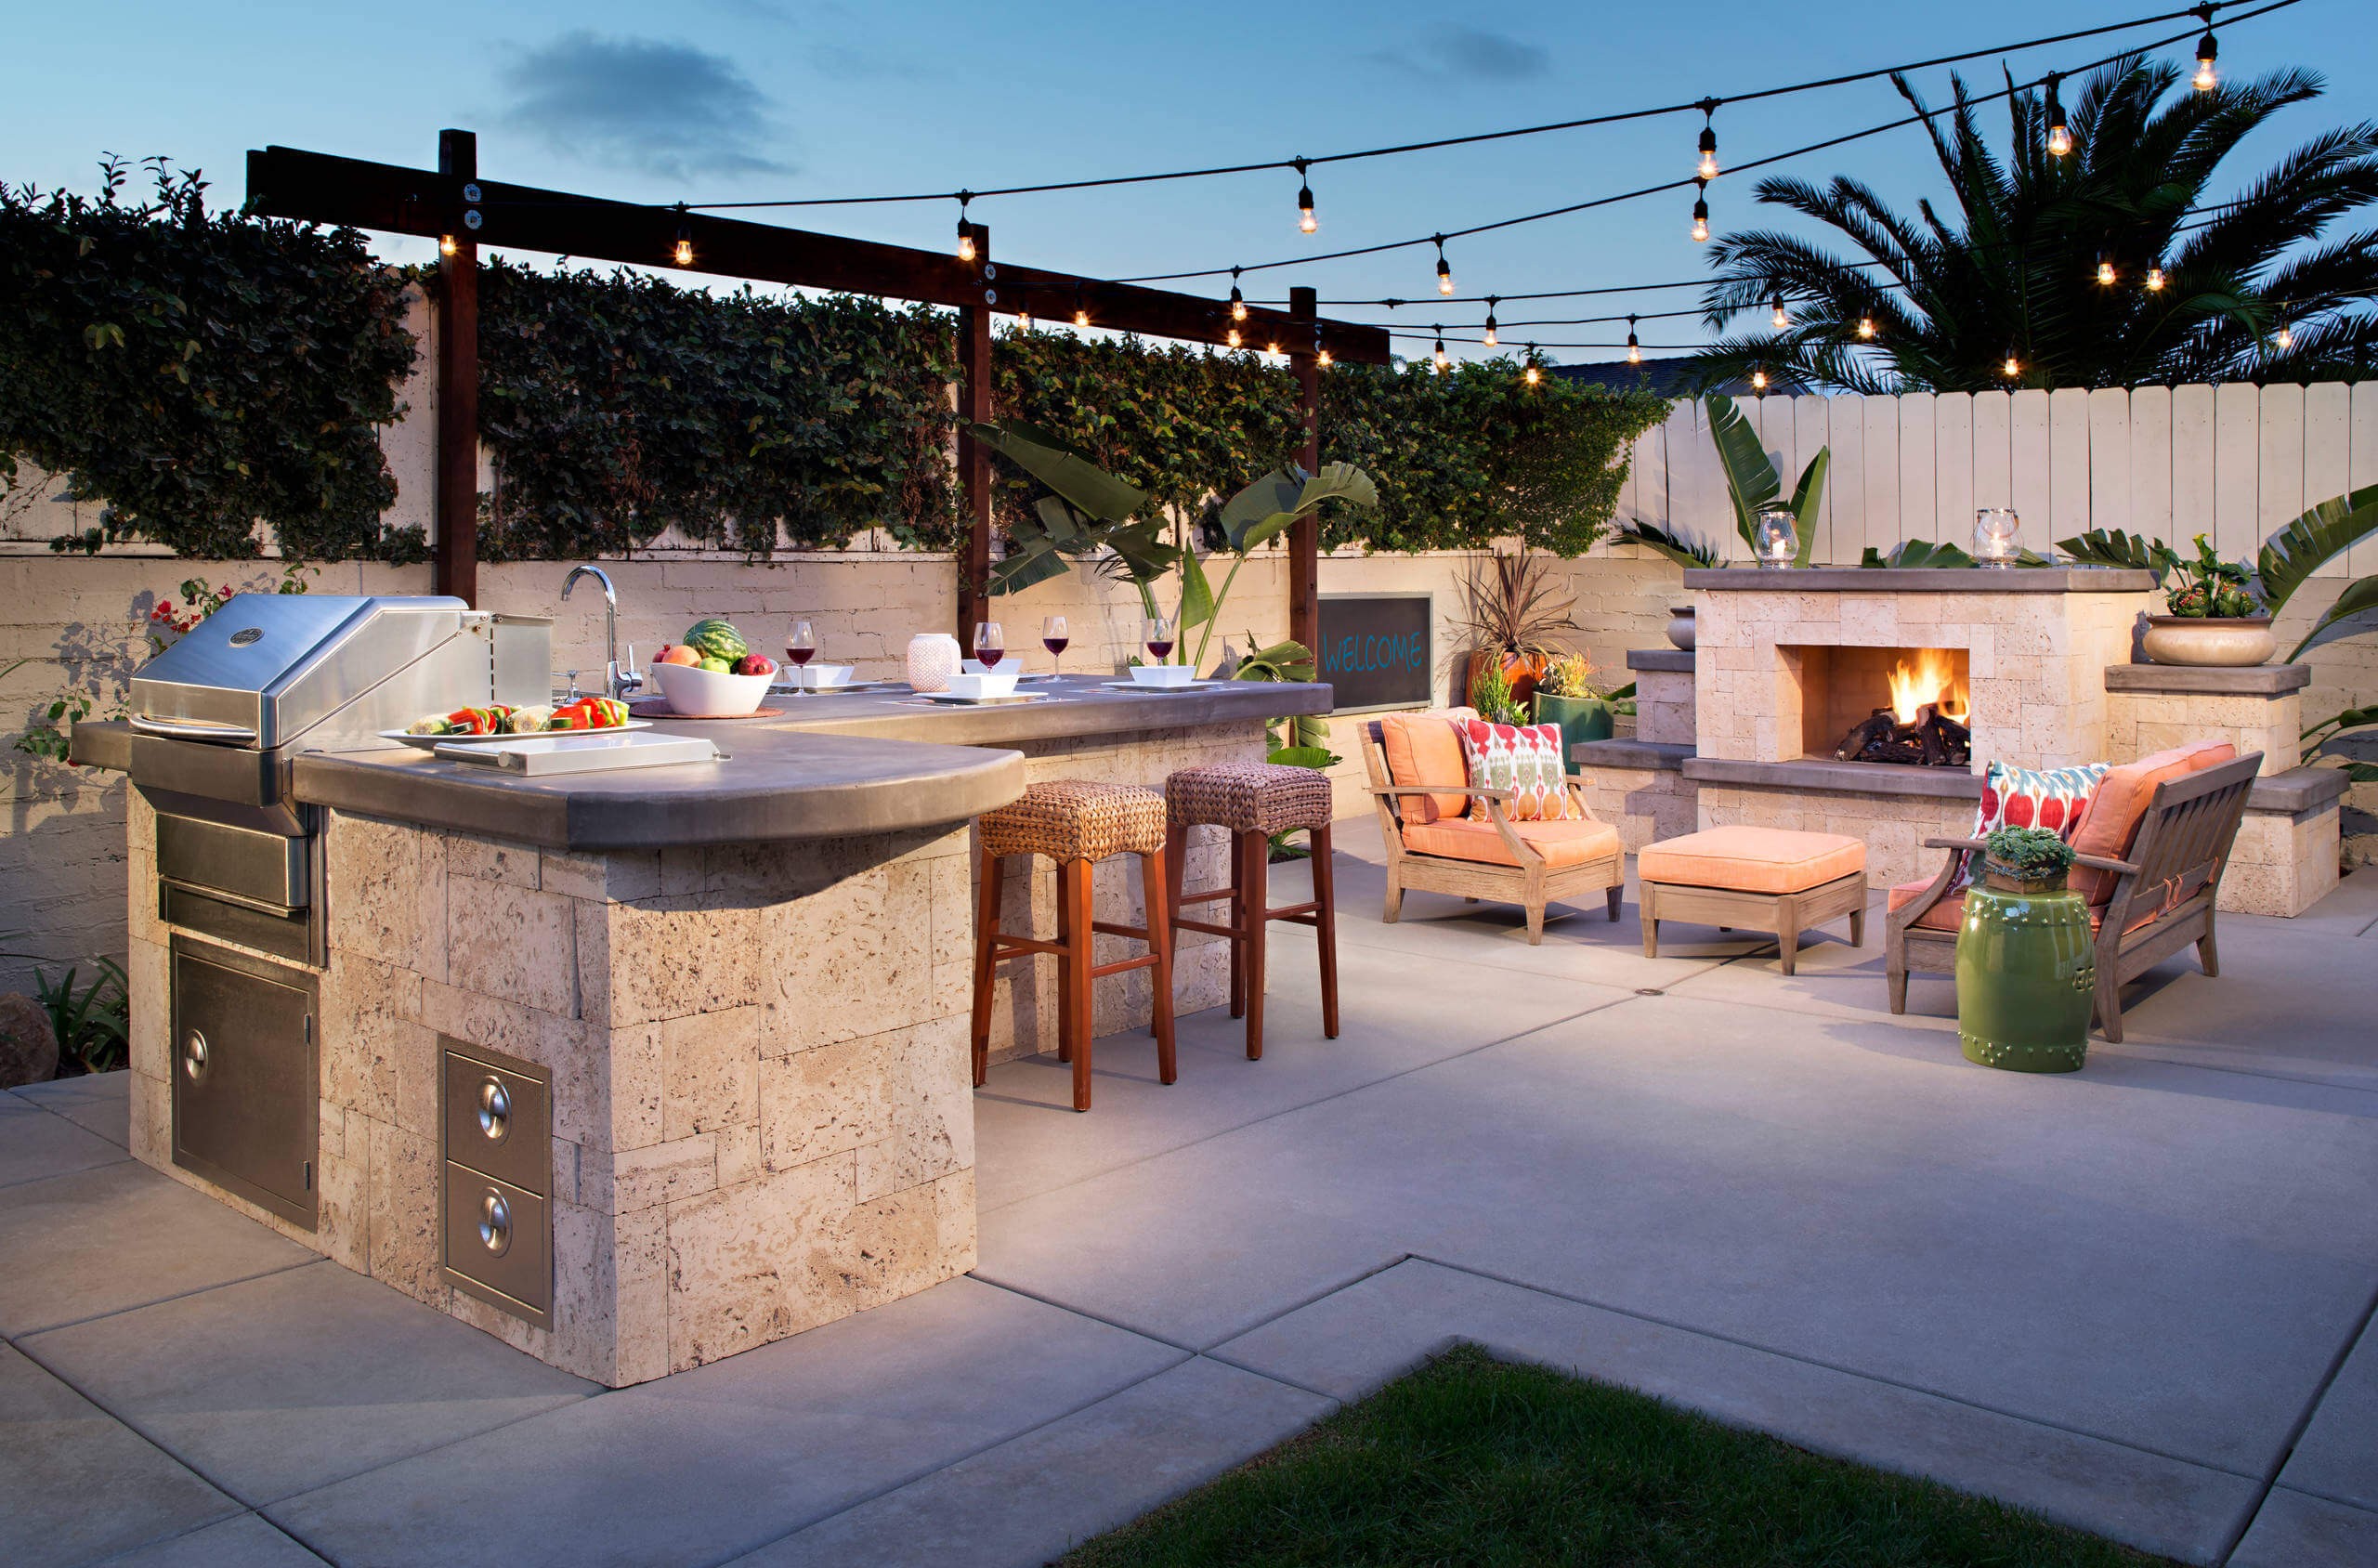
#14. Mid-sized tropical backyard concrete patio kitchen
#15. Industrial kitchen

C. How to Cure, Grind, and Polish a Concrete Counter Top
Finishing concrete countertops requires meticulous attention to detail, yielding stunningly polished results that elevate the aesthetic appeal of any room.
Curing Concrete Counters
Once the concrete has been poured into its mold and all air bubbles have been released, it’s time to let the mixture cure for a couple of days. If the environment is particularly dry, you’ll want to tent the mold with some plastic sheeting to prevent the concrete from curing too quickly.
To achieve this, create a makeshift enclosure by placing plastic sheeting over the mold, allowing it to hover anywhere from a few inches to several feet above the surface depending on the level of dryness and heat. Be sure to avoid direct sunlight on the curing concrete. After two days have passed, place two flat pieces of wood on a stable surface and carefully invert the mold onto them. Unscrew the mold and gently pry off the side pieces.
Avoid applying pressure against the concrete itself, as it’s still too soft at this stage. To further facilitate the curing process, lightly mist the concrete with water before allowing it to sit for another day. As the concrete continues to lighten in color over the next several days, it will eventually take on a darker hue once sealed – although this can vary depending on factors such as pigments and mix composition.
It’s only after the concrete has been out of the mold for two full days that you can begin grinding and slurring any voids.
Grinding and Polishing the Concrete Counter Top
Finishing the countertop’s surface offers various possibilities, with simplicity being one of them. This approach involves merely filling in any pinholes or voids on the top surface and then polishing the concrete using a 200 grit diamond polishing pad, starting from scratch. Alternatively, you can grind the surface to reveal the aggregates (rocks and sands) within the mix. A 50 grit diamond polishing pad is ideal for exposing larger aggregates, while a 100 grit pad will expose finer sands.
The choice ultimately comes down to personal preference. With a practice piece, you can experiment with different styles in various parts of the same concrete slab. If you decide to expose the aggregate, start the wet grinding process two days after flipping the slab out of its mold. If you opt for polishing only, wait until day five. Regardless of your chosen method, all grinding is done using a constant stream of water flowing onto the countertop.
To achieve this, you can employ a few techniques. Without a water-fed grinder, one method involves poking holes in the bottom of a large plastic container (a vinegar container works well), placing it on the countertop, and feeding a hose into the opening to create a gentle trickle of water. This will wash away any debris from the surface.
When exposing rocks, work slowly with a 50 grit circular diamond pad attached to the grinder across all areas of the surface until you achieve the desired level of aggregate exposure. Switch to a 100 grit pad and repeat the process until your desired finish is reached. Be sure to hose off the surface thoroughly before proceeding. Slurrying can be done the next day, if needed.
Slurrying Concrete Countertop Pinholes and Voids
When handling countertop imperfections, you’ll typically encounter tiny pinholes and occasional small divots resulting from minor mold imperfections. To rectify these issues, create a specialized slurry using Portland cement, pigment, and bonding agent. You can employ the same pigment ratio as your original concrete mix or opt for a contrasting color by adjusting the concentration.
For a 1:10 bonding agent-to-cement ratio, consult our countertop supplies guide (linked at the bottom of this page). Mix the slurry ingredients with just enough water to achieve a thicker consistency than sour cream. Apply the slurry using gloved hands and a putty knife, working it into the holes. Some users prefer massaging the mixture in by hand before refining it with the putty knife. Be mindful that the bonding agent will cause the slurry to set quickly; work swiftly to avoid issues.
Once the excess slurry is removed using the putty knife, hose the surface thoroughly to prevent residue buildup. If necessary, repeat the slurrying process the next day. After the final slurry application, wait 24 hours before wet-grinding with 400 and 800 grit polishing pads. Allow the piece to sit for a total of 10 days beyond its initial removal from the mold before progressing to higher-grit polishing pads.
Final Polishing of Cement Counter Tops
As you progress through the diamond polishing pad sequence, start with the coarsest grits (up to 1500) and meticulously cover every area of the slab. This ensures consistency across the entire surface. Use hand pads where electric grinders can’t reach. With this methodical approach, your slab will emerge as a glass-like finish. Once sealed, the concrete will transform, adopting a hue that lies midway between its unsealed appearance when dry and its polished look when wet-polished.
Related Posts
Embarking on a career as a kitchen and bath designer requires a clear understanding of the pathway involved. To kick-start your journey, it’s essential to explore different layouts that optimize space in kitchens like those found in Singapore. One way to achieve this is by adopting top-notch renovation tips, which can be applied to any kitchen makeover. Moreover, when it comes to selecting new countertops, homeowners need guidance on how to make the right choice for their unique space.
Similarly, giving a kitchen a great makeover necessitates following expert advice on choosing the perfect cabinets. In fact, white cabinets have emerged as a popular choice for kitchen remodels due to their timeless appeal and versatility.