Do Ink Stamps Work On Wood?
Ink stamps are devices used to imprint text or images onto a surface by transferring ink from a hand-held or mechanized stamp pad. Common uses for ink stamps include office paperwork, artwork, crafting, labeling products, and personalizing objects. The inked stamps can be pressed onto paper, fabric, metal, glass, and other materials to leave behind a mark.
Wood surfaces present a unique challenge for ink stamping. The porous and textured nature of wood can make it difficult to achieve a clear imprint. This raises the question of whether standard ink stamps are able to effectively and permanently mark various types of wood. This article will examine the properties of wood, key considerations for preparing and stamping wood, optimal ink formulations, alternative wood marking techniques, and methods for maintaining stamped woodwork.
Properties of Wood
Wood has some key properties that affect how well it can be stamped such as grain, hardness, and texture (Wood Plank Concrete Stamps). The grain refers to the direction and arrangement of the wood fibers and vessels. Harder woods like oak have a more pronounced grain while softer woods like pine have a less distinct grain. The hardness of the wood impacts how easily it can be stamped without damaging the fibers. Very hard woods may be too difficult to imprint clearly while soft woods risk the stamp imprint being less defined. The texture of the wood surface matters too – rough, uneven surfaces are harder to stamp evenly versus smooth planed wood.
Understanding these wood properties allows you to select wood types that will stamp well. Look for woods with moderate hardness and a smooth, even texture without extreme grain. Test stamping various wood samples first to ensure the stamp quality before using it for final projects.
Types of Ink Stamps
There are two main types of ink stamps – self-inking stamps and traditional ink pads. Self-inking stamps have the ink built into the stamp itself and re-ink automatically each time you stamp. Traditional stamps require a separate ink pad that you press the stamp into before each impression. Self-inking stamps are very convenient while traditional stamps offer more flexibility and customization in ink color and type (Source: https://www.thestampmaker.com/rubber-stamps/popular-stamp-features.aspx).
The ink used in stamps comes in various formulations optimized for different materials. Standard stamp ink works on paper and cardstock. Specialty options include pigment ink for porous surfaces like wood and fabric, solvent ink for nonporous surfaces like metal and glass, and acid-free archival ink designed for long-term storage (Source: https://www.rubberstamps.com/blogs/diy/different-types-of-stamping-inks). Choosing the right ink formulation allows the stamps to transfer cleanly and securely onto the target surface.
Preparing the Wood Surface
Properly preparing the wood surface is one of the most important steps for achieving great results when stamping wood. The preparation process helps the wood better receive the ink from the stamps.

Sanding the wood smooth is usually the first step. This removes any splinters or rough areas that could catch the stamp and cause skipping or inconsistent ink transfer. Start with a coarse grit sandpaper like 80 grit to level the surface, then work up to finer 120-220 grit sandpaper for a smooth finish. Always sand in the direction of the wood grain.
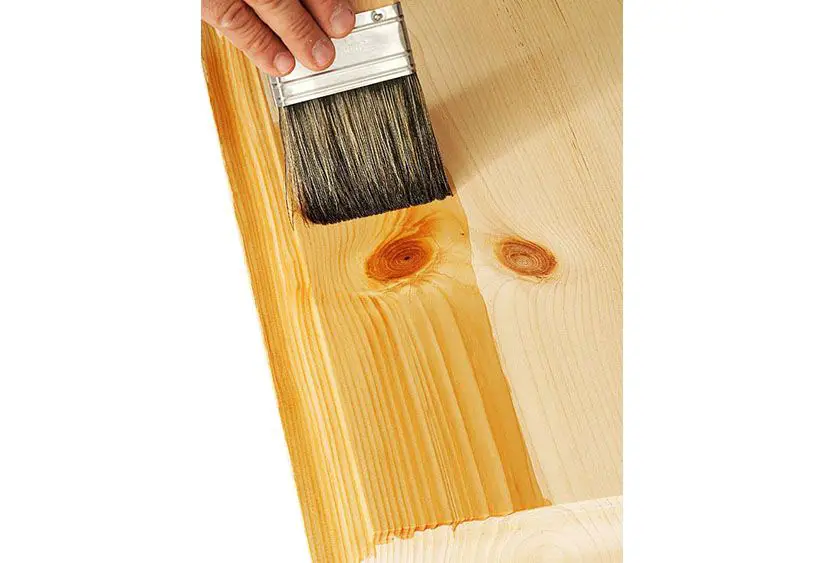
Staining the wood beforehand can provide an attractive background color to complement the stamped image. Gel stains tend to work better than liquid stains, as they help seal and protect the wood rather than soak in deeply. Always let stain fully dry before stamping.
Applying a sealant like polyurethane is highly recommended before stamping wood. The sealant creates a protective barrier that allows the ink to transfer cleanly onto the surface without soaking in. 2-3 coats of sealant is ideal, letting each coat fully cure before adding the next. A sealed surface produces crisper image results.
Properly prepping the wood blanks the canvas for the ink stamp to make its mark flawlessly. Sanding, staining, and sealing enable the vivid ink colors to properly sit on the surface rather than absorb in, creating a stunning stamped effect on wood.
Technique for Stamping
Applying the right amount of pressure and aligning the stamp properly are crucial for getting a clean, crisp impression on wood. Using too little pressure can result in a faint, incomplete image, while too much pressure can cause smudging or distortion. Always check your alignment before stamping to ensure the image will be straight and centered.
You can either utilize single stamps or create patterns by stamping repeatedly. For single stamps, focus on consistent pressure and alignment. For patterns, map out your design first, then systematically stamp each impression while maintaining even pressure. Leave enough space between patterned stamps to prevent smearing or overlaps. Refer to this helpful video on proper technique for stamping wood: https://www.youtube.com/watch?v=xMc8Z2Gb-Yc.
Effective Ink Stamp Designs
For ink stamps to be effective on wood surfaces, the designs need to be optimized for wood applications. Some key considerations for effective ink stamp designs for wood include:
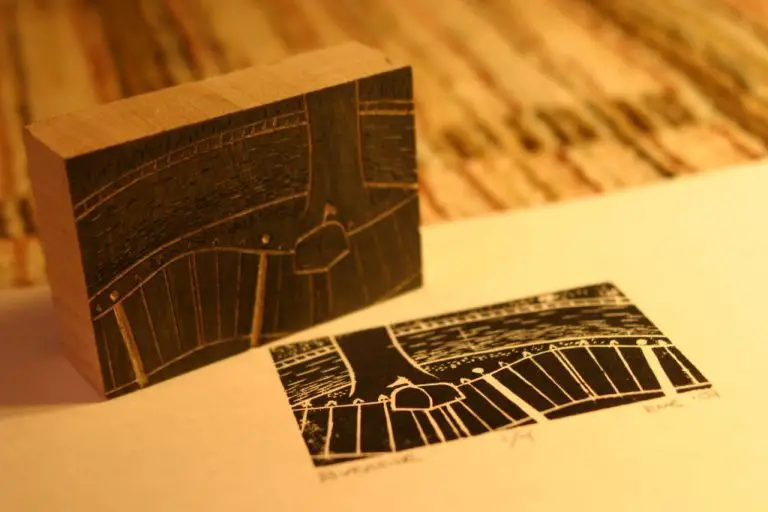
Bold, high-contrast designs work best. The natural grain and texture of wood can make intricate details and subtle shading difficult to pick up. Using bold lines and high contrast between inked and non-inked areas helps create a crisp, legible impression on wood.
Avoid intricate details and fine lines. Intricate patterns with lots of small details are difficult to imprint cleanly on the porous, fibrous surface of wood. Simpler, bolder designs with minimal fine detail are easiest to stamp successfully. Geometric patterns or solid block letters work better than cursive scripts or detailed illustrations.
Consider size and layout. Larger stamp designs make alignment and impression easier than small, dense designs. Leave adequate blank space around the edges. Centralized or corner-aligned layouts are often effective. Allow room between letters or elements.
Use single, solid impressions. Outlined shapes that require aligning multiple impressions are challenging for hand stamping wood. Single solid shapes tend to transfer cleanly.
Go with lower ink coverage. Large solid areas of ink may end up spotty or uneven on wood. Using less than 100% ink coverage helps avoid this. Line art or more scattered/broken up designs distribute ink more effectively.
Test different samples first. When designing custom wood stamps, it’s wise to get samples made up with different design approaches. Test these on actual wood materials first before finalizing the design, to determine what imprints best.
By focusing on simple, high-contrast, boldly inked designs with minimal fine details, wood stamps can make a clear, legible impression on a wood surface.
Top Inks for Stamping Wood
When selecting an ink for stamping wood, it’s important to consider the type of ink and its qualities. The two main types of stamping ink are pigment ink and dye-based ink:
Pigment ink is opaque and sits on top of the surface it is stamped on. It tends to produce a crisper image on porous surfaces like wood. Pigment inks are more fade resistant over time. Popular pigment ink brands like VersaCraft, Memento, and Ranger Archival are good options for stamping wood.
Dye-based inks soak into the surface they are stamped on, producing a softer image. They work well on non-porous surfaces, but tend to bleed and spread on porous wood. Dye inks are not as fade resistant over time compared to pigment inks. However, alcohol-based dye inks like Ranger’s StazOn are specially formulated for use on non-paper surfaces like wood and metal.
When selecting an ink, also consider the viscosity and opacity. Thicker inks likeVersaCraft provide good coverage on uneven wood grain, while thinner inks like Memento work well if you need fine detail. Highly opaque inks like StazOn provide vivid images on dark woods.
Testing different ink brands and types is recommended to find one that provides your desired image quality on a specific wood surface.
Alternative Marking Methods
While ink stamps are a popular way to mark wood, there are some alternative methods that can also be effective:
Engraving
Engraving involves using a sharp tool to cut lines and patterns into the wood surface (source). This creates a permanent mark as the wood is physically altered. Engraving requires some skill, but can produce very precise marks. Compared to ink stamps, engraving marks won’t fade over time.
Wood Burning
Wood burning uses a heated metal tip to burn lines and patterns into the wood (source). Like engraving, this makes a permanent mark by changing the wood. Wood burning requires a special tool and skill. The marks can be very precise and won’t fade. But it takes more time than using an ink stamp.
Paint and Markers
Paint pens, markers, or paint can also be used to mark wood. They are quick and easy to apply. But the marks may not be as precise or permanent as engraving or burning. Paint and markers risk fading over time, especially with exposure to sunlight. They need to be reapplied periodically.
Overall, while other marking methods are available, ink stamps offer a good balance of speed, precision, and convenience for most woodworking projects.
Maintaining and Enhancing Stamped Wood
Properly maintaining stamped wood pieces can help preserve the stamped marks and keep the wood looking its best. There are several things to keep in mind:
Applying a clear protective coat like polyurethane or lacquer can help protect the stamped marks from wearing down over time. According to the video “How To Clean Old Wood Mounted Stamps” https://www.youtube.com/watch?v=YALkmuu1L7k, multiple thin coats allow the wood to breathe better than one thick coat.
For stamped wood that has faded over time, re-inking can help revive and darken the stamped marks. Gently rub ink over the stamped area using a cloth or cotton swab. Test on a small area first to ensure the ink adheres properly.
For minor touch ups, carefully re-stamping over an existing mark with the original stamp can help reinforce it. Use a gentle tapping motion to avoid making the mark too dark.
Applying a stain, wood finish, or paint after stamping can both preserve the marks and make them stand out more. Multiple thin layers often look best. Consider coordinating the finish color with the ink stamp color for a cohesive look.
With proper care and maintenance, stamped wood can retain its markings and unique stamped character for years to come.
Conclusion
When done properly, ink stamping is an effective and attractive way to customize and decorate wooden surfaces. It offers a simple yet artistic approach for marking wood that requires minimal supplies. With the right preparation, technique and ink selection, ink stamps can leave crisp, clear impressions on most bare wood items.
The key is to start with a smooth, sanded bare wood surface, apply firm even pressure during the stamping process, and choose an oil-based ink that will dry on and adhere to the wood. Proper curing and sealing is also important for long-lasting results. While stamps with more intricate designs can be challenging on uneven wood grain, simpler patterns generally transfer well.
With some practice and experimentation with inks and stamp designs, you can achieve beautiful embossed motifs that make your handcrafted or repurposed wood items stand out. Just be sure to account for the absorbency and texture of the wood when choosing stamp images. Overall, ink stamping provides a fun, crafty way to customize wooden surfaces with personal artwork and designs.


