Do Regular Stamps Work On Clay?
Clay stamping is a fun and creative way to add texture and patterns to clay projects. Stamps allow you to quickly imprint designs onto clay surfaces without needing to hand-carve patterns. With the right supplies and techniques, regular stamps – like those used for paper projects – can also be used on polymer clay and air-dry clays.
When working with polymer clay, it’s best to use acrylic-based polymer clay. Oil-based clays like Sculpey III can interact poorly with the inks used on rubber stamps. Acrylic clays like Premo or Fimo do not have this issue. It’s also important to condition the clay properly and apply enough pressure when stamping to get a clean impression.
For air dry clays, stamps work best on clays that have dried but are not fully cured. The clay needs to be firm enough to hold the impression. With the right prep and techniques, beautiful stamp designs can be achieved on a variety of clay types.
Types of Clay
There are several main types of clay that can be stamped:
Polymer Clay
Polymer clay is a very popular type of modeling clay that air-dries to a hard, durable finish through a baking process. It comes in a variety of colors and can be conditioned with hands or tools to become soft and malleable for stamping. Brands like Sculpey and Fimo are common polymer clay options.
Air-Dry Clay
Air-dry clay is clay that dries and hardens naturally at room temperature through evaporation. It can be stamped once it’s conditioned but works best when slightly dryer and firmer. Air-dry clays like Crayola Model Magic do not require baking.
Ceramic Clay
Ceramic clays are natural, water-based clays for pottery and sculpture that must be fired in a high-heat kiln to permanently harden. These clays can be stamped when wet, but may need additional sealers or preparations for successful stamped results.
Modeling Clay
Modeling clays include oil-based and non-hardening clays like plasticine that stay soft and pliable. They work well for stamping but may require reconditioning and will not retain an impression indefinitely unless baked or sealed.
Types of Stamps
There are several types of stamps that can be used to decorate clay:
Rubber Stamps
Rubber stamps are a popular choice for clay stamping. They come in a wide variety of designs and can be purchased from craft stores. Rubber stamps have raised images that can imprint designs into clay. They work well on polymer clay and air-dry clays.
Custom Stamps
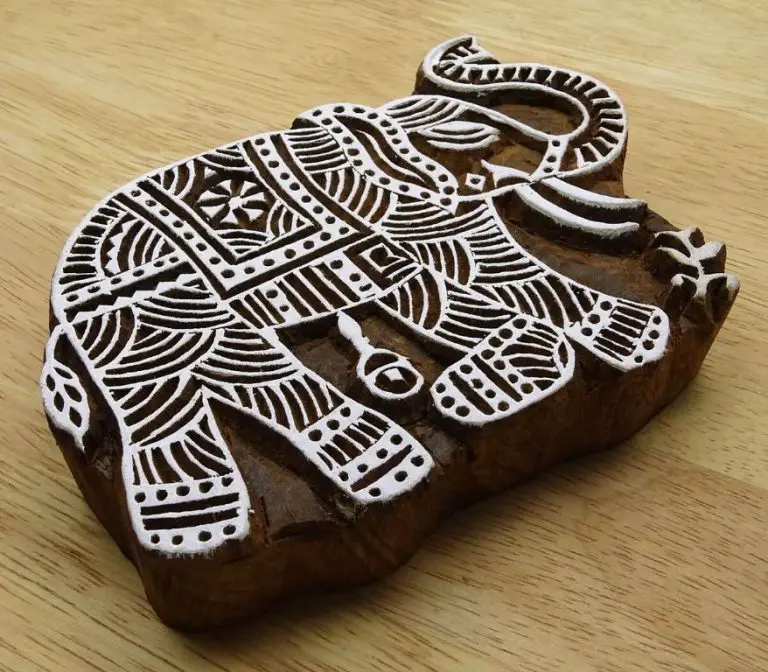
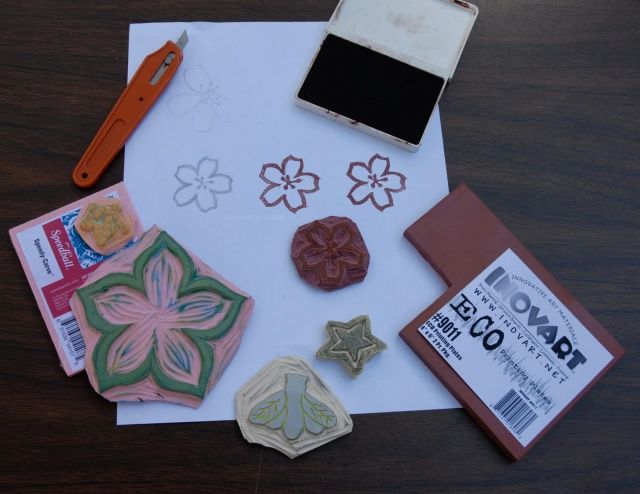
Custom stamps allow you to create your own unique designs. They can be carved from erasers, potatoes, foam, or rubber. You can carve simple shapes and patterns or get more intricate with detailed designs. Custom stamps give you the flexibility to stamp exactly what you want onto your clay.
Found Object Stamps
Found objects like buttons, keys, coins, washers, beads, shells, and more can be used as stamps for clay. Pressing these items into the clay leaves interesting impressions. Repurposing found objects as stamps is an eco-friendly way to decorate clay without buying new supplies.
Inking Stamps for Clay
When inkng stamps to use on clay, there are a few good options to get a quality impression. The three main types of inks to use are:
Acrylic Paint
Acrylic paint works very well for stamping on clay. It helps create a vivid impression and is easy to apply evenly to the stamp. Acrylic dries quickly and cleans up easily from stamps with soap and water. Some clays can have a reaction to the chemicals in acrylic paint, so test a small area first.
Oil-Based Inks
Oil-based block printing inks are another great option for stamping clay. They spread smoothly and evenly on the stamp and leave a sharp, detailed impression. Oil-based inks take longer to dry, so wipe off any excess before stamping. Use an oil-based ink remover to clean stamps after use.
Chalk Inks
Inks made from chalk or pigmented chalk work well on polymers and some other clays. Chalk inks create a slightly softer impression. The downside is that chalk can easily rub off of cured clay. Seal cured pieces with varnish if using chalk inks.
Preparing the Clay Surface
Properly preparing the clay surface is crucial for getting a clean, detailed stamp impression. Here are some key steps:
Condition the clay by kneading it thoroughly until soft and pliable. This removes any air bubbles and makes the clay easier to smooth out.
Use an acrylic roller or your fingers to smooth the clay surface. Remove any fingerprints, marks, or imperfections. The clay should be as smooth as possible.
Let the clay firm up slightly after conditioning and smoothing, but not completely dry. There should be a bit of “give” left so the stamp can leave an impression.
Consider lightly baking the clay before stamping. Some clayers bake for 5-10 minutes to firm the surface just enough to get crisper stamps. Be careful not to bake too long or the clay will be too hard.
Work on a smooth, non-stick surface for easiest clay preparation. Avoid porous surfaces that could imprint patterns.
Check for any debris or dust that could transfer onto the stamped clay. Wipe the surface gently with a soft brush or cloth.
The clay surface should now be perfectly smooth, conditioned, and ready for stamping clean designs.
Stamping the Clay
When you’re ready to start stamping the clay, hold the stamp vertically and press it down evenly into the surface. Don’t rock the stamp back and forth or twist it, as this can distort the impression. Apply firm, even pressure across the whole stamp to ensure good contact with the clay.
If you see air bubbles appear on the surface when stamping, simply smooth them away with your finger or a sculpting tool. Air bubbles are common when stamping into soft clay. Re-ink the stamp each time to get a clear impression.
For large solid stamps, consider pressing down in stages around the edges first to push out air before stamping the middle. Check your stamped impression and re-ink if needed between multiple stamps to maintain crisp details.
Aim for consistent, even stamping pressure and depth across your project for the best results. Re-ink frequently for optimal stamp quality.
Troubleshooting
When stamping clay, you may run into some issues like fuzzy images, ink staining the clay, or ink transferring onto the stamp. Here are some tips for troubleshooting common stamping problems:
If your stamped image comes out fuzzy, the clay may be too soft. Let the clay firm up slightly before stamping. You can also try pressing harder when stamping to get a crisper impression. Rolling the stamp around as you press can help press the stamp design more firmly into the clay.
Ink staining the clay surface or transferring onto the stamp is often caused by excess ink on the stamp. Try cleaning off any excess ink on a paper towel before stamping the clay. You can also try baking the inked stamps for a few minutes, which sets the ink and prevents transferring.
Another trick is to lightly dust the inked stamp with cornstarch, baby powder, or dryer sheets. This creates a barrier to absorb excess ink and prevent transferring. Re-ink and powder the stamp between impressions.
If you see ink residue remaining on the clay after baking, try cleaning it gently with a soft toothbrush or cotton swab dipped in rubbing alcohol. This can help remove any remaining ink stains without disturbing the clay surface.
Cleaning Stamps
It’s important to properly clean stamps after using them with polymer clay to remove any excess clay, ink buildup, or other residue. Allowing clay, ink, paint, or glaze to build up on stamps can affect the quality of impressions, damage the stamp surface, or result in unwanted texture transfers.
To clean clay stamps, first remove large pieces of stuck clay by gently rubbing with a soft rubber tool. Avoid using anything sharp or metal that could scratch the stamp. For stubborn areas, roll or peel off the clay (Source: https://www.beadsandbeading.com/blog/rubber-stamping-polymer-clay-clean-stamps/4888/).
Next, wash the stamp in warm water with a small amount of mild soap. Use a soft sponge or toothbrush to gently scrub away remaining residue. Rinse thoroughly. PAT the stamp dry gently with a lint-free cloth. Allow it to fully air dry before storing (Source: https://stampty.co/blogs/news/potter-stamp-cleaning). Avoid soaking stamps for extended periods.
For ink buildup, use rubbing alcohol or stamp cleaner applied with a cotton pad. Take care not to soak any rubber or polymer stamps in alcohol as it can damage the material.
Clay Stamping Tips
Here are some helpful tips for getting great results when stamping clay:
Avoid These Common Mistakes
Don’t press too hard when stamping, as this can distort the design and damage the clay. Apply even, medium pressure and roll the stamp around to gradually imprint the design (source). Also avoid moving the stamp around too much, which can smear and smudge the design.
Make sure your clay is conditioned properly and not too soft. Soft clay can stick to the stamp and ruin the imprint. The clay should be firm but still pliable.
Work slowly and methodically. Rushing through the stamping process can lead to crooked or uneven designs.
Creative Design Ideas
Layer multiple stamps over each other to create intricate patterns and textures (source). Use alphabet and custom stamps to add words, names, and phrases.
Stamp along the edges of a clay piece to create a decorative border. Use geometric and nature-inspired stamps to make abstract geometric designs.
Mix stamps with different sizes and shapes together in creative combinations. Overlap stamps to create a collage effect.
Inspiration and Examples
There are many inspiring examples of stamped clay projects that can provide ideas and inspiration. Stamping on clay allows for endless creativity and customization. Here are some photos of stamped clay projects:
This jewelry dish has a intricate geometric design stamped into the clay before baking. The stamps used have a Moroccan tile motif that transfers beautifully onto the smooth clay surface. (Source: https://www.pinterest.com/modernmakerstamps/stamped-clay/)
These clay coasters are stamped with a simple polka dot design. Using just one basic circular stamp, the creator was able to achieve a stylish and coordinated look on a set of matching coasters. (Source: https://www.pinterest.com/modernmakerstamps/stamped-clay/)
This set of hanging clay ornaments uses letter stamps to imprint names into the uncured clay. Personalized name ornaments make for thoughtful handmade gifts. (Source: https://www.pinterest.com/modernmakerstamps/stamped-clay/)
A nature-inspired leaf design is stamped around the edges of this serving platter, creating a beautiful border. Varying the stamp orientation adds visual interest. (Source: https://www.pinterest.com/modernmakerstamps/stamped-clay/)
These clay beads are stamped with various global cultural symbols using small custom stamps. Stamping before baking and glazing allows the designs to show through. (Source: https://www.pinterest.com/modernmakerstamps/stamped-clay/)