Do You Glaze Pottery Before Or After Painting?
Glazing and painting pottery are important finishing techniques in ceramic arts that add color, design, and protection to pottery pieces. Deciding whether to glaze before or after painting depends on the desired effects and can vary based on the type of glaze and paint used. This article will provide an overview of glazing and painting techniques, the differences between glazing first versus painting first, the types of glazes and paints, firing considerations, tips for success, common problems to avoid, and examples of beautifully glazed and painted pottery.
Glazing Before Painting
Some potters choose to glaze their pieces before painting them. There are a few potential advantages to glazing first:
Glazing before painting seals the porous clay surface, which provides a smoother surface for painting finer details and prevents the clay from absorbing too much paint or water (How To Glaze Pottery: Guide To Ceramics Glazing).
Applying a transparent glaze first can allow the underlying clay color to show through painted designs. This creates visual depth and interest (Do You Glaze Pottery Before Or After Firing).
However, there are also some potential downsides to glazing before painting:
The glazed surface can be too slick for some paints to adhere well, unless special surfaces are created with glaze resists.
Painting on an already glazed piece reduces options for distressed effects revealing the clay surface.
Details painted on the glaze can end up more muted compared to painting directly on the clay.
So glazing first can be an option but requires adjusting paints and techniques for the particular glazed surface.
Glazing After Painting
Many potters prefer to glaze after painting designs or images on their pottery. There are several advantages to glazing after painting:
Applying glaze over painted decorations helps seal and protect the artwork. The glaze creates a smooth, glassy surface over the paint that makes it more durable and resistant to chipping or fading over time. According to The Crucible, underglazes and glazes chemically fuse together when fired, so glazing after painting locks in the painted design.
Glazing after painting also allows for more creativity and control in the painting process. Paints and underglazes can be applied precisely without needing to worry about disrupting a glaze layer. The colors of painted images will be truer and more vibrant when not applied over an opaque glaze.
However, there are a few potential downsides to glazing after painting:
If too much glaze is applied over painted areas, it can cause colors to become muddied or less sharp. Painted details can become obscured if the glaze application is too heavy.
Glazing after painting requires good timing and care when handling to avoid smearing or blurring painted decorations. The piece needs to be handled gently until fired.
Firing and glazing processes may need to be combined for painted and glazed pieces whereas glazing first allows pieces to be fired after painting alone.
Glaze Types
There are many different types of glazes that potters use to add color and effects to ceramic objects. Glazes can produce surfaces that are glossy, matte, cracked, or textured. Some of the most common categories of glazes include traditional glazes, specialty glazes, and commercial glazes.
Traditional glazes have been used for centuries and include options like feldspathic glazes, ash glazes, salt glazes, and tin glazes. Feldspathic glazes are high-fire glazes made from feldspar, silica, and other fluxes. They create surfaces ranging from matte to glossy. Ash glazes utilize ash from wood or plant materials, creating natural, muted earthy tones.
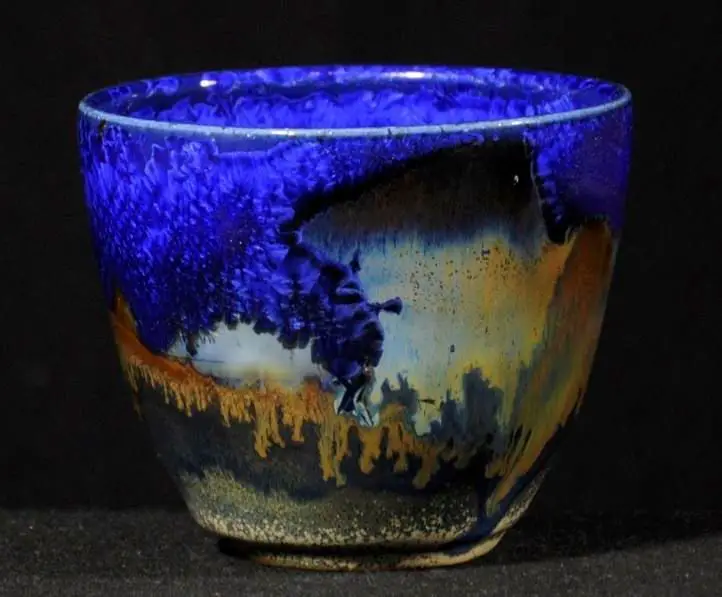
Specialty glazes produce distinct visual effects like cracking, crazing, or spotting. They include crawl glazes, which crack and craze as they melt and flow unevenly across the clay surface. Crystalline glazes form visible crystal structures as they cool and harden on the ware. Commercial glazes are mass-produced, consistent glazes that come premixed for ease of use.
Paint Types
There are several types of paint that can be used on pottery before or after glazing. The main categories are:
Underglazes
Underglazes are paints that are formulated to be used under a glaze. They are available in a wide variety of colors and produce a matte finish. Underglazes work well for covering large areas with an even coat of color. Some common types of underglazes are:
- Ceramic underglazes – These are thick, opaque paints that completely cover the clay surface.
- China paints – Made from metal oxides, these underglazes can create bright, vibrant colors.
- Underglaze pencils – Allow you to draw fine details and patterns which will then be sealed by a glaze.
Overglazes
Overglazes are applied on top of an already-glazed surface. They add extra color, patterns, and effects. Types of overglazes include:
- Glazes – Can be used as an overglaze layer for additional color and blending effects.
- China paints – Also work well as overglazes to accentuate design details.
- Lusters – Contain metal salts that create an iridescent finish.
- Gold, silver and copper metallic paints – Add shiny metallic accents.
Paints for Bisqueware
These acrylic paints are formulated to adhere to unglazed bisqueware. They come in a wide color palette and can be used to hand paint pottery pieces before glazing.
Specialty Paints
There are effects paints such as crackles, textures, and resists that can be used to achieve certain artistic finishes. Testors enamel model paints are sometimes used on pottery as well.
Firing Process
Firing pottery with glaze requires careful timing and technique to achieve the desired results. There are two main options for when to fire glazed pottery: before or after painting. Firing before painting means applying an underglaze coat and firing the pottery before any decorative painting is done. The benefit of this method is that the glaze provides a smooth, non-porous surface for painting. However, firing too many times can cause the clay body to become brittle.
The more common approach is to fire pottery after applying both glaze and decorative paints. This “single firing” allows the glaze and paints to melt together into an integrated design. Proper application of glaze is crucial – too thin and it may not flow correctly, too thick and it can obscure intricate brushwork. Low-fire glazes are typically used with acrylic paints, while mid-range glazes match up best with underglazes. High-fire glazes require the use of special glaze paints rated for those temperatures. Understanding these compatibilities is key for a successful finished piece.
Tips and Techniques
When glazing and painting pottery, here are some useful tips to keep in mind for the best results:
Prepare the pottery surface – Make sure the piece is smooth, clean, and dry before painting or glazing. Sand any rough areas and wipe away dust with a damp sponge (according to this source).
Use quality brushes – Invest in soft, natural bristle brushes that hold and release glaze smoothly. Stiff bristles can leave visible brush strokes (per this guide).
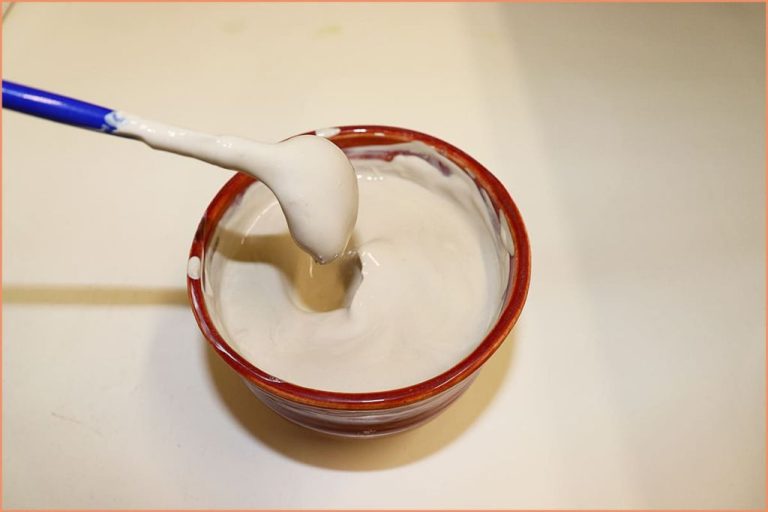
Apply glaze thinly and evenly – Multiple thin layers of glaze look better than one thick coat. Too much glaze can cause drips or cracking. Aim for the consistency of melted ice cream.
Let pieces dry between coats – Allow adequate drying time between layers of glaze or paint to prevent smearing and blending of colors.
Mix glazes thoroughly – Stir glazes well so ingredients are fully incorporated and the glaze is smooth. This helps avoid uneven results.
Clean brushes promptly – Rinse brushes in water frequently as you work to prevent drying or contamination of colors. Let brushes fully dry before storing.
Use wax resist – Coat areas you want unglazed with wax before glazing. The wax prevents glaze from adhering to those spots (according to these tips).
Fire according to glaze instructions – Closely follow manufacturer firing guidelines. Test new glazes on tile before using on pottery.
Common Problems
There are several common problems that can occur when glazing and painting pottery. Being aware of these issues and what causes them can help avoid setbacks.
Glaze Crawling
Glaze crawling refers to when the glaze pulls away from areas of the clay surface, leaving bare patches. This often occurs because the clay body and glaze are incompatible, usually due to different thermal expansion rates. Using a glaze formulated for that specific clay body can prevent crawling. Ensuring proper clay moistness before glazing, applying an even glaze coat, and preventing drafts during firing may also help (source).
Crazing
Crazing is when a glaze forms fine interconnected cracks, caused by the glaze expanding and contracting at a different rate than the clay body. Using a glaze and clay with similar expansion rates, proper clay dryness, and avoiding sudden temperature changes during firing can help limit crazing (source).
Blistering
Blisters in the glaze are caused by gases escaping through the glaze during firing. Applying thinner glaze coats, using less volatile glazes, and slow temperature increases during firing can reduce blistering.
Pinholes
Small holes in the glaze are called pinholes. These are caused by bubbles forming from trapped air, humidity, or gases escaping the clay. Letting ware dry fully, spraying glaze on rather than dipping, and maintaining consistent firing temperatures can minimize pinholes.
Glaze Peeling or Flaking
If glaze detaches and peels off areas of the pottery, it is likely due to poor clay preparation or adhesion. The clay may have been too wet, preventing the glaze from bonding properly. Bisque firing before glazing, cleaning ware thoroughly before glazing, ensuring good glaze mix consistency, and applying multiple thin glaze coats can improve adhesion.
Examples and Inspiration
When it comes to painted and glazed pottery, there are so many beautiful examples that showcase the amazing effects that can be achieved. From flowing abstract designs to intricate landscapes, the possibilities are endless. Let’s take a look at some stunning pieces for inspiration.
This gorgeous plate features an abstract beach scene painted using specialty glazes. The blues and greens blend smoothly to emulate the movement of water, while the addition of glaze gives the whole piece a glossy, liquid-like finish.

Skull motifs are always eye-catching, like on this vivid mug glazed in an incredible crystalline effect. The 3D details of the skull stand out in sharp relief against the shimmering background.
For landscapes, using multiple glazes can create depth and dimension. As seen on this piece, the fields appear to recede into the distance thanks to clever color variations.
And you can never go wrong with simple, elegant floral motifs either. The grace of the flowers on this vase is accentuated by the soft, satin-matte glaze.
So explore different painting techniques and glaze combinations – the possibilities are endless for creating your own awe-inspiring pottery art!
Conclusion
To summarize, there are benefits and drawbacks when deciding whether to glaze pottery before or after painting. Glazing first provides a smooth surface for painting and prevents underglazes from running, but limits the color options. Painting first allows for more creative freedom with layers and textures, but can cause paints to run or flake off during firing. The best approach often depends on the types of glazes and paints being used, as well as personal preference.
When glazing before painting, be sure to use glazes rated for high temperatures so they don’t burn off in the kiln. Go for underglazes or specialty glaze paints designed to bond directly onto raw glazes. If painting first, low-fire glazes are recommended so they don’t boil under the paint and cause cracking. Multiple thin layers of paint and leaving blank spaces also helps. Test different techniques on sample pieces to find what works best.
With some planning and experimentation, beautiful painted and glazed pottery can be achieved regardless of order. Focus on what inspires you creatively and keep notes on what glazes, paints, and approaches produce the best results. Mastering the firing process is also key. With practice and patience, you’ll be able to bring your visions to life on clay.


