Do You Need To Slip And Score Air Dry Clay?
What is Air Dry Clay?
Air dry clay is a modeling material that dries naturally at room temperature. It contains clay and binders that hold the material together when dry. The main ingredients are clay powders, cornstarch or cellulose, and polymers like PVA glue or resin. When mixed with water, air dry clay becomes pliable and can be shaped by hand. As it dries, the water evaporates and it hardens while retaining its form.
There are several types of air dry clays, including:
- Basic air dry clay – The most affordable and common type, good for simple projects. Dries hard and brittle.
- Polymer air dry clay – Modified with polymers for increased strength and flexibility when dry.
- Paper clay – Contains cellulose fiber for lightweight, papier-mâché-like models.
- Self-hardening clay – Does not require drying time, begins hardening as it’s sculpted.
Air dry clay is used for arts and crafts, DIY projects, modeling and sculpture. Anything made with air dry clay must be protected from moisture, as the clay can soften if wet. Common uses include making decorative objects, jewelry, dolls, miniature food models, ornaments and more.
Why Slip and Score Air Dry Clay?
Slipping and scoring is a technique used to join pieces of air dry clay together. The main purpose is to improve the adhesion between the clay pieces, creating a stronger bond and reducing the risk of seams cracking or pieces separating after drying.
Applying clay slip to the edges of the clay before joining them acts as a kind of glue. The water in the slip partially dissolves the clay surface, allowing the molecules to mix and bind together as the water evaporates. This creates a smooth, strong seam.
Scoring or scratching the clay surface before applying the slip further improves adhesion. Scoring gives the slip something to grip onto and increases the surface area, resulting in a more mechanical bond between the clay pieces.
Overall, slipping and scoring results in smoother, less visible seams between clay pieces. The improved adhesion helps the joint withstand handling and drying stresses. Taking the time to properly slip and score air dry clay projects creates more durable, professional looking finished pieces.
How to Make Clay Slip
Making a good clay slip is crucial for a strong bond when slip and scoring air dry clay. The clay and water ratio needs to be just right to create a slip with the proper consistency. Here are some tips:
Clay to Water Ratios
A good starting ratio is 1 part clay to 1 part water. However, the exact ratio can vary depending on the clay. Aim for a consistency like heavy cream – the slip should readily pour but still coat the clay well.
Mixing the Slip
Start by putting water in a jar or plastic container. Slowly sprinkle clay powder in while mixing constantly. Use a popsicle stick, spoon, or stir stick to mix thoroughly and break up any clumps.
If the slip is too thin and runny, mix in more clay powder. If it’s too thick, add additional water slowly while continuing to mix. Keep adjusting until the ideal creamy consistency is reached.
Make sure to remix or stir the slip frequently while working to prevent settling. Fresh slip works best for joining.
Applying Clay Slip
Properly applying a thin, even coating of clay slip is crucial for getting a good bond when joining air dry clay pieces. There are two main methods for applying slip:
Brushing on Slip
Using a small paintbrush to brush slip onto the surfaces to be joined is the most common and effective technique. Dip the brush into the prepared slip and gently brush it on evenly. Make sure to get full coverage and work the slip into any crevices or textures on the clay’s surface.
Brush in one direction, applying a thin coat without pooling too much slip. Let any excess drip off the brush before re-dipping into the slip container.
Dipping Pieces in Slip
For some situations, dipping the edge or surface to be joined directly into the slip may work better than brushing. Slowly dip the piece at a 90 degree angle, submerging just the area to be joined and allowing it to soak for 5-10 seconds.
As you lift out, let any excess slip run off before turning the piece upright. Check for full, even coverage and re-dip if needed. This technique can help ensure you don’t over apply slip to areas that won’t be joined.
Whichever application method you use, take care to fully cover the surfaces while keeping the layer thin. Slip that is too thick or uneven can cause slipping, cracking, or weak bonds when attaching air dry clay pieces.
Scoring the Clay
Once you’ve applied the slip, it’s time to add the scoring lines to help the two pieces bond together securely. Scoring simply means dragging a tool across the wet slip to create scratches or lines in the surface.
For scoring you’ll want a tool with a sharp tip or edge to cut into the clay easily. Some common scoring tools include:
- Needle tool
- Craft knife
- Toothpick
- Skewer
Use your tool to scratch lines across the entire slipped surface in a crosshatch pattern. Make sure to apply enough pressure so the lines cut through the slip layer down into the clay slightly. The depth of the scoring lines should be about 1/16th inch or 1-2mm.
Crosshatching creates a textured surface for the slip to grab onto and helps ensure a strong bond between the two clay pieces.
Joining the Pieces
Once you have applied slip to both surfaces you want to join, press the pieces together with even pressure. Try to line up the edges precisely. Apply firm pressure across the entire seam to force out any air bubbles and ensure good adhesion.
After pressing the pieces together, use your fingers or a smooth tool to blend and smooth the seams. Work the slip into any gaps and wipe away any excess. Smooth seam lines will help hide the joints.
It’s important to let air dry clay joints dry fully before continuing to work on the project. The slip needs time to cure and gain strength. Allow projects to dry for 24-48 hours before sanding or painting the piece. Rushing the drying time can lead to weak joins that later separate or crack.
Tips for Successful Slip and Score
Getting good results when slip scoring air dry clay requires attention to some key details:
Slip Consistency
The slip should have a smooth, creamy consistency – too thin and it won’t hold, too thick and it will be hard to apply evenly. Aim for the consistency of heavy cream. If your slip is too thin, let some water evaporate. If it’s too thick, add small amounts of water and stir to thin it out.
Scoring Depth
Score the clay deep enough to expose fresh clay underneath, but not so deep that you risk breaking through. Aim for scoring 1-2mm deep. Use a toothpick, skewer or scoring tool – not something so sharp it will slice the clay.
Drying Time
Allow adequate drying time before handling slip-scored pieces. The slip needs time to dry and bond completely. Wait at least 24 hours. Gently test if the bond is set before moving or working with the joined pieces.
Troubleshooting Issues
When slip and scoring air dry clay projects, you may run into some problems like cracking seams, pieces not sticking, or excess slip oozing out. Here are some tips for troubleshooting these common issues:
Cracking Seams
If you notice cracks forming where two pieces of clay meet, there are a few things you can try. First, make sure you are scoring the surfaces thoroughly before applying slip. Shallow scores allow air bubbles to form which can lead to cracks. You can also try using thicker slip or applying more slip to the join. Letting the piece dry a bit before handling can help prevent cracks from forming as well.
Pieces Not Sticking
If your clay pieces won’t stay together, it likely means there is not enough slip or your slip is too thin. Try making a thicker mix and applying more liberally to both scored surfaces. Ensure the slip has not dried out too much before applying as this can prevent a strong bond. Letting the pieces sit undisturbed while drying can also help them adhere better.
Excess Slip Oozing
Too much slip or slip that is too thin can lead to it oozing out of the seams. Try wiping away any excess slip after joining pieces. If slip continues oozing out, you may need to make a thicker slip or use less when joining. Score the surfaces a bit deeper as well so the slip has somewhere to sit rather than oozing out.
With some trial and error, you’ll get the hang of the ideal slip consistency and application for strong, clean joints. Be patient and remember slipped and scored projects take longer to dry fully to avoid issues.
Slip and Score vs Other Joining Methods
Slip and scoring has some advantages and disadvantages compared to other techniques for joining air dry clay pieces:
Compared to Gluing
Slip and scoring creates a stronger bond between clay pieces than simply using a glue. The clay slip penetrates into the clay pieces, fusing them together once dry. Glue tends to create a weaker connection between the outer surfaces.
However, gluing is faster and easier for small pieces that don’t require a robust connection. Slip and scoring takes more time and effort to apply the slip and score the surfaces.
Compared to Liquid Clay
Liquid clay can also be used to join pieces of air dry clay. Liquid clay results in an incredibly strong seamless bond. However, it takes much longer to dry than a water-based clay slip.
Slip and scoring dries faster, so it is better for projects on a timeline. Liquid clay is preferred for pieces that need to withstand stress and heavy use.
When Slip and Score Works Best
Slip and scoring is the ideal choice when you need a strong clay-to-clay bond that dries fairly quickly. It works best for:
- Medium to large pieces
- Connections that will be stressed or handled
- Points where seamlessness is not critical
For tiny pieces or ones that won’t undergo stress, gluing is faster. For a perfectly seamless join, opt for liquid clay instead.
Example Air Dry Clay Projects
Air dry clay is extremely versatile and can be used to create all kinds of crafts and miniature sculptures. Here are some common projects that utilize the slip and score technique:
Figures and Sculptures
Air dry clay is perfect for sculpting detailed figurines, characters, animals, and more. You can make realistic or stylized sculptures by shaping and joining multiple pieces together with slip and score. Let your imagination run wild and create unique clay figures and mini statues.
Jewelry
From pendants to beads, air dry clay works great for small jewelry pieces. Create focal bead charms by adhering findings with slip and score. Or, make flatter pieces like disks and buttons to turn into necklaces and earrings. The lightweight nature of air dry clay makes it comfortable to wear.
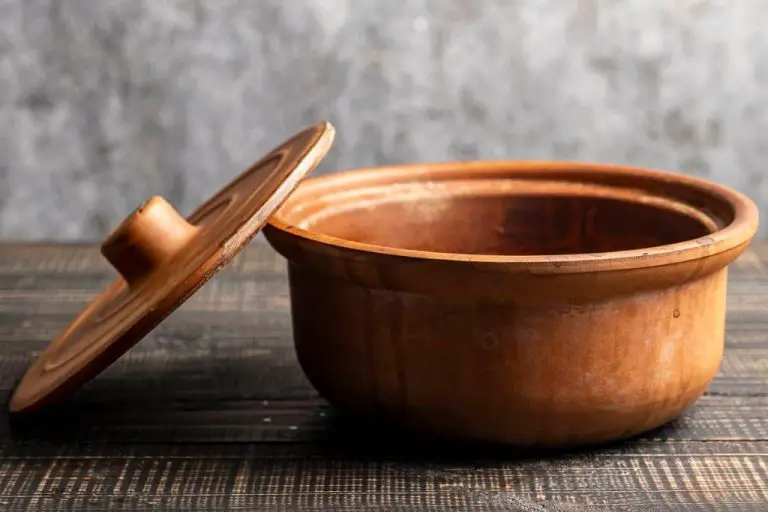
Decorations
Make one-of-a-kind decor items like bowls, boxes, plaques, wall hangings and more with air dry clay. Cut shapes using cookie cutters or freehand patterns, then join them into 3D objects. Paint and embellish dried clay pieces with paint, glaze, glitter, and other mixed media supplies. The finished products make lovely gifts and ornaments.