Does Clay Have To Be Dry To Make Slip?
What is Slip?
Slip is a liquid mixture of clay and water used in pottery and ceramics. It has a creamy consistency similar to heavy cream or yogurt. Slip can be made from any type of clay, but is typically made from the same type of clay body that the ceramic pieces are made from.
Slip is primarily used as a decorative element in pottery. It is painted onto bisqueware or greenware ceramics before firing to give the surface an additional layer of color and texture. Slip comes in various colors like white, black, red, and brown. The color is derived from natural pigments within the clay body. Clear glazes are often applied on top of colored slip designs.
In addition to decoration, slip serves some important functional purposes:
- It can be used to join two pieces of clay together, acting like glue before firing.
- It can fill small holes and smooth over rough areas on piece.
- A coat of slip provides an even, smoothed surface for glazes to adhere to.
Slip gives potters an versatile material to work with in both form and decoration. Mastering how to properly make, apply, and decorate with slip is an essential skill in pottery and ceramic arts.
Making Slip from Dry Clay
Making slip from dry clay powder is a straightforward process. Here are the steps:
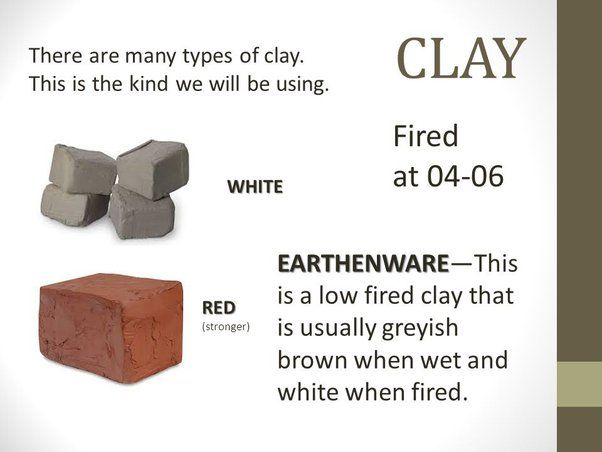
1. Choose the right clay. The best clays for making slip are kaolin or ball clays. These have higher plasticity and suspend well in water. Avoid stoneware clays as they tend to settle quickly.
2. Measure out dry clay. Use a scale to weigh your dry clay. The ratio is generally 1 part dry clay to 3-5 parts water by weight. For example, 100g of dry clay to 300-500g water.
3. Add water and mix. Place the clay in a bucket or container and slowly add water while mixing to avoid clumps. Use a drill with a paint mixer to combine thoroughly.
4. Let hydrate. Allow the slip to sit for several hours so the clay fully hydrates and absorbs the water. Cover with plastic to prevent drying.
5. Strain slip. Pour the slip through a fine mesh strainer or sieve to remove any remaining clumps or undesirables.
6. Adjust consistency. If needed, add more water to thin the slip or allow to evaporate if too thin. The ideal consistency is like heavy cream.
The slip is now ready to use. Store covered slip in a bucket to prevent drying. Remake slip if it thickens over time by adding more water and remixing.
Making Slip from Wet Clay
Making slip from wet clay is a simple process that has some advantages over using dry clay. The basic steps are:
- Take a chunk of prepared clay that has been wedged. Do not use bone dry clay.
- Break off pieces of the clay and put them in a bucket or other large container.
- Add water gradually while mixing and breaking up the clay pieces into a smooth liquid.
- Use a blender or drill with a paint mixer to fully incorporate the water and smooth out any clay lumps.
- Strain the mixture through a fine mesh sieve or paint filter to remove any remaining grit.
The main benefit of using wet clay is that it easily breaks down into an ultra smooth slip without clumps. Dry clay can be stubborn to incorporate water and often requires lengthy soaking, mixing, and sieving to fully hydrate. Wet clay slip also tends to have a creamier consistency. The downside is that the slip will have a higher water content and may need to be dried out more before use.
Key Differences Between Wet and Dry Clay Slip
There are some notable differences between slip made from dry clay versus slip made from wet clay. These differences affect the properties and ideal uses for each type of slip.
Differences in Properties
Dry clay slip tends to have a thicker, pasty consistency. It often contains small lumps or specks from undispersed dry clay particles. Wet clay slip has a smoother, creamier consistency without lumps. Dry clay slip dries faster than wet clay slip. It can become tacky in just a few minutes, while wet slip remains workable for longer.
Dry clay also provides more control over slip thickness. Adding less water produces thicker slip for covering larger surface defects. Wet clay limits the range of possible slip consistencies. The pre-existing moisture content fixes the thickness.
Differences in Uses
The thicker texture makes dry clay slip better for filling cracks, holes, and large pits in greenware or bisque. It can patch flaws in a single application without dripping or running. Wet clay slip flows more readily for smoother, thinner coats.
Wet clay slip often adheres better to moist greenware or bisque. Dry clay slip bonds better on dried bisque since it won’t get diluted. Dry slip also works better for slip trailing decorative lines and details. Its thickness gives crisp edges that maintain shape during drying.
For basic slip coating, either wet or dry clay can work. But their differences make certain slip types preferable for specific uses. Understanding these differences allows potters to choose the best kind of slip for their projects.
Slip Recipes
Slip recipes vary depending on the type of clay you are using and the consistency you need for your project. Here are some standard slip recipe ratios to get you started:
Cone 6 Stoneware Clay
A common recipe is 1 part dry clay to 3 parts water. Mix the dry clay and water thoroughly until you achieve a creamy, liquid consistency. Let the mixture sit for several hours so the clay can fully saturate before using.
Cone 10 Stoneware or Porcelain
Use a thinner mixture of 1 part dry clay to 4-5 parts water. The higher clay content requires more water to reach a good slip consistency.
Earthenware Clays
Earthenware clays are very porous and require less water in the slip recipe. Try starting with a 1:2 ratio of clay to water.
Paper Clay
For paper clay slips, use a thicker mixture like 1 part paper clay to 2 parts water. The pulp fibers in paper clay soak up more water.
Feel free to experiment with different water amounts to get the ideal slip consistency for your project. Thinner slips work well for surface decoration while thicker slips are better for attaching or joining.
Using Commercial Slip
Many ceramic artists opt to use commercially available slip rather than mixing their own. Commercial slip offers some key advantages:
- Convenience – Commercial slip is ready to use right out of the container. You don’t have to measure ingredients or blend your own slip.
- Consistency – Commercial slip formulations are meticulously engineered to offer reliable, consistent results. You’ll get the same viscosity and workability every time.
- Quality – Commercial slips utilize high grade clays and minerals engineered for optimized performance. They often exceed the quality possible with home mixed slips.
- Range of Options – You’ll find a broad range of commercial slip varieties available, from velvety smooth porcelain slips to coarse stoneware slips and everything in between.
Some of the most popular types of commercial ceramic slips include:
- Porcelain – Very smooth, white, translucent after firing. Low shrinkage.
- Stoneware – Denser, more textured. Grey/brown after firing. Moderate shrinkage.
- Earthenware – Bright white after firing. Higher shrinkage.
- Casting Slip – Heavily thixotropic for retaining fine detail.
- Engobe – Colored slips that act as decorating glazes.
With the range of options available, commercial slips offer convenience, quality, and reliability for ceramic artists.
Slip Application Techniques
There are several techniques to apply slip to clay or ceramic pieces. Choosing the right technique depends on the desired effect and finish.
Brushing
Applying slip with a brush gives good control and is common for handmade pottery and sculpture. Use a soft brush to brush an even coat of slip onto the clay surface. Gentle, smooth strokes work best to minimize brush marks. Let the slip dry completely before handling.
Dipping
Dipping fully immerses the clay piece in a container of prepared slip. This ensures full, even coverage. Let excess slip drip off before drying upside down on a rack. Dipping works well for covering complex shapes evenly.
Pouring
Pouring slip from a container allows coating large flat areas quickly. Tilt and rotate the piece to spread the slip around before pouring off any excess. This technique requires some practice to control the thickness and coverage.
Spraying
Spraying slip through an airbrush tool or spray bottle creates a fine mist application. Spray in light coats from all angles to build up an even color. Mask off areas by taping over surfaces that should remain slip-free. Spraying slip gives a smooth, consistent finish.
Slip Decorating Methods
Slip can be used to decorate pottery in various creative ways. Two popular techniques are coloring slip and using slip to create textures.
Coloring Slip
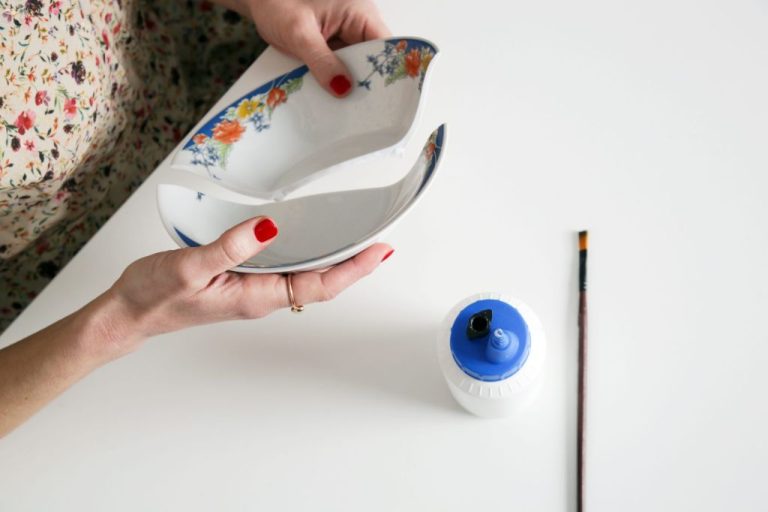
Colored slips allow you to paint directly onto bare clay with a brush to add accents, patterns, or cover the entire piece. To color slip, you can add ceramic stains, oxides, or underglaze pigments. Start with just a small amount of colorant and mix thoroughly to achieve an even consistency and your desired shade. Test on a piece of scrap clay before applying to your actual artwork. Keep in mind that colors will often appear slightly different after firing.
Using Slip for Textures
Slip can also be used to create interesting textures. Try dipping or pouring slip onto the surface and allowing it to dry slightly before carving into it with tools. You can also make slip trailing bottles to drizzle beautiful delicate lines. For bolder textures, add materials like sand or grog to the slip recipe. Apply slip textures in layers for added dimension. Experiment with different tools and techniques to create your own unique effects.
Slip Troubleshooting
Slip can be tricky to get just right. Here are some common slip problems and how to fix them:
Common Slip Problems
Slip that is too thin and runny. This can cause the slip to drip off the piece or make decorations blurry.
Slip that is too thick or chunky. Thick slip can get clumpy and be hard to apply smoothly.
Bubbles in the slip. This can leave undesirable bubble markings on the finished piece.
Slip that dries too quickly. Fast drying slip makes it hard to blend or smooth out.
Fixing Runny or Thick Slip
To fix runny slip, let it sit uncovered until some of the water evaporates. You can also mix in a teaspoon of cornstarch, flour, or clay powder to thicken it up.
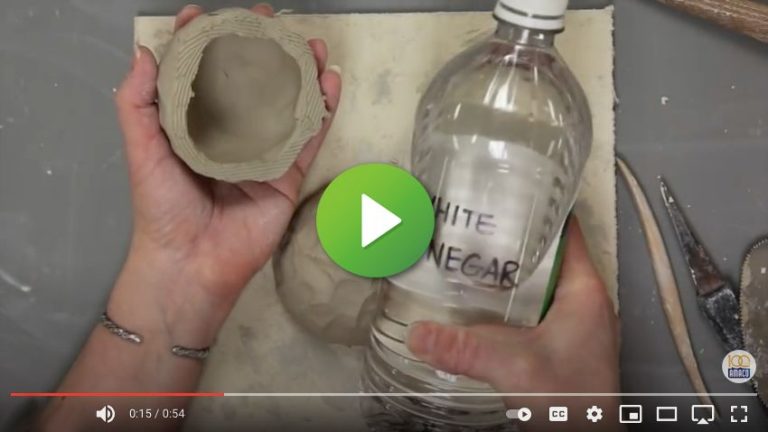
For thick slip, add water a few drops at a time and mix thoroughly until it reaches a creamy milk-like consistency. You can also add a few drops of vinegar to help break up clumps.
Test the consistency on a piece of scrap clay and adjust as needed. The slip should glide smoothly off a stirring stick.
Safety When Using Slip
When working with slip, it’s important to take proper safety precautions. Slip contains silica dust which can irritate eyes and lungs if inhaled. Proper ventilation is critical when mixing and applying slip.
Use a ventilated area or wear a respirator mask rated for fine particulate matter. Open windows and use fans to keep air circulating. Avoid breathing in slip dust by keeping your face away while mixing. Consider wearing goggles to protect eyes from splashes when pouring.
Wear gloves when handling slip, as it can dry out skin. Latex, rubber, or nitrile gloves work well. Wash hands after finishing work. Clean spills right away by wiping up excess slip. Avoid using water which can make slip muddy and slippery. Use a dustpan and brush to clean up dry slip dust.
Take precautions to prevent and clean up slip spills. Ventilate your workspace, protect your hands and eyes, and contain dust. Follow basic studio safety practices when handling slip powder or liquid to create pottery safely.