Free Zentangle Patterns | Step By Step
Discover the joy of creating stunning visuals with ease, courtesy of Zentangles. As a beginner-friendly art form, it’s no wonder why many people are drawn to this captivating medium. Let’s dive into some of the most impressive Zentangle designs and explore the simple yet effective techniques required to bring them to life.
Bronx Cheer Zentangle
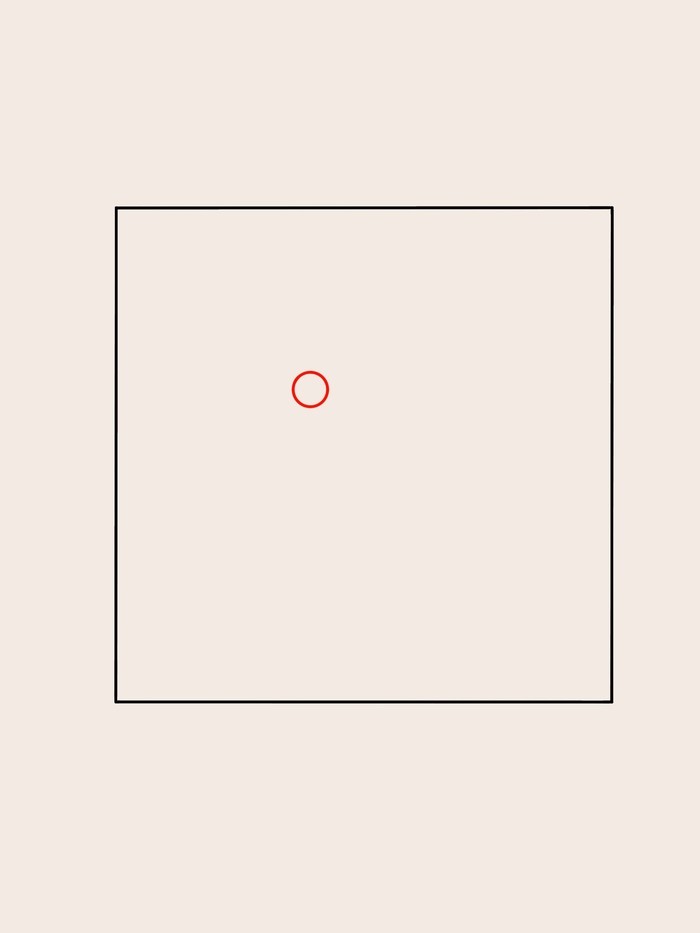
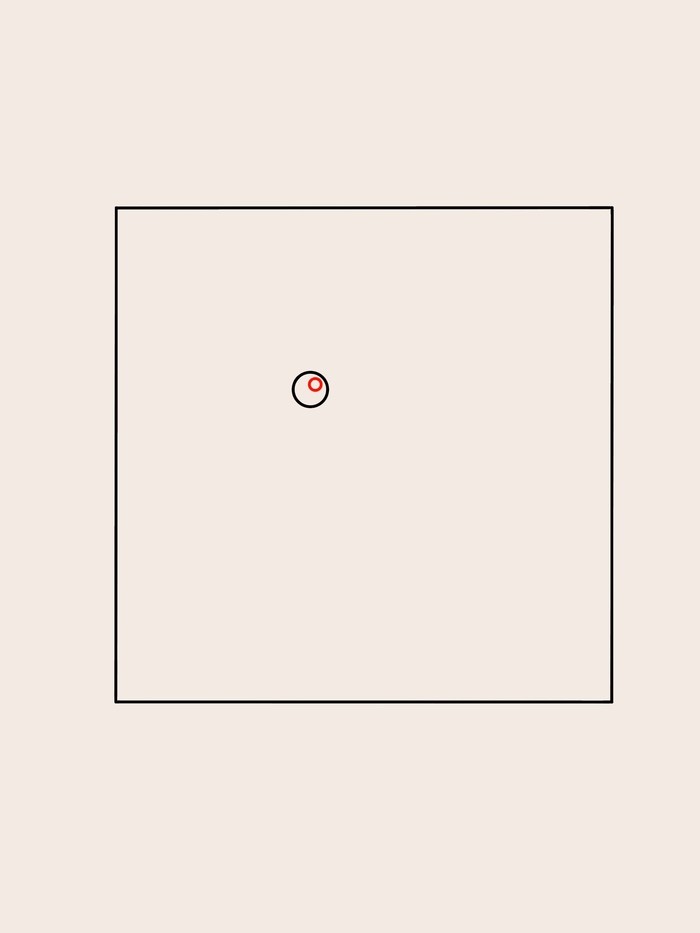
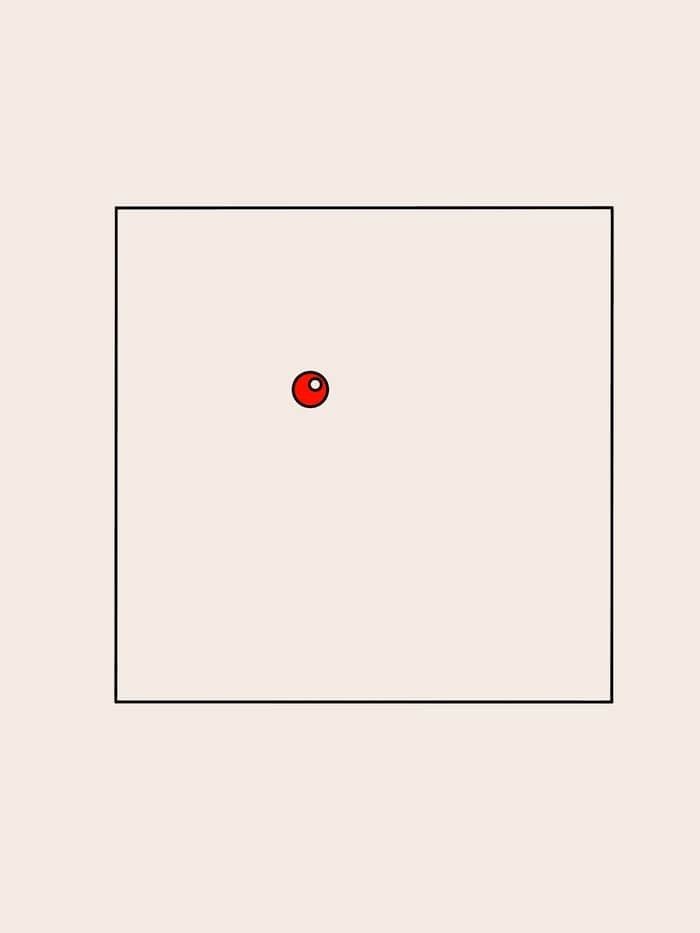

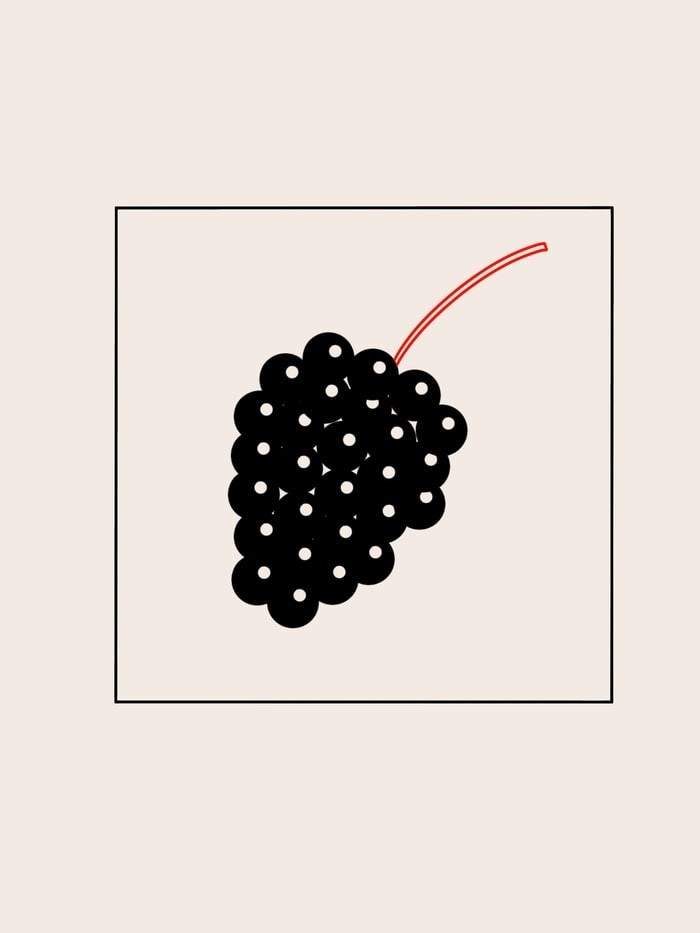
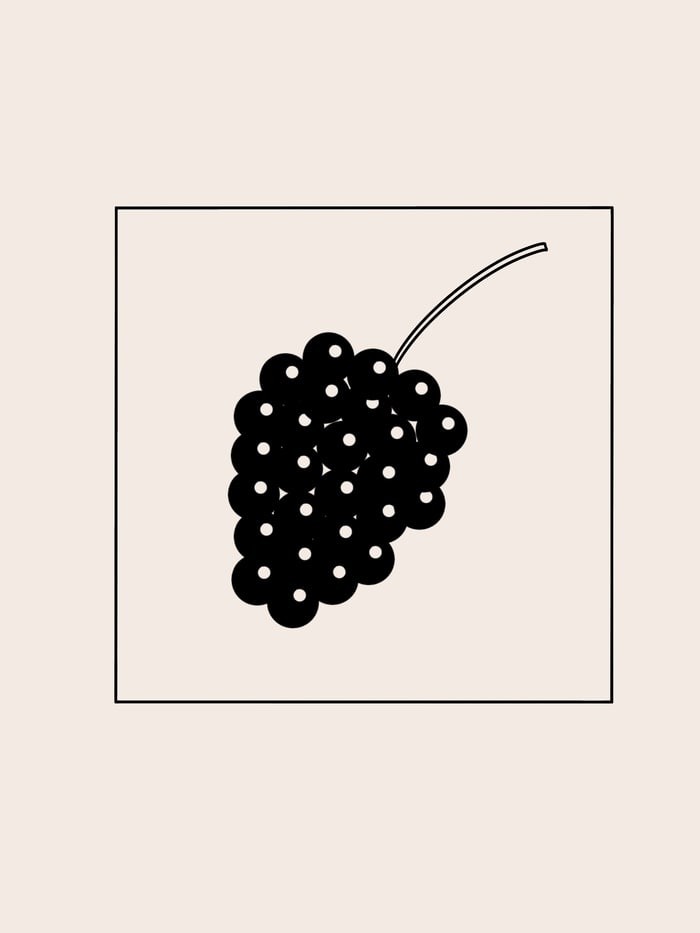
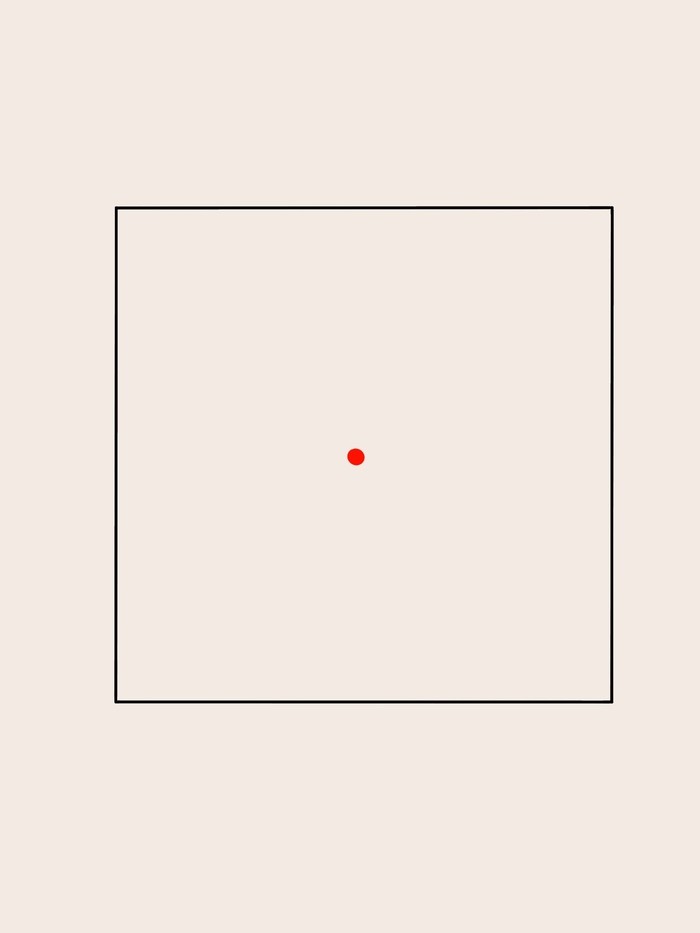
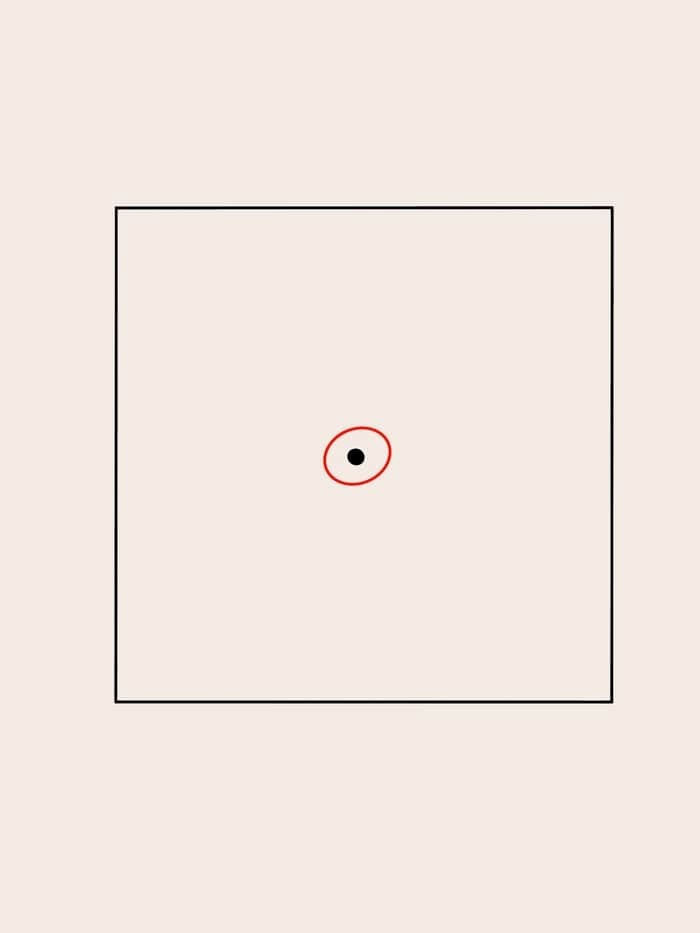
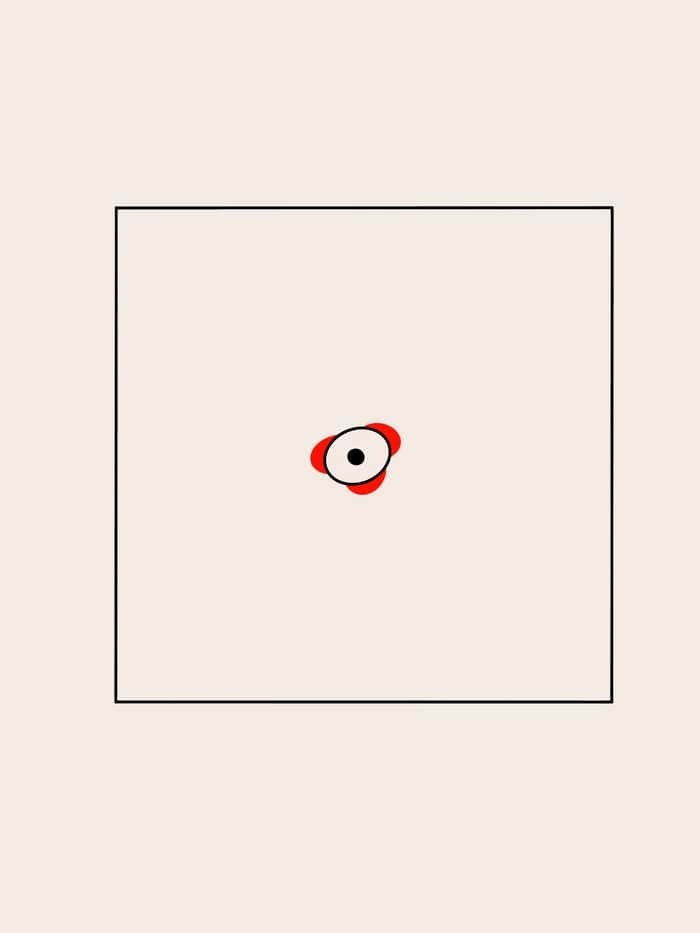
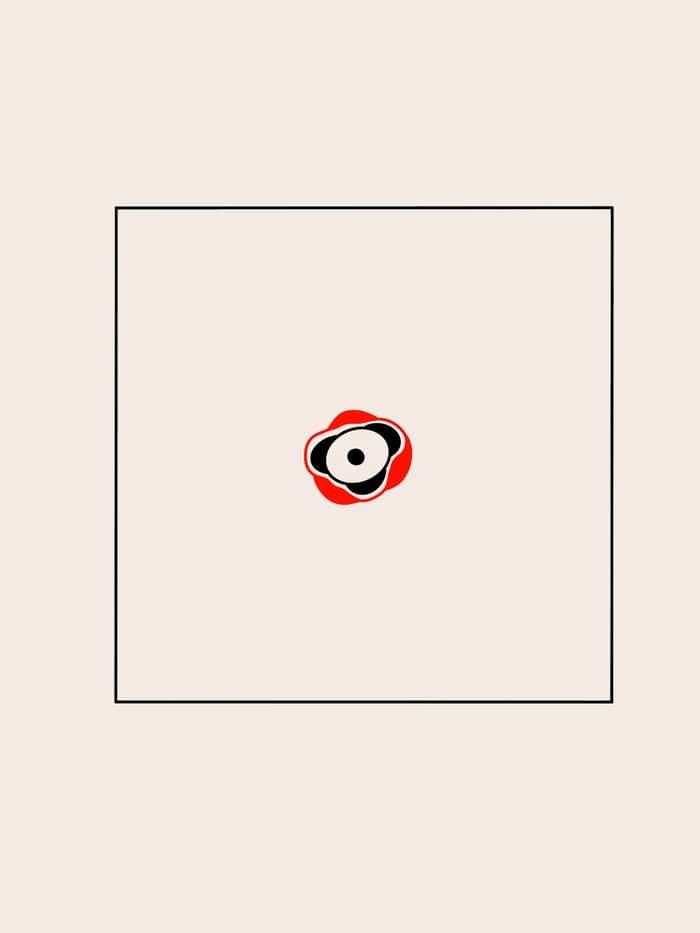
While the Bronx Cheer and Bronx Spear tangles may appear complex at first glance, they’re actually based on simple shapes like raspberries. In this case, the Bronx Cheer zentangle is comprised of nothing more than circles.Let’s dive in and learn how to draw the Bronx Cheer together! To get started, create a small circle near the center of your paper. This will serve as the foundation for our raspberry design.Next, draw a slightly smaller circle inside the first one, positioned towards one edge. This inner circle represents the highlight on the berry’s surface.Fill the entire outer circle with a solid color – traditionally, zentangles are created in black, but since this pattern is inspired by raspberries, you could opt for a bright red hue instead.To give your raspberry some shape and dimension, continue drawing small circles adjacent to one another. Feel free to overlap them slightly or leave a small gap between each circle; this will add a natural touch to the design.Finally, draw two thin lines from the top of the raspberry to represent the stem. And that’s it – you’ve successfully drawn the Bronx Cheer!This adorable pattern is surprisingly easy to create and requires no advanced techniques. I hope you’ll give it a try and experiment with different colors and shading techniques to make your design truly unique.If you need additional guidance, be sure to check out the accompanying video tutorial for step-by-step instructions on drawing the Bronx Cheer.
Enyshou Zentangle
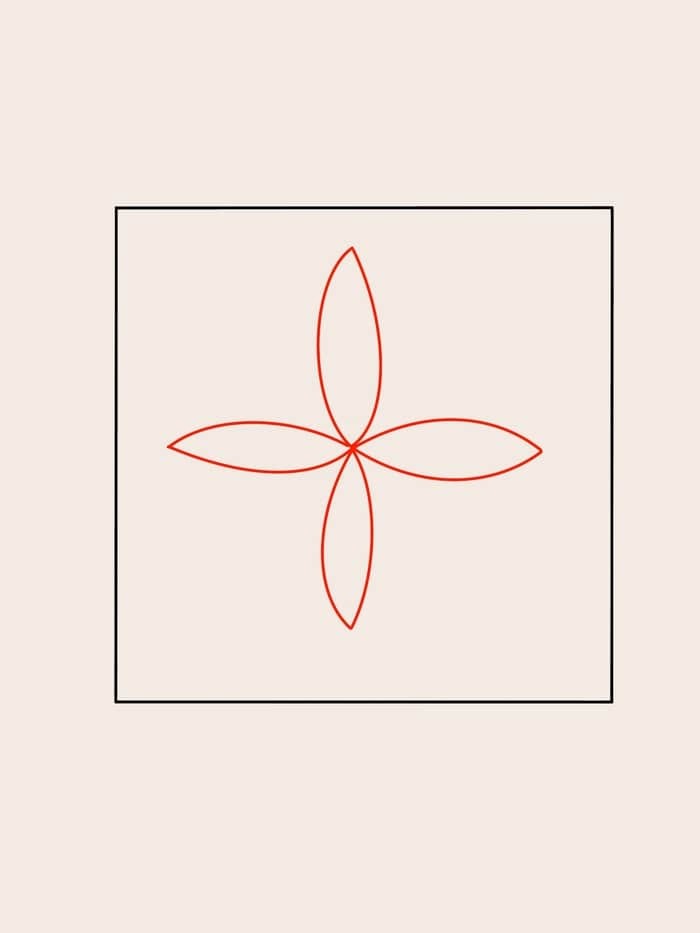
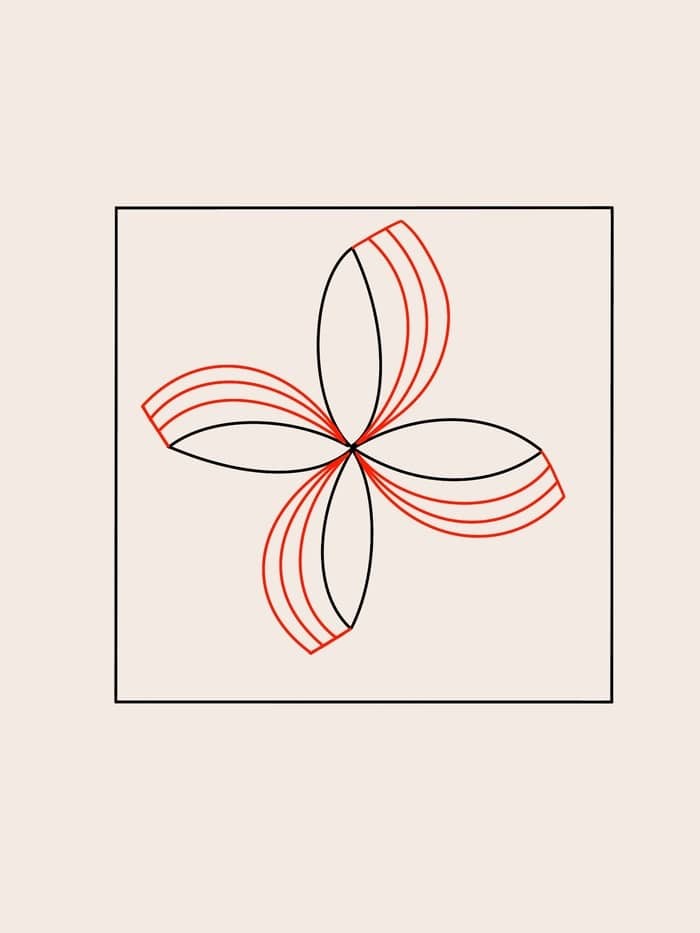
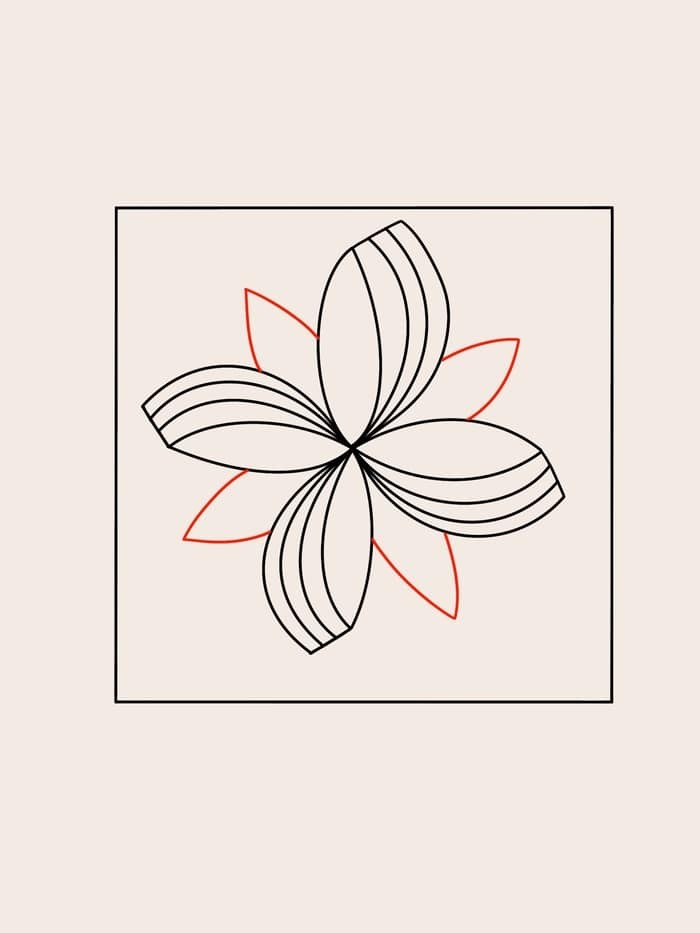
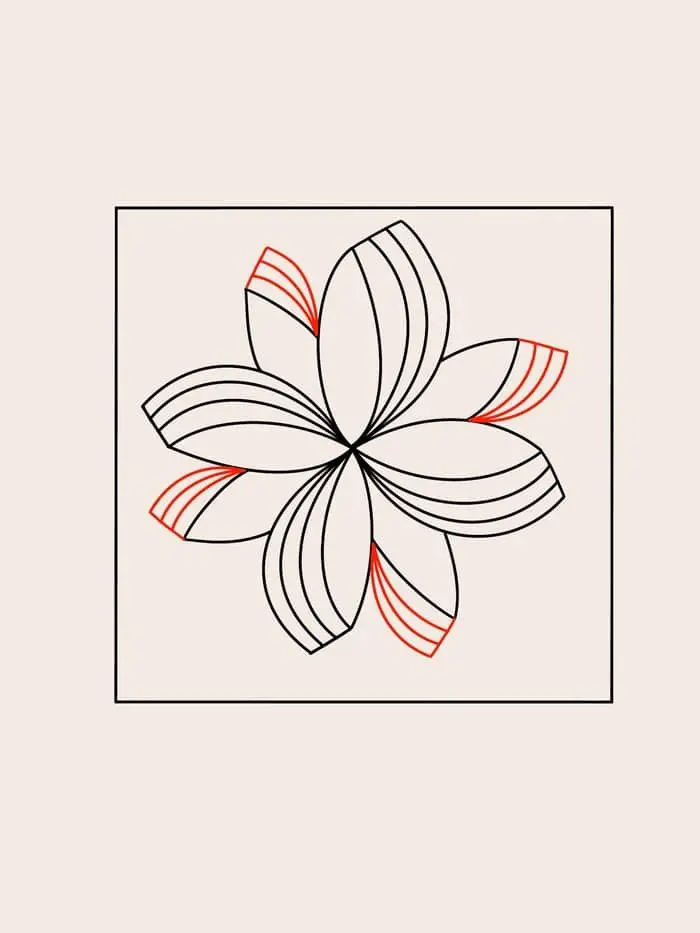
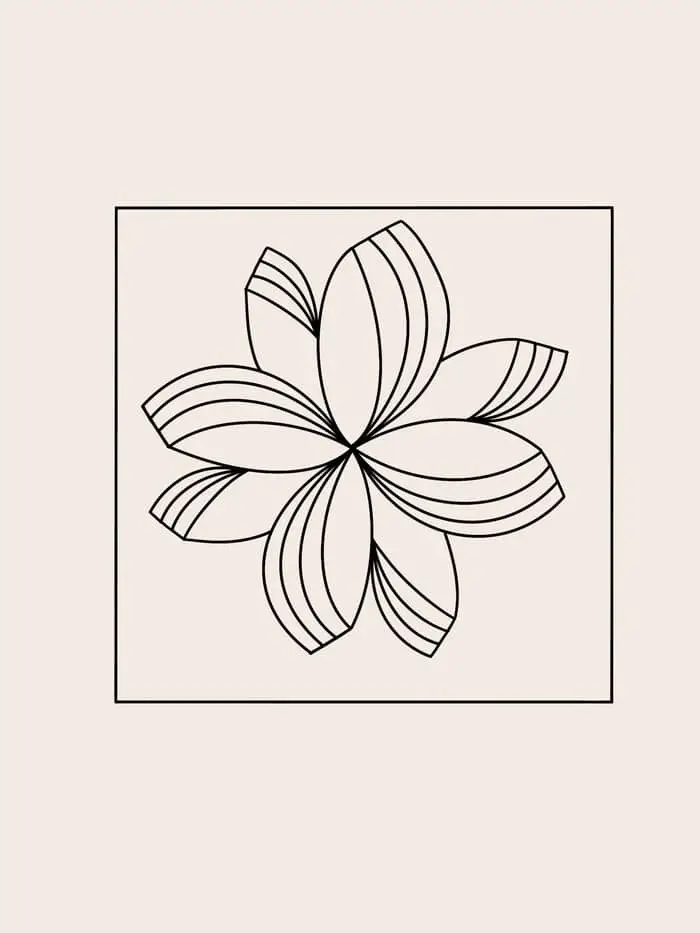
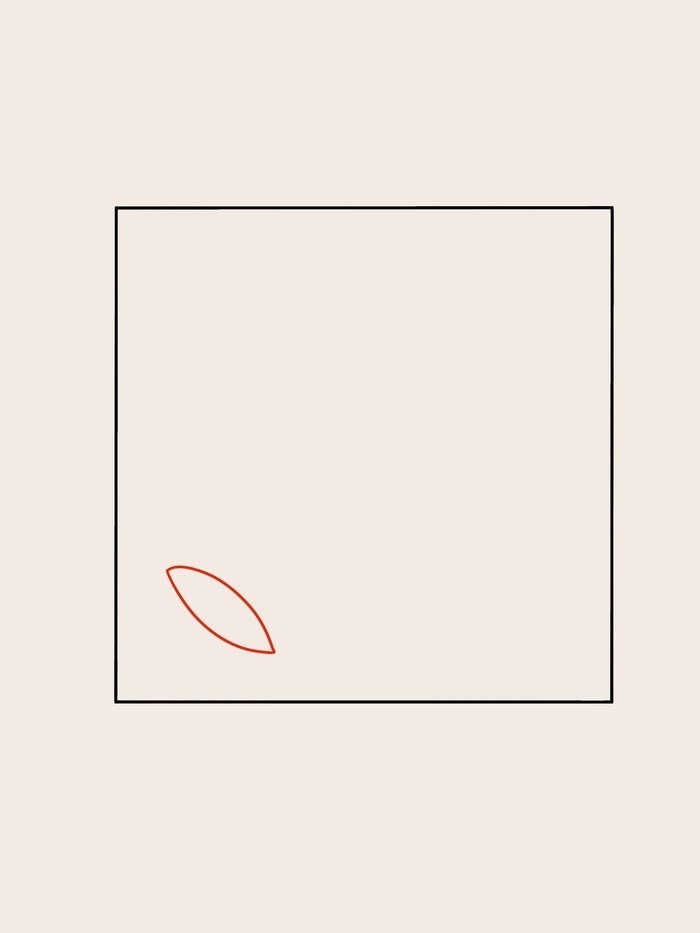
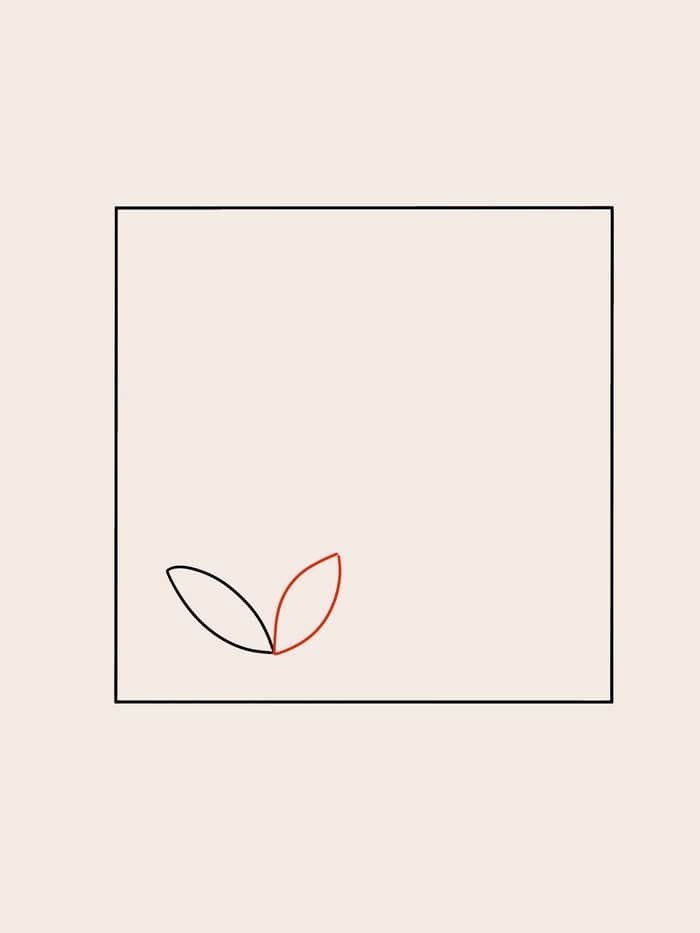
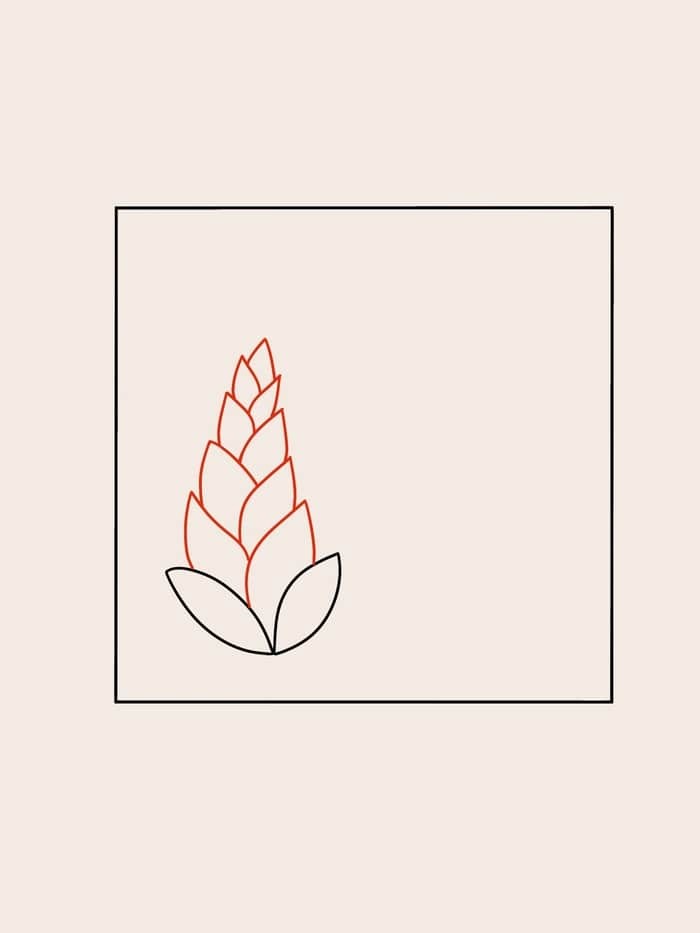
The Enyshou pattern is a charming and straightforward design that pairs beautifully with other organic tangles. To bring this zentangle pattern to life, begin by drawing an ellipse in one corner of your paper. Next, create a flowing, curved line extending from the ellipse towards another corner, gradually tapering off at one point. Repeat this process three more times, parallel to each other and converging at the same point, forming one petal. To add depth and visual interest, repeat the process to draw additional petals, offsetting each new addition slightly and in a different direction. As you continue drawing, feel free to experiment with varying the size and placement of your petals to create unique and expressive results. Once you’ve achieved the desired effect, you’ll have successfully drawn the Enyshou pattern. For those seeking additional guidance or visual clarification, a short video tutorial is available below, providing step-by-step instructions for drawing Enyshou.
Diva Dance Zentangle
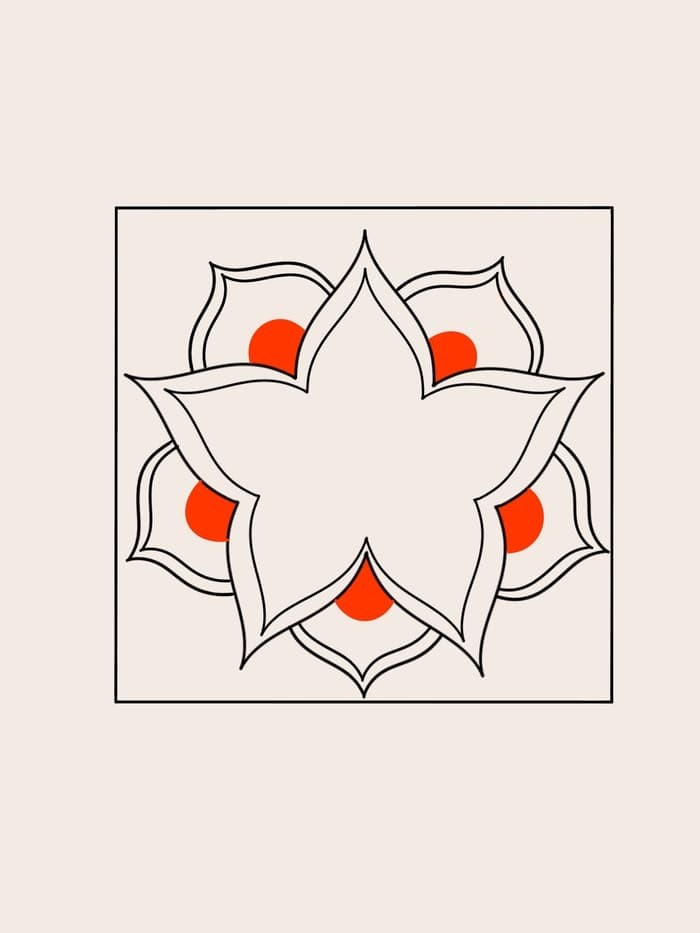
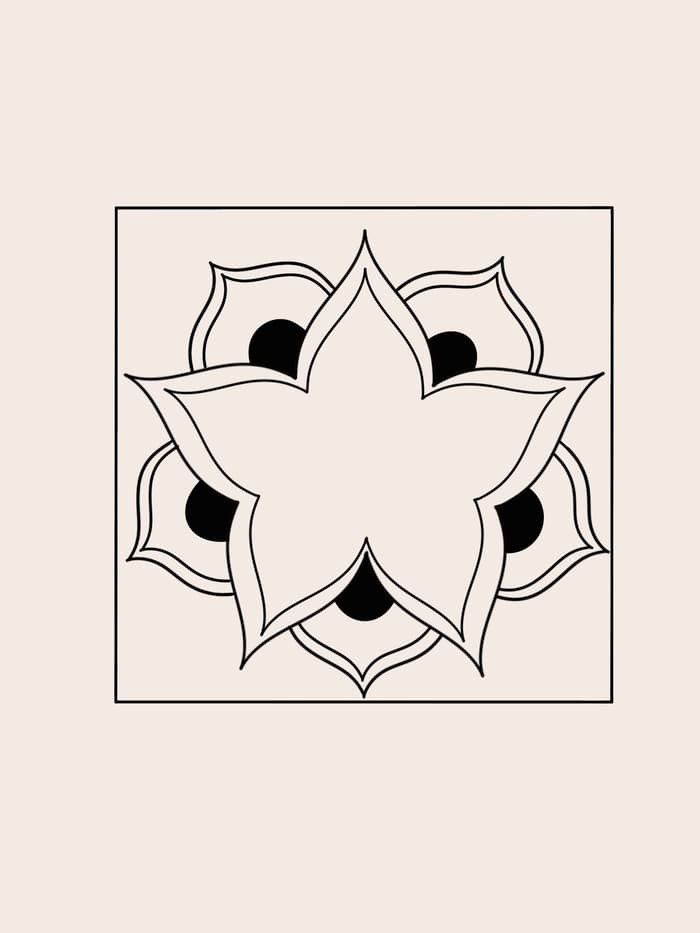
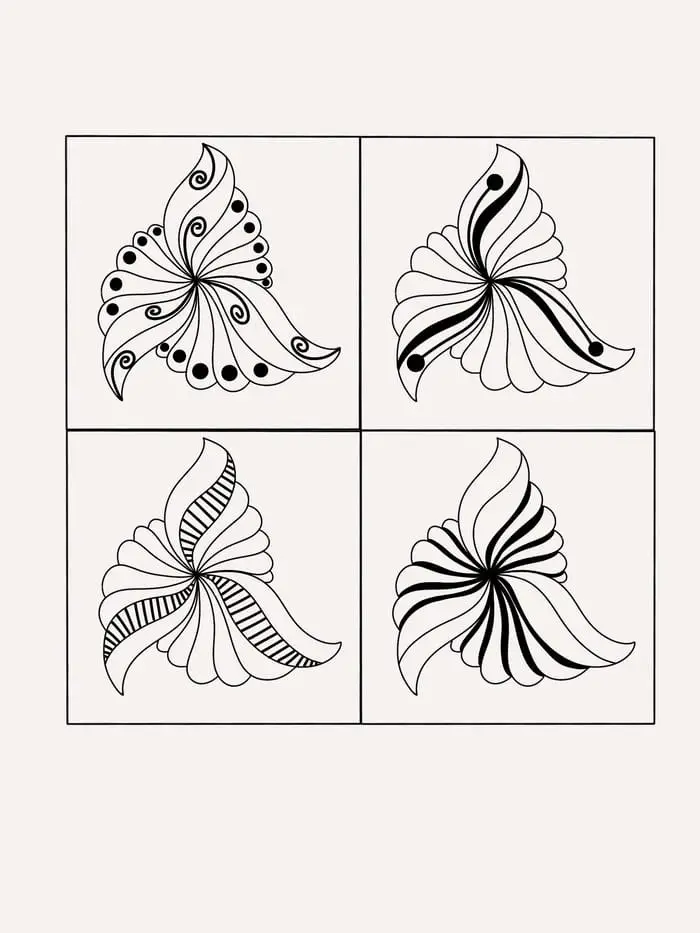
The enigmatic Diva Dance is a delightful Zentangle pattern that requires minimal fuss. Its flower-like appearance makes it an attractive addition to any art enthusiast’s repertoire. To create this masterpiece, start with a simple dot or filled circle, although a heart-shaped center can also yield a charming outcome. The process begins with a single foundation shape, which serves as the base for the rest of the design.Begin by drawing a circle around your chosen starting point. Next, add several small leaves radiating from the central figure. Repeat this process by drawing a line around the existing elements and then adding multiple petals attached to the line. Continue layering these additions until you’re satisfied with the size of your pattern.To achieve an organic appearance, experiment with varying the number of petals on each successive layer. Once you’ve reached your desired level of intricacy, feel free to embellish your Zentangle by incorporating additional Diva Dance patterns or other designs from the Zentangle repertoire. For a more comprehensive guide, consult the accompanying video tutorial that walks you through the step-by-step process.
Dyon Zentangle
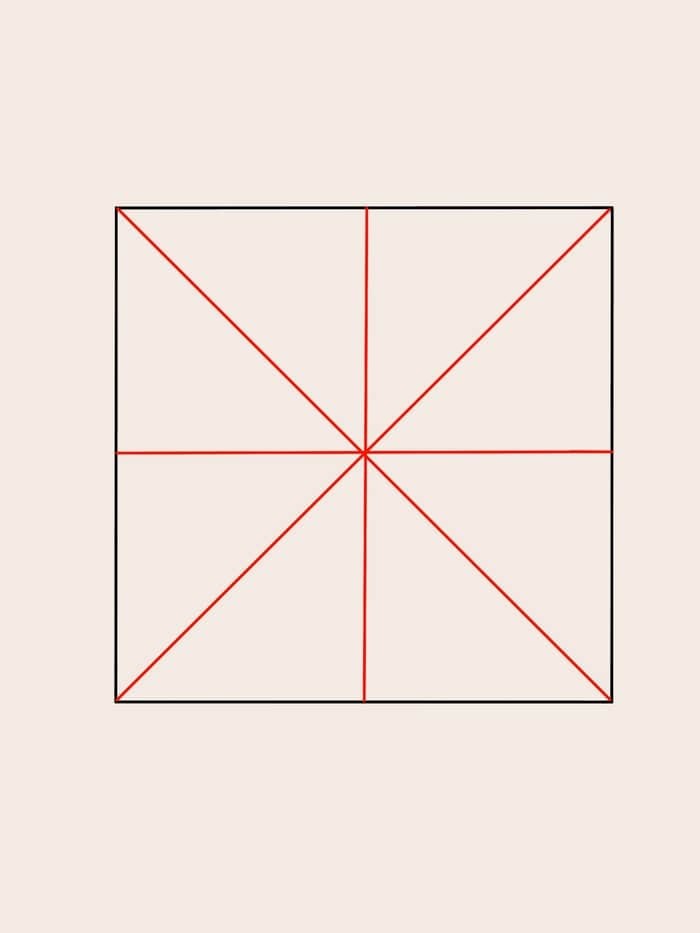
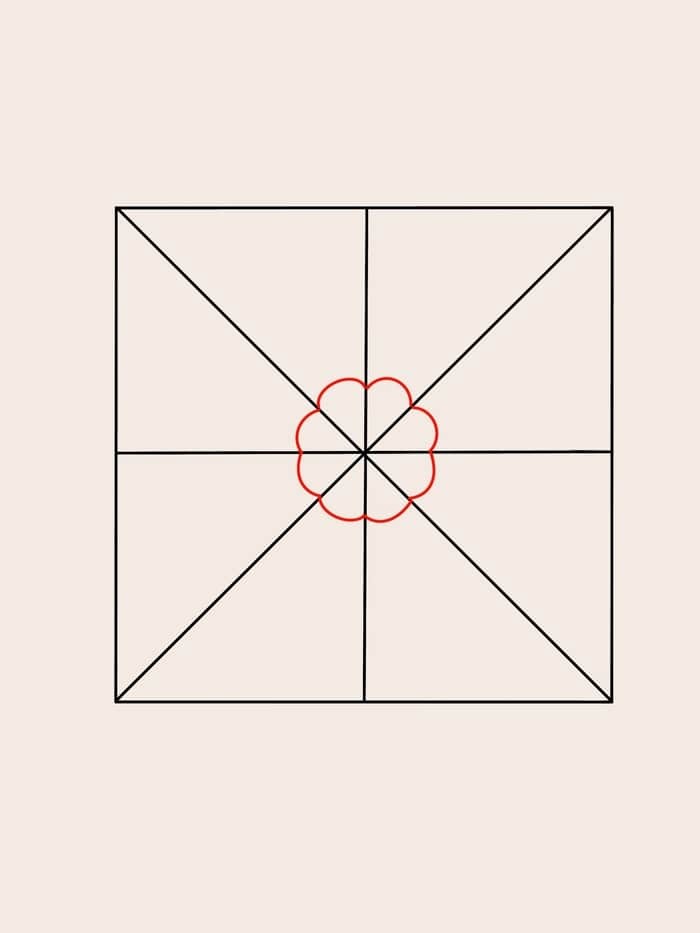
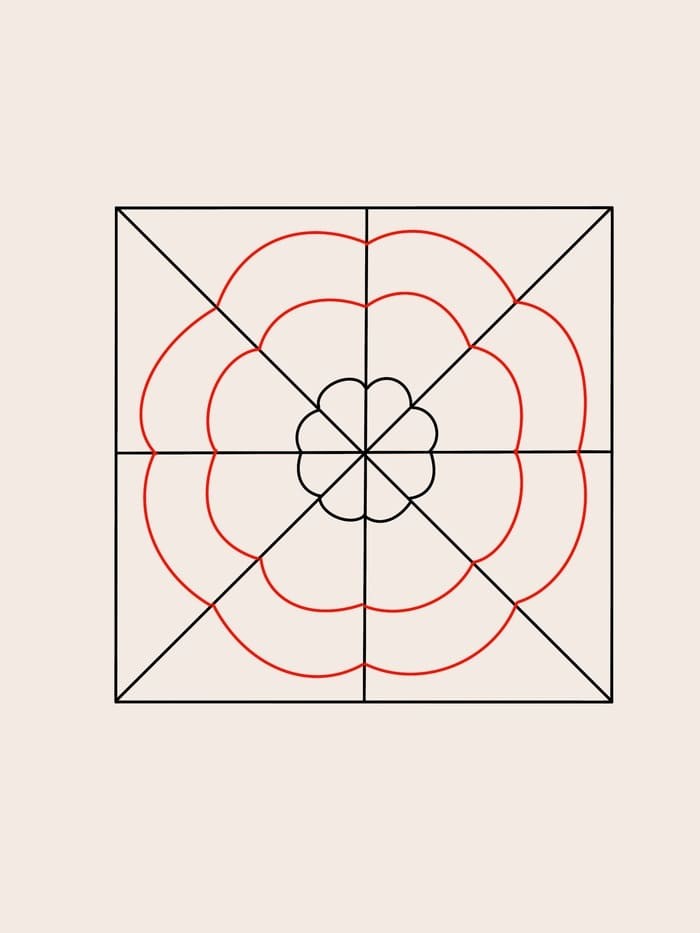
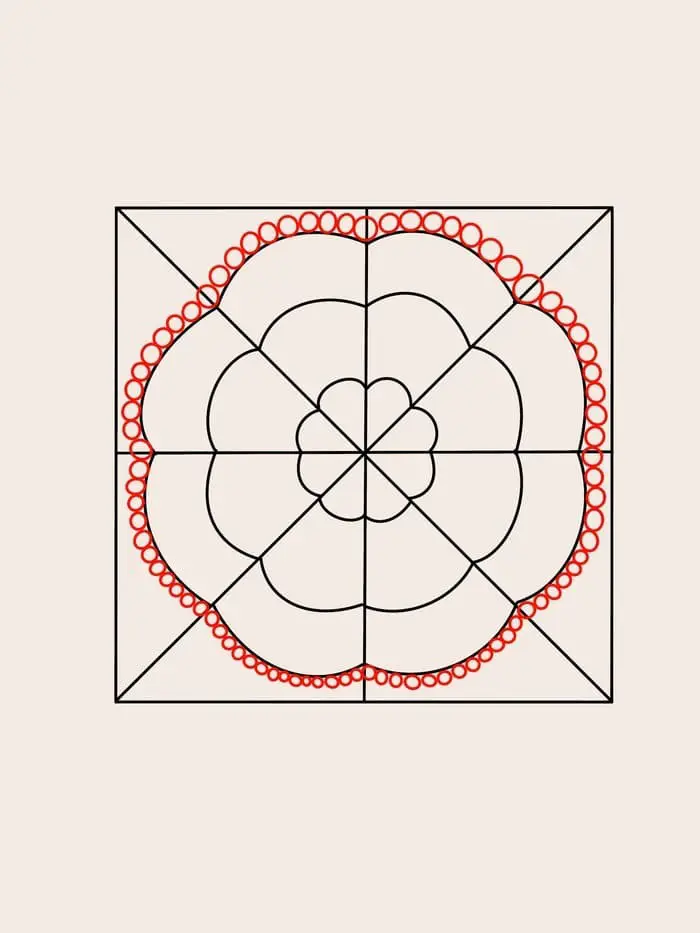
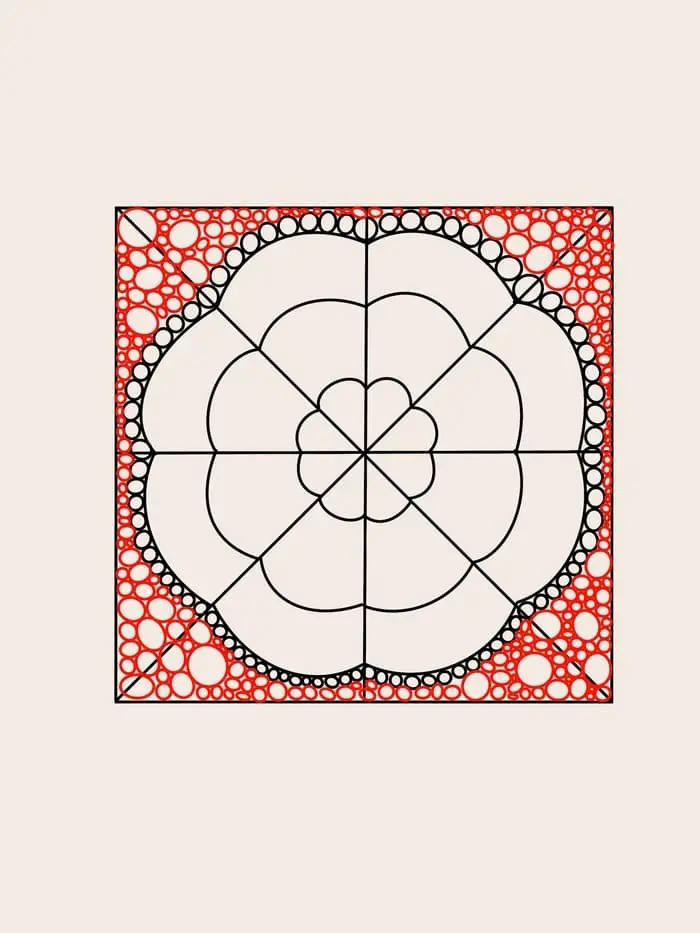
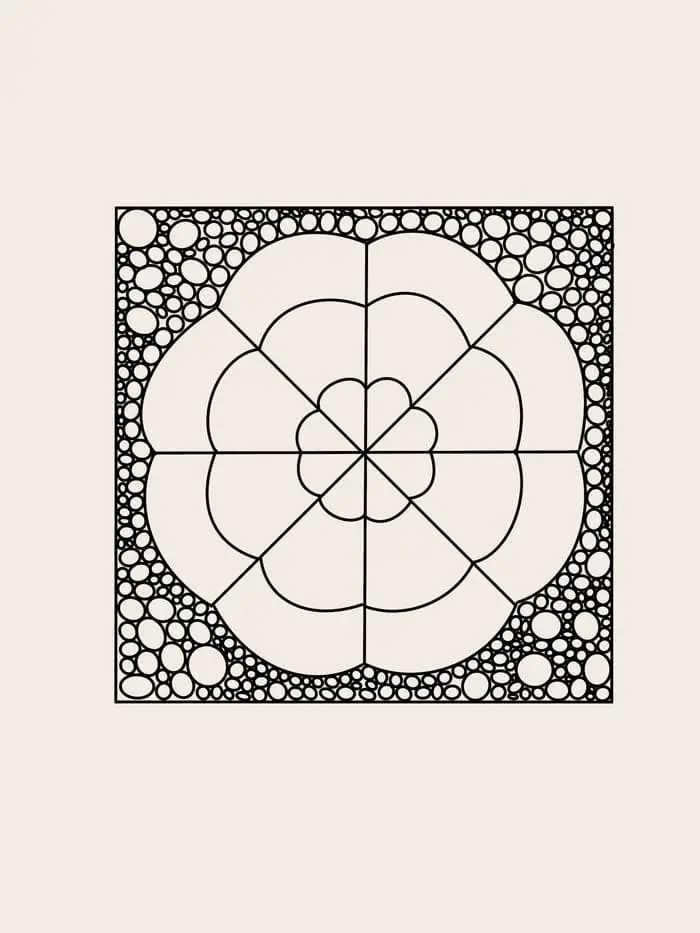
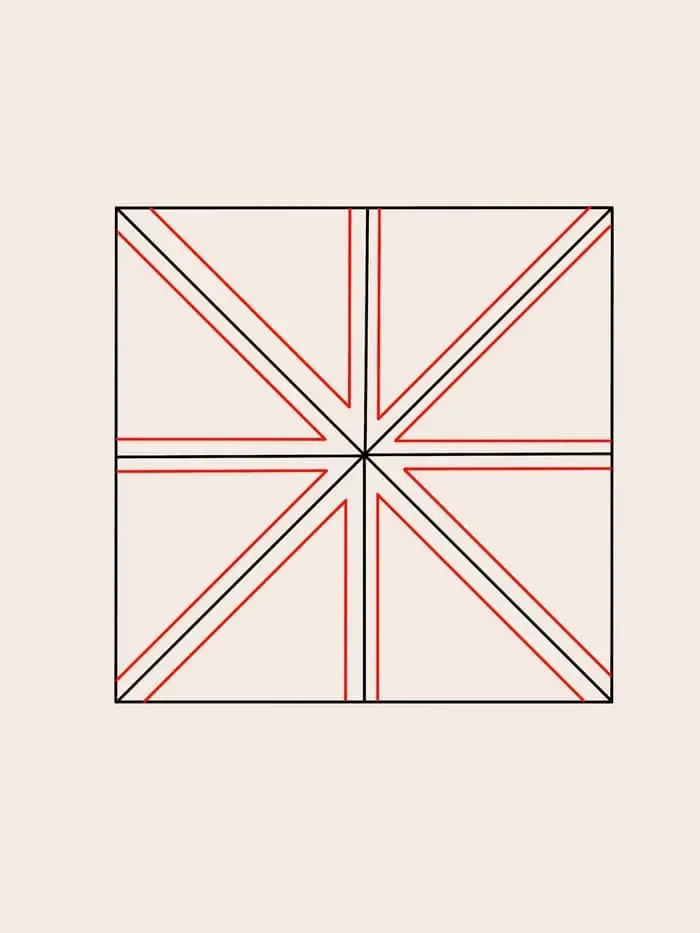
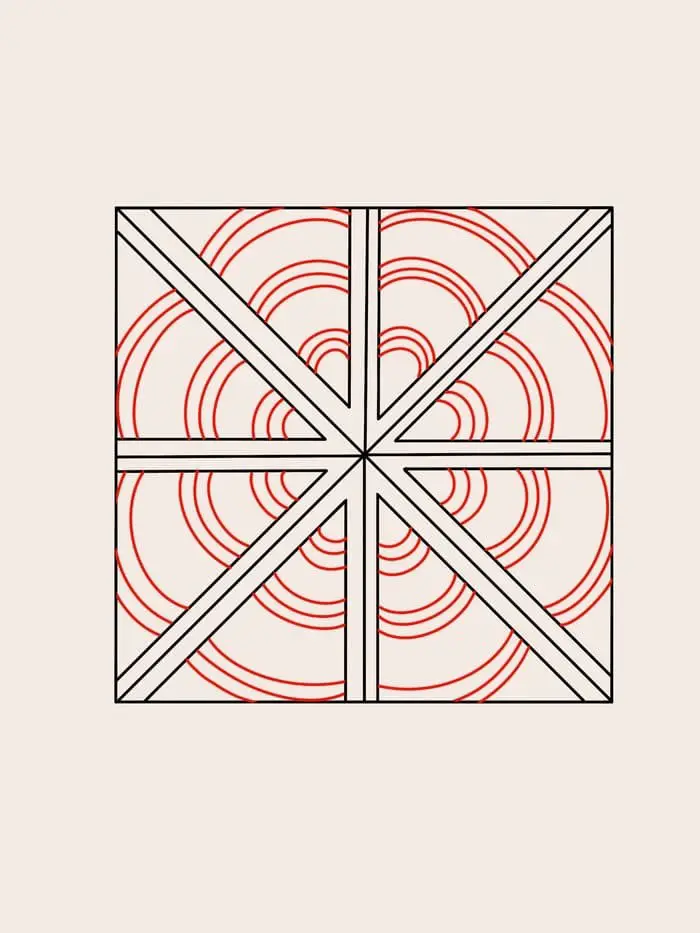
The Dyon zentangle pattern is an excellent starting point for beginners, characterized by its simplicity and floral appeal. If you’re familiar with zentangles, you might recognize similarities with the Cyme pattern. With minimal fuss, let’s dive into drawing Dyon! To begin, create four intersecting lines that meet at a single point. A straightforward approach is to draw the two diagonals first, followed by the horizontal and vertical line through the intersection point. Alternatively, use curved lines for added creativity.Once your zentangle is divided into eight sections, add a semicircle in each section, ensuring they touch at the edges. Repeat this step, gradually moving further away from the center. You can repeat this process as many times as you have space, leaving some room between the outermost circles and the edges.Next, draw circles around the outermost arches. The size of these circles is unimportant; aim for roughly uniform circles for the best result. If you have remaining empty space, fill it with more circles or add leaves to enhance the floral theme.With these steps complete, you’ve successfully created your first Dyon zentangle! This pattern shares similarities with Cyme and is one of the simpler designs in the zentangle world.
Drupe Zentangle

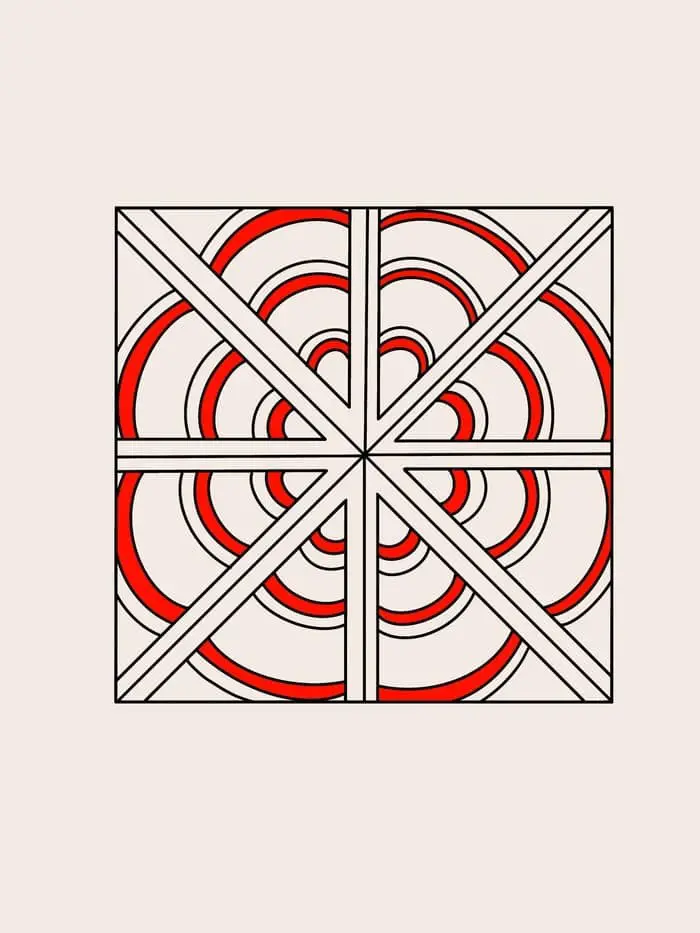
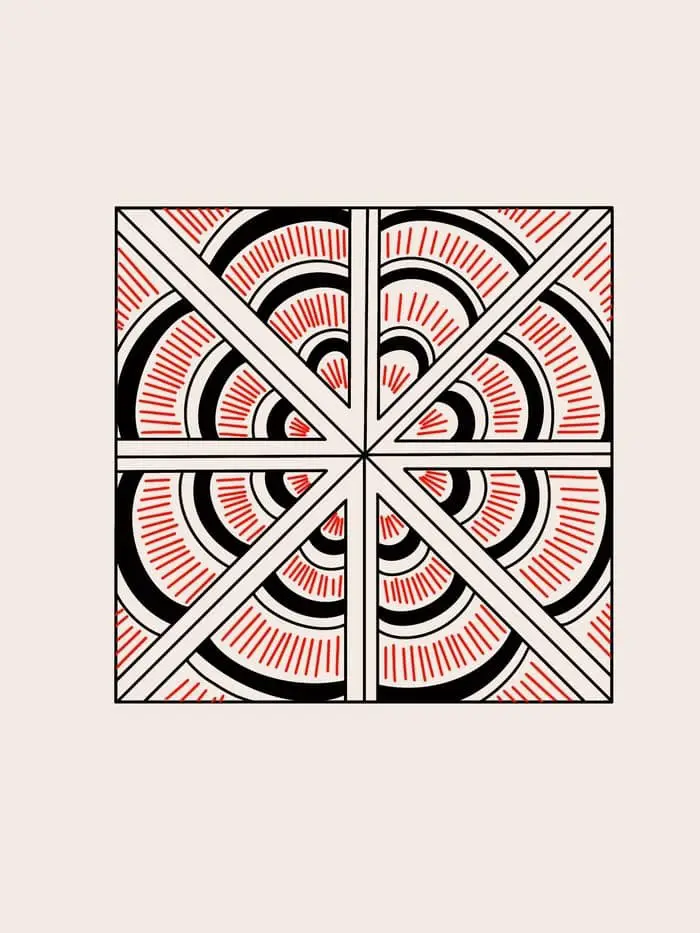
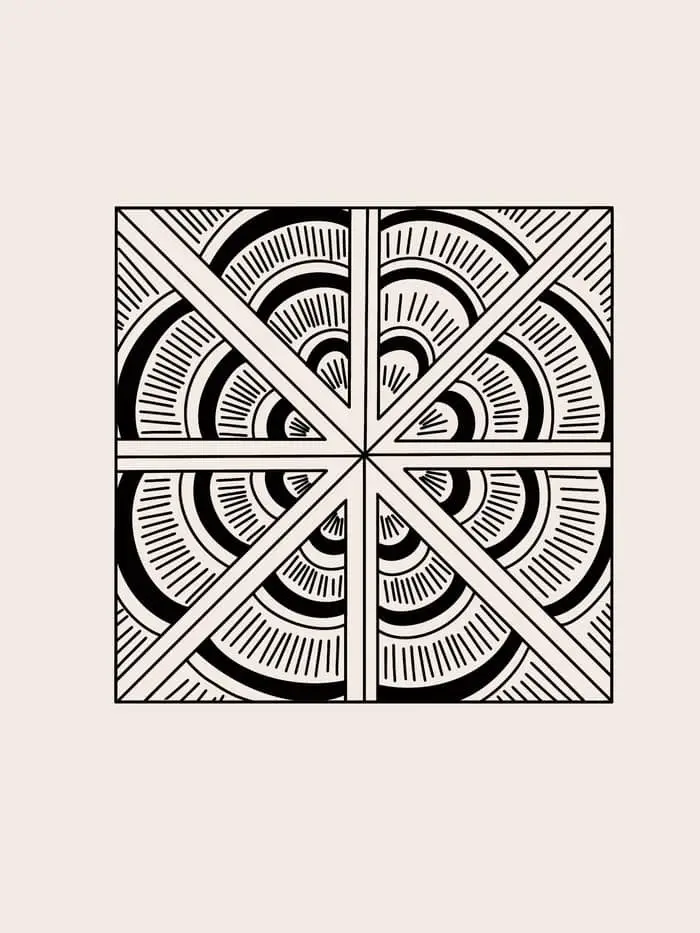
While Drupe may appear complex at first glance, it’s actually a manageable Zentangle pattern once you understand the steps. The key is to break down the process into smaller, more manageable components. To start, create four intersecting lines on your tile. If you’re new to drawing this pattern, consider using straight lines and even a ruler if needed. As you become more comfortable, feel free to experiment with curved lines that still intersect at the same point.Next, draw an aura around the initial lines by creating parallel lines to each of the original four lines. This will divide your tile into eight sections. Within each section, create two connected arches using three half-circles. Leave a small gap between the arches and then add three more half-circles. You can continue adding layers until you reach the edge of the paper.The final step is to color the inner arch for each set of arches. Then, fill in the blank areas between the arches with radial lines that move outward from the center. This part of the process allows for a lot of creativity and flexibility – feel free to get playful with your lines!If you’ve followed these steps, congratulations – you’ve just completed your first Drupe Zentangle! One of the unique aspects of this pattern is that it looks even more stunning when larger in size. You can showcase it on its own or pair it with other patterns to create a visually appealing composition.
Cyme Zentangle
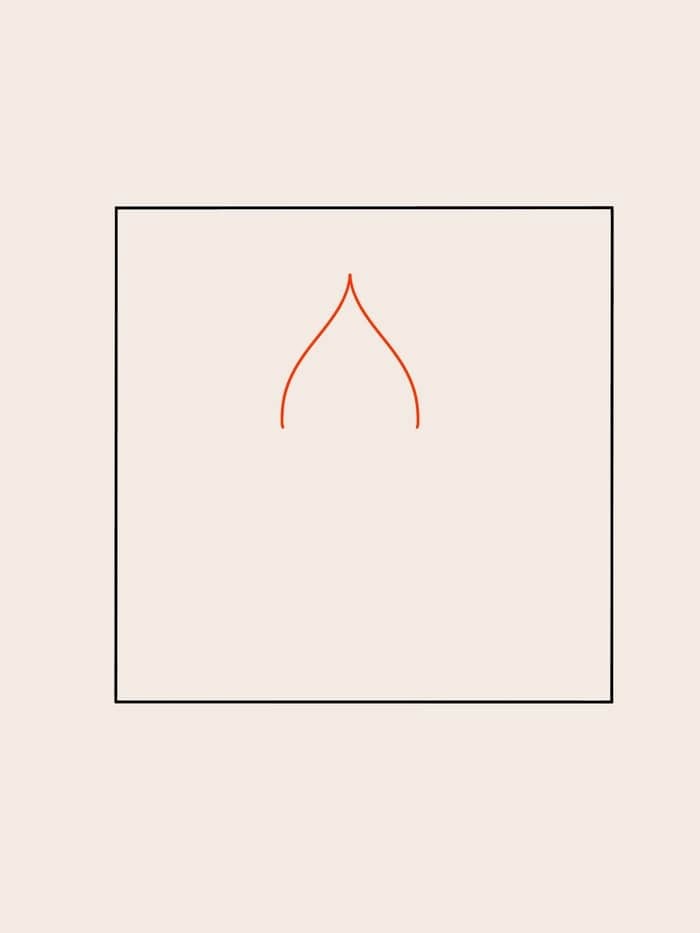
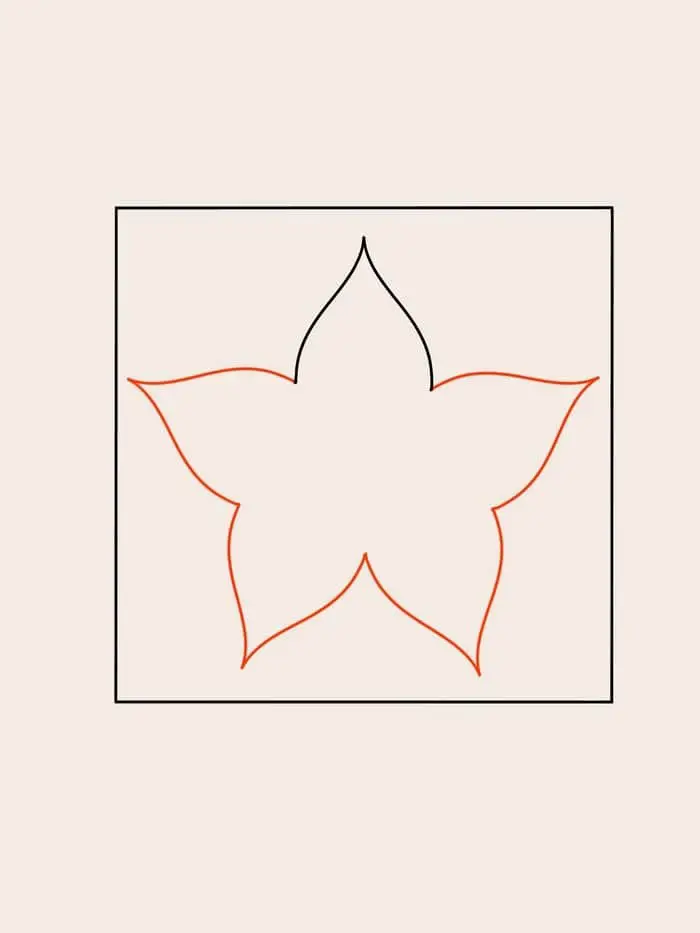

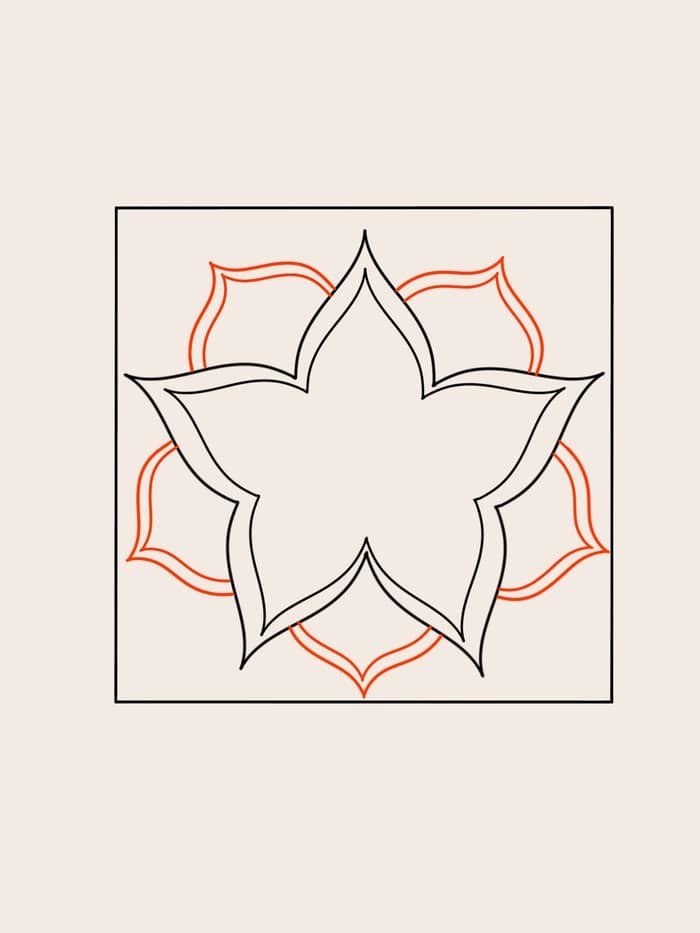
Cyme, a beautiful and easy-to-draw flower tangle, is perfect for those looking to add some floral flair to their Zentangle art. Its unique shape and simplicity make it an excellent choice for beginners and experienced artists alike. When used in conjunction with other floral patterns, Cyme creates a stunning visual effect.To create this lovely pattern, start by drawing five connected leaves that resemble upside-down V’s, each slightly bent at the tip. As you add more leaves, remember to rotate them to achieve a natural, organic look.Once you’ve completed the core of the flower, draw an aura around it – a simple yet effective way to make the design stand out. Then, repeat the process, adding additional layers of petals and auras.For a finishing touch, feel free to adorn the outer leaves with a circle or any other basic Zentangle pattern that suits your style. Alternatively, you can keep things simple like me, and let the beauty of Cyme shine through.Congratulations, you’ve just created your first Cyme tangle! This pattern is incredibly easy to draw, and its versatility allows for endless layers and creative possibilities. If you’d like to explore more, I encourage you to watch the accompanying video that provides a step-by-step guide on how to draw Cyme.
Toodles Zentangles

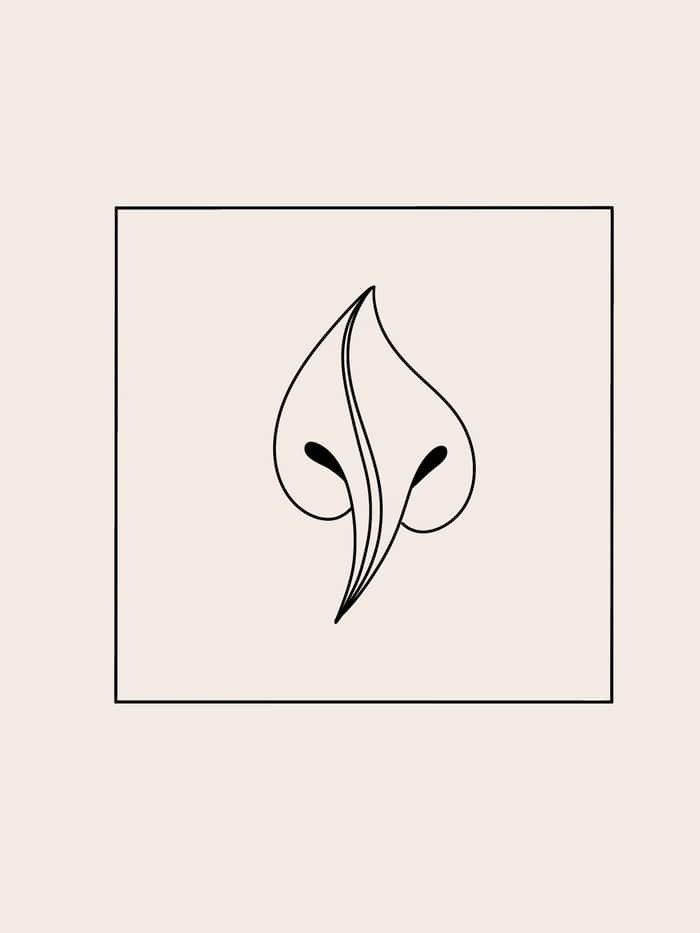
Toodles is a charming Zentangle pattern that I just adore, and its floral inspiration only adds to my love for it. The simplicity of this design makes it perfect for those new to the world of Zentangle or looking for a quick and easy addition to their art journal pages. Let’s dive in and explore how to bring Toodles to life!Start by creating the foundation of your leaf with two elongated S-shapes that meet at their starting and ending points, forming a neat little package. This pair of lines will serve as the ‘nerve’ of your leaf.Next, add some depth and dimension by drawing an additional line from the bottom that ends in a beautiful teardrop shape. Repeat this process on the opposite side of the nerve to create balance and harmony.Finally, add two elongated C-shapes that start at the top of the nerve and flow down to just below the teardrop shape. And just like that, your Toodles leaf is complete!I must say, this pattern is one of the easier flower-inspired Zentangles out there, making it perfect for beginners or those looking to add a little whimsy to their art. So go ahead, give Toodles a try in your next Zentangle adventure! And if you need a little extra guidance, be sure to check out the accompanying video that provides a step-by-step tutorial on how to draw Toodles.
Unbirthday Zentangle
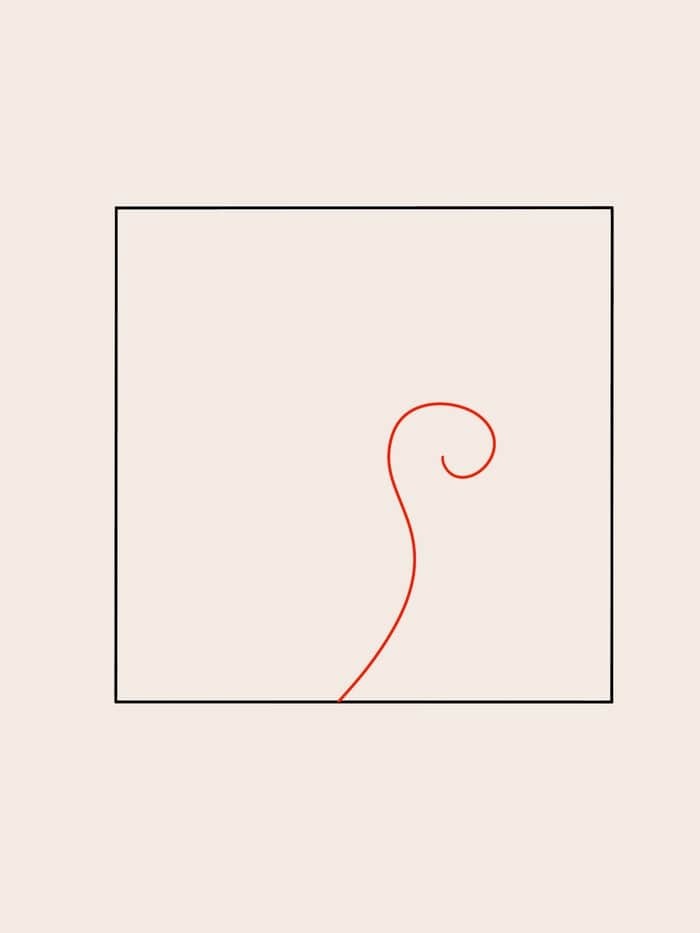
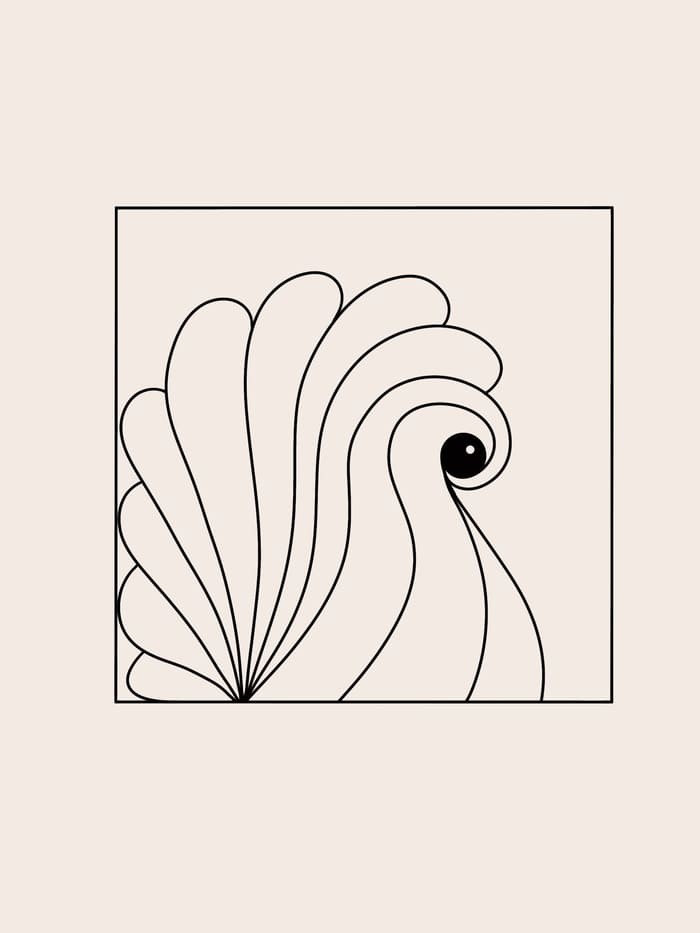
Some zentangles can be versatile and work well in various designs. The Unbirthday tangle is one such pattern that can be used in a wide range of zentangles. Despite its seemingly complex appearance, it’s actually quite simple to draw. Let’s dive into the process! To start with Unbirthday, begin by drawing a spiral that gradually bends away from the end, resembling the line drawing below. Next, draw another line that begins at the same point as the spiral but gradually moves further away towards the end, resulting in two lines that resemble tentacles, as shown. The key to this tangle is creating the illusion of movement and fluidity by varying the distance between the two lines. To add more visual interest, you can draw additional lines that branch off directly from the spiral. I’ve kept it simple with just two lines for this example, but feel free to experiment with more. Then, start drawing loops above the spiral, ensuring each new loop is slightly smaller than the previous one. Continue until your loops reach the edge of your paper or until you’re ready to move on to another pattern. If desired, add a filled circle at the center of the spiral for an added touch. While not always drawn, this feature can give Unbirthday a regal quality reminiscent of a proud peacock displaying its feathers. That’s it! Give Unbirthday a try and discover how this versatile tangle can fill those corner spaces with a delightful pattern. If you need further guidance, refer to the accompanying video for step-by-step instructions on drawing Unbirthday.
Verdigogh Zentangle
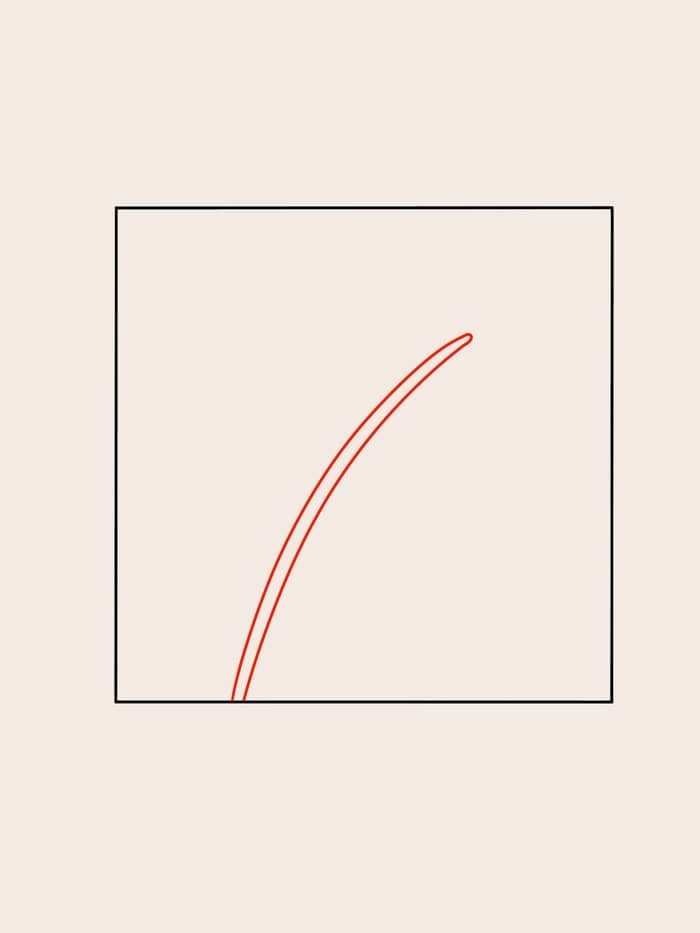
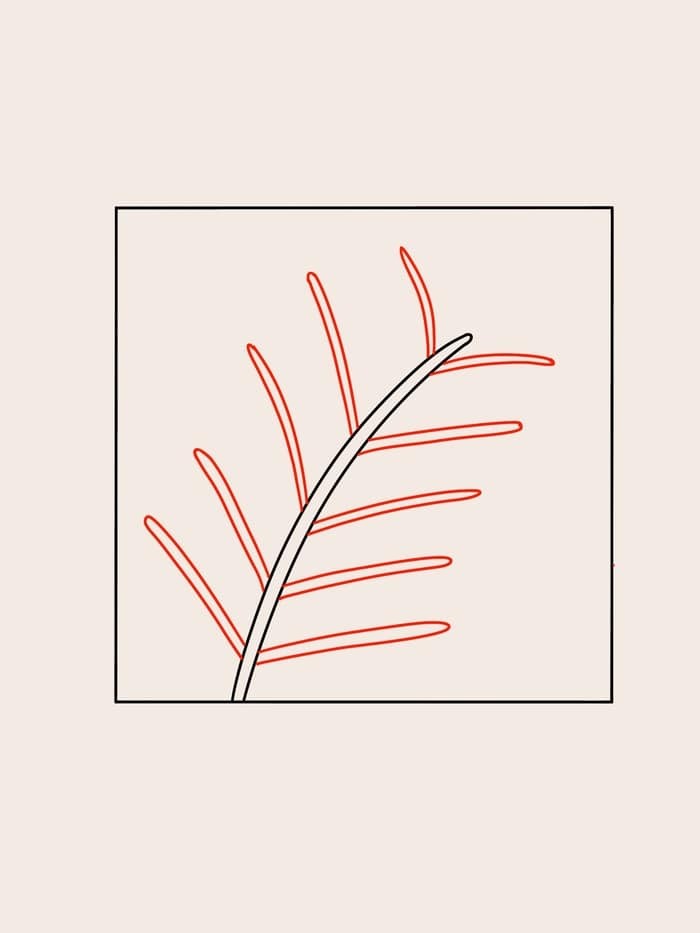
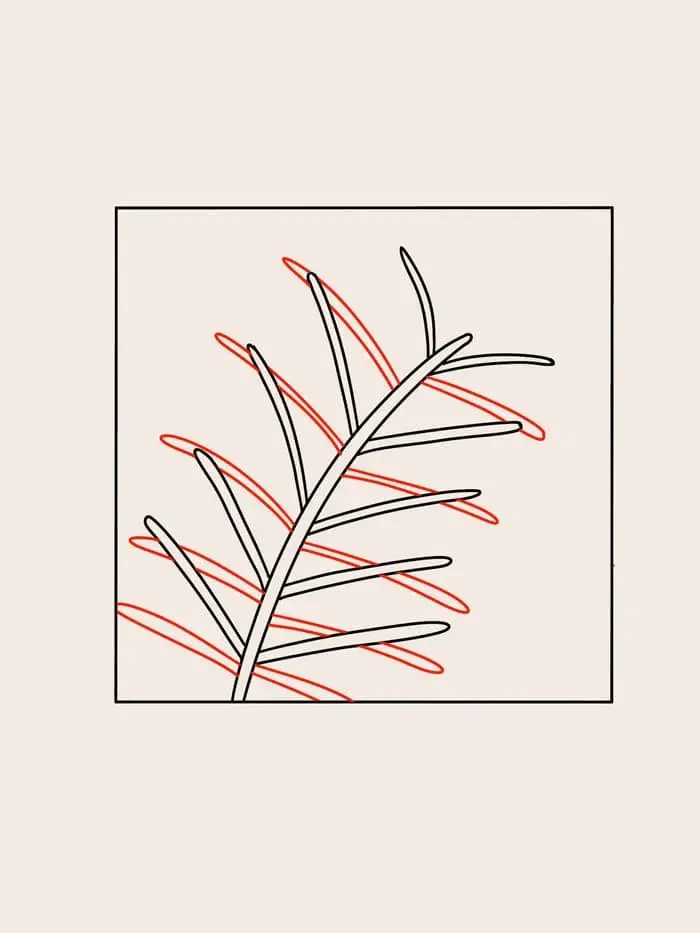
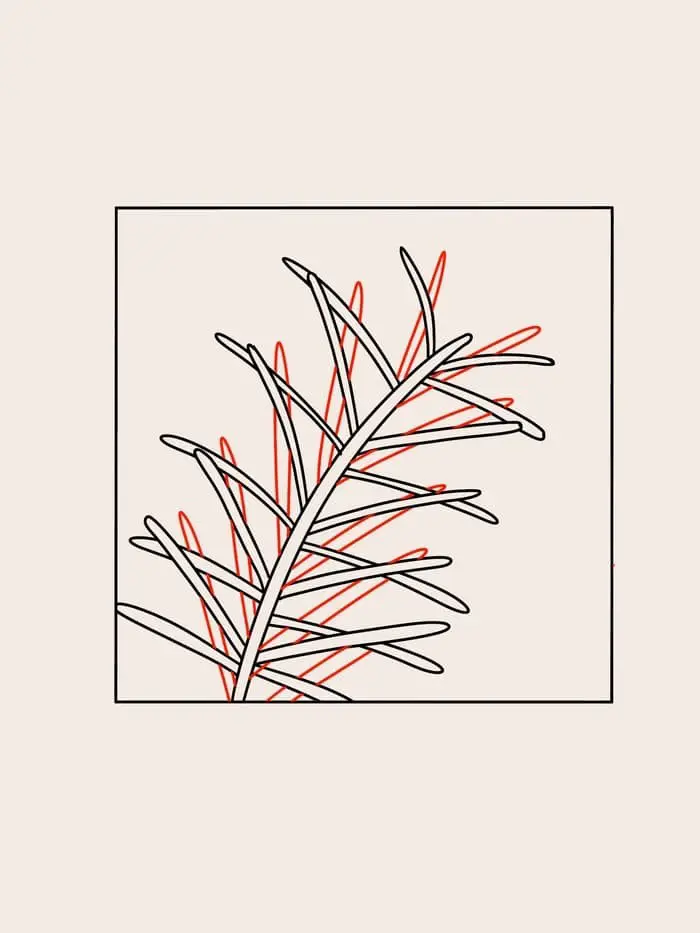
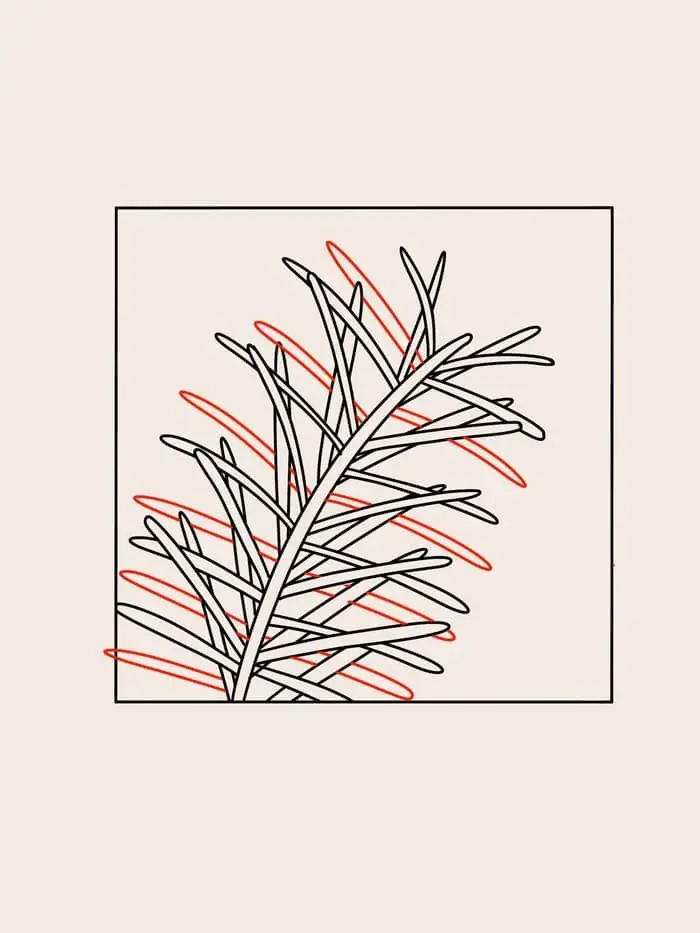
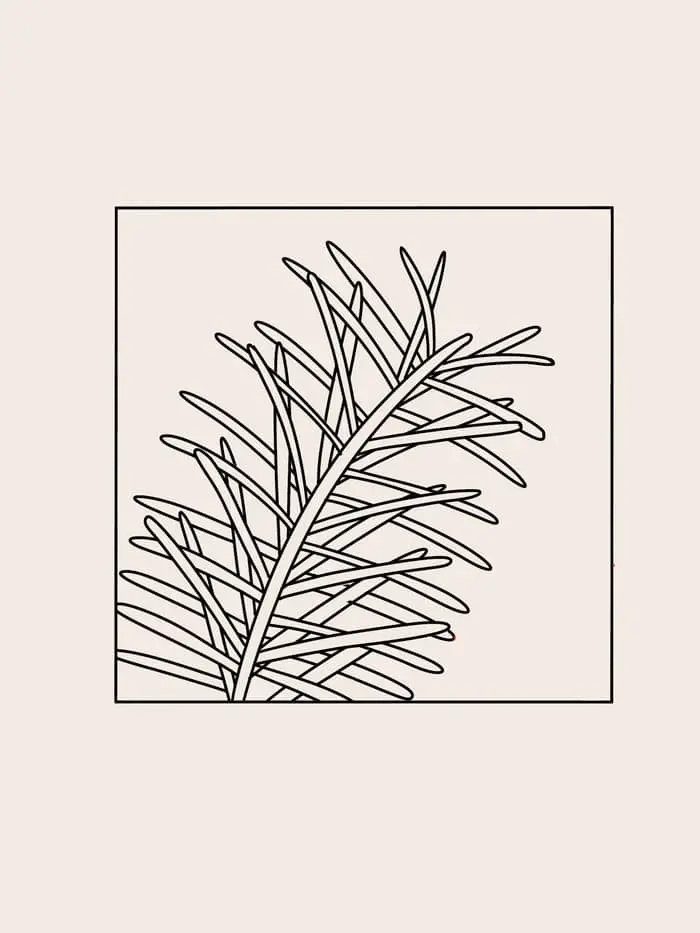
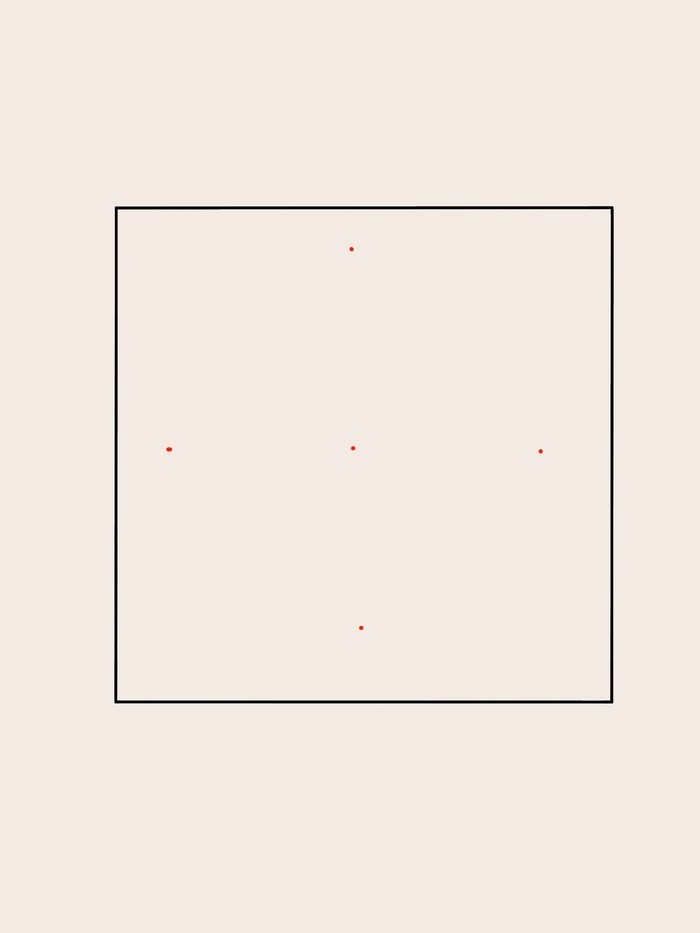
Verdigogh is a pine branch-inspired tangle that may seem complex at first, but with the right steps, it’s surprisingly easy to draw. Let’s dive into the process! Start by drawing a long, thin stem, ideally from one corner to the opposite corner. Then, add needles pointing upwards on both sides of the stem, aiming for a 45-degree angle. Next, draw the same number of horizontal needles underneath the previous ones. Repeat step two by adding more needles at roughly a 45-degree angle, but this time be mindful of the existing needles. Finally, repeat step three to fill in any remaining gaps on the stem. If needed, you can add additional layers or try combining Verdigogh with other tangles for a unique look.
Xac Zentangle
The world of Zentangle is constantly evolving, with new patterns emerging all the time. One lesser-known yet charming pattern is the Xac tangle, which boasts a simplicity that belies its beauty. Let’s dive into the process of drawing this lovely design. To begin, start by creating a central dot surrounded by four evenly spaced dots, serving as a guide for the next step. From the central dot, draw two lines radiating outwards to form a seed shape, marking the first petal of your flower. Repeat this process three more times to create a total of four petals that converge at the center. Next, for each petal, draw a slightly larger version behind it with a small offset, repeating this process twice in the same clockwise direction. This will add depth and dimension to your design. To further elaborate on the pattern, draw new seed shapes between the initial four petals, resulting in four additional petals. Repeat the same process of drawing a slightly larger petal with an offset, two times, to create more texture and visual interest. That’s the basic outline for drawing the Xac Zentangle pattern! You can choose to expand on this design by adding more and more petals, or, as I prefer, combine it with other patterns to create unique and intriguing designs.
Ynix Zentangle
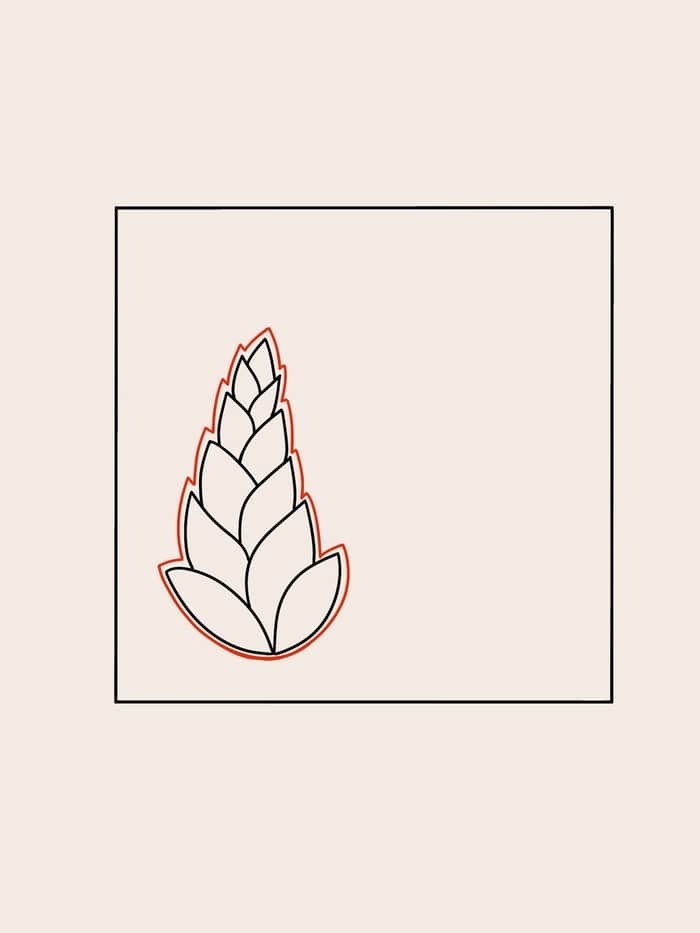
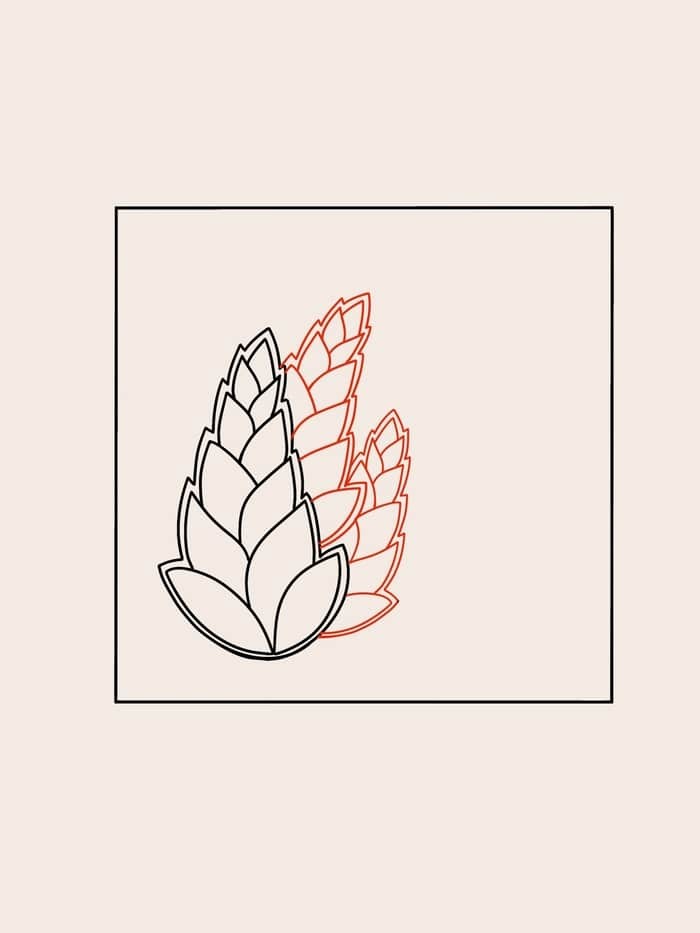
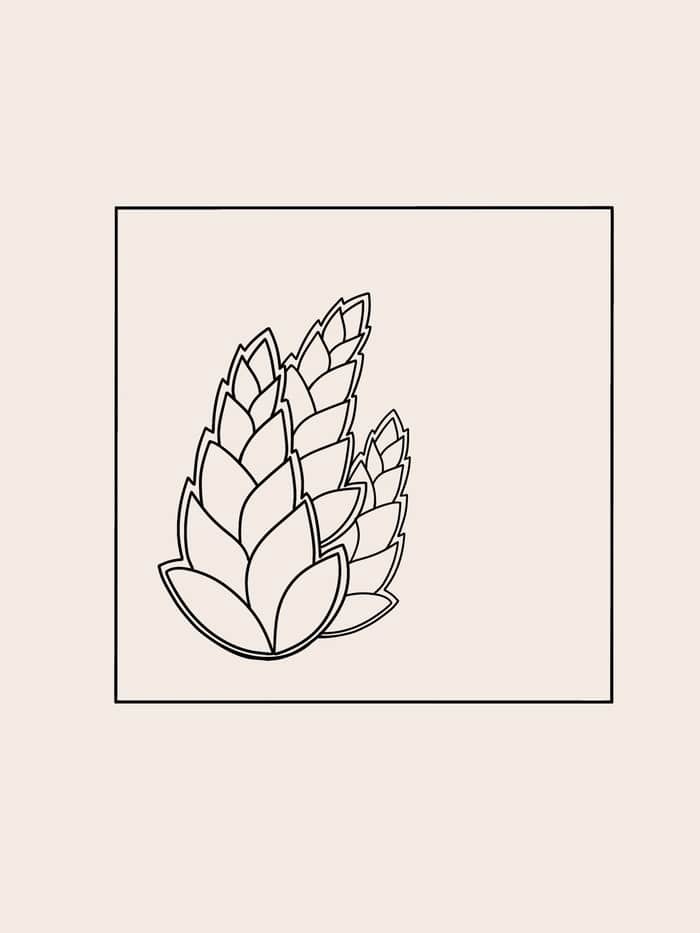
While many floral Zentangle patterns can be intricate and complex, the Ynix tangle offers a refreshing simplicity. Its ease of execution makes it an ideal starting point for beginners or a delightful way to unwind for experienced artists. Let’s dive into the process of creating this charming flower design.To begin, sketch a seed shape near one of the corners of your tile or paper. Next, draw a second seed adjacent to the first, with both ends touching each other. Continue adding layers of seeds, with each subsequent layer slightly smaller than the previous one, gradually tapering towards the top. You can finish by drawing a single seed pointing upwards or two seeds extending outward.To complete the design, add a thin outline around your seeds, also known as an ‘aura,’ which is a characteristic element in many Zentangle patterns. Once you’ve mastered this basic pattern, you can repeat the process to create a larger design, filling the entire square with Ynix or combining it with other Zentangles.Congratulations, you’ve just created your first Ynix pattern! If you desire to add an extra layer of depth, consider decorating each seed with another pattern for an even more striking effect. For further guidance, refer to the accompanying video that provides a concise tutorial on drawing Ynix.
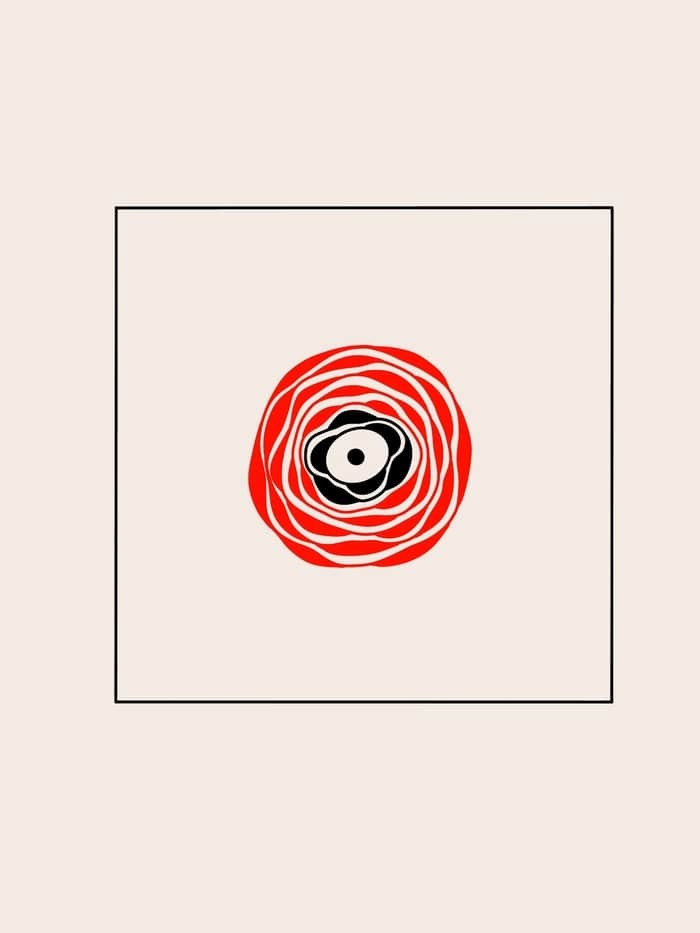
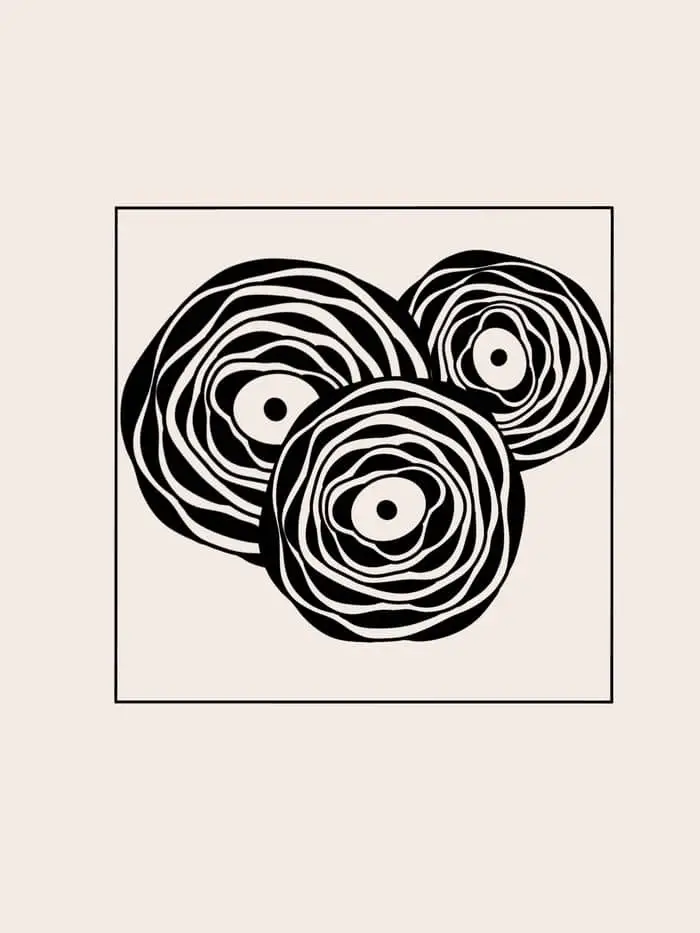
Zinger Zentangle
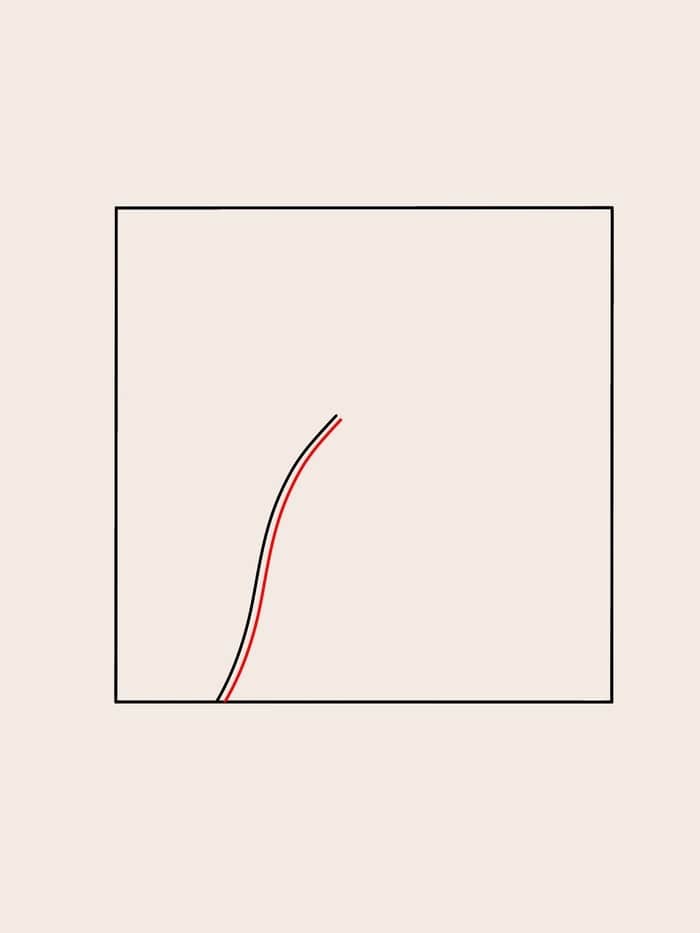
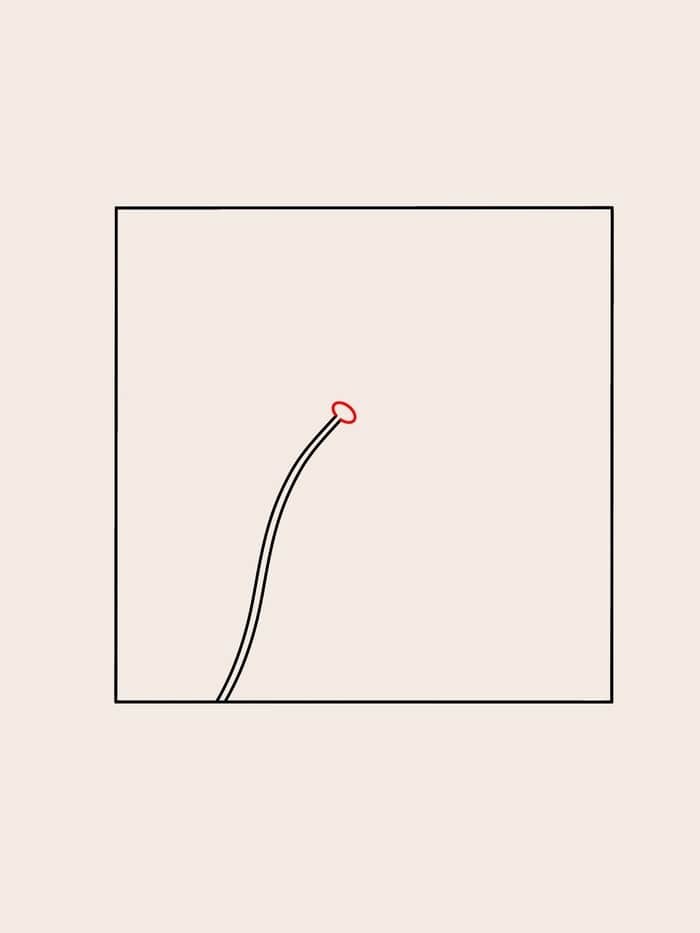
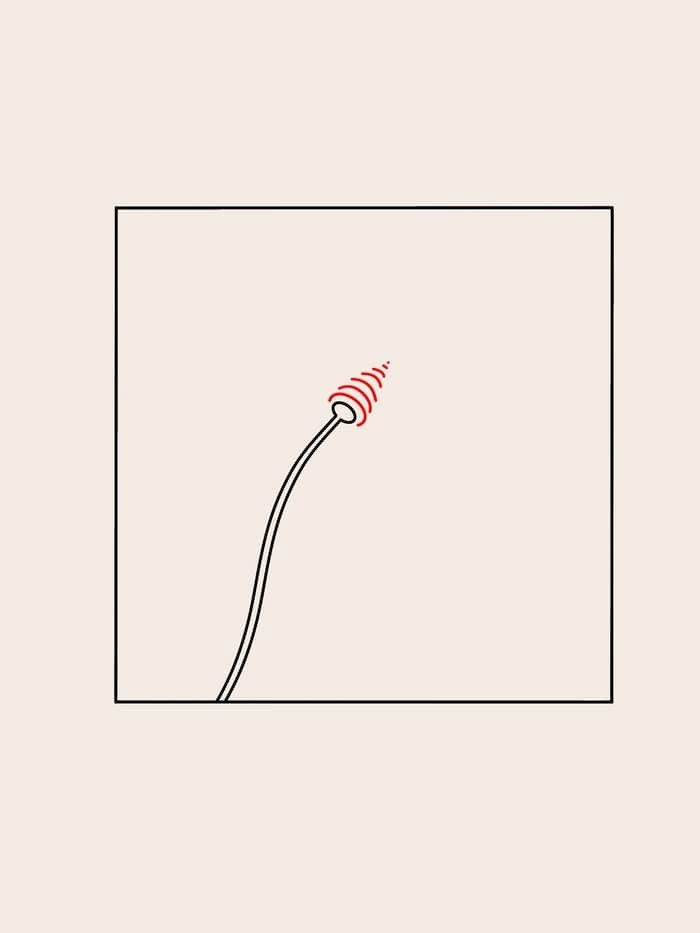
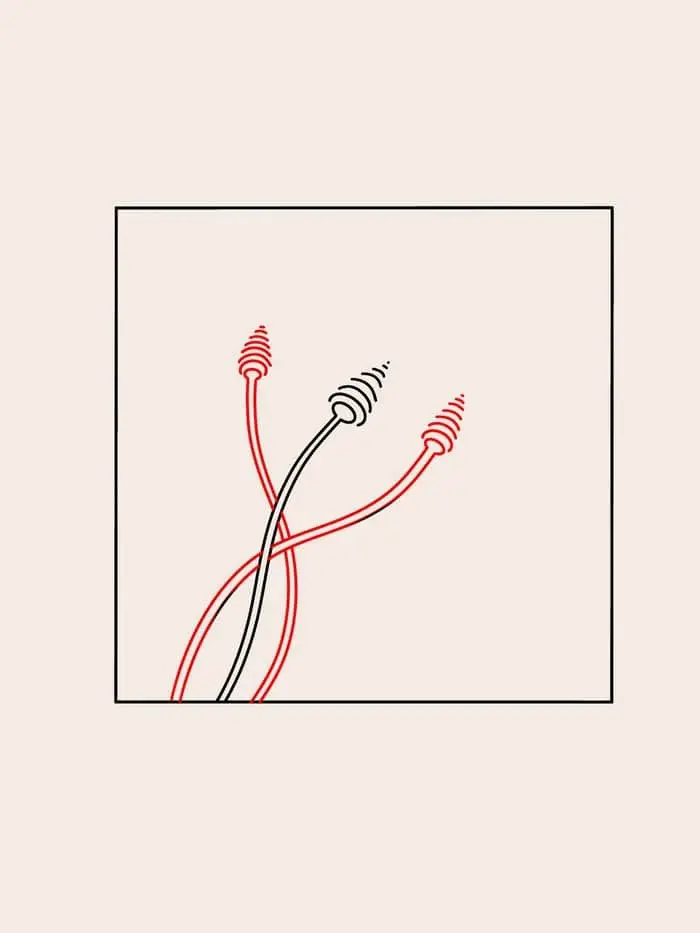
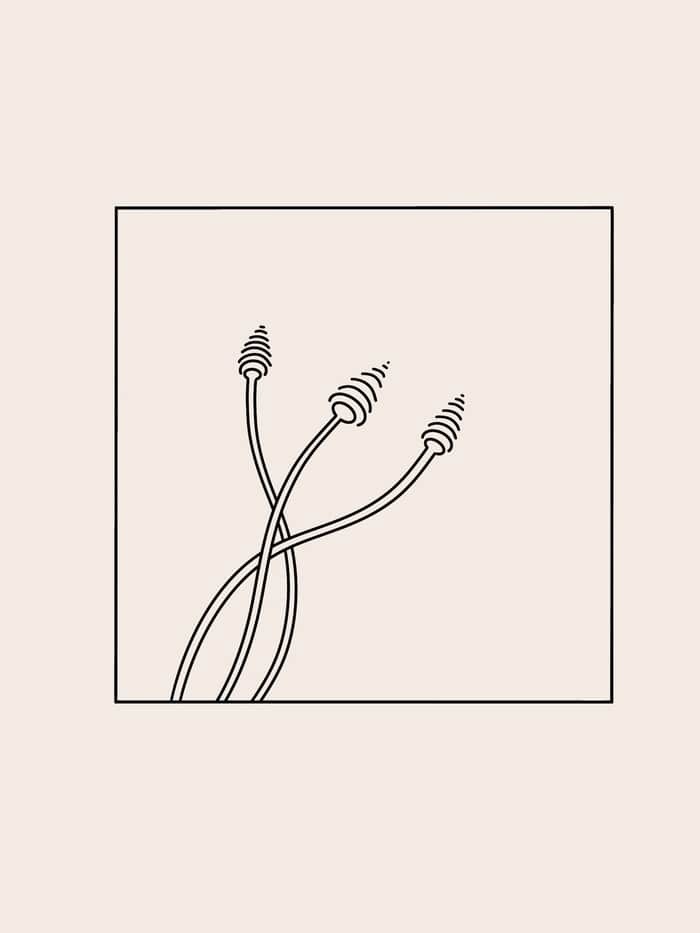
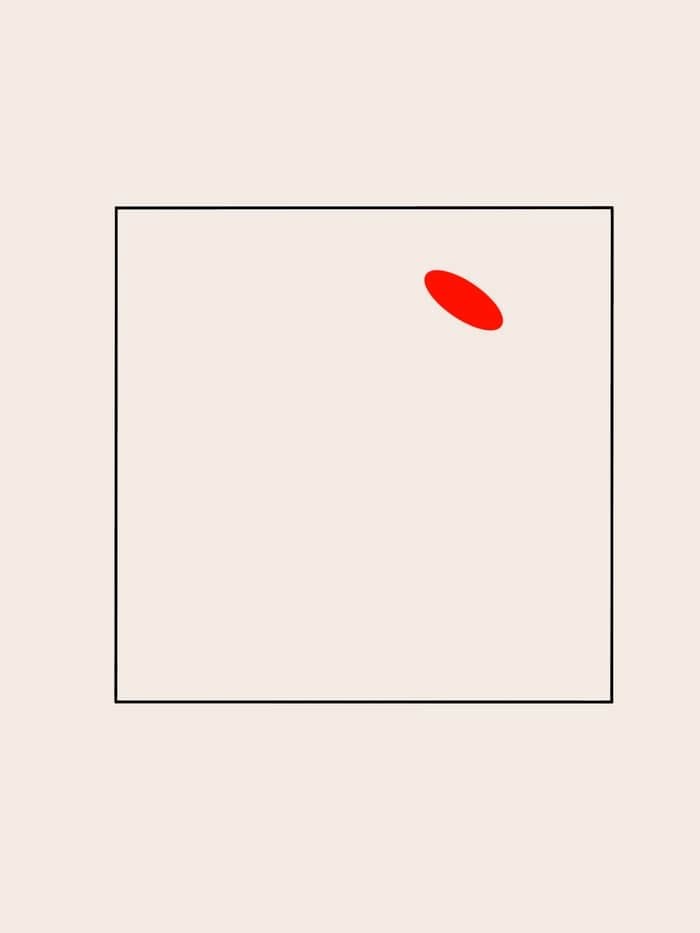
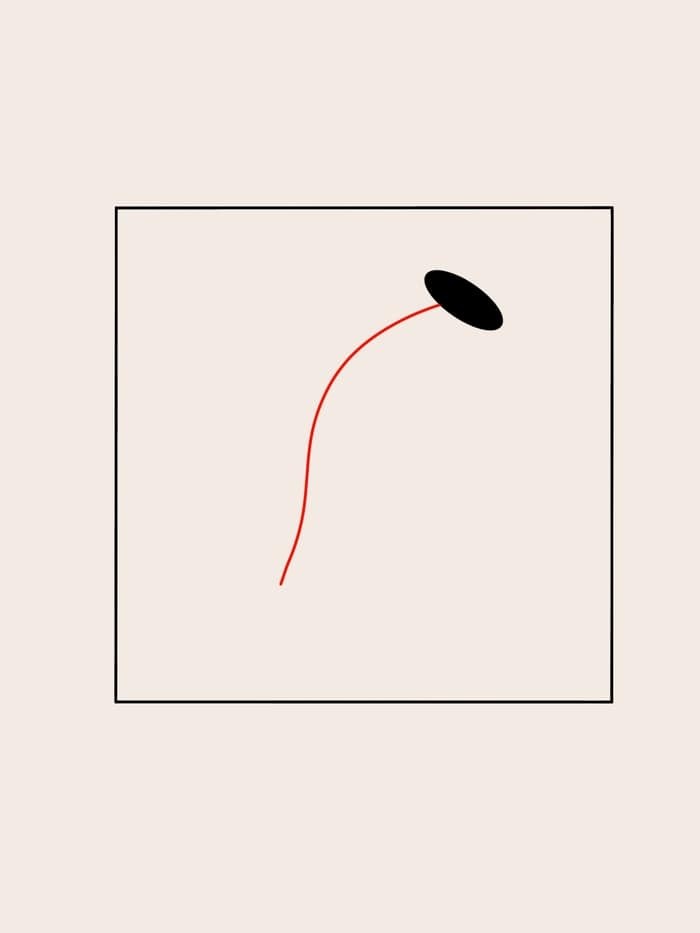
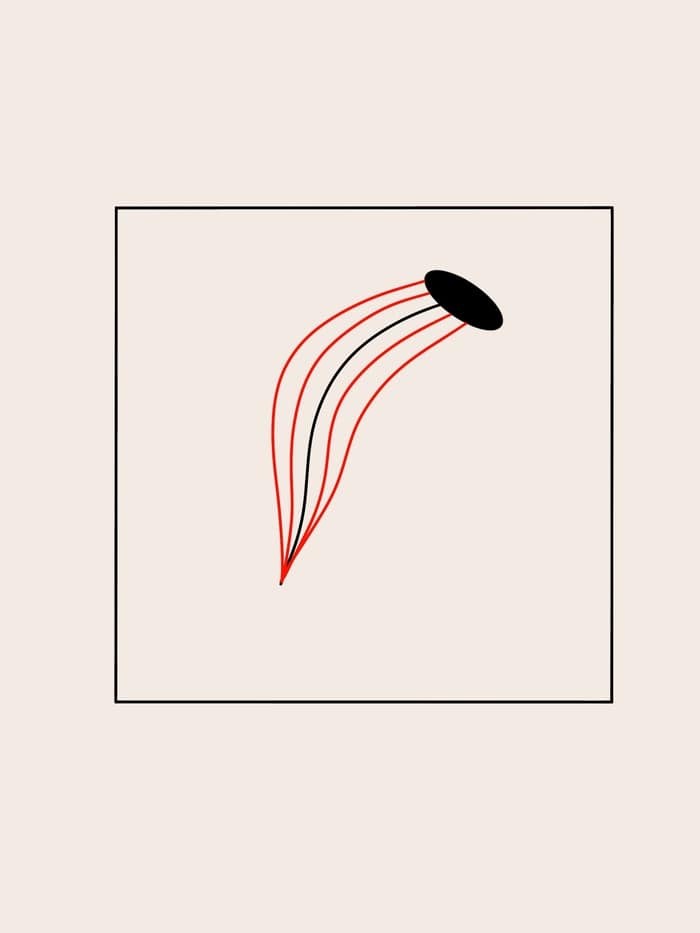
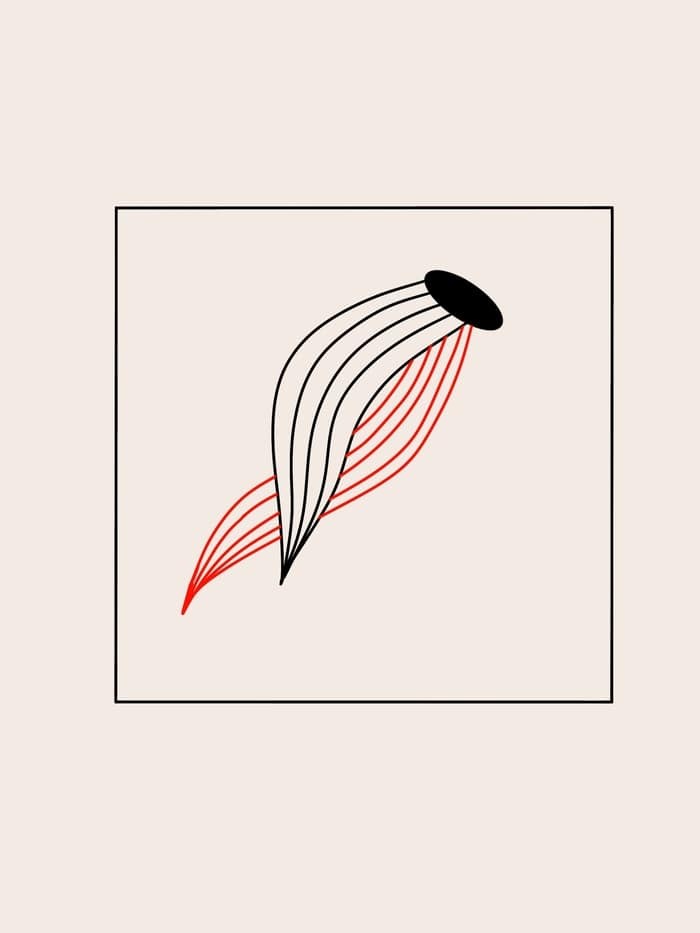
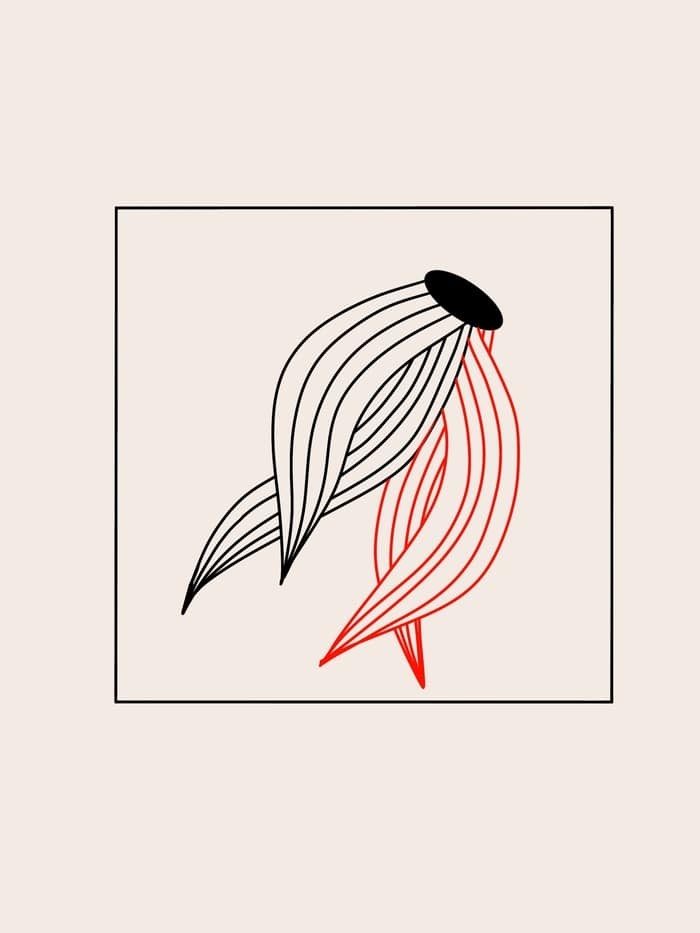
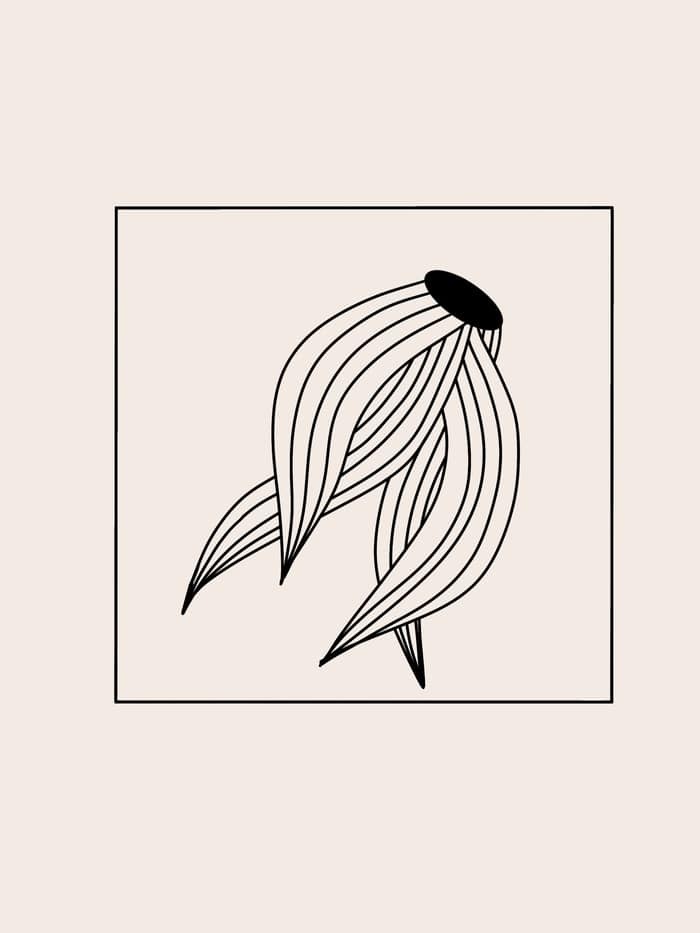
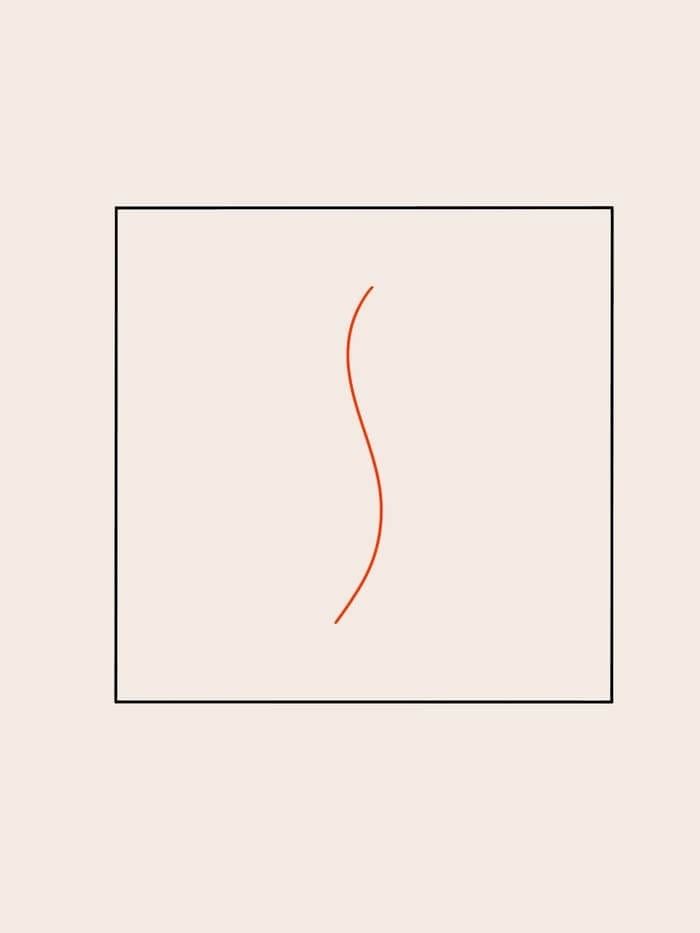
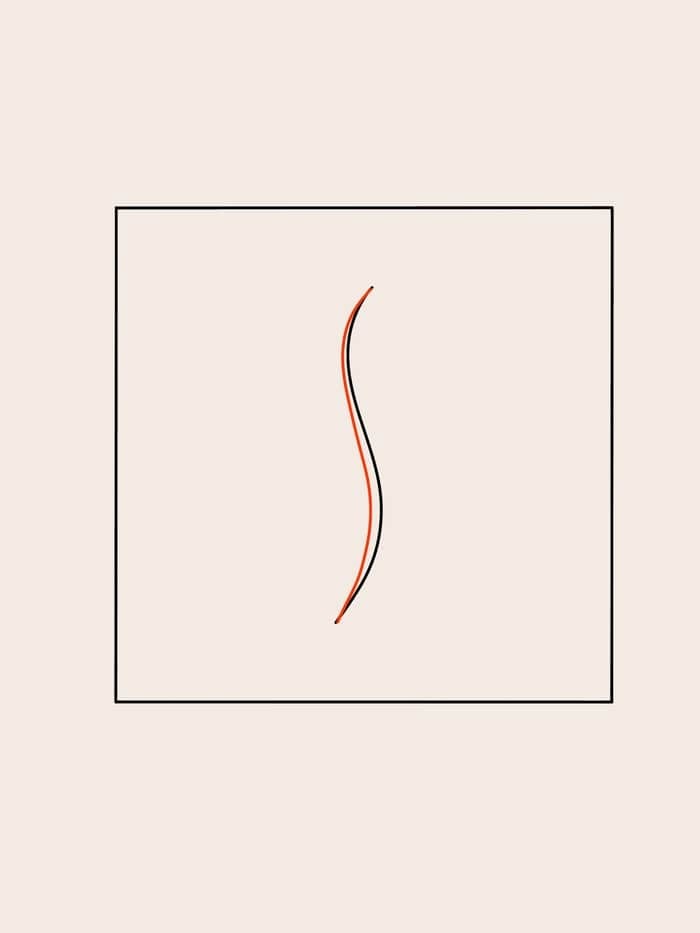
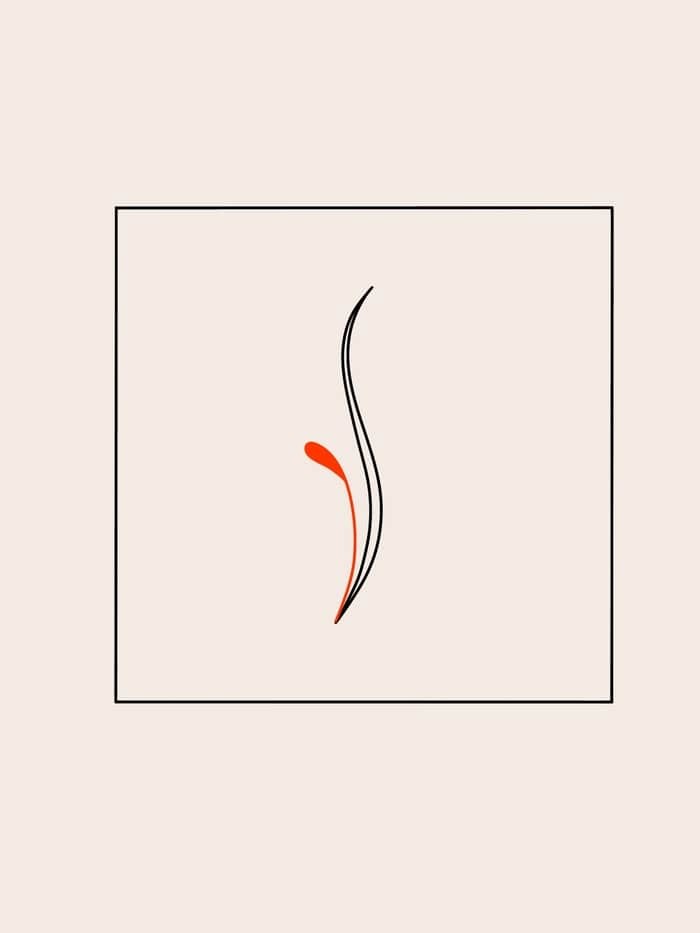
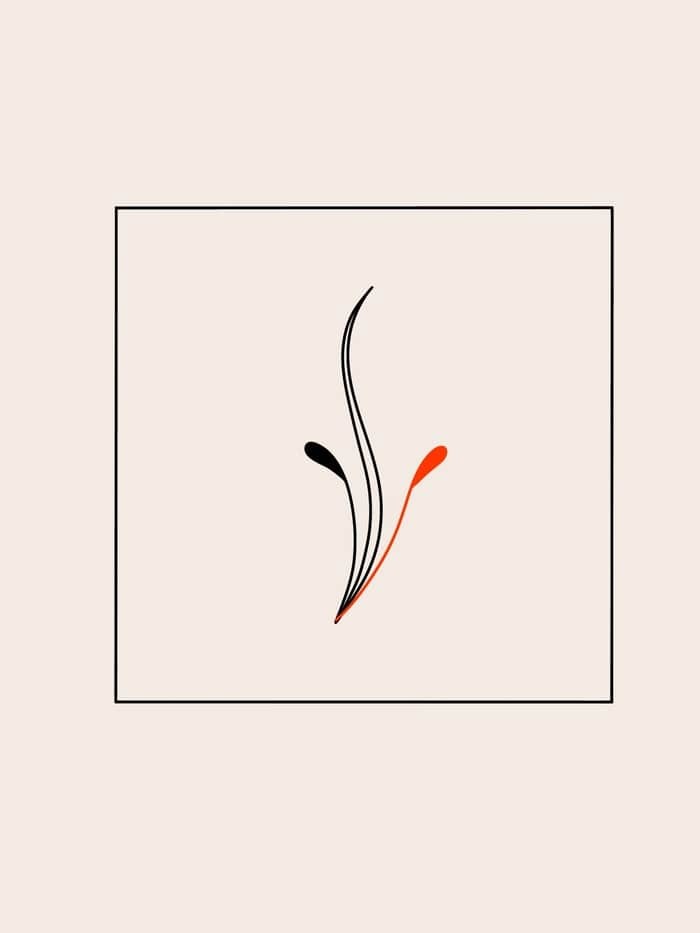
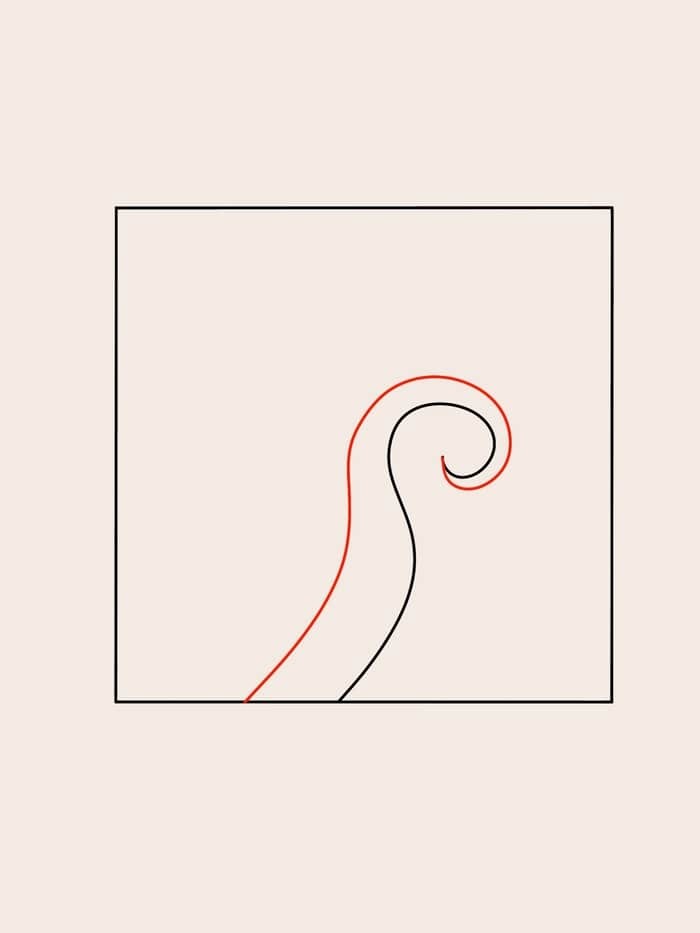
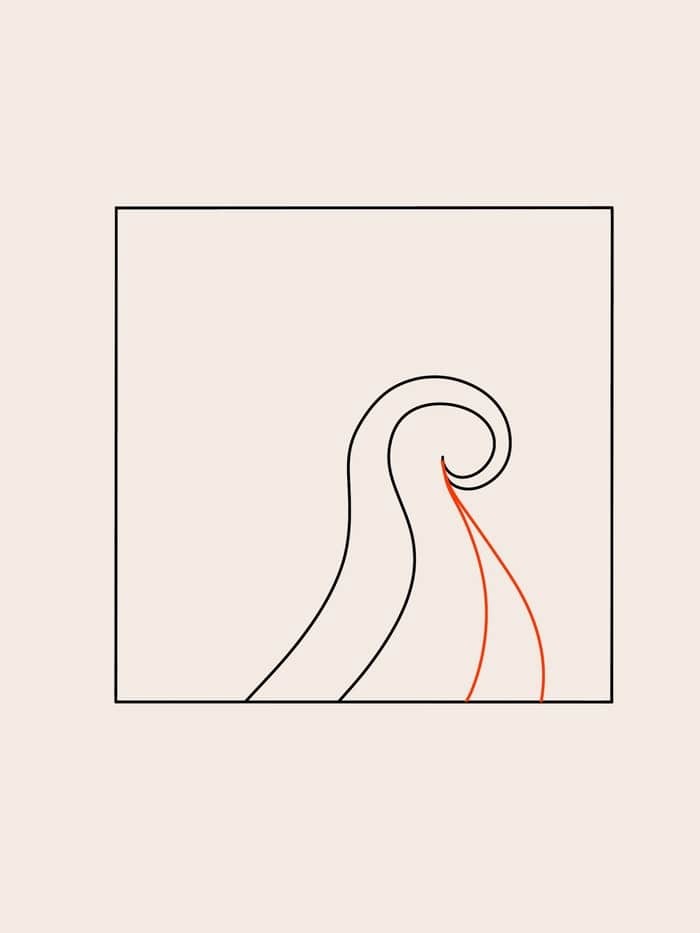
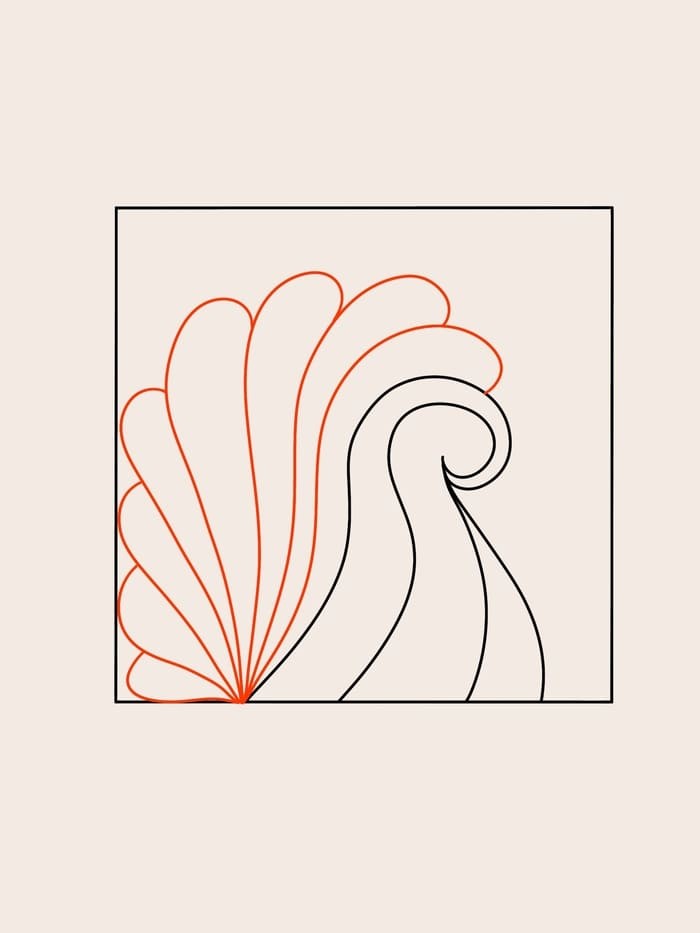
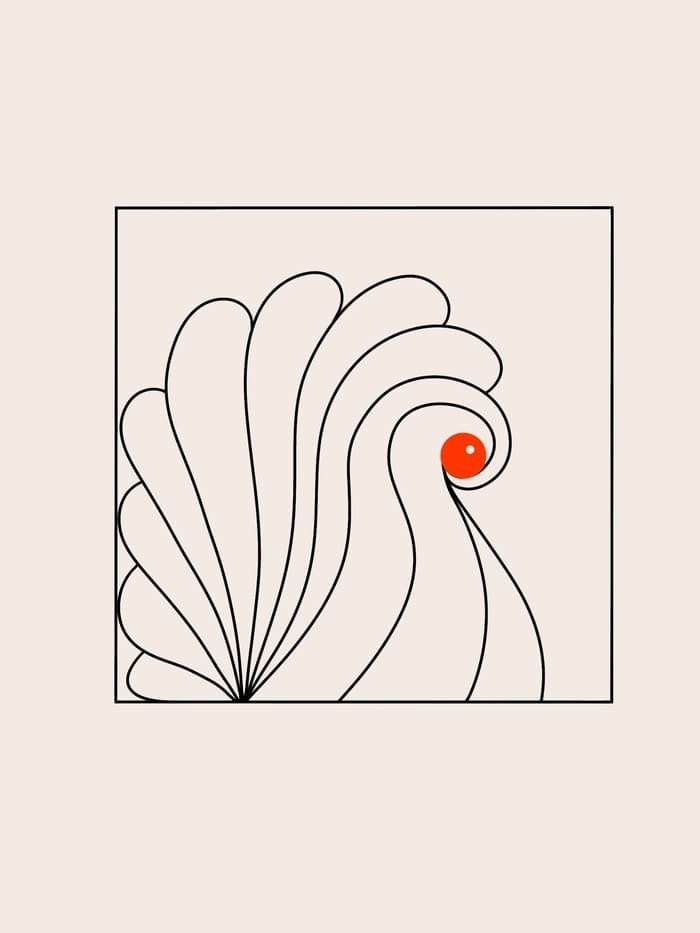
Not all Zentangle patterns rely on geometric shapes and straight lines. Organic patterns like the Zinger tangle offer a more fluid and chaotic design experience. Let’s dive into drawing the Zinger Zentangle pattern! The first step is to create a wavy line that starts at an edge and flows towards the center. This sets the stage for the rest of the design. Next, draw a parallel line to create the stem. The two lines together form the foundation of the Zinger tangle. From there, add an oval shape at the end of the stem – you can make it a complete oval or leave it slightly open. Some artists also choose to color the interior of the oval black, while others prefer to keep it blank like me. The next step is to draw semicircles that are slightly offset from the original oval. Each one should be smaller than the previous one, creating a cone-like shape. Repeat these steps as many times as you’d like to build a larger and more interesting design. In fact, I drew three Zinger tangles in the image below – feel free to keep going until your entire space is filled! The Zinger pattern’s lack of symmetry or geometry can make it challenging for some, but with practice, drawing Zinger can be a fun and rewarding experience.
Amarin Zentangle
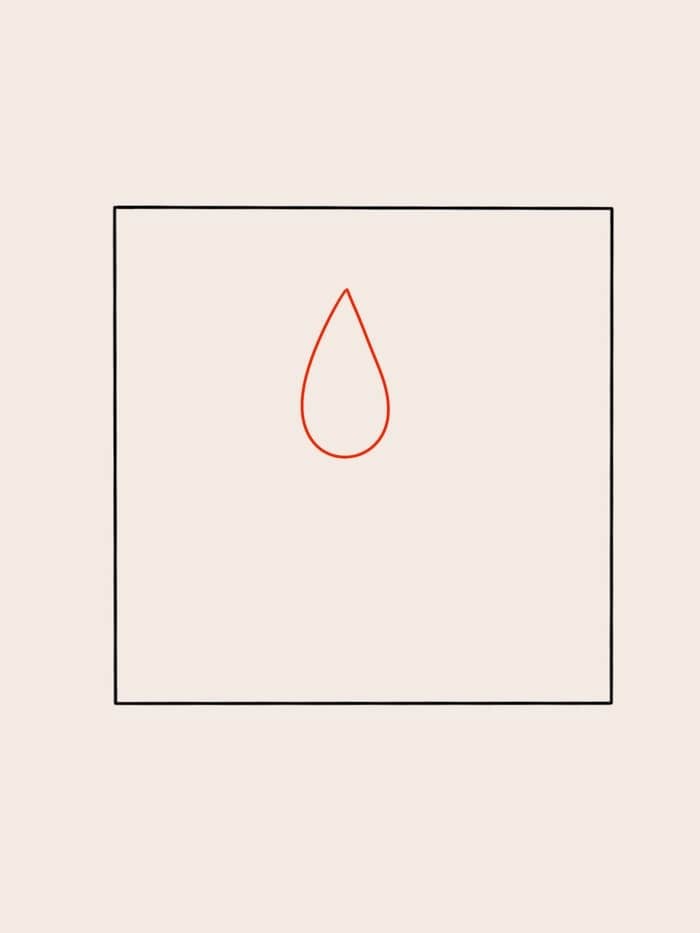
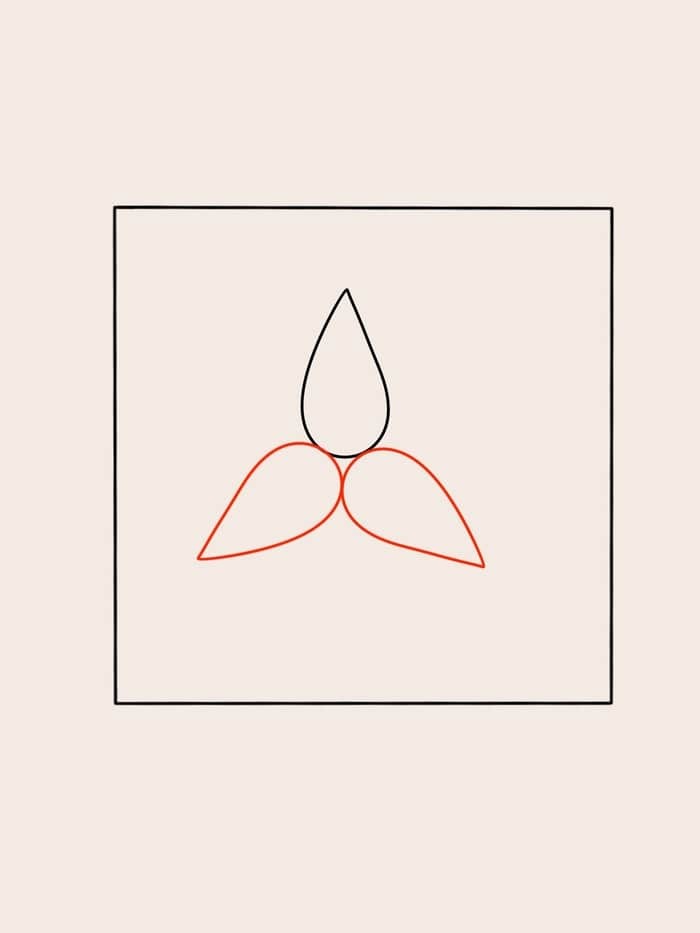
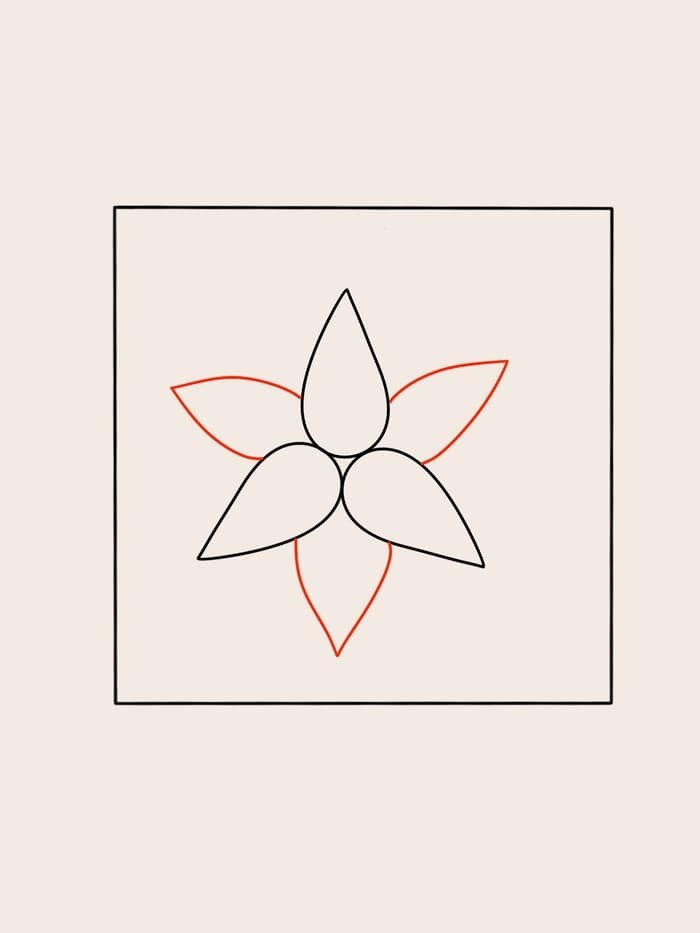
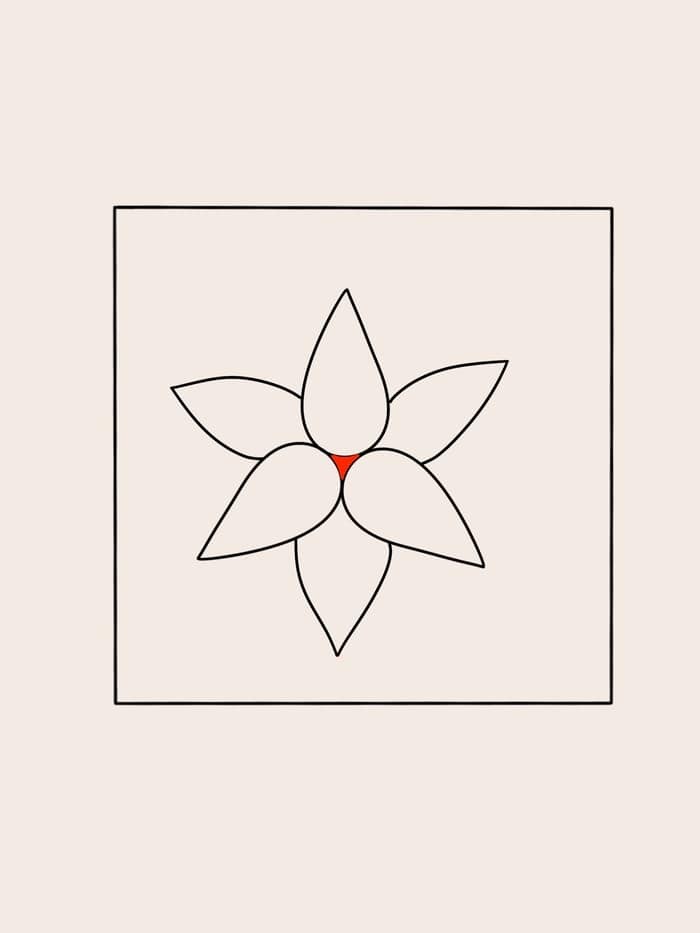
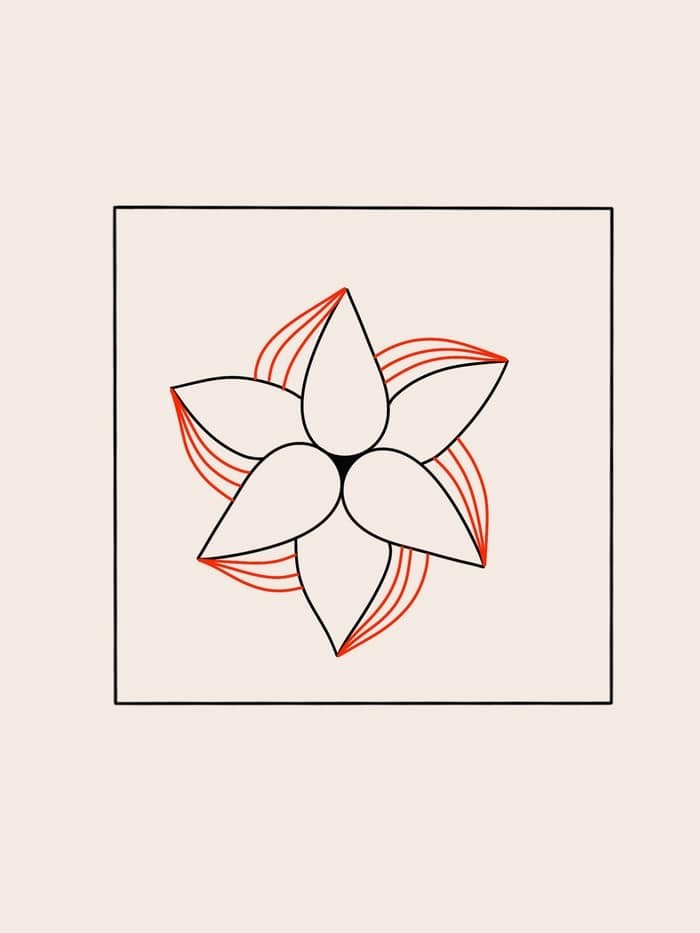
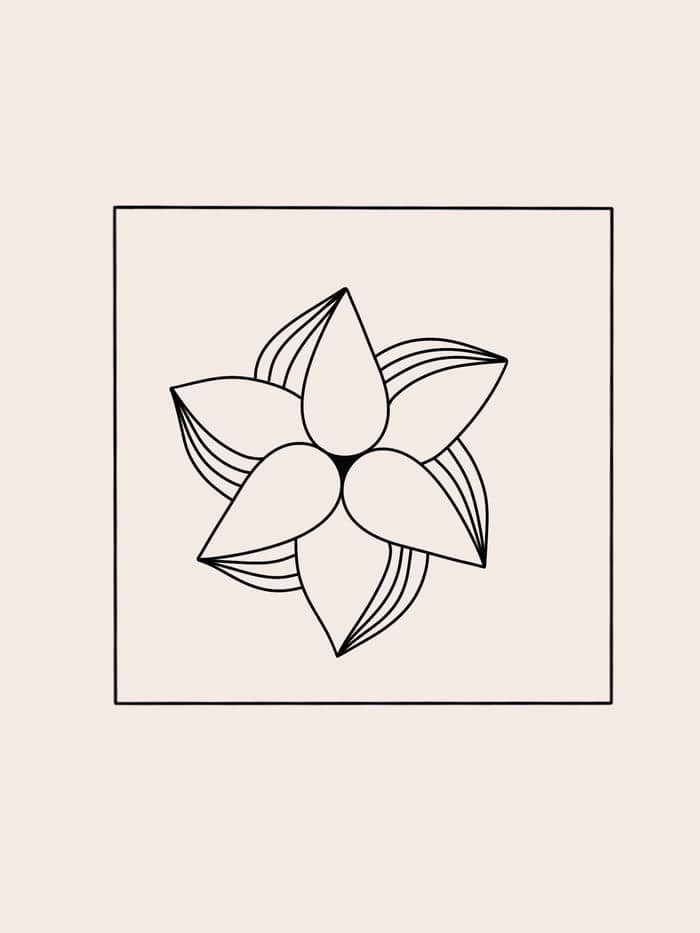
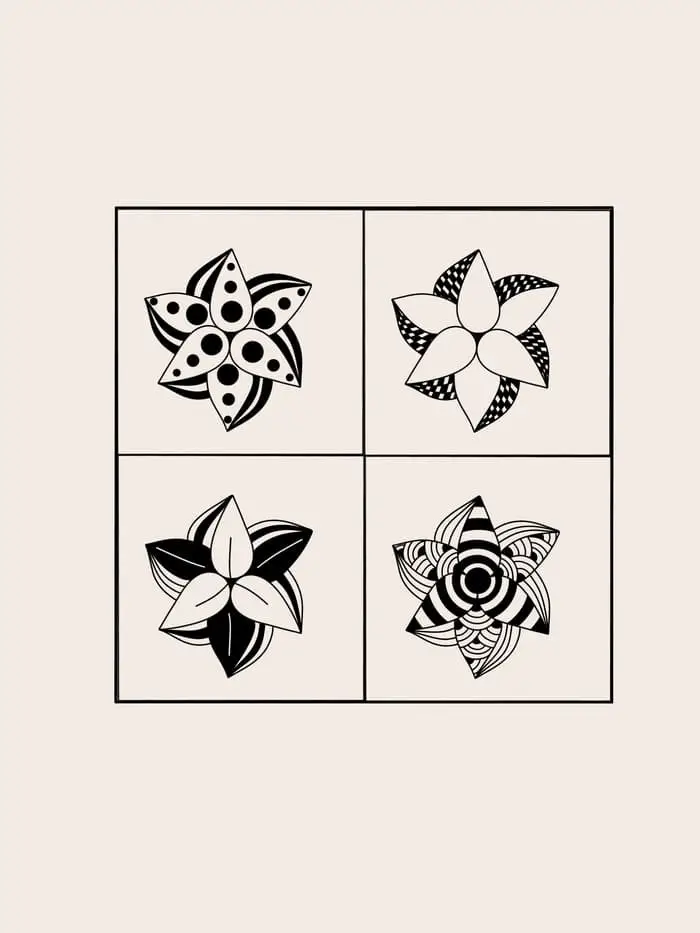
The Amarin tangle is a delightful and easy-to-draw Zentangle pattern that can add a touch of elegance to any artwork. Among various flower-based patterns, I find myself drawn to this simple yet charming design.To get started, create the foundation of your Amarin tangle by drawing three teardrop-shaped petals pointing in different directions. This will form the base of your flower. Repeat this step two more times to complete a total of three petals.Next, add additional layers of petals between the original three. Since these petals are positioned behind the first set, you’ll only need to draw the top portion to create an illusion of depth. You can continue adding layers for a larger tangle, such as drawing six more petals between the initial six.While personal preference plays a role in coloring, I find that filling in the triangular shape at the center adds a nice pop of color. However, this is entirely up to you.To give your Amarin tangle some added visual interest, draw three lines next to each petal. You can choose to position them on either side of the petals, but maintain consistency throughout the design. These lines will create the illusion that your flower is spinning, adding movement and energy to the piece.With these steps complete, you’ve successfully created your first Amarin Zentangle! To take it to the next level, consider expanding the design by adding additional layers or incorporating other patterns to create a unique and captivating artwork. For inspiration, check out four examples of beautifully decorated Amarin Tangles below.
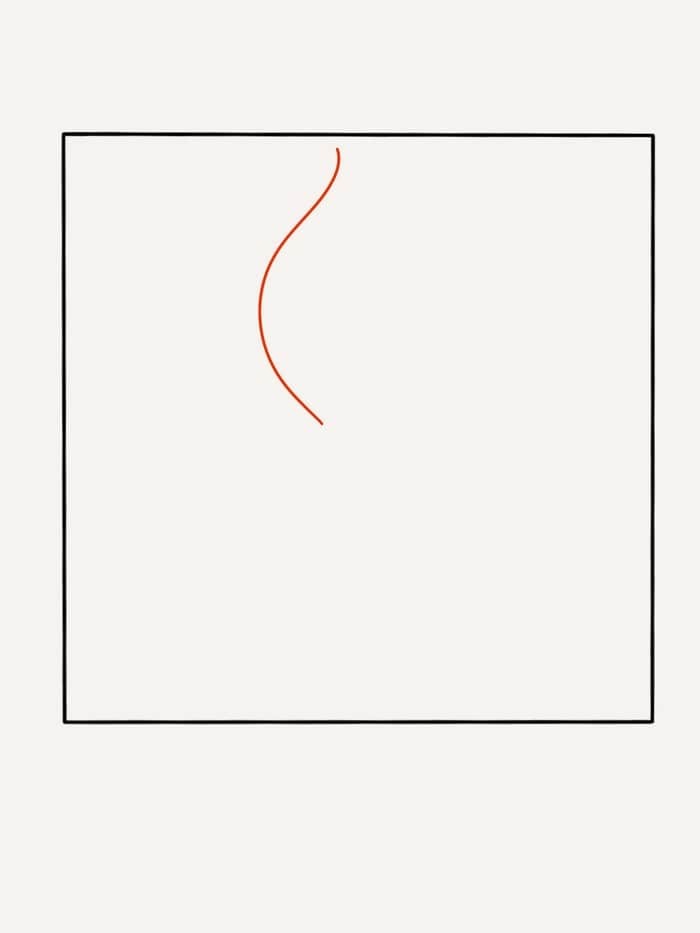
Aquafleur Zentangle
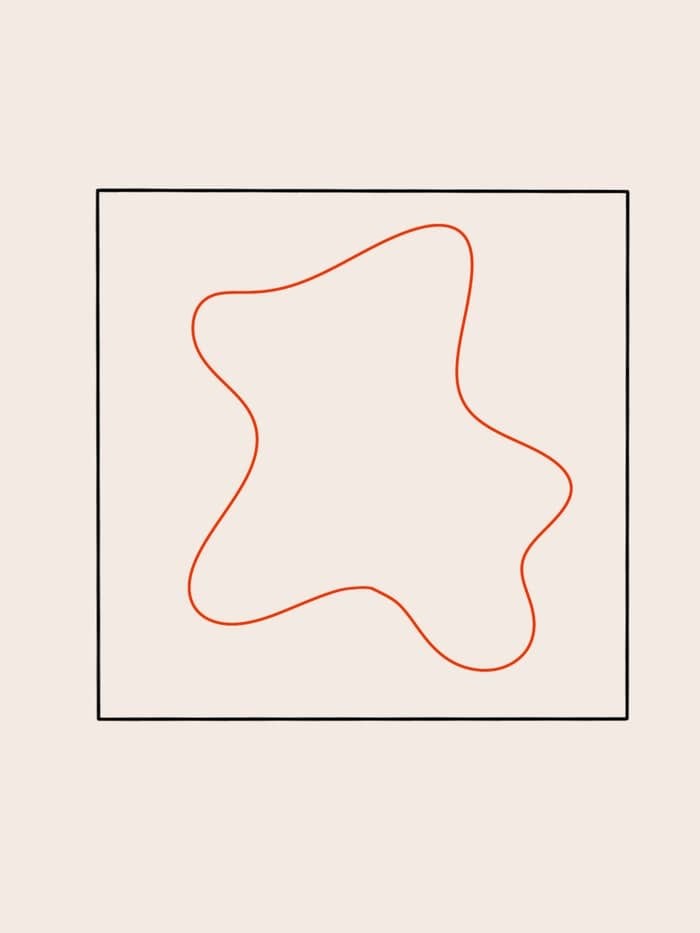
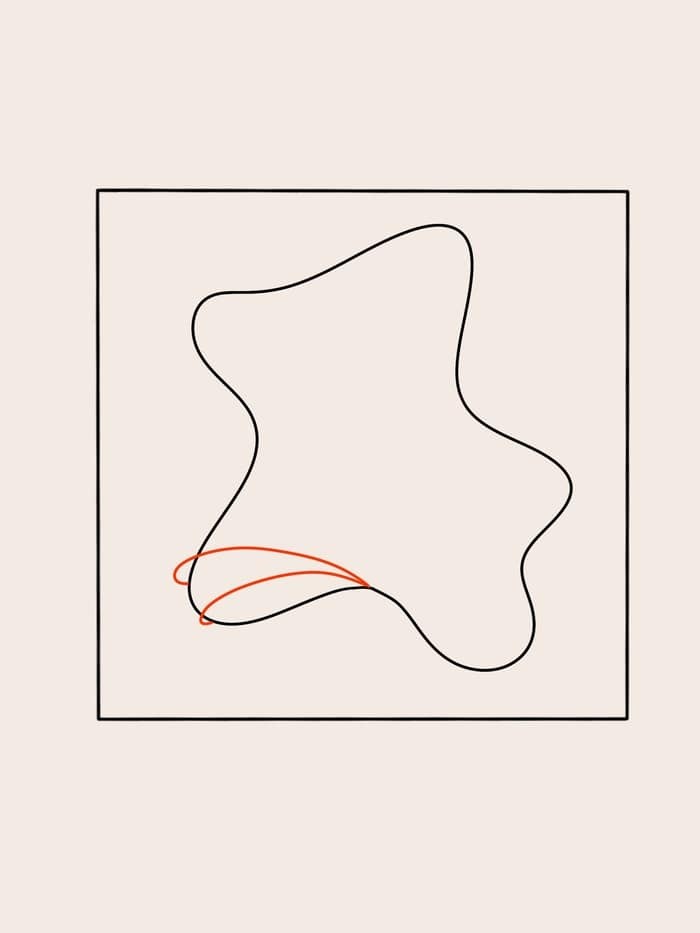
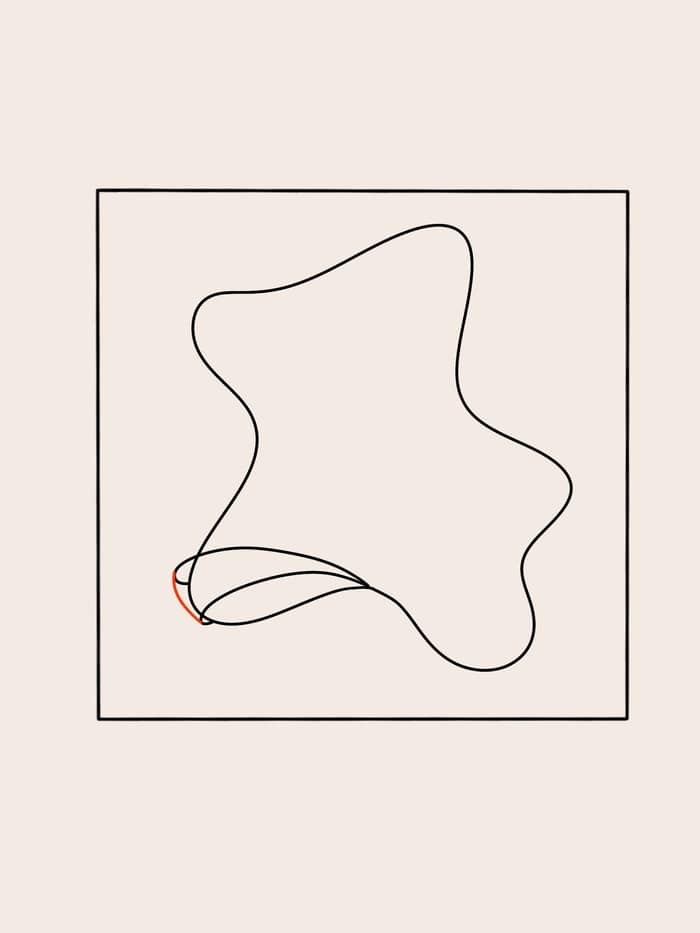
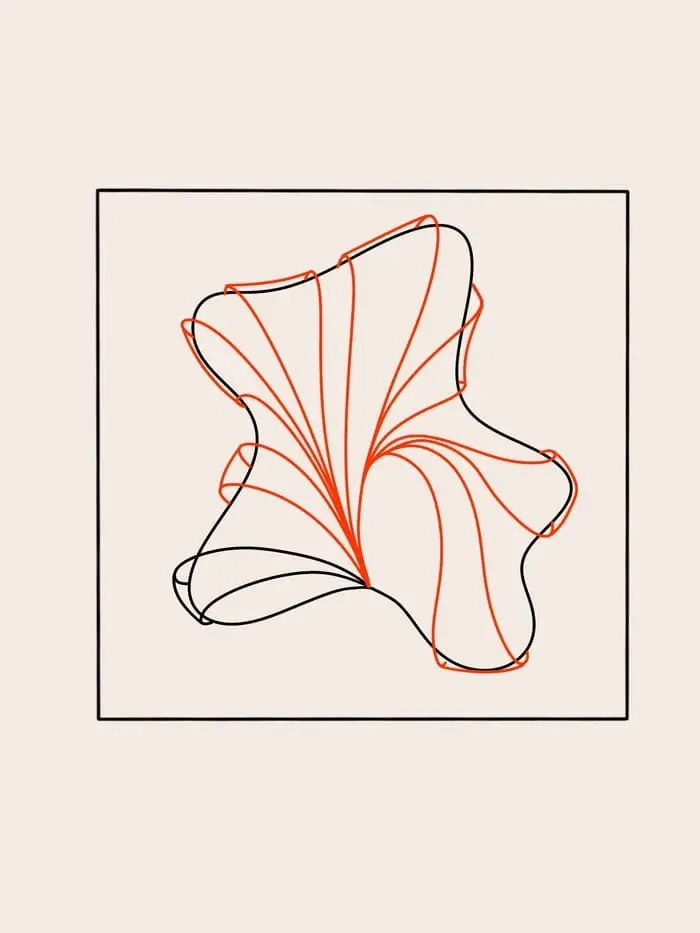
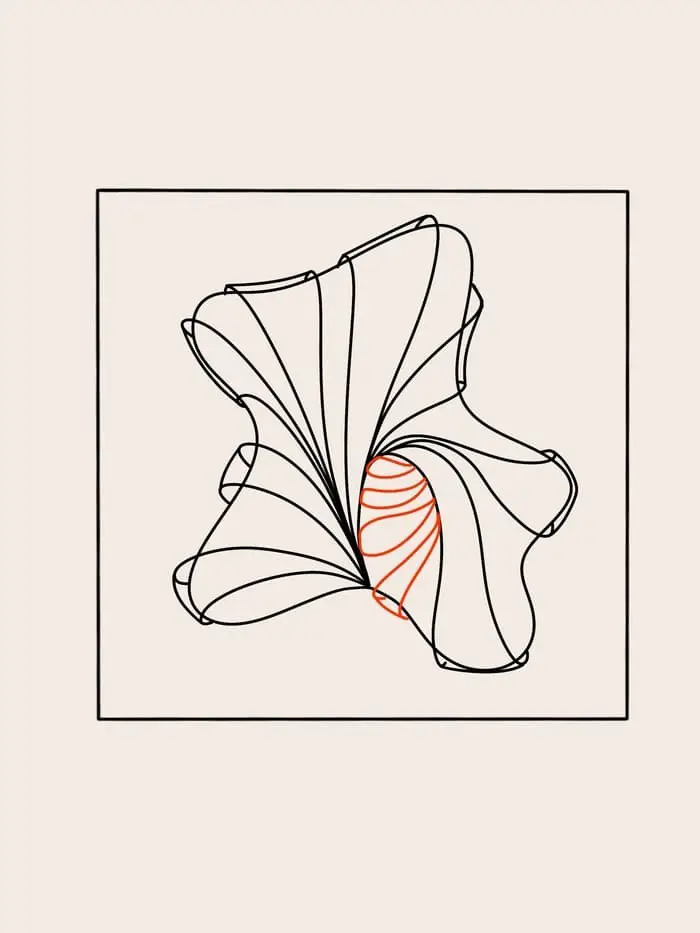
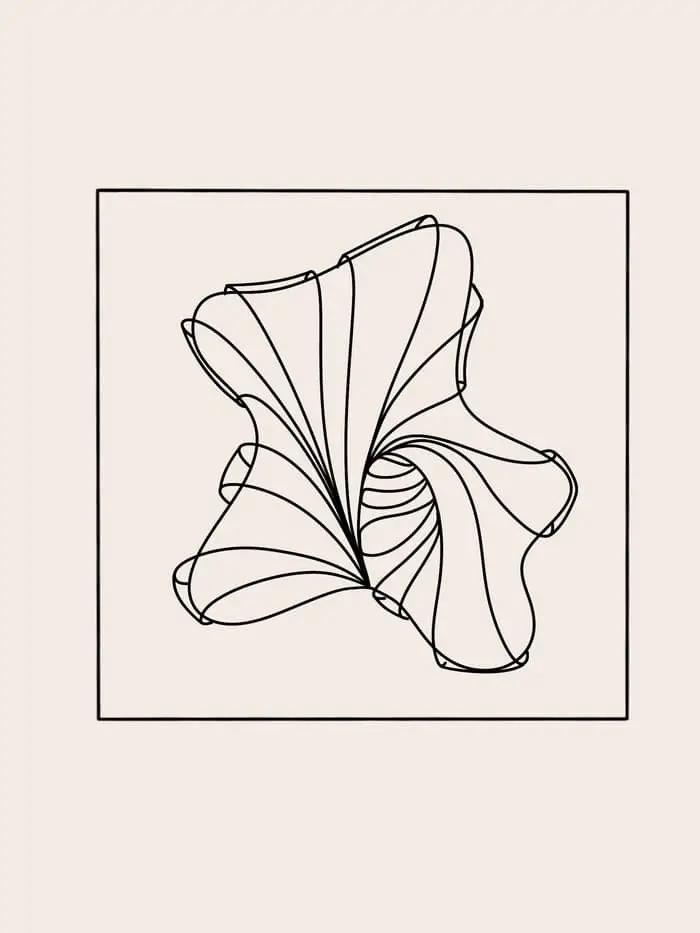
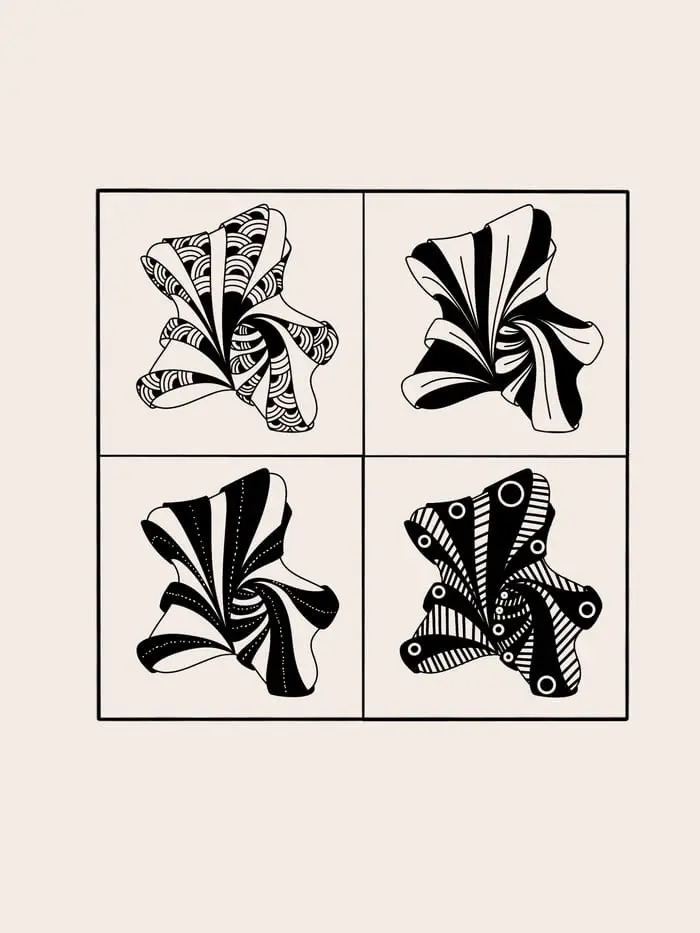
The versatility of Zentangles is what makes them so engaging to create. One pattern that exemplifies this flexibility is the Aquafleur design, which allows for experimentation with various sizes and shapes. Let’s dive into the process of drawing this unique tangle! Begin by sketching a random shape with rounded edges, reminiscent of a splash of paint or water. As your starting point, choose a location on the outline of your splash and draw two lines close together towards one edge. Ensure these lines loop around the edge with a subtle curve before connecting them with a third line at the end. This trio of lines should resemble a loose ribbon or leaf wrapping around an object. Repeat this process to cover the entire shape, always starting from the same point for each new ribbon. Feel free to leave some space at the end and instead of drawing the final ribbon from the same spot, create several smaller ones beginning from adjacent ribbons. This adds a visually appealing effect, giving the impression that the ribbons are folding inward. With these steps, you’ll have successfully drawn the Aquafleur tangle! Feel encouraged to experiment with different shapes and colors to create beautiful Zentangles. The ribbons themselves can be colored black, but there are numerous ways to decorate this design. You’re free to explore and add your personal touch to make it truly unique.
Ayame Zentangle
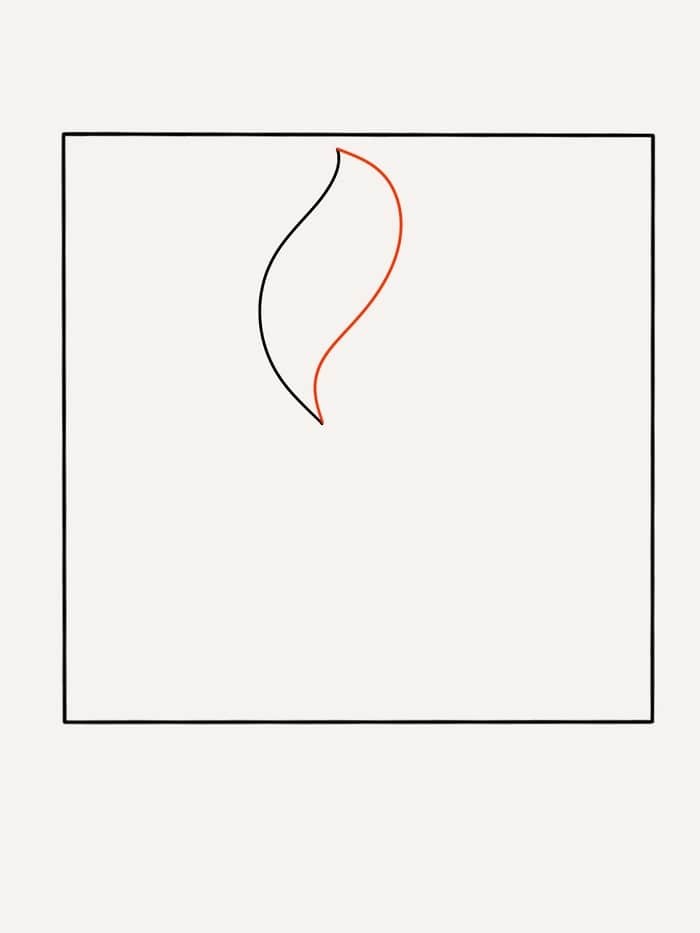
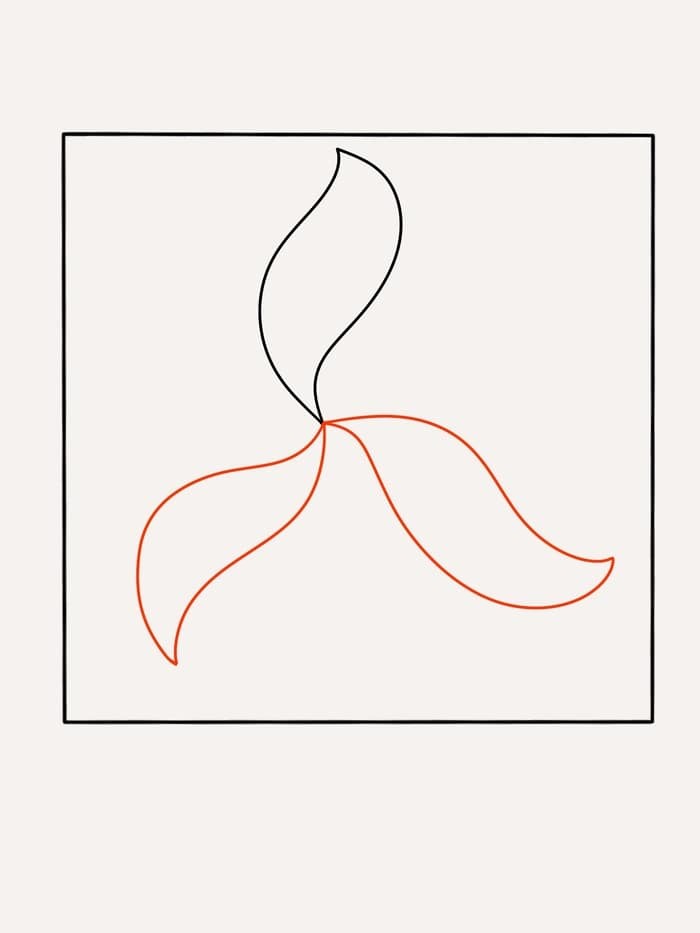

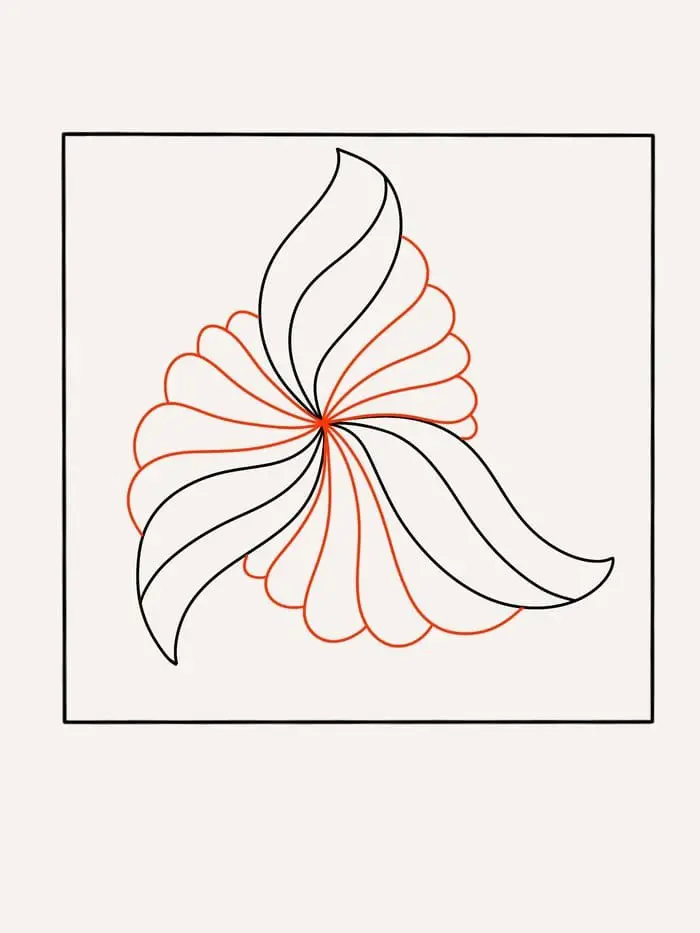
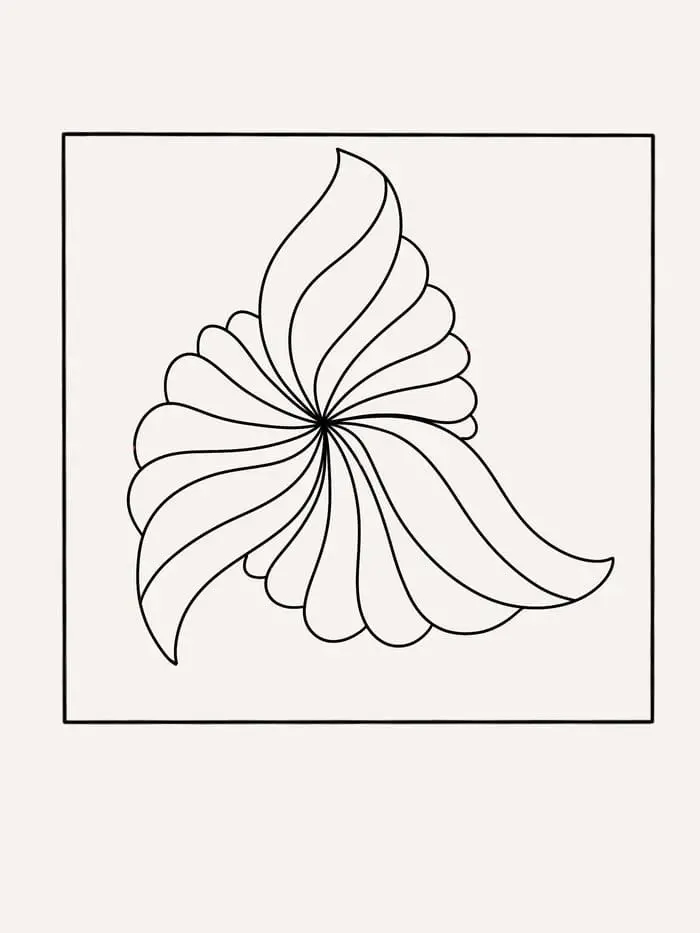
One of the joys of exploring Zentangles is discovering new patterns and techniques to add to your repertoire. The Ayame pattern, designed by Emiko Kaneko, is a beautiful flower-inspired design that’s perfect for beginners. Its simplicity makes it an excellent starting point for those new to the art form. Let’s dive into the steps to create this lovely tangle!To begin, draw a wavy line starting from the center of your tile or paper. This will serve as the foundation for the first leaf. Next, draw a second wavy line to complete the initial leaf. Repeat this process two more times to achieve three leaves in total. If you’re working on a larger surface, feel free to add more leaves to create a more elaborate design.Notice that an odd number of leaves tends to work better for this pattern. Once you’ve established your leaves, draw a line through the middle of each one. Some artists prefer to add small strips instead of a single line as a decorative touch. However, in its original form, Ayame features a simple line running through each leaf.Moving on to the final step, draw several loops behind each leaf. Aim for at least three loops per leaf, but feel free to add more if you’re working with smaller loops. With these steps complete, you’ve successfully created your first Ayame tangle!From here, you can experiment by combining multiple Ayame patterns or adding additional elements to create unique designs. Don’t be afraid to get creative and make the pattern your own!