How Are Clay Plant Pots Made?
Clay pottery has an ancient history, with clay vessels for cooking and storage dating back over 10,000 years. The potter’s wheel was invented around 6,000 years ago, allowing more uniform shaping of clay. Today, while some artisan potters still handcraft pots completely by hand, most commercial pottery producers use some level of mechanization in their manufacturing process.
The basic process for making a clay pot begins with mining clay and other minerals from the earth. The clay goes through several refining and aging steps before it is ready to be molded into pottery. Pots can be shaped by hand, or mass produced using molds and pottery wheels. After forming the basic pot shape, the pottery is dried to remove moisture before firing at high temperatures in a kiln. Many pots receive decorative glazing and finishing touches after firing.
There are many types of clay used in pottery, each with unique properties that affect the texture and firing qualities. Common clays include earthenware, stoneware, and porcelain. The clay composition and intended use determines the best type of clay to use for a certain piece of pottery.
Gathering Raw Clay
Natural clay deposits are found all over the world, often near river banks and in areas that were historically lakes or seas. Clays can vary greatly in their mineral composition based on geography, which gives them different properties for pottery making.
Raw clay is extracted from open pit mines or quarries using heavy machinery to remove surface layers and access the deeper clay deposits. Some softer clays can even be extracted by hand using simple tools and manual labor. The raw clay is then stockpiled on site before being transported for processing.
Extracted clay undergoes testing at the mining site or in a laboratory to determine its chemical composition, plasticity, firing qualities, and suitability for making pottery. Preliminary wedging, rolling, and drying tests check how well the clay can be worked and shaped. Test firing samples at different temperatures reveals how the clay responds to heat and what types of pottery it is best suited for.
Preparing the Clay
Once the raw clay is gathered, it undergoes an extensive preparation process before pottery can be shaped from it. This crucial step removes impurities and readies the clay for pottery making.
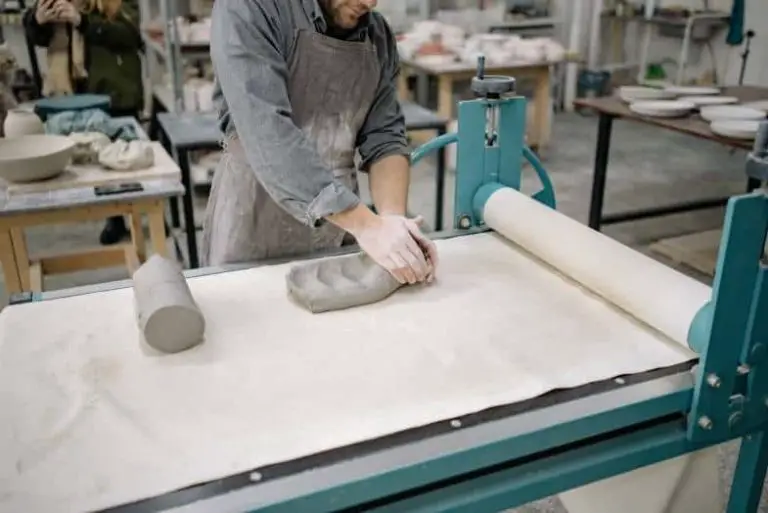
The preparation begins by adding water to the clay in a process known as hydrating or “wedging” the clay. This adds moisture to the clay and makes it more malleable. The clay is then kneaded, much like bread dough, to evenly distribute the water and create a smooth, lump-free consistency.
Next, any rocks, roots or other solid impurities are removed from the clay. This ensures no defects will be present in the final pottery product. The clay is then pressed through a screen to filter out smaller debris.
Finally, the consistency of the hydrated clay is adjusted to the ideal texture for shaping pottery. Factors like the desired shape and thickness of the clay pots determine the exact moisture content and firmness needed. The prepared clay is then ready for the potter’s wheel or mold.
Shaping the Pots
After the clay has been properly prepared, it’s time to shape it into pots. There are two main methods used for shaping clay pots – the pottery wheel and hand sculpting.
The pottery wheel is the most common method used in commercial pottery production. It consists of a rotating disk that the potter can spin at various speeds while using their hands to shape the clay. As the wheel spins, the potter places a lump of clay in the center and presses into it with their thumbs to create a hole. They then begin pulling up the sides using their fingers and palms to shape and taper the clay into the desired pot form. The spinning wheel provides centrifugal force that allows the clay to be evenly shaped into symmetrical pots. Experienced potters can create intricate curving shapes and patterns using this technique.
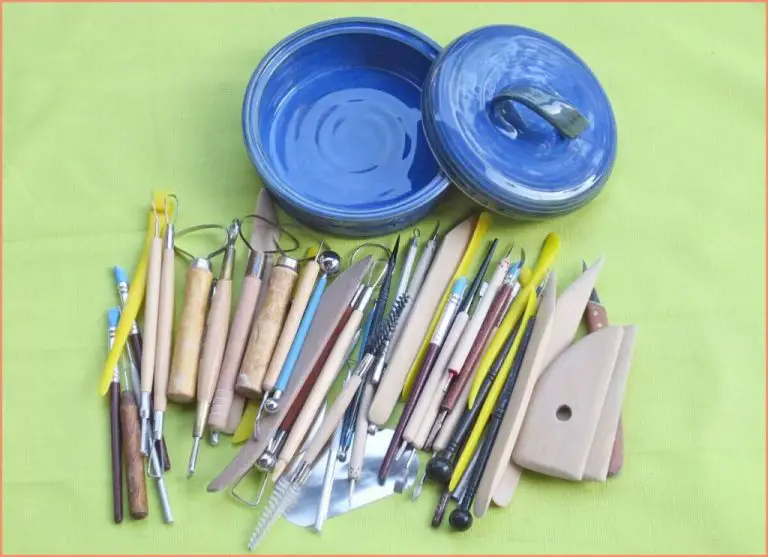
Hand sculpting is the traditional method of shaping clay pots that dates back thousands of years. The potter uses their hands, simple tools like paddles, and their fingertips to pinch, coil, and slab build the clay into freeform shapes and styles. More irregular and asymmetric forms can be created this way. Textures and patterns can also be impressed into the clay by hand. While hand sculpting takes more skill and practice, it allows artisan potters to create unique, customized pieces.
Common pottery shapes that are created include simple smooth bowls, vases, pots, pitchers, mugs and cups. The clay can be pinched and pulled into geometric or fluid, flowing forms. Textures like ruffles, pleats, and ribs can be added for visual interest. The potter’s imagination and skill guides what shapes can be achieved with these clay shaping techniques.
Drying the Clay
After the clay pots have been shaped, they must be thoroughly dried before firing. There are two main methods used for drying clay pots: air drying and drying chambers.
Air Drying
When air drying, the shaped clay pots are left to sit at room temperature for an extended period of time. Depending on factors like humidity and pot thickness, air drying can take between several days to several weeks. The pots are periodically checked and rotated to ensure even drying. Cracking can occur if dried too quickly.
Drying Chambers
Drying chambers speed up the drying process by controlling temperature, humidity, and air circulation around the pottery. The shaped clay pieces are loaded onto shelves or racks and wheeled into large, climate-controlled rooms. Drying times can be reduced to just 1-3 days. Ventilation systems circulate warm, dry air around the wares. Humidity is kept low to facilitate moisture evaporation. The temperature may be gradually increased to harden the clay. Drying chambers allow high-volume production while minimizing cracking risks.
Firing the Pottery
Once the pottery pieces are fully dried, they are ready to be fired in a kiln. Firing is one of the most important steps in hardening and finishing the clay through exposing it to high temperatures.
There are several types of kilns used for firing pottery:
-
Electric kilns – These kilns use electricity to generate heat and allow precise control over temperatures.
-
Gas kilns – Fueled by natural gas or propane, these kilns can achieve high temperatures.
-
Wood-fired kilns – Firing pottery in a wood-fired kiln leads to unique effects from the wood ash.
Firing temperature greatly affects the physical properties of the clay and finished ceramic piece. Typical firing temperatures are between 1,800°F to 2,400°F. Higher temperatures make the pottery more durable and water-resistant. The clay becomes permanently hardened as intense heat fuses the clay particles.
Specific desired effects can be achieved by carefully controlling the kiln atmosphere, temperature progression, and length of firing. The firing process draws out chemical changes in the clay that impact the color and texture of the final pottery product.
Glazing
The glaze is a vitreous coating applied to pottery to create a glassy, decorative surface and make it less porous. Glazes consist of a mixture of finely ground minerals, metal oxides, and other ingredients that fuse together when fired at high temperatures. Common ingredients include silica, feldspar, kaolin, quartz, dolomite, and colorants such as metal oxides.
Glazes can have different properties depending on the ingredients and firing process. They may be transparent, opaque, glossy, matte, or somewhere in between. The glaze recipe determines characteristics like color, texture, and how well it adheres to the clay body. Glaze ingredients fuse together during firing to create a thin glass layer on the surface of the pottery.
There are various techniques for applying glaze to pottery. Some common methods include dipping pieces into a bucket of glaze, pouring glaze over pots, brushing glaze on with a brush, or spray-applying glaze. The thickness and evenness of the glaze layer depends on the application technique. Multiple coats may be applied to build up thickness and opacity.
After glazing, the pottery must be fired again in a high-temperature kiln, usually between 2200°F-2400°F. This melts the glaze ingredients, fusing them smoothly onto the clay surface. Firing glazed pottery requires careful control of temperature, atmosphere, and firing schedule to properly mature the glaze and achieve the desired results without defects.
Final Touches
Once the clay pots have been glazed and fired, there are often some final touches added for decoration or to polish up the final product. Some popular techniques include:
Additional decorative techniques: Clay artisans will sometimes add decorative elements like carvings, stamps, or painted designs. These can be done by hand or using decorative tools. Things like geometric patterns, flowers, animals, and other freehand designs can make the pottery more unique and eye-catching.
Polishing and cleaning: The pots may go through a polishing process to smooth out any rough spots and give them a shiny finished look. This can be done using polishing discs or stones. Any dust or debris is brushed or washed off to give the pottery a clean, finished appearance before packaging.
Taking the time for these final touches and decorative flourishes helps ensure the clay pots meet quality standards and have an attractive, polished look before going out to retailers or customers.
Quality Control
Quality control is an important final step before packaging and shipping clay plant pots. This process involves meticulously testing each individual pot for any flaws or defects. Workers will examine the pots for things like cracks, uneven shapes, drips or runs in the glaze, etc. Any pots that do not meet quality standards are removed and either discarded or set aside to be recycled into new clay.
After testing, the remaining quality pots are then sorted according to size, color, and shape. Similar pots are grouped together before being packaged and shipped to retailers or customers. Proper quality control ensures that only the highest quality pots make it to market. Customers can be confident they are receiving sturdy, well-made plant pots that will last a long time.
Packaging and Shipping
Once the clay pots have been fired, glazed, and finished, they are ready for packaging and shipping to retailers or customers. Protecting the finished pottery products from damage during transit is crucial.
Potters carefully wrap each piece in bubble wrap or foam to prevent cracks or chips. Fragile items may be placed in boxes filled with styrofoam peanuts or crumpled paper to cushion them. Multiple pieces are often packaged together in larger cardboard boxes lined with more bubble wrap for added protection.
The packaged pots are then loaded onto pallets or trucks for distribution. Delivery methods depend on the quantity being shipped and destination. Small orders may be sent in regular parcel packages, while bulk shipments to retailers often go out on palletized truckloads or freight carriers. Proper labeling and handling ensures the pottery arrives safely at its final selling point without damage.
With secure and efficient packaging and transportation, beautiful handmade clay pots make it from the pottery studio to home kitchens and gardens all over the world for customers to enjoy.


