How Can I Make Sculpting Clay?
Sculpting clay, also known as modeling clay, is clay that air dries to a hard finish and is designed for shaping into art, figures, and other creative objects. The clay can be molded with your hands, as well as sculpting tools. There are many types of sculpting clay available including natural clays dug from the earth such as potter’s clay, as well as clays engineered specifically for sculpting and modeling like polymer clay and self-hardening clay.
Creating your own sculpting clay at home allows you full control over the texture, flexibility, drying time and other properties. Homemade sculpting clay costs just a fraction of the price of commercial clays. You can also create large quantities fairly easily. Additionally, making your own clay allows for customization of color and creativity in developing unique clay recipes.
Ingredients Needed
The main ingredients you’ll need to make homemade sculpting clay are:
- Flour – The flour provides structure and stiffness to the clay when mixed with water. All-purpose flour works best.
- Salt – A small amount of salt is added which slightly stiffens the clay. Table salt or fine sea salt work well.
- Water – The water mixes with the flour to create the clay texture. You’ll need about 1 cup of warm water.
- Oil – A small amount of vegetable, olive or mineral oil helps keep the clay soft and workable. Use 1-2 tablespoons.
- Cream of Tartar (optional) – Adding a teaspoon of cream of tartar helps strengthen the clay slightly.
- Food Coloring (optional) – For colored clay, add a few drops of liquid food coloring and mix thoroughly.
Recipe Ratios
The typical recipe for homemade sculpting clay calls for 2 parts flour to 1 part salt to 1 part water. Oil is added in small amounts to improve the texture. Here are some example recipes to get you started:
Basic Recipe
- 2 cups flour
- 1 cup salt
- 1 cup water
- 1 tablespoon oil
Smooth Texture
- 2 cups flour
- 1 cup salt
- 1 cup water
- 2 tablespoons oil
Adding more oil gives the clay a smoother, silkier texture. Less oil makes the clay more crumbly.
Light Texture
- 2.5 cups flour
- 1 cup salt
- 1 cup water
- 1 tablespoon oil
Using more flour lightens the texture. The clay is easier to shape but may be more prone to cracking.
Feel free to experiment with your own preferred ratios. The ingredients can be adjusted to achieve the texture you want for sculpting.
Preparing the Ingredients
Properly preparing the ingredients is an essential first step when making homemade sculpting clay. This involves both sifting the dry ingredients and accurately measuring out the wet ingredients.
For the dry ingredients, you’ll want to sift together the flour, salt, and cream of tartar. Sifting aerates these ingredients and breaks up any clumps. It also allows you to fully incorporate them. Use a fine mesh strainer or sifter for best results.
When measuring the wet ingredients, be sure to use an accurate liquid measuring cup. The amount of water and vegetable oil is important for getting the right consistency of clay. Too much liquid will make the clay sticky and hard to work with. Too little can make it crumble and dry out faster. Measure out the vinegar and glycerin using a spoon or liquid measuring teaspoon.
Having all the dry and wet ingredients precisely prepared before mixing is key. It will ensure your homemade clay comes out with the ideal texture for sculpting and creating amazing crafts and art projects.
Mixing the Clay
Properly mixing the clay is one of the most important steps in making high quality homemade sculpting clay. You can mix the clay either by hand or using a stand mixer.
Mixing by hand takes more time and elbow grease, but allows you to feel when the consistency is just right. Start by pouring the dry ingredients into a large bowl or bucket. Make a well in the center and pour in the liquid ingredients. Use your hands to slowly incorporate the dry and wet ingredients together. Keep kneading and folding the clay mixture until it forms an even, smooth dough with no lumps.
Using a stand mixer speeds up the mixing process. Fit the mixer with the dough hook attachment and start it on low speed. Add the dry ingredients to the mixer bowl first, then pour the liquid ingredients into the center while mixing. Let the dough hook knead the clay for 5-10 minutes until it binds together in a smooth, uniform ball.
The final clay should have a pliable, doughy texture similar to bread dough. It should not be sticky to the touch or crumbly. If the clay is too wet, mix in a bit more flour or cornstarch. If it’s too dry, add a teaspoon of vegetable oil and mix thoroughly. The clay is ready when it’s smooth, elastic, and bounces back when pressed gently.
Be careful not to overmix, as this can make the clay tough. Mix just until the ingredients come together into a cohesive ball of clay.
Cooking the Clay
Properly cooking the clay is one of the most important steps in the process. Undercooked clay will never harden and overcooked clay can become brittle.
There are two main methods for cooking the clay – stovetop and microwave.
For stovetop, pour the mixed clay into a saucepan and heat over medium, stirring frequently. Continue heating and stirring until the clay thickens to a dough consistency. This usually takes around 15-20 minutes. Make sure to scrape the bottom and sides of the pan regularly so the clay doesn’t burn.
Microwaving is a much faster method. Place the clay in a microwave-safe container and microwave in 1 minute increments, stirring after each minute, until the clay forms into a smooth dough, usually around 3-5 minutes total. Microwaving can sometimes lead to uneven cooking, so stir thoroughly to eliminate any hard spots.
To test if the clay is fully cooked, press a small piece onto a ceramic tile or glass surface. If it doesn’t soften after sitting for several minutes, it is ready. It should still be pliable, not dried out or crumbly.
Let the clay cool slightly before handling.
Drying and Conditioning
After you have mixed and cooked your sculpting clay, it’s important to let it fully dry before using it for sculpting. Lay the clay out in a thin layer no more than 1/4 inch thick and allow it to air dry completely. Depending on the size of your clay batch, this can take 12-48 hours.
Once the clay is fully dried, you will need to condition it by kneading before sculpting. Kneading helps to make the clay pliable again and removes any air bubbles that may have formed during drying. Knead the clay for 5-10 minutes until it becomes smooth, elastic, and free of cracks. The clay should be workable but not sticky. If it feels too hard, add a few drops of water while kneading to help soften it up.
Properly drying and conditioning your homemade sculpting clay is a crucial step for achieving a clay that is ready for sculpting without cracking or crumbling.
### Coloring the Clay
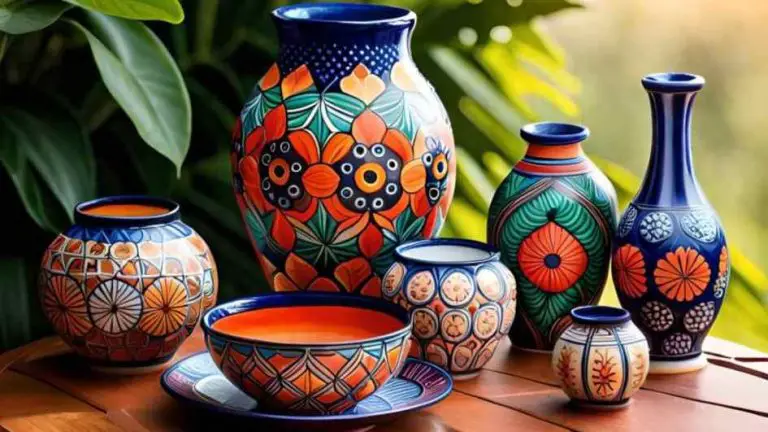
Adding color to your homemade sculpting clay can allow you to create more vibrant and visually appealing sculptures. There are a few key considerations when coloring clay:
Types of Colorants
Some commonly used colorants for clay include:
- Oil paints – These are very pigmented and a little goes a long way. Try starting with a pea sized amount.
- Acrylic paints – Water-based and easy to mix in. Start with about 1 teaspoon per 1 pound of clay.
- Liquid watercolors – Add just a few drops into the clay and knead to distribute the color.
- Powder pigments – Very concentrated dry pigments. Use sparingly and mix thoroughly.
- Chalk pastels – Grind pastels into a powder to make vibrant colors. Start with 1/2 teaspoon.
When to Add Color
It’s best to add colorants when the clay is still relatively soft and workable. If the clay has been hardened through cooking or drying, it will be more difficult for the color to fully incorporate.
Mixing In Pigments
Thoroughly knead the colorant into the clay until the color is evenly distributed. Ensure there are no color streaks. Start with a small amount of colorant and add more if needed. Too much pigment can make the clay difficult to work with.
Storing the Clay
Properly storing your homemade clay is important for keeping it soft and workable. The two main factors to consider are storage containers and temperature.
For storage containers, glass and plastic are ideal materials. Avoid using porous materials like untreated wood, unglazed terra cotta, or cardboard, which can lead to drying and contamination. The container should have an airtight lid or seal to prevent air exposure and drying.
You also need to decide whether to refrigerate the clay or store it at room temperature. Refrigeration is recommended for longer term storage, as it slows drying and prevents mold growth. Place the clay in an airtight container and store in the refrigerator for up to several months. For short term storage up to a few weeks, an airtight container kept at room temperature is sufficient.
Monitoring the clay and adding a few drops of water as needed will help maintain the ideal texture and workability. Proper storage keeps your clay soft and ready for your next sculpting session.
Sculpting with Homemade Clay
One of the great things about sculpting with homemade clay is that you can be very creative with shapes and textures. Here are some sculpting techniques to try:
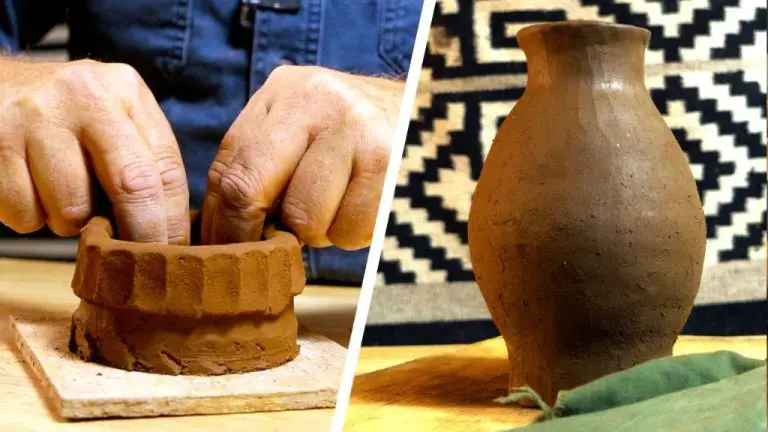
Coil building – Roll clay into long coils or snakes and stack or bend them to form shapes like pots or figurines. Pinch the coils together and blend with water.
Slab building – Roll out flat slabs of consistent thickness and cut shapes to assemble into forms. Attach slabs by scoring surfaces and blending. Great for making boxes, plaques, and tiles.
Pinching – Form shapes simply by pinching and pulling the clay with your fingers. Pinch bowls, faces, animals and more.
Smoothing and shaping – Use simple household tools like potato peelers, butter knives, or Popsicle sticks to refine shapes, blend coils/slabs, add texture, or smooth surfaces.
While sculpting, you may run into some issues like cracking or difficulty getting smooth forms. Here are some tips to troubleshoot problems:
– If clay is cracking, it may be too dry. Condition it by kneading in some water.
– Letting clay rest between working can allow moisture to even out and reduce cracking.
– A spray bottle of water is helpful for smoothing and shaping clay as you work.
– If clay is sticky, dust hands and tools lightly with cornstarch or baking powder.
– Allow time for moisture in attached parts to blend thoroughly to avoid seam lines or cracking along joins.