How Can Kids Make A Clock?
Making a clock is a fun and educational STEM activity for kids that teaches important concepts in science, technology, engineering, and math. Hands-on STEM projects like this allow children to apply classroom lessons to real-world examples. Building the clock gives kids practice in areas like counting, telling time, assembling parts, and problem solving. Following step-by-step instructions also builds confidence and patience.
STEM learning promotes critical thinking, creativity, teamwork, leadership, and other vital skills according to invent.org. Creating their own working clock allows kids to see how academic concepts connect to tangible objects. The sense of accomplishment upon finishing a DIY clock can spark an ongoing interest in STEM fields. In summary, this hands-on project offers an engaging way for children to explore core STEM principles.
Gather Materials
To make a fun DIY clock with your kids, you’ll need the following materials:
- Paper plate or cardboard for the clock face
- Markers, crayons or paint to decorate the clock face
- Glue or tape
- Scissors
- Cardstock or construction paper for the clock hands
- Brad or thumb tack
- Number stickers or you can write the numbers
For a more advanced clock, you may also need:
- A battery-operated clock mechanism
- Mini gear motors
- Wires and soldering iron
The Spruce Crafts recommends using a sturdy paper plate or cardboard for the clock face so it holds up over time. Gather markers, crayons or craft paint to decorate the background. You’ll also need some simple materials like construction paper, scissors, glue and a brad to hand-make the clock hands. Number stickers or written numbers finish off the clock face. For a working clock, you can install a store-bought clock mechanism.
Make the Clock Face
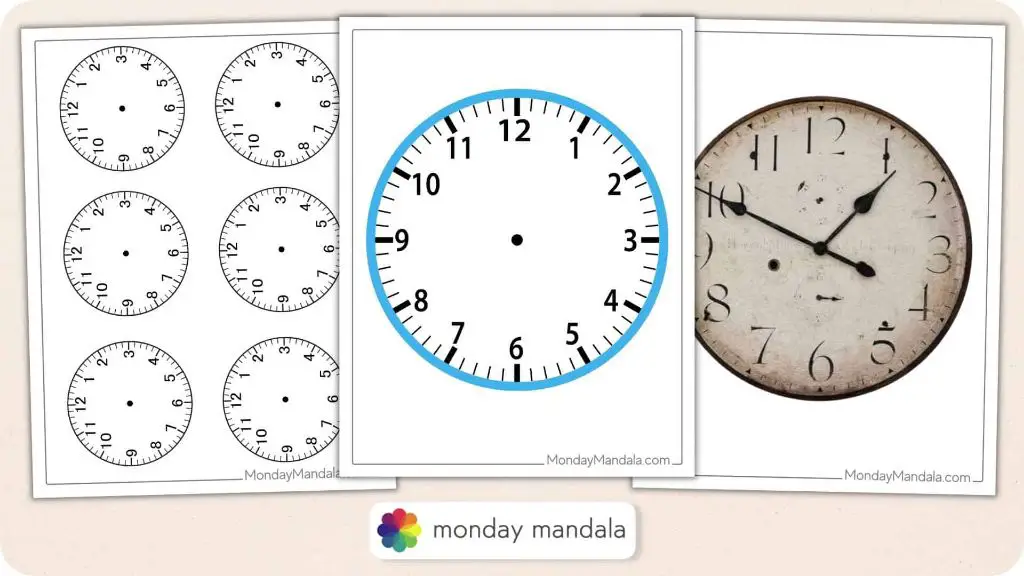
The clock face can be made out of cardboard, paper, wood, or other materials. Here are the steps for making a cardboard clock face:

-
Cut out a circle from cardboard using a compass or by tracing a circular object like a plate. Make the circle at least 8-10 inches wide.
-
Take a ruler and lightly draw a straight line vertically through the center of the circle to divide it in half. Then draw another straight line horizontally through the center to divide it into quarters.
-
Make a small hole in the very center of the circle using an awl or thin nail. This hole will be used later to attach the clock hands.
-
Use the vertical and horizontal lines as a guide to lightly draw the numbers 1-12 around the edge of the clock face. Space the numbers evenly apart.
-
Use a compass to make a mark 3/4 inch long for each of the 12 numbers. These will be used for the hour indicators.
-
Once you are happy with the placement, carefully go over the numbers and indicators with a pen or marker to make them stand out.
-
The clock face is now ready to decorate as desired with paints, stickers, glitter, etc. Just leave the center area clean.
For numbering tips or ideas on materials to use, check out this guide on how to make a homemade clock face.
Add the Clock Hands
The clock hands will allow you to actually tell time with your homemade clock. To add movable hour and minute hands:
Cut out an arrow shape from cardboard, construction paper, or foam for the minute hand. Make it long enough to reach close to the edge of the clock face. Cut out another shorter, wider arrow for the hour hand.
Poke a hole in the center of each hand. Attach a brass brad through the hole, flat side down. Open up the brad legs on the back to keep the hands in place.
Position the hands near the center of the clock face, lining them up at 12. The minute hand should be longer and pointier, while the hour hand is shorter and wider.
Secure the brad legs to the back of the clock face using tape. This will allow the hands to spin independently.
You now have movable hands to point to the hours and minutes! Adjust them appropriately as you learn to tell time.
Make It Personal
Once the clock is assembled, let kids customize it and make it their own. This is the fun, creative part where they can add personal touches. Here are some ideas for personalizing the homemade clock:
- Use markers, crayons, or paint to color the clock face. Let kids decorate the numbers on the clock face with their favorite colors and designs.
- Glue craft materials like glitter, puffy stickers, buttons, or pom poms onto the clock face for added decoration.
- Attach a photo of the child to the center of the clock face.
- Use letter stickers or handwritten text to add the child’s name to the bottom or top of the clock face.
- Attach ribbon, string, or rickrack around the outer edge of the clock face.
- Let the child decorate the outside of the box or clock base with markers, stickers, glitter, etc.
Adding personal touches makes it a fun project the child will be proud of. Allowing them to customize the clock to reflect their own personality and interests is part of the creativity and ownership.
Sources:
https://www.pinterest.com/pin/433401164141938505/
Install Working Mechanism
The key to making a functional clock is installing a working mechanism so the hands can move automatically. Here are the steps for adding a motor:
Purchase a clock movement kit. These kits contain a battery-powered quartz clock motor and hardware for attaching the hands. Popular options include products from Timelike, Tikround, and Aililife.
Follow the instructions to install the clock motor mechanism on the back of the clock face. This usually involves drilling a hole in the center of the clock face to fit the clock shaft through. Use pliers to tighten and secure the motor in place.
Slide the clock hands onto the clock shaft in this order – seconds, minutes, hours. Make sure the hands can rotate freely without bumping into each other.
Insert a new AA battery to power the motor. The clock hands should start ticking and moving automatically now that the motor is installed!
Set the time by rotating the hands manually. The motor will then keep the hands moving accurately after that.
Add a battery case to the back of the clock to hold and conceal the battery.
Test It Out
Once you’ve assembled your homemade clock, it’s time to try it out! Wind up the clock mechanism and make sure the hands start ticking and moving. Observe the motion of the hands over a few minutes to ensure they are moving smoothly and at the proper speed.
Here are some common troubleshooting tips if your clock isn’t working properly:
- If the hands aren’t moving at all, check that the clock mechanism is wound up and the hands are attached securely. You may need to give the mechanism an extra turn or two to get it started.
- If the hands are moving erratically or getting stuck, there could be an issue with the mechanism. Make sure there is no debris inside and that the hands can move freely without friction.
- If the hands are moving too fast or too slow, you may need to adjust the mechanism. Consult the specific instructions for your clock movement on how to regulate the beat.
- If the hands are loose or falling off, remove them and reattach more securely at the center. A dot of superglue can help reinforce the bond.
Be patient in the testing phase and make any needed tweaks. Get your family’s help testing the clock over a full day. Celebrate when your homemade clock is finally ticking along and keeping accurate time!
Learn Time Telling
Once the clock is complete, it’s time for your child to practice telling time. Having a homemade clock they created themselves provides a hands-on learning experience. Reference the resources below for games and activities for practicing time telling with the new clock:
According to Komodo Math (source), start by explaining the hour and minute hands. Then, ask your child to show times on the clock face like “show me 2 o’clock” or “where is the minute hand at 3:30?” You can also use the homemade clock for worksheets where kids write down the times shown.
The PBS Parents article (source) suggests playing time telling games like setting the clock to match times you call out. Let them move the hands to show the requested times. Quiz them by showing a time on the clock and asking them to identify it.
Display the Clock
Once your kid’s homemade clock is complete, they’ll be eager to show it off! Displaying the finished clock proudly at home or school is a great way for them to feel a sense of accomplishment. Here are some creative ideas for showcasing their new timepiece:
At home, consider putting the clock in your child’s bedroom so they can use it and see their hard work everyday. Mount it to the wall or place it on a desk or shelf. Decorate the area around the clock with their artwork or favorite toys and trinkets to make a personalized display space.
To display at school, attach a loop of ribbon to the back so it can be hung on a bulletin board, white board, or over a classroom door. The teacher can put up a display of clocks made by the whole class. This allows students to compare designs and show their individual creativity.
For a more formal display, consider entering your child’s homemade clock in a school science fair or art show. Create a display board with photos documenting the process of building the clock. Let them explain their clock and what they learned to the judges.
No matter how you choose to showcase it, a handmade clock will remind kids of the time and effort they put into this fun hands-on project. Displaying their clock proudly gives a boost to their confidence and creativity.
More DIY Clock Ideas
There are many fun variations on DIY clocks that kids can make. Here are some ideas to spark creativity:
Use different shapes for the clock face besides a circle. Try squares, triangles, hearts, stars or hexagons (1). Cutting unique shapes out of paper, foam or cardboard can make for an interesting clock.
Experiment with materials besides paper plates. Wood, plastic lids, and felt also work well for clock faces. Get creative with cardboard, scrapbook paper, foam sheets, fabric and more (2).
Add extra features like movable hands, alarms, or chimes. Use brads to attach hands that can move to point to the time. Integrate a simple buzzer circuit for an alarm. Attach a small bell for a ticking or chiming sound effect.
Make a sun clock with sun-shaped hands and hourly markings. The hands can cast shadows on the clock face to tell time. Or try a moon phase clock showing the lunar cycle.
Use clock shapes or numbers to spell words. For example, use the 12 numbers to spell out a name in a personalized design.
Go big by creating 3D or wall clocks using large materials like cardboard, wood, vinyl or metal. Add colorful decorations with paint, glitter, stickers, gems and more.
Let kids’ imaginations run wild and encourage them to be as creative as possible with their own unique clock designs.


