How Do I Glaze My Pottery?
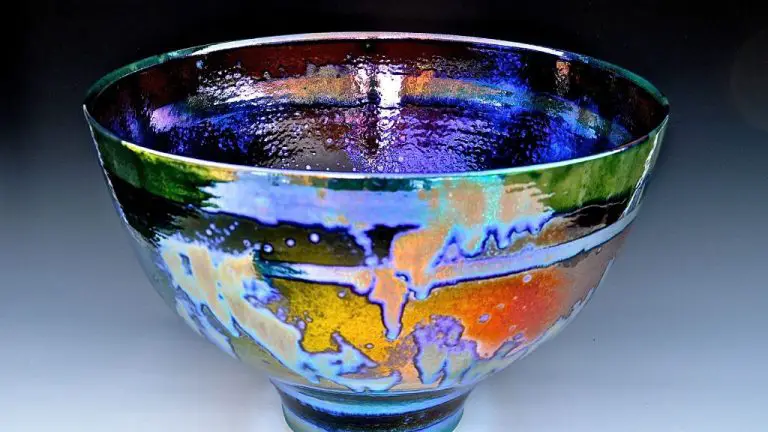
Pottery glazing is the process of applying a thin coating of glass-like material called glaze to bisqueware pottery to create a watertight, decorative surface. Glazing transforms ordinary bisqueware into finished ceramic ware with an impermeable, shiny appearance and feel. It can add color, texture, and aesthetic appeal to pottery pieces.
Glazing serves several important functions in pottery making. First, it seals the porous clay body and makes the pottery impervious to liquids and resistant to stains. An unglazed clay vessel would absorb water and leak when used for drinking or storing liquids. Glazing prevents this absorption so the pottery can hold liquids without contamination. Second, glazing decorates the pottery with color, shine, patterns, and textures that enhance the aesthetic beauty of the piece. The glaze finish brings out the form of the clay shape in a visually striking way. Finally, glazing provides a durable, scratch-resistant surface that withstands frequent use and cleaning over time. Unglazed pottery tends to show wear and tear more readily with handling. Overall, glazing transforms basic clay vessels into functional works of art.
As noted in the article “What is Glazing?” on HomeQuestionsAnswered.com, glazing is an essential part of creating durable, beautiful pottery items that can be practically used and appreciated for generations.
Types of Glazes
There are several main types of glazes used in pottery and ceramics:
Underglazes – These are glazes that are applied to pottery before the final glaze firing. Common types of underglazes include colored stains, engobes, and terra sigillatas. Underglazes are used to add color, patterns, and textures under a final transparent glaze layer. They allow for more detailed decorative effects. However, the colors can be muted by the final glaze firing.[1]
Overglazes – Overglazes are applied on top of an already fired glazed piece. They include enamels, china paints, and lusters. Overglazes allow bright, vibrant colors and effects since they are applied after the high-temperature glaze firing. However, they require a second firing at a lower temperature which can be more time consuming.[2]
Single-Fire Glazes – These glazes can be applied directly to bare clay and fired in one step. They include high-fire glazes, mid-range glazes, low-fire glazes, and raku glazes. Single-fire glazes simplify the process since only one glaze application and firing is needed. However, the results may not be as intricate as using multiple glazes and firings.
In summary, underglazes allow for detailed designs but muted colors, overglazes create vivid effects through multiple firings, and single-fire glazes provide a simpler one-step process.
[1] https://www.youtube.com/watch?v=l6cnkV0185Y
[2] https://www.potterycreative.com/what-is-pottery-glaze/
Choosing a Glaze
When selecting a glaze for your pottery, there are several factors to consider. As a beginner, you’ll want to choose a glaze that is forgiving and easy to work with. According to Pottery Crafters, important factors include:
– Finish – Do you want a glossy, satin, or matte look? Glossy glazes tend to be more forgiving.
– Color – Consider the aesthetics you want to achieve. Brighter glazes are often easier for beginners.
– Application method – Some glazes are best for dipping, others for spraying or brushing. Select a glaze matched to your preferred technique.
– Base material – Stoneware and porcelain clay bodies require specific glaze types to prevent crazing.
– Firing temperature – Make sure the glaze firing range matches your kiln temperature.
For beginners, many potters recommend starting with basic glazes like a clear brushed-on glaze or Glossy Mid-Range glazes which are versatile and more forgiving. Avoid highly textured glazes initially. Test tiles can help you experiment with glaze options before using them on finished pieces.
Preparing the Pottery
Before applying glaze to bisqueware, it’s important to properly clean and prepare the pottery’s surface. Start by removing any dust or debris from the bisque using a soft brush or compressed air 1. Make sure the bisque is completely free of contaminants that could affect the glaze results.
Next, inspect the bisqueware and sand any rough areas with fine grit sandpaper between 180-240 grit. This will smooth the surface and allow for even glaze application 2. Be careful not to sand too much or make the surface too smooth, as the glaze needs some texture to properly adhere.
Some potters also choose to use a glaze release or bisque wash on the pottery before glazing. This provides a protective barrier between the glaze and bisque and prevents them from fusing together too much. If using a glaze release, apply it evenly according to the product instructions.
Once the bisque is cleaned, sanded, and prepared, it’s ready for glaze application.
Mixing the Glaze
The key to properly mixing glaze is following the recipe instructions carefully. Each glaze recipe will specify the ingredients and ratios of ingredients to use. It’s important to measure ingredients precisely using a scale, as even small variations can significantly impact the final results.
Typically glaze recipes consist of 3 main components: silica, fluxes, and alumina. The silica provides the glassy quality, fluxes help lower the melting temperature, and alumina stiffens the glaze. Other additives like colorants and opacifiers may also be used.
Once the dry ingredients are measured out, add water slowly while mixing until you achieve the proper consistency. The glaze should flow smoothly like heavy cream. If it’s too thin, add more dry material. If too thick, add more water. Getting the right thickness is crucial for the glaze to be applied evenly in the correct thickness on the bisqueware. [1]
Be sure to mix the glaze thoroughly to fully blend all ingredients with no lumps. Sieving the mixed glaze can help achieve a smooth, lump-free consistency. Let the glaze sit for several hours after mixing so ingredients can fully hydrate before application.
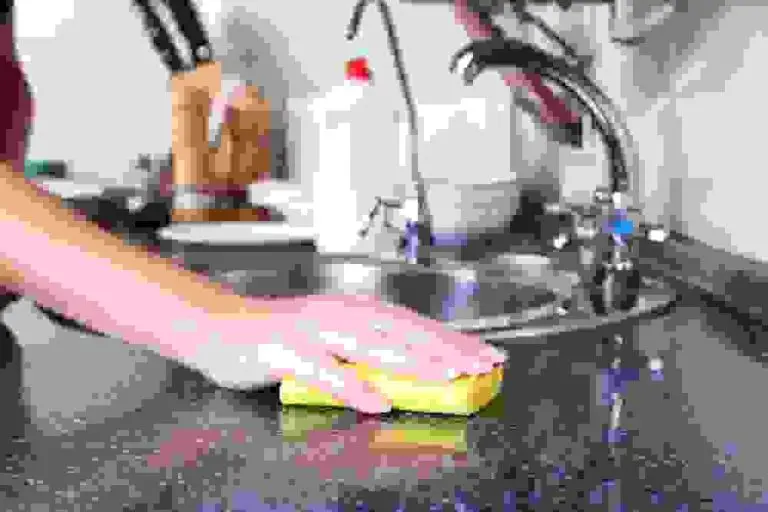
Applying the Glaze
There are a few techniques for applying glaze to pottery depending on the desired effect.
The most common method is to use a soft bristle brush to brush on an even layer of glaze. Dip the brush into the glaze and apply it gently in smooth, overlapping strokes. Make sure to get full coverage, including any indentations and carved details in the pottery. Avoid applying the glaze too thickly or it may crack during firing. Thin, even layers are best.
Another technique is pouring where the liquid glaze is simply poured directly onto the pottery. Tilt and rotate the piece to allow the glaze to flow over all surfaces. This can create interesting drips and uneven effects. Try banding with masking tape to constrain the poured glaze to specific areas.
Spraying glaze with an airbrush tool allows for a very smooth and even layer of glaze quickly. This requires some skill to master the spraying technique. Make sure to work in a ventilated area and wear a respirator mask.
Whichever method you choose, insure the glaze is applied evenly without any thick blobs or bare patches. This will provide the best results after firing. Allow the piece to fully dry before placing it in the kiln.
Drying the Glaze
After applying the glaze, it’s crucial to allow adequate drying time before firing. The drying time varies based on factors like the thickness of the glaze application, the clay body, and the type of glaze used.
Thicker glaze coats require longer drying times, sometimes upwards of 24 hours. Porous clay bodies like earthenware may dry faster than dense bodies like porcelain. Certain glazes like those high in silica dry quickly, while others with high clay content dry slower.
Insufficient drying can cause glaze defects like cracking, pinholing, or peeling. Allow glazed pieces to dry completely before firing. Drying times can be shortened by using fans, dehumidifiers, or commercial dryers. Monitor the glaze surface for dryness before firing. The glaze should feel dry to the touch without any tackiness.
With adequate drying, the glaze will harden properly in the kiln and achieve the desired surface texture and colors. Rushing the drying risks poor glaze fit and mistakes like underfired glazes or glaze blowouts.
(Source: http://delibra.bg.polsl.pl/Content/14008/P-1611_1946_Vol38_No1.pdf)
Firing the Glaze
Once the glaze has been fully dried on the pottery, the next step is to fire it in a kiln. Firing the glaze serves to melt it onto the clay body and finish the glazing process. Each glaze has an optimal firing temperature that must be followed for the best results.
Check the manufacturer’s instructions for the required firing temperature of your specific glaze. Most glazes fire between cone 04 and cone 10, which is a temperature range of approximately 1,857-2,372°F (1,016-1,300°C). For example, a mid-range glaze may fire at cone 6 which is about 2,165°F (1,185°C).
It’s critical to closely follow the recommended firing schedule or cone for the glaze. Firing too low can result in under-melted glaze that flakes off. Firing too high can cause glaze defects like pinholing, blistering, and crawling. Stick to the cone the glaze was formulated for.1
Load the pottery carefully into the kiln, keeping adequate space between pieces. Fire according to the schedule, firing to the peak temperature and holding there before cooling. The glaze will melt and fuse with the clay body, resulting in a glassy coating.
Finishing
After the pottery has been fired in the kiln, the next steps are removing it from the kiln and allowing it to cool properly. It’s important not to open the kiln door until the temperature inside has cooled to about 100°C or lower. Removing the pottery too soon can lead to thermal shock, which can cause cracks or breakage. Wear heavy gloves when removing each piece.
Set the pottery aside on a heat-resistant surface like a metal or stone counter or wire rack. Don’t place directly on a cold surface like concrete as this can also lead to thermal shock. Allow the pottery to air cool fully before handling further. This may take several hours or longer depending on the size and thickness of the pieces.
Once cooled, inspect each piece. Glazes can dull slightly after firing, so items may require polishing. Use a very fine grit sandpaper, steel wool, or a buffing wheel with polishing compound to gently rub the surface and restore shine. Avoid polishing through or removing the glaze layer. Handle pieces carefully to prevent new scratches or chips during polishing.
After polishing, wash each piece with soap and water to remove any residue. Finally, apply a food-safe sealant if intended for functional use with eating or drinking. The pottery is now ready to enjoy! Pieces should be handled gently since fired glazes can chip over time with use. For display-only items, consider felt pads on the bottom to prevent scratches.
(Source: https://www.vianolavie.org/2014/11/24/leos-bread-inside-the-kitchen-32978/)
Troubleshooting
Glazing pottery can sometimes result in imperfections. Here are some common glazing problems and solutions:
Crazing
Crazing occurs when the glaze cracks into a fine network of lines. It is often caused by a mismatch between the glaze and clay body expansion rates. To fix crazing, try adjusting the glaze recipe to have a lower expansion rate, like adding more silica or substituting feldspar for a clay mineral. Using a liner glaze between the clay and top glaze can also help prevent crazing (Source).
Crawling
Crawling happens when the glaze pulls back into thick beads instead of laying smoothly. This is typically caused by the glaze being too thick or drying too quickly. To prevent crawling, apply thinner and multiple coats of glaze and allow ample drying time between coats. Cleaning bisque ware thoroughly before glazing can also help eliminate oils that repel the glaze (Source).
Blistering
Blisters form when gases get trapped between the glaze and clay body during firing. Using a liner glaze, firing at a slower ramp rate, or reducing the firing temperature can help prevent blisters. If blisters are small, sanding them flush with the surface after firing is one solution.
Pinholes
Pinholes are small holes in the glaze surface caused by bubbles bursting. Applying thinner coats of glaze, using a sprayer or dipping method, and firing at a slower rate can minimize pinholes. Though not ideal aesthetically, pinholes are generally safe if the piece is non-porous.
Orange Peel
The orange peel effect gives the glaze surface a bumpy texture, like orange peel. This happens when the glaze is too thick or dries too quickly after application. Using thinner glaze layers with ample drying time helps prevent orange peel. Spraying or dipping glazes can also improve smoothness.