How Do I Start Organizing My Craft Room?
Assess Your Space
The first step in organizing your craft room is to take measurements and assess the space you have available. Get out a tape measure and note the length and width of the room along with any nooks, corners, or potential storage areas. Pay attention to windows and doors as these can impact furniture placement and lighting. According to the Minimalist Crafter, “The most obvious place to start is with the space you have to store the supplies and tools you want to keep. If you are serious about minimizing your stash, then take an inventory of your storage space first.”
Walk through the room and envision how you want to use it. Will you need space for a work table? Shelving for supplies? Comfortable seating? Make a list of must-haves based on your crafting needs and style. Having a thorough understanding of the size and layout of the room will allow you to maximize every inch.
Declutter
Decluttering your craft space is one of the most important steps when getting organized. It’s easy for craft supplies, tools, and unfinished projects to accumulate over time, leaving you feeling overwhelmed. According to one survey, 54% of Americans are overwhelmed by clutter and don’t know what to do with it (https://www.prnewswire.com/news-releases/survey-finds-54-percent-of-americans-are-overwhelmed-with-clutter-and-dont-know-what-to-do-with-it-300019518.html).
Go through all your materials, tools, and unfinished projects. Be ruthless and honest with yourself. Anything you haven’t used in over a year, toss or donate. Craft supplies have a tendency to accumulate since many crafters buy materials for projects they want to do but never start. Getting rid of the excess will clear both physical and mental space.
Try to limit your supplies to only what you realistically need for your current and upcoming projects. Storing a large stash of unused materials adds to clutter. Take an inventory and think critically about what is essential to keep on hand versus what’s just taking up space.
For unfinished projects, decide whether it’s worthwhile to complete them or if you’d be better off recycling or repurposing the materials for future crafts. While it’s tempting to hang onto half-finished projects with good intentions, realistically most people lack the time and motivation to revisit them.
Regular decluttering maintenance will prevent your craft space from becoming cluttered again. Set reminders to purge unused items every 3-6 months.
Categorize Your Tools and Materials
Grouping like items together is key for craft room organization. Start by categorizing all of your tools and materials into logical groups. For example, you may want to group all of your paper crafts supplies together, sewing and fabric items together, painting materials together, etc. The Spruce suggests using baskets, bins and storage containers to hold each category of items, labeling them clearly for easy identification.
You’ll also want to think about how frequently you use certain supplies. Keep your most used tools and materials in the most accessible areas of your craft room, while rarely used items can go into more out-of-the-way storage. Clutter Keeper recommends designating prime real estate shelf space or desktop space closest to your work area for your most used supplies. Store the items you use less often on higher shelves or in closed bins.
No matter where you store your categorized craft materials, be sure to label everything clearly. Use labels on baskets, storage bins, shelves and drawers to index your items for quick and easy access. A label maker can make short work of this labeling and indexing. As Clutter Keeper notes, a labeled storage system will keep your craft room neat and let you see what you have at a glance.
Maximize Storage
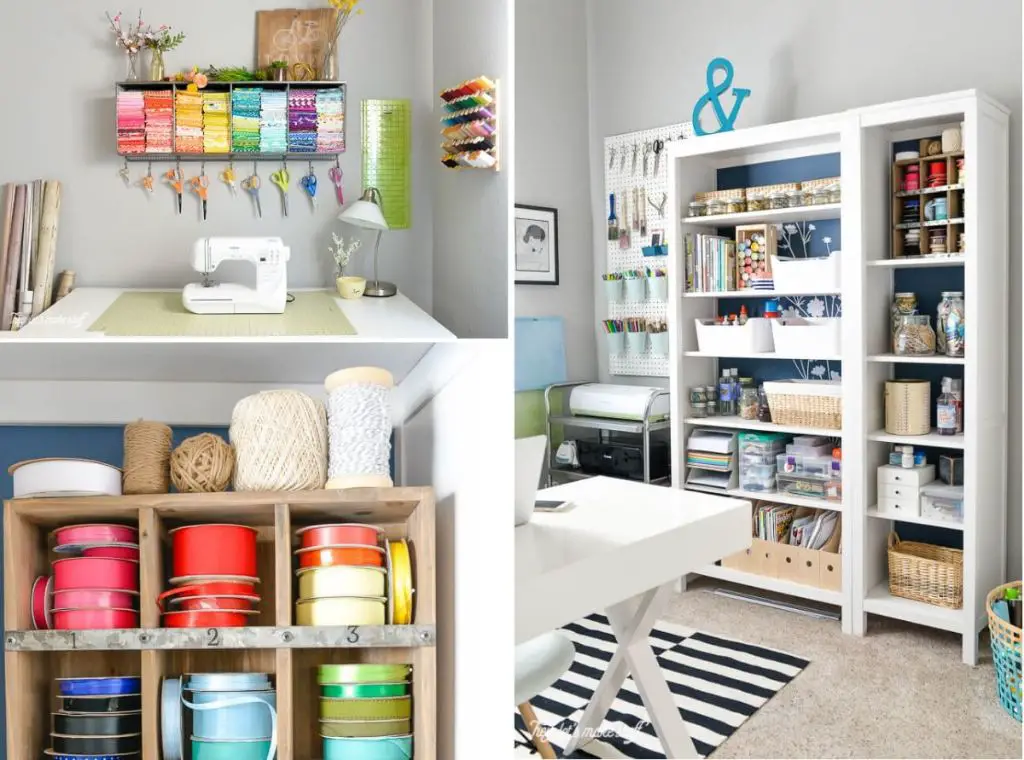
Maximizing storage in your craft room is key to staying organized. Look for ways to make the most of every inch of space, both horizontally and vertically. Shelving is an obvious solution – install shelves on walls, over work surfaces, and even consider utility shelving units if floor space allows 1. For small items, use bins, baskets and jars to corral supplies; label them clearly so you can find what you need quickly. Hang storage baskets or shelves on the wall to utilize vertical space. Install pegboards or slatwall panels to hang frequently-used tools within easy reach. Maximize vertical space by looking up – install shelves all the way to the ceiling and use wall space for additional storage. Aim to keep everything visible and accessible so your supplies don’t get buried at the back of a cupboard.

Designate Work Zones
One of the most effective ways to organize your craft room is to designate different work zones for specific crafting tasks. This allows you to keep like items together and make your workflow more efficient. Here are some of the essential work zones to include:
Planning Area
Have a dedicated desk or table for planning projects and working on computer tasks like designing patterns or digital scrapbooking. Make sure you have storage nearby for paper, pens, design books, and other planning supplies. A comfortable chair is also key for extended time spent on computer work.
Cutting and Sewing Zone
Clear an open area on a large table or counter space for laying out fabric and other materials for cutting and sewing. Make sure you have adequate task lighting, and keep your cutting tools, pins, thread, and sewing machine supplies organized and within reach. Consider designating part of this zone for ironing as well.
Painting and Gluing Area
Set aside a spot for messier crafts like painting, gluing, and working with dye. Protect the surfaces with washable coverings or disposable paper. Have storage to corral paints, brushes, adhesives, and other wet supplies. A utility sink is useful for rinsing brushes and hands.
By grouping similar activities into designated work zones, you can save time spent hunting for supplies and keep your craft room neater and more functional.
Source: https://www.michellelast.co.uk/2021/05/zone-your-craft-space.html
Improve Lighting
Proper lighting is essential for any craft room. You’ll want to take advantage of natural light when possible, supplement with task lighting for detailed work, and install general overhead lighting for ambient brightness. Here are some tips for lighting your craft room:
Maximize natural light by positioning your main work area near a window if possible. North-facing windows provide steady, even light throughout the day. Consider adding curtains or blinds to soften and diffuse sunlight as needed 1.
Add task lighting like an articulating lamp or light mounted on a swing arm. Position it near where you’ll be doing detailed work like sewing, painting, or papercrafts. Choose a lamp with adjustable brightness and color temperature 2.
Install bright general overhead lighting to illuminate the entire room. Opt for energy efficient LED lights on dimmer switches to control ambience. Make sure there are sufficient electrical outlets spaced throughout the room.
Avoid overhead fluorescent tube lights, which can cause eye strain. Dimmers, lamp shades, and wall sconces all help diffuse harsh bulbs. Layer lighting sources for flexibility.
Add Seating
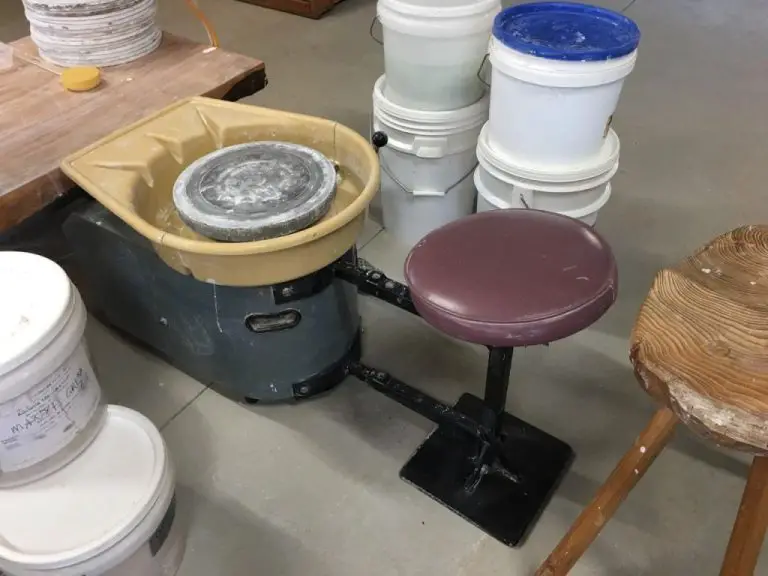
Having comfortable seating in your craft room is essential for being able to work on projects for extended periods. Look for chairs or stools that provide good back support. An adjustable office chair is a great option that allows you to sit up straight while working on projects at a table. For standing projects, consider getting a padded stool. This allows you to alternate between sitting and standing to avoid fatigue.
Focus on choosing seating that suits the main activities you do in your craft room. If sewing is your passion, look for a chair with a tall back and firm cushions. For beading or jewelry-making, an office chair that adjusts low to the ground is ideal. Having different height options for chairs and stools makes it easy to adjust your working position as needed.
You may also want a small loveseat or armchair in your craft room to provide a spot to relax and brainstorm new ideas. Place it near natural light from a window to create an inspiring space to gather inspiration. Opt for seating with washable slipcovers or fabrics that can stand up to craft room messes.
No matter what type of chair or stool you choose, make sure it is comfortable enough to sit in for hours. Test it out in the store and pay attention to the lumbar support. With the right seating, your craft room will be a space you look forward to spending time in.
Reduce Clutter
One of the best ways to reduce clutter in your craft room is by using baskets, trays, and containers to corral all those small items that can quickly get out of control. As Home Storage Solutions 101 suggests, invest in a variety of baskets, trays, and bins in different sizes to hold everything from ribbon spools to stamps to embellishments. Having designated homes for all your small craft supplies will keep them neatly contained and make them easy to find when you need them.
For very small items like brads, sequins, and beads, opt for compartments organizers that can neatly sort everything. Clear plastic containers are great for storing items you use frequently so you can easily see what’s inside. For larger supplies like die cuts, choose sturdy bins or cubes that can neatly stack on shelves. And don’t forget about vertical storage for thin items like paper and vinyl. Install racks, pockets, or magazine files on walls to maximize every inch.
With a system of tailored containers and organizers, even the smallest craft room supplies can be neatly corralled and tucked away while keeping clutter at bay.
Create Inspiration
Surrounding yourself with inspirational elements like mood boards, art, and photos can help spark your creativity and keep you motivated in your craft room. Consider creating a mood board wall with fabric swatches, magazine clippings, paint chips, and other samples to serve as a source of ideas and color inspiration (Source). You could also hang art prints, paintings, or photos that you find inspiring or uplifting. Curating a space with visual inspirations unique to your style and creative interests will help cultivate an environment where your imagination can flourish.
Maintain Organization
Keeping your craft room organized after the initial decluttering and setup takes some regular maintenance. Here are some tips to maintain organization in your craft space:
Regular decluttering is essential. Set aside time each month or quarter to go through your craft supplies and tools and remove anything you haven’t used in awhile or that is past its prime. Get in the habit of decluttering often so things don’t build up over time. As this source suggests, declutter your drawers, cabinets, and closets periodically.
Putting supplies and tools back in their designated spots after each craft session will keep things tidy. Install organizers and storage solutions that make this quick and easy to do. Labeling storage areas clearly will help ensure things get returned properly.
Group like items together and label the storage containers and shelves. As noted in this guide, labeling helps keep your system intuitive so you know exactly where to find and return items.


