How Do People Make Clay Pots?
Making clay pots and other ceramic items dates back over 20,000 years to some of the earliest human civilizations. Archeologists have found ceramic artifacts in ancient sites across the world, from Asia and the Middle East to Europe and the Americas. The development of pottery was an important technological advancement for early societies.
Today, ceramic arts and pottery making remain popular hobbies and crafts. While some techniques have changed over the millennia, the basic process contains many similarities to ancient pottery making. The standard steps include gathering clay, preparing it for use, shaping it into the desired form, drying the clay carefully, firing it in a kiln, and sometimes applying decorative glazes or paints.
There are several major types of clay used for pottery today. Earthenware clay contains higher amounts of minerals and absorbs more water, making it easier to work with but prone to cracking and less durable when fired. Stoneware clay has lower permeability, allowing it to be fired at higher temperatures to produce harder finished products. Porcelain clays can create delicate, translucent ceramics and are fired at the highest temperatures.
Gathering Clay
Clay is an abundant natural material that can be found in many locations across the world. The main natural sources of clay are:
- Residual deposits – Clay that remains in place after thousands of years of weathering of rocks like granite.
- Sedimentary deposits – Clay that has settled at the bottom of lakes, seas, and rivers and then dried up over time.
- Transported clays – Clays that have been moved from their original source by water or wind and deposited elsewhere.
Clay is extracted from open pit mines or quarries. The clay deposits are dug up using excavators and backhoes. The clay is then refined and processed to remove any impurities or unwanted debris before being sold commercially.
There are many different types of clay that potters use, each with their own properties:
- Earthenware clays – Contain lower amounts of fluxes and require lower firing temperatures. These clays are more porous.
- Stoneware clays – Contain more fluxes and require higher firing temperatures to become non-porous. These clays are stronger and less porous.
- Porcelain clays – Are made of almost pure kaolin clay. Require the highest firing temperatures but produce very strong, non-porous items.
Choosing the right type of clay is important depending on the characteristics needed for the pottery piece.
Preparing the Clay
After gathering the clay, the next step is preparing it for forming the pot. This involves wedging and kneading the clay to achieve the proper consistency and moisture level.
Wedging is the process of cutting the clay into chunks and then slamming it onto a flat surface. This action pushes air bubbles out of the clay and unifies the texture and moisture level. Wedging also makes the clay more pliable and easier to work with.
After wedging, the clay is kneaded to further mix it and distribute the moisture evenly. Kneading involves folding, pressing, and pushing the clay to blend it thoroughly. This also removes any remaining air pockets.
The clay must be properly wedged and kneaded until it reaches the desired plasticity. The consistency should be smooth, flexible, and have no cracks. The moisture level can be adjusted by spraying water or allowing the clay to air dry slightly.
Taking the time to correctly prepare the clay is a crucial step. Properly wedged and kneaded clay will be easier to form into pottery shapes without tearing or cracking while drying and firing.
Forming the Clay
There are two main techniques for forming clay into a pot – handbuilding or using a potter’s wheel. Handbuilding involves shaping the clay by hand using techniques like pinching, coiling, and slab building. Pinch pots are made by pinching and pulling the clay into shape. Coil pots are made by rolling out ‘snakes’ of clay into coils, then stacking the coils on top of each other to build the pot shape. Slab pots are made by rolling out flat slabs of clay and joining them together.
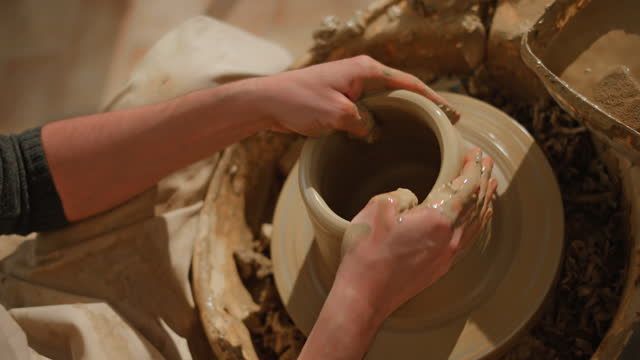
The other main forming technique is throwing on a potter’s wheel. The clay is centered on the wheel and then pushed, pulled, and shaped as the wheel spins. Throwing takes practice to master, but allows for symmetrical, uniform shapes. Potters can make vases, bowls, cups, and more by throwing on the wheel. Both handbuilding and wheel throwing have advantages and disadvantages in terms of the forms that can be created. Many potters will use a combination of techniques in their work.
Trimming and Refining
Once the basic shape of the pot has been formed, it often requires additional refinement to create the final form. This is done through a process called trimming. Trimming involves using various metal cutting tools to refine the shape and smooth the surface.
Trimming is done with the clay mounted on a pottery wheel. As the wheel spins, the potter carefully scrapes and cuts away excess clay using loop tools, ribs, and metal scrapers. This allows them to refine the shape, thin the walls, and smooth away finger marks and other surface irregularities.
Common trimming tools include:
- Metal loop tools – These have a curved metal wire used to scrape and cut clay.
- Ribs – These are thin pieces of metal or wood used to compress clay and smooth surfaces.
- Metal scrapers – Straight pieces of metal used to trim foot rings and flatten bases.
Trimming requires practice to master, as too much pressure can collapse the walls of the pot. But with care and patience, trimming gives potters precision control to refine their pieces. It transforms roughly formed pots into finely crafted works with clean lines and smooth surfaces.
Drying the Clay
Once a clay pot has been formed, it must be thoroughly dried before firing. There are two main methods for drying greenware (unfired clay pots): air drying and using plaster bats.
Air drying involves leaving the pottery out at room temperature until all moisture evaporates. This is the most common and accessible drying method, but it can take several days or even weeks for a large or thick-walled piece. The pottery must be supported on wire racks or spacers so air can circulate underneath.
Plaster bats wick moisture out of the clay much more quickly than air drying alone. These absorbent plaster blocks can cut drying time down to hours or days. The pottery is placed on the plaster bat, which pulls the moisture through the clay walls via capillary action. The plaster needs to be re-wetted and replaced periodically as it saturates.
Ensuring an even, gradual dry is crucial. Drying too quickly can cause cracks as the exterior dries faster than the interior, putting stress on the clay walls. Careful air drying or using plaster bats will remove moisture at a measured pace to prevent defects.
Bisque Firing
After the pottery pieces have air dried completely, they undergo a low-temperature kiln firing known as bisque firing. This process heats up the pottery to approximately 1600-2100°F (871-1149°C), which is hot enough to permanently harden the clay but not hot enough to melt the composition.
Bisque firing serves a crucial purpose in the pottery-making process. Because the clay particles have only been dried at this point, not fired at a high temperature, they are still porous and prone to cracking and breaking. The bisque firing vitrifies the clay, fusing the particles and sealing the pores, which makes the pottery much more durable and stable. This protects the pottery from cracking or exploding in the later glaze firing.
Proper bisque firing ensures the pottery will remain its desired size and shape through the remaining production steps. It is a low-risk way for potters to test the structural integrity of a piece before applying decorative glazes and investing more time and effort. Overall, bisque firing is an essential intermediate step that prevents cracking and stabilizes the clay structure.
Glazing
Glazing is an important step in creating clay pots that gives them color, texture, and unique visual effects. Glazes are made from mixtures of minerals, oxides, and compounds that melt and fuse to the clay body during the firing process.
There are many options when it comes to choosing and using glazes. Glaze ingredients such as silica, alumina, fluxes, and colorants produce different results depending on their proportions in the recipe. Natural ingredients like wood ash, clay, and feldspar can be used to create glazes with earthy tones. Oxides of metals like copper, cobalt, manganese, and iron produce vibrant colors from blue to green to brown and more.
Glazes can be mixed to the correct thickness and applied using methods like dipping, pouring, or spraying. The thickness of the glaze slurry determines how much will remain on the bisqueware after excess drips off. Glazes flow and spread out during firing, so overlapping layers or bold brush strokes can create patterns and textures.
Special techniques like wax resist, scraffito, and layering multiple glazes offer even more creative possibilities. Masking off sections with wax before glazing preserves the bare clay color underneath. Scraffito involves carving through one glaze layer to reveal a different color below. Using complementary glazes together produces new colors and effects where they blend and mingle.
With the right glaze recipes, application techniques, and firing, potters can produce stunning visual depth and color on their finished clay work.
Final Firing
The final step in creating ceramic pottery is firing the bisqueware pieces in a high-temperature kiln to melt the glazes and harden the clay. This process, known as glaze firing, vitrifies the clay and glazes, sealing the clay body and creating a glossy surface finish.
Glaze firing is typically done between 2,200°F and 2,400°F, much hotter than bisque firing. Kilns used for glaze firing are specialized for reaching these high temperatures evenly throughout the kiln chamber. The glazes melt and fuse to the clay body, resulting in a smooth, non-porous pottery piece.
It’s critical to closely control the final firing temperature. Pyrometers are used to constantly monitor the temperature inside the kiln. If underfired, the glazes may not fully melt and fuse. If overfired, the clay can become damaged, glazes can become melted too thin, and pottery pieces may stick together.
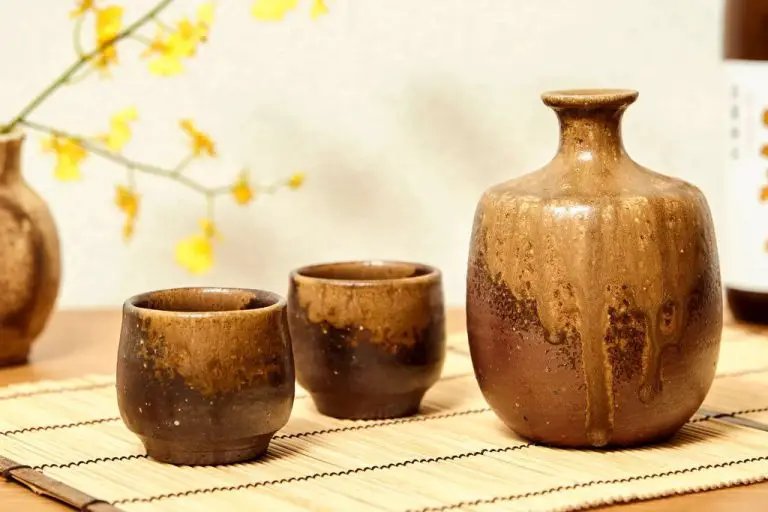
The final firing process hardens the clay and seals the surface with beautiful glazes, resulting in finished ceramic pottery ready for use. Careful firing completes the transformation from raw clay into artful, functional pottery.
Conclusion
Making clay pots by hand is a time-honored tradition that requires patience, skill, and creativity. From gathering and preparing the clay, to forming, firing, and finishing each piece, potters must carefully follow each step of the process to end up with a finished product that is both beautiful and functional.
While factory-made pottery achieves consistency through automation, no two handmade clay pots are exactly alike. The subtle variations in shape, texture, and color reflect the humanity and imperfection of their creators. Handmade pottery often exhibits charming irregularities that mass-produced pieces lack. Beyond their utility, these handcrafted objects have an intrinsic value that connects us to ancient cultures across the world.