How Do You Add Gloss To Clay?
Adding gloss to clay, also known as burnishing, gives clay artworks and pottery a polished, shiny appearance. There are several techniques to achieve this, ranging from applying clear glazes to rubbing the surface with oils and waxes. Gloss enhances the natural beauty and color of clay, protects the surface from dust and marks, and can give a smooth, professional look. The shine draws attention to the form and texture of the piece. Deciding on the right gloss method depends on the needs of the particular clay piece and the desired visual effects. This guide will provide an overview of simple, foolproof techniques for beautifully glossing clay.
Supplies Needed
The main types of supplies you’ll need to add gloss to clay include:
Clear Glazes
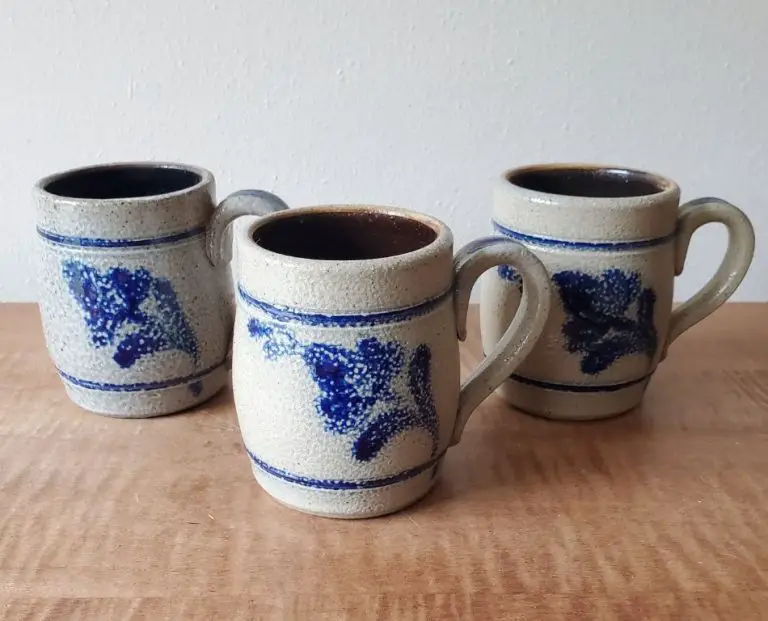
Clear glazes come in various finishes like matte, satin or gloss. They are applied to bisqueware clay before the final firing. Clear glazes are available at most craft stores in small jars ready for brushing on. They can also be mixed from raw materials for a wider variety of options.
Wax-Based Polishes
Wax polishes are rubbed onto unfired or bisque-fired clay pieces to give a protective coating and add sheen. Common waxes used are beeswax, carnauba wax or paraffin wax. These are available as bars which can be rubbed directly on the clay or melted into a liquid polish.
Oil or Wax Rubs
Oils like linseed, tung or mineral oil can be rubbed into unfired clay for a smooth, glossy look. Oils are often combined with wax to make a paste wax blend. These oil rubs bring out the natural color tones of the clay.
Commercial Liquid Gloss
There are various acrylic-based liquid gloss products made for finishing polymer clay. These are brushed on baked polymer clay and air dry for a durable high-gloss coat. Some options are Varathane, Sculpey Gloss and Lisa Pavelka’s Magic Glos.
Applying Clear Glazes
Clear glazes are one of the most common ways to add gloss to clay surfaces. They come in various forms including liquids, powders, and sprays. Clear glazes work by forming a glassy coating on the clay body through high temperature firing. There are several techniques for applying clear glazes:
Brushing – Using a soft bristle brush to brush on liquid glaze. Ensure the glaze is mixed well and is the consistency of melted ice cream. Apply in smooth, overlapping strokes. Let dry completely between coats.
Dipping – Fully submerging the clay piece in a container of liquid glaze. Allow excess to drip off and dry between coats. Best for pieces with no intricate details.
Spraying – Using a spray gun or spray bottle to mist the glaze over the surface. Apply light, even coats and allow to dry between applications. Spraying allows for a very smooth finish.
Typically 2-3 coats of a clear glaze are needed for good coverage and an evenly glossy finish. Take care not to apply too thickly or the glaze may bubble or drip when fired. Test samples first to ensure the desired glossiness will be achieved.
Using Wax Polishes
Wax polishes are an easy way to add a beautiful sheen to finished clay pieces. Wax comes in soft and hard formulas. Soft wax is easier to apply by hand but hard wax tends to be more durable.
To apply, rub a small amount of wax into the clay using a clean, soft cloth. Apply in a circular motion, working in sections. For a higher shine, the piece can be buffed by hand or using a buffing wheel attached to a variable speed drill or dremel tool. Buff until the desired glossiness is achieved.
When buffing by machine, work from low to higher speeds to avoid overheating the clay. Never buff soft clay pieces. Allow all clay to fully cure before polishing with wax to ensure it achieves maximum hardness.
Wax polishes produce a lovely satin to high gloss finish. They tend to enhance the natural tones of the clay. Over time the wax may need reapplied, especially on frequently handled areas. Wax is easy to touch up as needed.
Oil and Wax Rubs
Oil and wax rubs are a traditional way to add gloss to clay surfaces. The most common ingredients are beeswax and linseed oil. You can also use other plant-based oils like olive oil or walnut oil. Avoid mineral oils as they will not properly cure.
To make your own oil and wax rub, melt beeswax in a double boiler and slowly stir in linseed or other plant-based oil until you get an even paste-like consistency. Allow to cool fully before using. The ideal ratio is approximately 1 part wax to 3 parts oil.
Rub the paste thoroughly over the surface of the clay using your hands or a soft cloth. Apply in a circular polishing motion. The friction helps melt the wax so it penetrates the clay. Remove any excess. Allow the gloss rub to cure for 24-48 hours.
You can layer additional coats to increase the shine. Oil and wax rubs will deepen the natural tones of the clay and give an attractive satin luster.
Commercial Liquid Gloss
When looking to add gloss to clay projects, one of the easiest options is to use a commercial liquid gloss. These products are specially formulated to provide a shiny, glossy finish to clay. There are two main types of commercial liquid gloss for clay: acrylic-based and water-based.
Acrylic-based gloss provides a high shine finish and is durable. It works well for both indoor and outdoor pieces. Acrylic gloss dries to a hard, protective coating. Water-based glosses are lower in odor and clean up easier with just water. The finish is slightly less glossy than acrylic. Water-based gloss should only be used for indoor items.
Application technique also differs between the two main options. Acrylic gloss should be applied in thin layers using an aerosol spray can. Multiple thin coats allow the gloss to fully cure and prevents dripping. Water-based gloss can be brushed directly on the clay. Brushing allows you to control exactly where the gloss is applied.
Testing different commercial liquid glosses to compare the finish and ease of application can help identify the best option for your projects. Proper preparation like sanding and cleaning the clay first will also improve adhesion and final results.
Achieving Different Effects
Clay can be made glossy in a variety of ways to achieve different aesthetic effects. Two of the most popular are satin vs high-gloss finishes and using molds or stamps for patterns.
A satin finish provides a soft subtle sheen, while a high-gloss finish is shiny and reflective. Satin is achieved by carefully rubbing the clay with a very fine grit sandpaper after applying a glaze or polish. High-gloss is attained by building up multiple layers of glaze and buffing to a shine. The high-gloss effect works best on smooth clay without etched details.
Using molds and stamps allows you to imprint patterns onto the clay before you apply any gloss. Geometric shapes, animal prints, textures, and more can be transferred. Stamp the raw clay first before baking. Then apply glazes or wax rubs over top of the stamped design. The gloss will help highlight and pronounce the patterns. This is an easy way to create beautiful effects with minimal effort. Just press the mold into the clay firmly and evenly to leave a clear impression.
Common Problems
When adding gloss to clay, there are a few common issues that can arise:
Bubbles – Tiny air bubbles can form in the glaze coating and leave an uneven, bumpy texture. To prevent bubbles, stir glazes thoroughly before applying and use a soft brush to gently apply an even coat without introducing extra air.
Brush marks – Visible brush strokes on the finished piece are another common problem. Using high quality soft bristle brushes and applying glaze in thin, smooth layers can minimize brush marks.
Drips – Excess glaze can drip down vertical surfaces leaving streaks. Allow adequate drying time between coats and keep layers thin to avoid drips.
Pinholes – Small holes in the glaze surface happen when air bubbles get trapped and pop. Multiple thin layers of glaze help fill in pinholes for a smooth finish.
Fixing issues – If problems do occur, lightly sanding flaws and reapplying a fresh coat of glaze often fixes it. For severe issues, stripping the piece and starting over may be needed.
Proper application technique and allowing adequate dry time between layers helps avoid most gloss issues on clay. When problems do pop up, sanding and reapplying glaze is the best solution.
Maintenance
Once you’ve achieved the desired glossy look on your clay sculpture or pottery, it’s important to take steps to maintain and protect that finish over time. Clay is porous, so the glossy surface can become damaged or worn down with handling and use.
Be gentle when moving or storing glossy clay pieces. Try to avoid scraping or bumping the surfaces that have been polished. You may want to wrap or pad pieces before stacking them together. Always test new cleaners or polishes on small inconspicuous areas first, to ensure they don’t damage the existing gloss.
Over time, frequently handled areas may start to lose their luster. Touch up these spots by applying a fresh coat of gloss medium. Clear glazes and wax polishes can be brushed on worn patches to bring back the shine. Be sure to follow the manufacturer’s instructions for proper application and drying time. Going over the entire piece with a thin coat of gloss protector every once in a while will help maintain an even finish.
With proper care and maintenance, the glossy sheen you’ve achieved on your clay artwork can last for many years of enjoyment.
Summary
There are various techniques for adding gloss and sheen to clay surfaces. Applying clear glazes or commercial liquid glosses provide a durable, glass-like shine. Wax polishes create a softer luster and maintain the natural look of the clay. Oil and wax rubs enhance color while providing a subtle glow. The gloss effect can also be customized by mixing glazes, adjusting application techniques, or using additives.
With any approach, proper surface preparation is key. Smooth, clean surfaces allow glazes and polishes to spread evenly and fully cover the clay. Multiple thin coats are better than a single thick application. Let layers dry between applications. Buffing or polishing brings out the best results. Proper maintenance will keep the gloss looking its best over time.
By selecting the right glossing method and following good techniques, clay surfaces can achieve stunning visual effects. A glossy finish adds depth, brilliance and beauty to ceramic, pottery or sculpture while protecting and enhancing the clay medium.