How Do You Bake A Large Polymer Clay Sculpture?
Polymer clay is a type of modeling and sculpting clay that is made from PVC resin and various fillers and pigments. It is a popular material for artists and hobbyists because it is lightweight, versatile, and easy to work with. Polymer clay remains soft and pliable until it is baked in a standard home oven, allowing it to be shaped and molded into detailed sculptures, jewelry, charms, dolls, and more.
One of the challenges of working with polymer clay is properly baking large sculptures. Polymer clay cures and hardens through heating in the oven, requiring temperatures between 265-300°F. However, ovens often have hot and cool spots which can lead to uneven baking, and the density of a large sculpture makes it difficult for heat to fully penetrate. This can result in areas that remain undercured, leading to sculptures that are weak, brittle, and may even deform. Proper support, baking in sections, and watching closely are keys to successfully baking and curing large polymer clay sculptures.
Picking the Right Clay
When working on large polymer clay sculptures, choosing the right type of clay is crucial. The clay must be strong enough to support the sculpture’s weight without cracking or warping. Some commonly used polymer clay brands for sculpture are Sculpey III, Premo, Fimo Professional, and Kato Polyclay.
Sculpey III is an affordable general use polymer clay that has medium strength and flexibility. Premo is very elastic and strong, making it good for sculptures with thin protruding parts that need support. Fimo Professional is extremely tough and rigid, perfect for elaborate sculptures that need a durable core. Kato Polyclay has high strength and stretches slightly before breaking, giving it a resilience suitable for large sculptural work.
Consider the scale and complexity of your sculpture. For intricate but small sculptures, standard clays like Sculpey III will suffice. For very large or highly detailed sculptures, choose a high performance clay like Fimo Professional or Kato Polyclay. Test brands to see which achieves the strength, durability and workability you need.
Armatures & Support
When sculpting a large polymer clay piece, it’s crucial to build an armature or internal support structure. The purpose of an armature is to provide strength and stability to the sculpture so it doesn’t collapse under its own weight. Depending on the design and size of your sculpture, you may need a sturdy metal wire, aluminum foil, wood, or other materials to create the framework.
For most sculptures, a wire armature made from thick gauges of aluminum or steel wire works well. You’ll want to cut and bend the wire into the basic shape of your planned sculpture. Ensure the wire frame provides ample internal support wherever there are large protruding parts or thin and elongated sections that will be prone to sagging or snapping.
Aluminum foil can serve as additional internal support and bulk when wrapped around the main wire structure. Foil is easily molded into smooth shapes and gives added stability. For very large sculptures, an internal wood framework may be necessary to prevent cracking or crumbling under the weight.
The armature provides the essential interior backbone for polymer clay work. Take time to carefully plan and construct a sturdy framework tailored to your design before adding on the clay.
Sculpting Tips
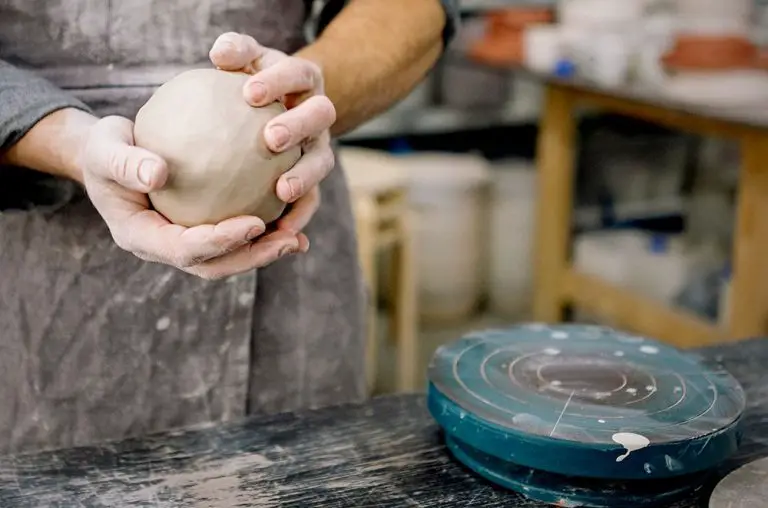
When sculpting your polymer clay artwork, it’s important to keep the clay conditioned so it remains malleable and doesn’t crack. Knead the clay frequently and work it until soft and smooth. If it starts to become stiff, add a few drops of liquid polymer clay softener and knead again. Conditioning the clay prevents cracking and makes sculpting much easier.
To bond clay pieces together, first score the surfaces by cutting small grooves into them with a craft knife or needle tool. Apply a thin layer of liquid clay as glue and press the pieces together firmly. Smooth over the seam and blend gently with your fingers to securely join the sections. Liquid clay works as an excellent adhesive to bond parts without cracking or easily coming apart.
Preparing for Baking
Proper preparation before baking is crucial for ensuring your sculpture comes out of the oven in perfect condition. Pay special attention to creating an even thickness throughout the sculpture. Thin or thick areas will bake at different rates, potentially leading to cracks, bubbles, or under-cured sections. Aim for a consistent 1⁄4-inch thickness wherever possible.
Applying a clay release agent is also an important preparatory step. These specialized sprays or powders prevent the clay from sticking to any surfaces it touches while baking. Be sure to coat all areas that will contact the baking surface or support structure. Popular options include ArmorAll, olive oil, and cornstarch. Multiple light coats work better than a single thick application. The release agent also makes sculpted areas like folds in clothing or textured details easier to separate after baking.
Baking Process
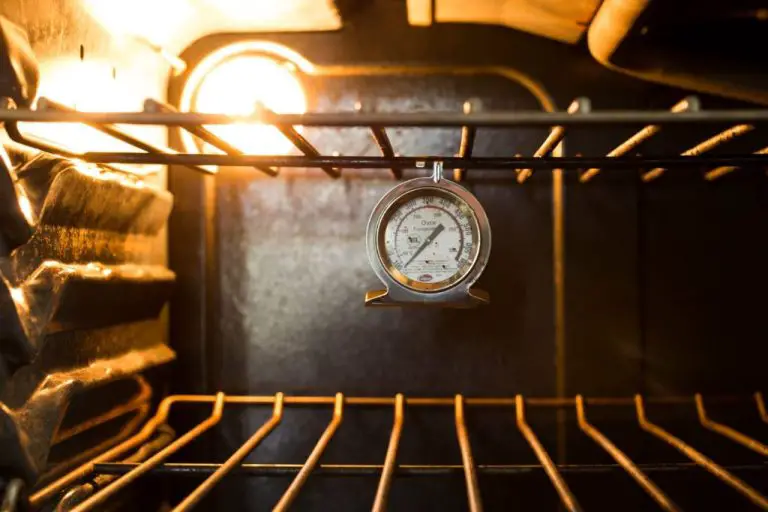
The baking process is a critical step for polymer clay sculptures to cure and harden fully. Choose an oven thermometer and clay manufacturer’s recommended baking temperature (typically around 130°C/275°F). Monitor the temperature closely since ovens can vary.
Baking times depend on the clay thickness. Thinner pieces may need 15-20 minutes while large, thick sculptures require longer, sometimes over an hour. Check regularly and bake until firm. Internal temperature should reach 100°C/212°F. Using an internal oven thermometer helps verify this, especially for large pieces.
Other baking tips:
- Bake pieces on a protected oven surface like parchment paper or aluminum foil.
- Avoid contact with oven walls or racks.
- Bake in sections for very large sculptures, following clay instructions.
Proper baking fully hardens the clay for a durable finish. Underbaking leaves sculptures tacky while overbaking may scorch the clay. With the right time and temperature, the polymer clay will cure fully without bubbles or cracks.
Baking in Sections
When sculpting large or complex pieces, it is often better to bake the sculpture in sections rather than all at once. There are several advantages to sectional baking:
Better Control Over the Baking Process: Baking smaller sections allows you to more easily monitor the curing process and make adjustments if needed. It is easier to identify and fix any problems that may arise.
Prevent Over-baking: Large thick pieces can be prone to over-baking if baked all together. Separate thinner sections will bake more evenly throughout.
Easier Transport: Moving and manipulating a large fragile green piece can be risky and cause damage. Separate sturdy baked sections will be much easier to transport and work with.
Flexibility in Assembly: Baking in sections allows you to fully cure each component before making permanent bonds between them. This provides more flexibility and options when assembling the final sculpture.
When joining baked sections, it is important to use a high-quality clay adhesive. Liquid polymer clays work very well to create strong seamless bonds between parts. Lightly scoring the joining surfaces will also help with adhesion. Take care when bonding to avoid distorting the sculpture’s shape.
Troubleshooting
Baking a large polymer clay sculpture can sometimes lead to issues like under- or over-baked clay. Here are some common troubleshooting tips for the baking process:
Common Baking Issues
Under-baked polymer clay will remain sticky, soft and prone to fingerprints after baking. This happens when the baking temperature or duration was too low. Over-baked clay becomes dark, brittle and prone to cracking – a sign that the temperature or duration was too high.
Baking in thick sections can also lead to under-baked interiors and over-baked exteriors. Air bubbles and internal stresses may expand or contract at different rates, resulting in cracks or explosions.
Fixing Under- or Over-baked Clay
For under-baked clay, you can rebake the sculpture at a higher temperature or for longer. Just watch carefully to avoid over-baking. Consider baking problem areas separately next time.
With over-baked clay, you may be able to sand down and buff out any superficial scorching. For deep cracks, you can fill them in with fresh clay before rebaking. In severe cases, you may need to re-sculpt damaged sections.
Adjusting the baking temperature, duration, and batch size can help avoid these issues. Baking in stages allows better control over the process. With some care and experience, you can master baking large polymer clay sculptures.
Finishing Touches
Once your sculpture is baked and cooled, it’s time to apply the finishing touches. This includes sanding, buffing, and adding a protective clear coat or glaze.
Use a fine grit sandpaper or sanding sponge to smooth out any rough spots or imperfections on the surface of the clay. Start with a coarse sandpaper like 220 grit and work your way up to 600 or 1000 grit for a super smooth finish. Sand lightly and be careful not to remove too much material.
After sanding, use a buffing wheel or cloth to polish the sculpture and make it really shine. A high gloss finish will make the colors pop and give your sculpture an attractive sheen. Apply a thin layer of jewelry polish or carnauba wax as you buff. Work in small sections until the entire surface is smooth and gleaming.
To protect the finish and give longevity to your polymer clay sculpture, apply a clear acrylic sealant or glaze. Water-based polyurethane, acrylic medium, or a liquid clay like Sculpey Glaze are good options. Use several thin coats and let dry fully between each layer for the best results. The coating will prevent fingerprint smudges, dulling, and damage over time.
Caring for Sculptures
Once your polymer clay sculpture is complete, you’ll want to take proper care of it to prevent damage and keep it looking its best for years to come. Here are some tips for cleaning and storing polymer clay sculptures:
Cleaning Tips
Use a soft, dry cloth to gently remove any dust or dirt from the sculpture. Avoid using any cleaners or solvents, as these can break down the clay over time.
If needed, you can use a slightly damp cloth to wipe away stubborn dirt. Make sure to thoroughly dry the sculpture afterwards.
For a glossy finish, you can buff the cured clay with a microfiber cloth to restore its shine.
Storage Tips
Store polymer clay sculptures in a cool, dry place away from direct sunlight, which can cause fading. Avoid areas with high humidity or temperature fluctuations.
Wrap or cover the sculpture with a soft cloth if storing for a long period to prevent dust buildup.
Use museum gel or non-acidic tissue paper to secure small parts and prevent breakage if the sculpture will be moved.
Display on a stable surface, avoiding locations prone to bumps or vibration that could cause stress cracks.
Preventing Damage
Handle cured polymer clay gently, as it can still chip or break if subjected to sharp impacts.
Keep away from heat sources like stoves, heaters, or direct sunlight, which can cause slumping or warping.
Protect from prolonged moisture exposure that can cause swelling. Avoid placing in humid environments.
Polymer clay can be brittle, so take care during cleaning and handling. Store securely to prevent accidental drops or bumps.
Ensure sculpture is fully cured before cleaning or handling to prevent surface damage.


